
Popular categories
Looking for a yarn?


















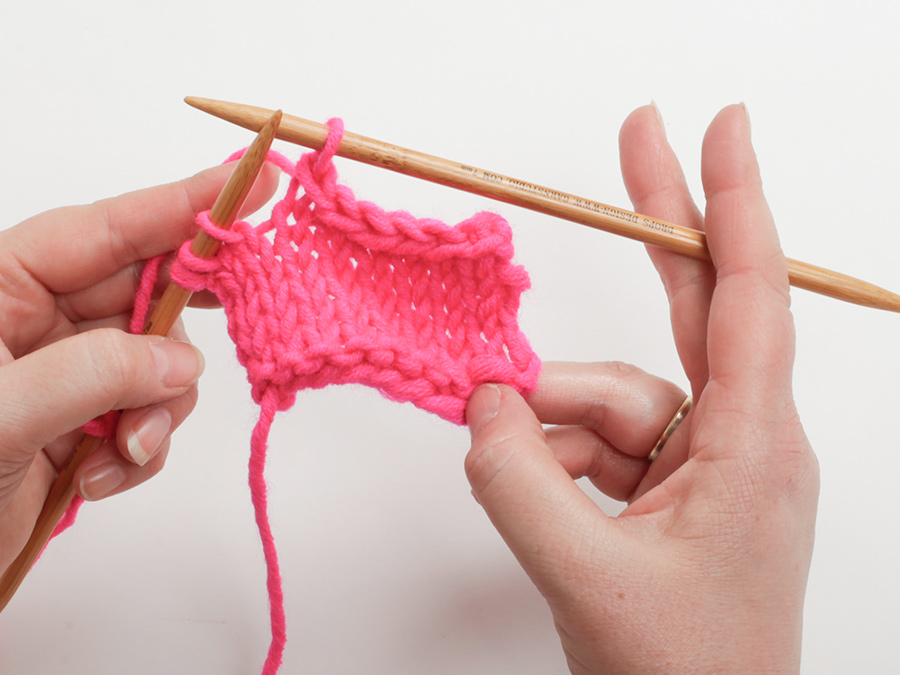
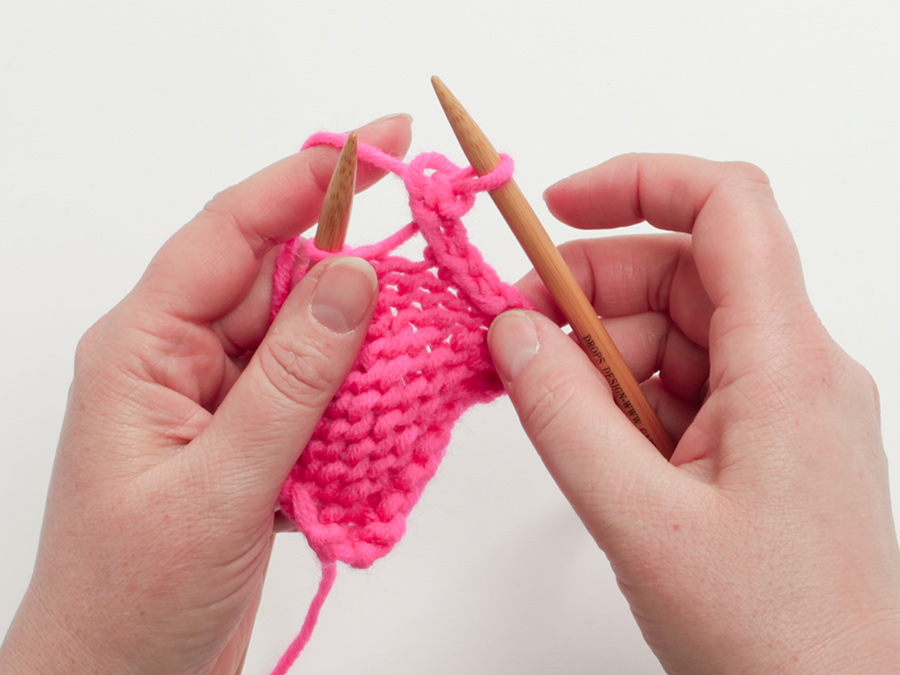
Comments / Questions (163)
 Andrea Bosse wrote:
Diese Anleitung ist sehr schwer verständlich. Ich kann ihr überhaupt nicht folgen.
08.11.2026 - 22:47DROPS Design answered:
Liebe Andrea, wenn Sie uns genauer sagen, was sie nicht verstehen oder worin Ihre Schwierigkeiten bestehen, können wir versuchen, Ihnen weiterzuhelfen.
09.11.2026 - 07:55
 Nancee wrote:
… je viens de voir le pictogramme… j’ai compris. Veuillez ignorer ma question précédente ☺️
06.11.2026 - 15:00
Nancee wrote:
Bonjour, je suis confuse… quand on fait 2 mailles endroit ensemble dans le point fantaisie, ne devrait-on pas faire un jeté pour conserver le même nombre de mailles au rang suivant? Merci! Je veux faire ce modèle en robe pull 🙂
06.11.2026 - 14:31DROPS Design answered:
Bonjour Nancee, lorsque vous devez diminuer dans A.2, vous n'avez pas besoin de compenser le nombre de mailles, cette diminution se fait justement pour conserver la bonne largeur lorsque vous continuez ensuite le diagramme suivant. Bon tricot!
06.11.2026 - 16:35
 Fabienne Schoonheyt wrote:
Bonjour, je ne comprends pas la différence entre les diminutions pour le raglan de chaque côté des manches et de chaque côté du devant et du dos. Puisque, dans ce modèle, il y a une différence dans le nombre de diminutions. Or , il n'y a que 4 marqueurs: dos/ manche gauche, dos/ manche droite, devant/ manche droite et devant/ manche gauche. Merci
04.11.2026 - 01:14DROPS Design answered:
Bonjour Mme Schoonheyt, les diminutions du raglan en taille XL, XXL et XXXL se font à un rythme différent sur les manches et sur le dos/le devant, ainsi vous allez diminuer soit 8 mailles (quand vous diminuez tous les tours pour les manches et le dos/le devant) soit 4 mailles (quand vous diminuez tous les tours pour les manche mais tous les 2 tours pour le dos/le devant). Bon tricot!
04.11.2026 - 08:52
 Cecile wrote:
Bonjour, quand on a fini les diminutions du raglan et de l'encolure, doit on rabattre toutes les mailles (sauf celles de devant) pour relever celles du col ? Merci de votre réponse.
03.11.2026 - 14:30DROPS Design answered:
Bonjour Cécile, quand l'empiècement est terminé, ne rabattez pas les mailles, gardez les sur l'aiguille - glissez les premières mailles sans les tricoter jusqu'à ce que vous arriviez au milieu dos, puis tricotez ces mailles en relevant pour l'encolure + en tricotant les mailles en attente, vous aurez entre 122 et 146 m. Tricotez 1 tour endroit en ajustant à 92 - 112 m et continuez comme indiqué. Bon Tricot!
04.11.2026 - 07:55
Maelys wrote:
Bonjour, impossible d'avoir le bon échantillon (malgré des aiguilles plus petites, étrange !), mon pull est donc trop grand. Y a-t-il un moyen de le rétrécir au blocage ? Merci par avance
28.08.2026 - 17:02DROPS Design answered:
Bonjour Maelys, 20 m x 26 rangs sont une tension relativement courante pour les fils du groupe B, donc avec cette tension, votre ouvrage devrait avoir les dimensions finales requises dans le schéma. Essayez de voir avec votre magasin, même par mail ou téléphone, on pourra peut être vous aider en fonction de la laine utilisée. Bon tricot!
31.08.2026 - 15:33
Cecile wrote:
Bonjour, pour les manches, est ce que commencer A4 au dessus de 1 maille, veut dire de commencer le diagramme après cette maille ? Et pour les diagrammes suivants idem ? Merci
11.08.2026 - 22:30DROPS Design answered:
Bonjour Cécile, quand vous devez tricoter A.1 au-desssus d'1 maille, vous tricotez le diagramme sur cette maille, en l'occurence pour la manche vous tricotez la maille avec le marqueur comme indiqué dans A.4. Vous augmenterez ensuite de chaque côté de cette maille et les augmentations seront incorporées dans A.4. Bon tricot!
12.08.2026 - 07:22
Diane wrote:
Bonjour à vous , J'aimerais faire ce modèle. Mais sans les torsades sur les manches . Est-ce que ça vous serait possible de m'aider à savoir combien de mailles je devrais augmenter après les cotes pour que ça soit moi large . S.V.P. Merci
02.08.2026 - 02:07DROPS Design answered:
Bonjour Diane, nous ne sommes malheureusement pas en mesure de pouvoir adapter chacun de nos modèles à chaque demande, vous pouvez vous inspirer d'un modèle similaire (même tension, mêmes mesures finales) pour faire les ajustements nécessaires. Merci pour votre compréhension. Bon tricot!
10.08.2026 - 11:17
Diane wrote:
Bonjour , j'aimerais faire ce modèle mais sans les torsades sur les manches est-ce que vous pourriez me dire de combien de mailles je devrais augmenter après les côtes, pour que ça soit pas trop large. Pour la grandeur Small. S.V.P. Merci
02.08.2026 - 02:00
 Nicola wrote:
Hi, I'm a little unclear about the sizing chart - if my bust is about 46 inches and I want the jumper to be a little oversized, should I plan to do the M or L size? I haven't done a jumper like this before and I'm excited but worried I will make it too small. Thanks!
22.07.2026 - 09:39DROPS Design answered:
Dear Nicola, you will find how to choose your size and the desired ease here. Happy knitting!
11.08.2026 - 11:44
|
|||||||||||||||||||||||||||||||
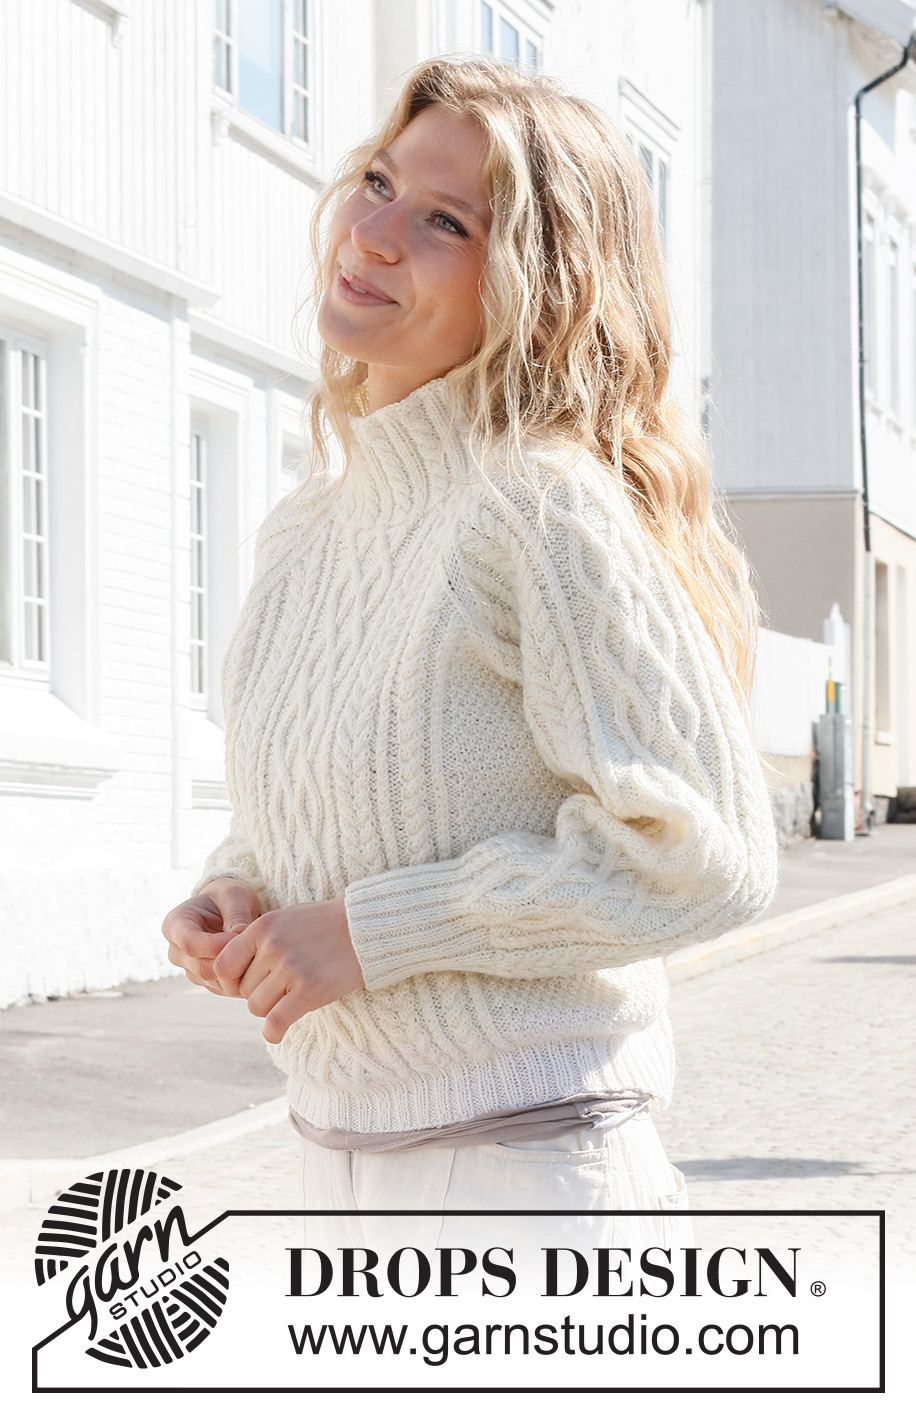
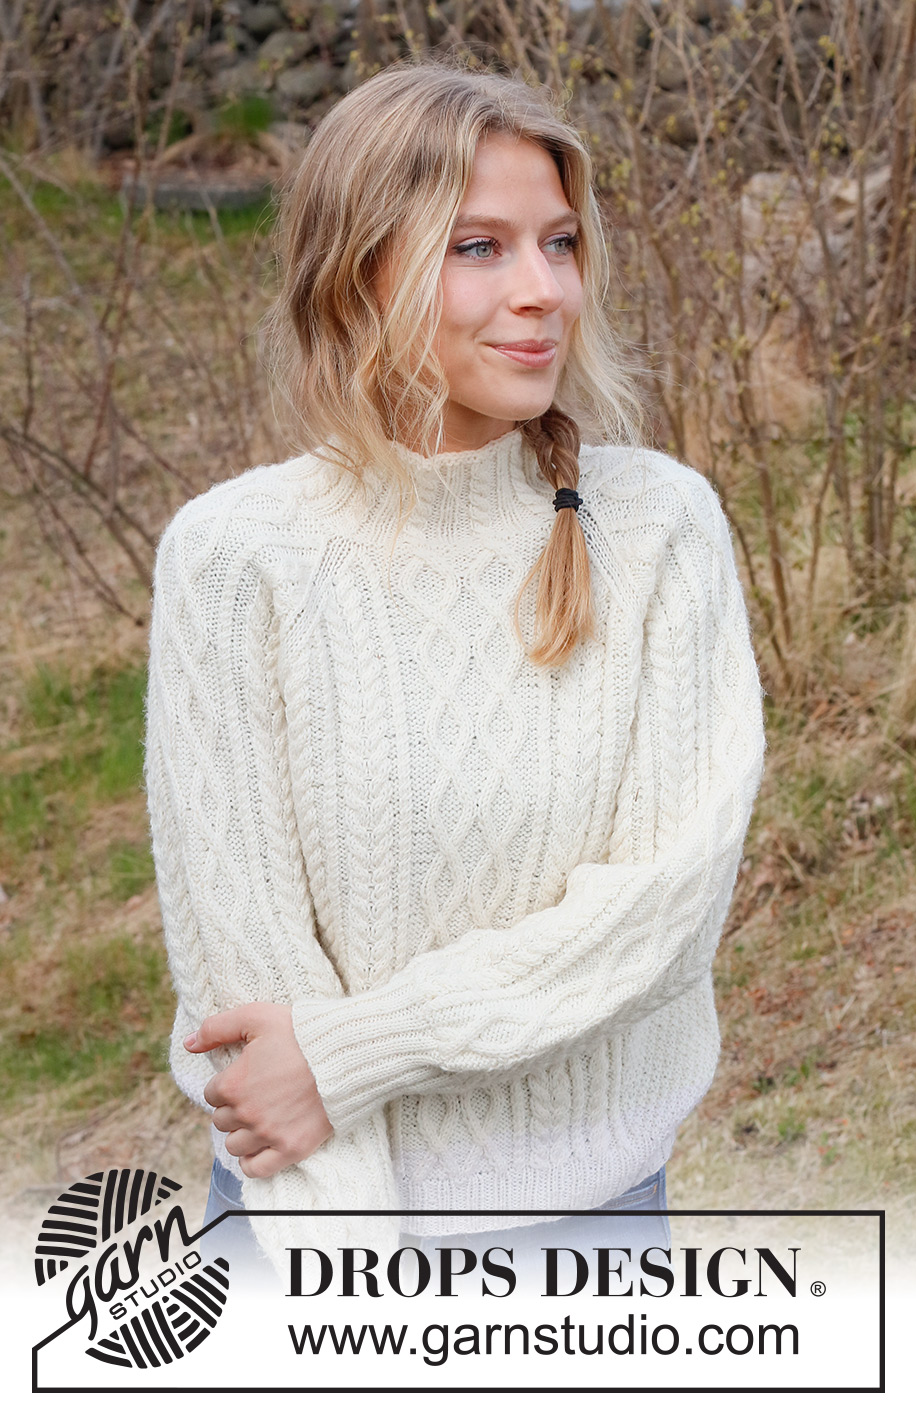
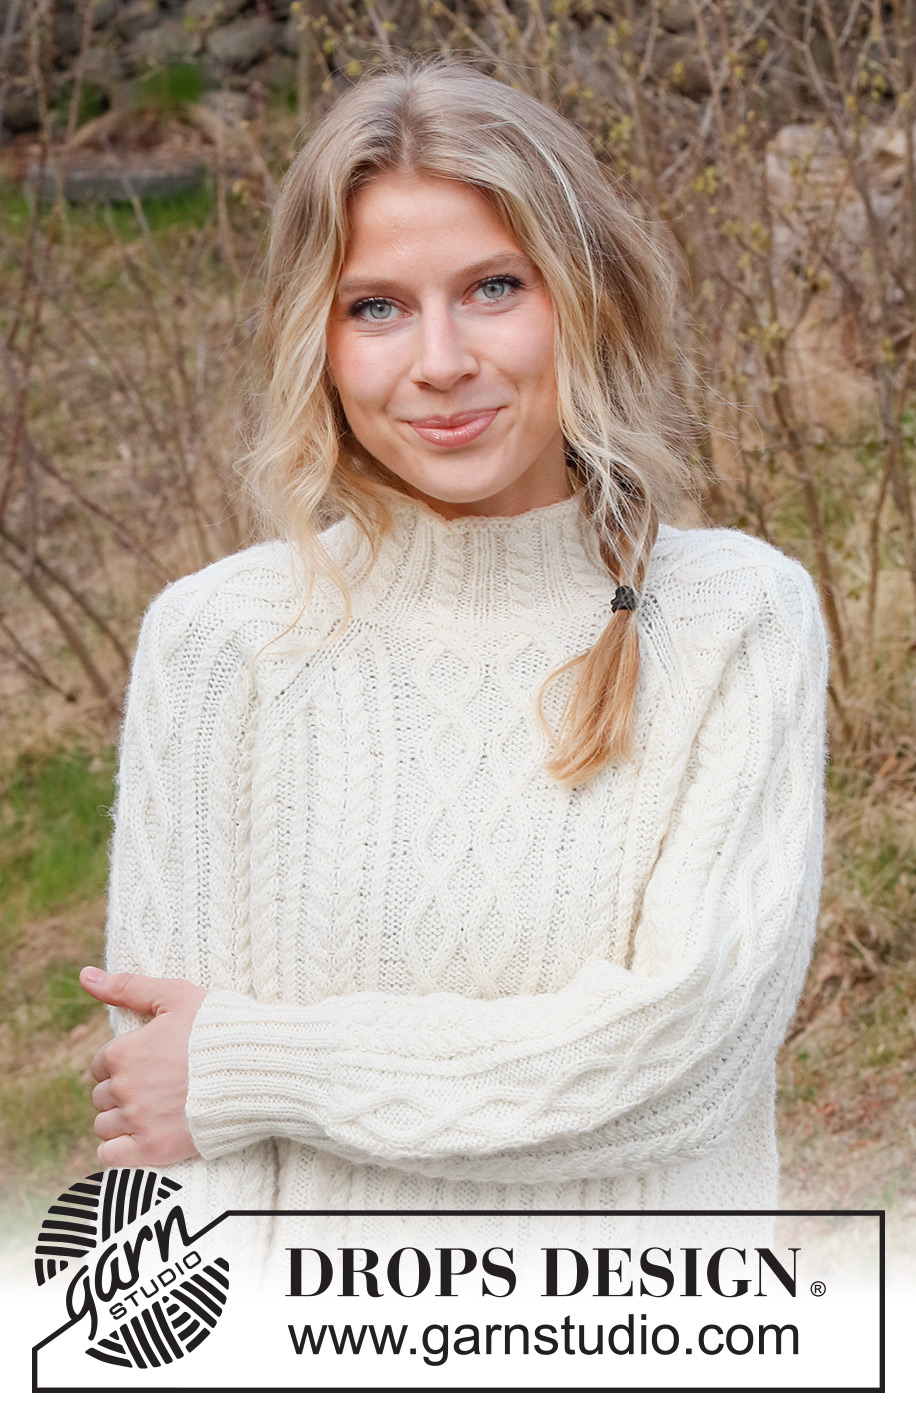
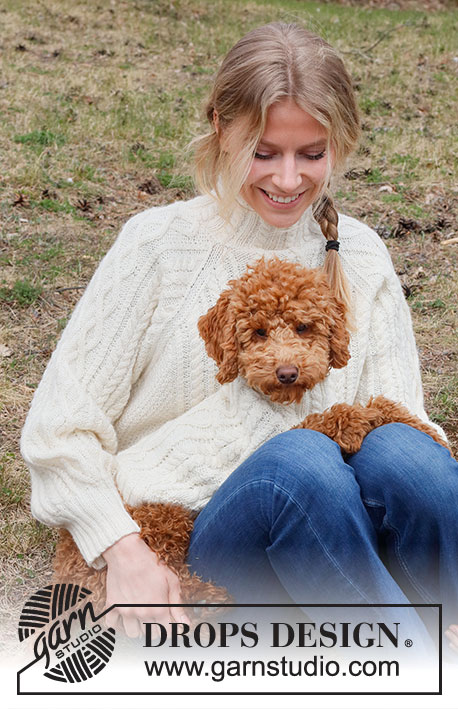
Snowy Trails#snowytrailssweater |
|||||||||||||||||||||||||||||||
 |
 |
||||||||||||||||||||||||||||||
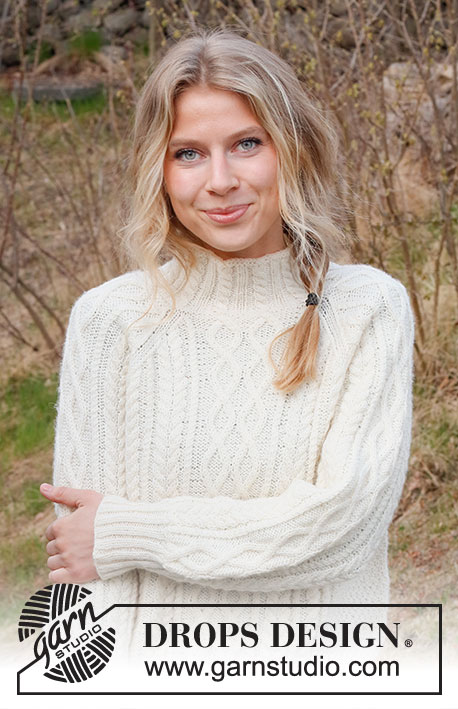
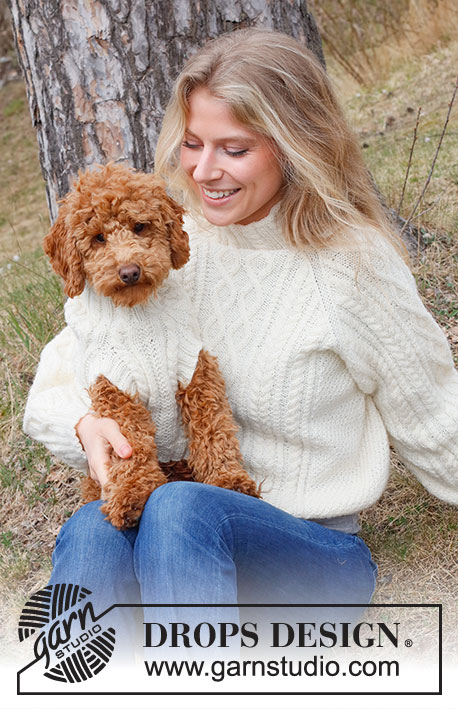
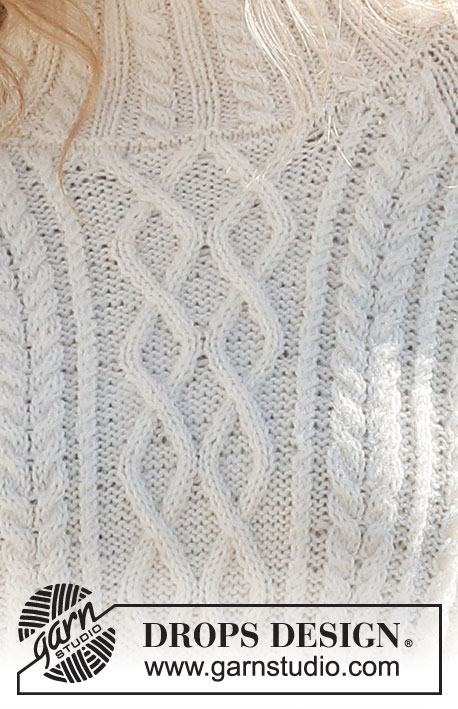
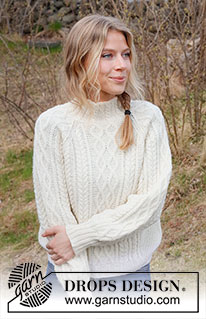
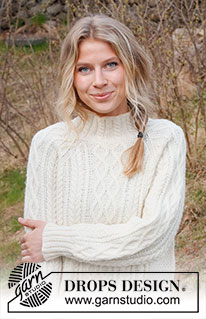
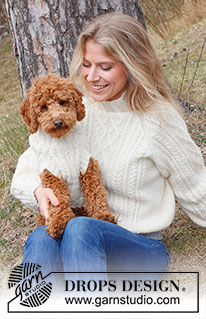
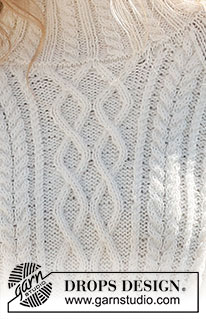
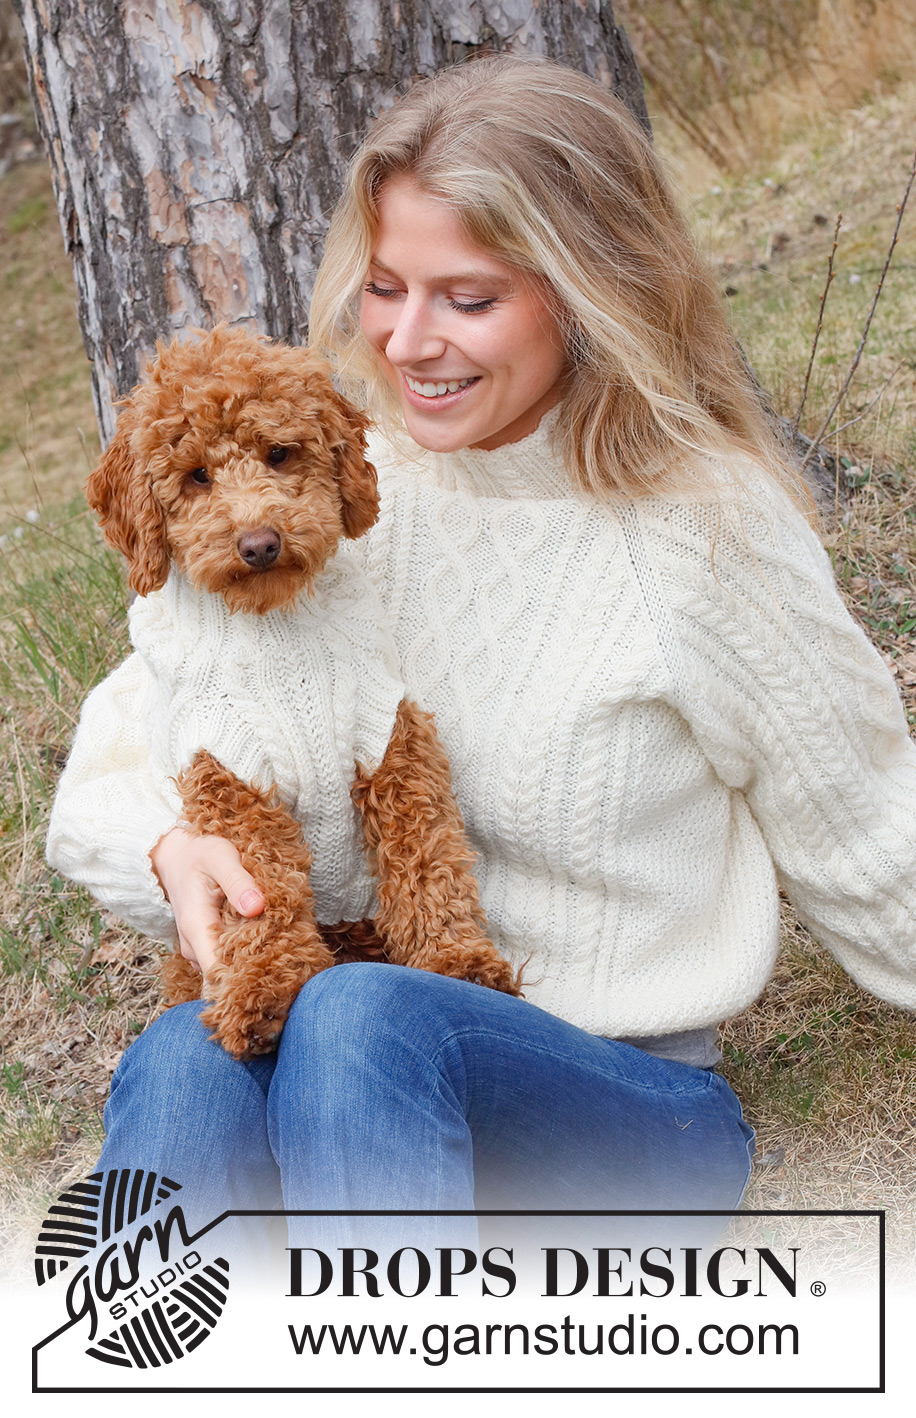
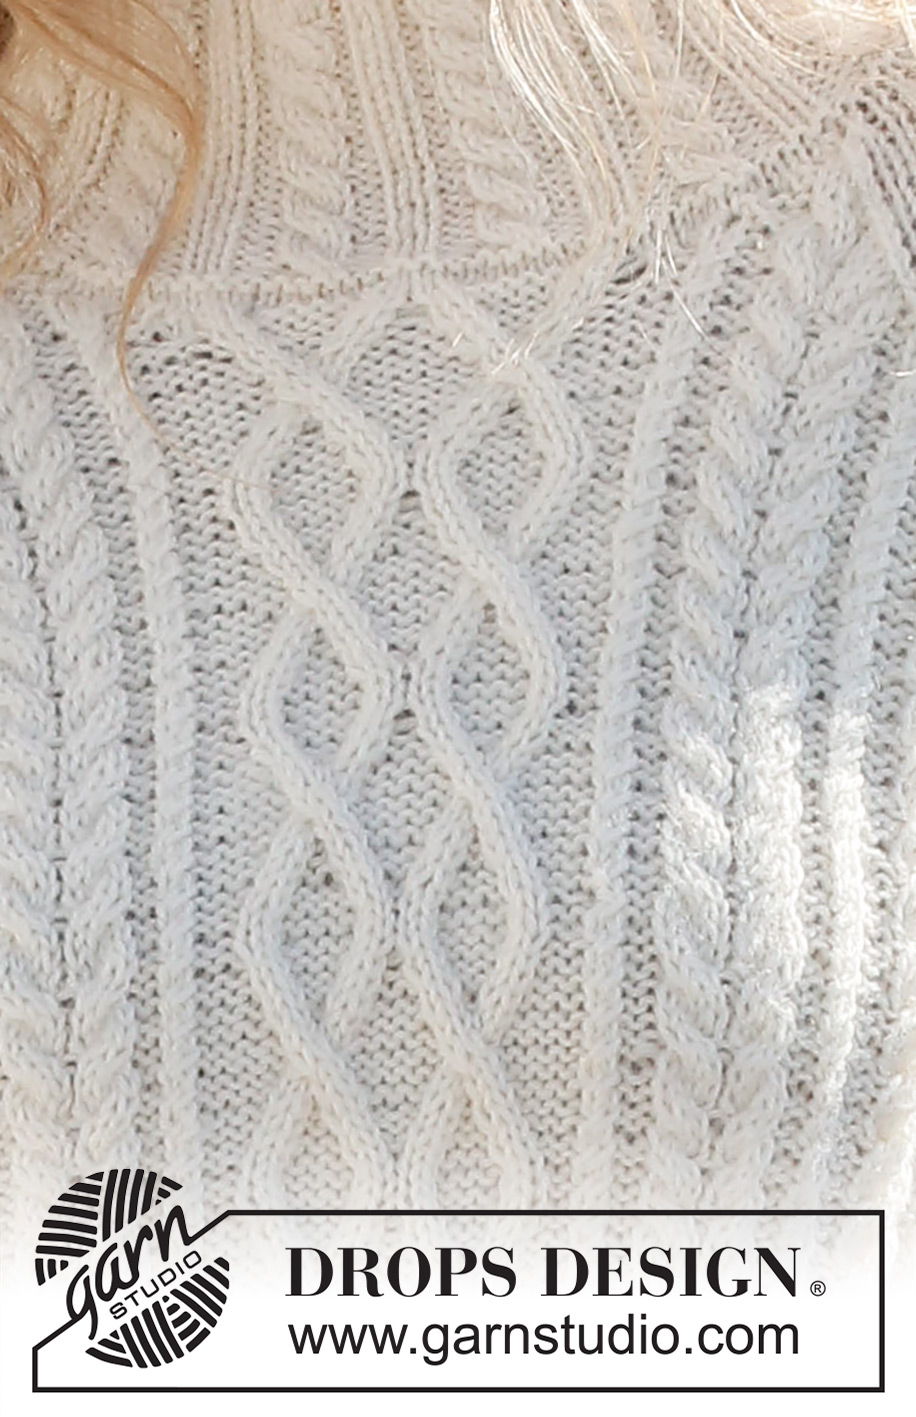
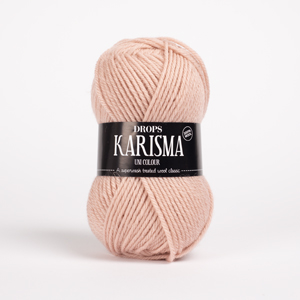
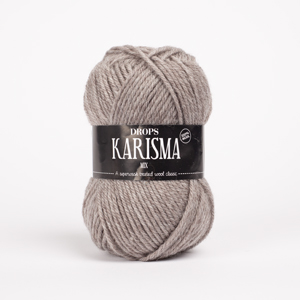
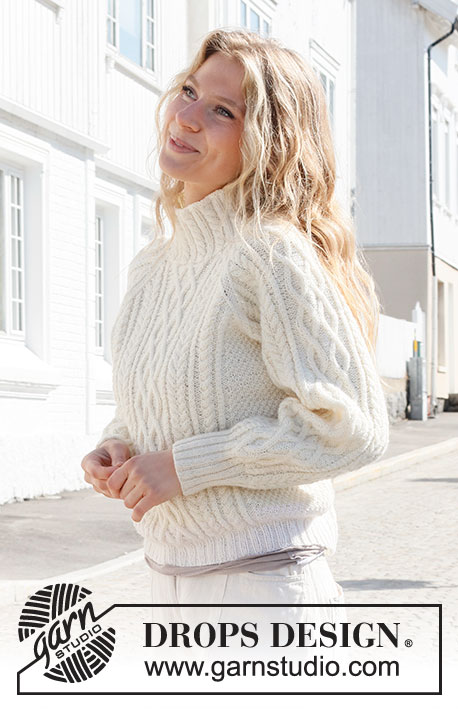
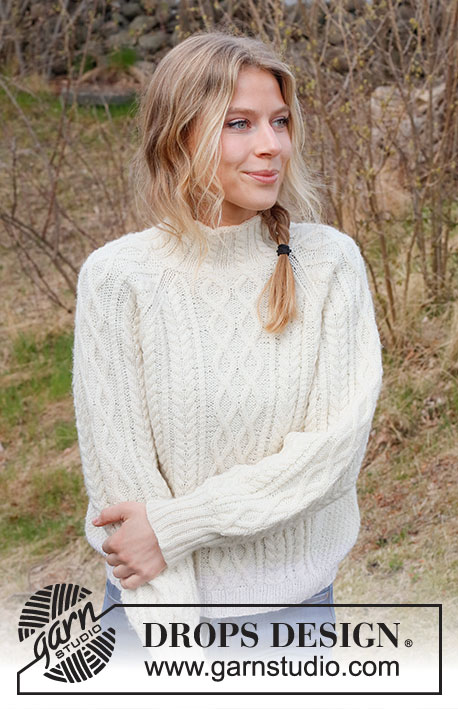
Knitted sweater in DROPS Karisma or DROPS Daisy. Piece is knitted with raglan, cables and moss stitch. Size: S - XXXL
DROPS 226-16 |
|||||||||||||||||||||||||||||||
|
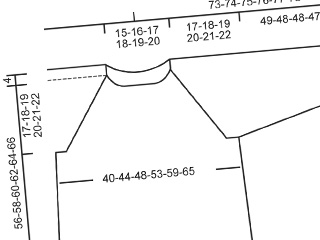
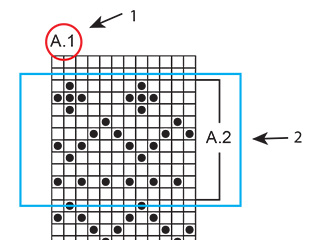
---------------------------------------------------------- EXPLANATION FOR THE PATTERN: ---------------------------------------------------------- KNITTING TIP: In sizes XL, XXL and XXXL, there will be 4 purl stitches next to each other when A.1 is worked 2 times in width. So the rib will match under A.5/A.8, which is worked after the rib. PATTERN: See diagrams A.1 to A.7. Diagrams show all rows in pattern seen from the right side. DECREASE/INCREASE TIP (evenly): To calculate how to decrease/increase evenly, use the total number of stitches to be decreased/increased over (e.g. 21 stitches) and divide stitches by number of decreases/increases to be done (e.g. 4) = 5.3. In this example decrease by knitting approx. every 4th and 5th stitch together. When increasing make in this example 1 yarn over after approx. every 5th stitch. On next round work yarn overs twisted to avoid holes. INCREASE TIP (applies to mid under sleeve): Increase 2 stitches by making 1 yarn over on each side of stitch with marker mid under sleeve. Work as follows from beginning of round: Work 1 stitch (work this stitch always like the first stitch in A.4), make 1 yarn over, pattern as before until stitch with marker, make 1 yarn over (= 2 stitches increased). On next round work yarn overs twisted to avoid holes. Then work the increased stitches in A.4. RAGLAN: Decrease for raglan on each side of marker thread in every transition between sleeves and front/back piece as explained below. In the largest sizes decrease unevenly on front/back piece and sleeves - this is explained in pattern. FROM RIGHT SIDE: DECREASE AS FOLLOWS AFTER MARKER THREAD: Knit 1, slip 1 stitch knitwise, knit 1, pass slipped stitch over stitch worked (= 1 stitch decreased) DECREASE AS FOLLOWS BEFORE MARKER THREAD: Work until 3 stitches remain before marker thread, knit the next 2 together, knit 1 (= 1 stitch decreased) FROM WRONG SIDE: DECREASE AS FOLLOWS AFTER MARKER THREAD: Purl 1, purl 2 together (= 1 stitch decreased) DECREASE AS FOLLOWS BEFORE MARKER THREAD: Work until 3 stitches remain before marker thread, purl 2 twisted together, purl 1 (= 1 stitch decreased) ---------------------------------------------------------- START THE PIECE HERE: ---------------------------------------------------------- SWEATER - SHORT OVERVIEW OF THE PIECE: Work body in the round on circular needle from the bottom and up to armholes. Sleeves are worked in the round on double pointed needles/a short circular needle, from the bottom and up to armholes. Then slip sleeves on to same circular needle as body where stitches for armholes where bind off. Work yoke in the round up to neck line. Bind off stitches for neck mid front. Then work the rest of yoke back and forth on circular needle until finished measurements. Finish with a neck edge in rib and cables. BODY: Cast on 264-280-296-336-352-384 stitches on circular needle size 3.5 MM = US 4 with DROPS Karisma or DROPS Daisy. Knit 1 round. Then work rib as follows: Knit 1, * purl 2, knit 2 *, work from *-* over the next 20-24-28-24-28-36 stitches, work A.1 over the next 14-14-14-28-28-28 stitches (= 1-1-1-2-2-2 repetitions of 14 stitches – read KNITTING TIP), work A.2 (= 18 stitches), work A.3 (= 26 stitches), work A.2 (= 18 stitches), Work A.1 over the next 14-14-14-28-28-28 stitches (= 1-1-1-2-2-2 repetitions of 14 stitches – read KNITTING TIP), * knit 2, purl 2 *, work from *-* over the next 40-48-56-48-56-72 stitches, knit 2, work A.1 over the next 14-14-14-28-28-28 stitches (= 1-1-1-2-2-2 repetitions of 14 stitches – read KNITTING TIP), work A.2 (= 18 stitches), work A.3 (= 26 stitches), work A.2 (= 18 stitches), work A.1 over the next 14-14-14-28-28-28 stitches (= 1-1-1-2-2-2 repetitions of 14 stitches – read KNITTING TIP), * knit 2, purl 2 *, work from *-* over the next 20-24-28-24-28-36 stitches, and finish with knit 1. Continue rib like this– NOTE: In diagram A.2 and A.3 repeat only the 2 first rounds vertically. When 1 round remains before piece measures 5 cm = 2", decrease stitches in rib - this is done as follows: Work in stockinette stitch over the first 21-25-29-25-29-37 stitches and decrease at the same time 4-4-4-4-4-6 stitches evenly over these 21-25-29-25-29-37 stitches – read DECREASE/INCREASE TIP, work A.1 as before over the next 14-14-14-28-28-28 stitches, work last round in A.2 (= 18 stitches and 1 stitch decreased), work last round in A.3 (= 26 stitches and 2 stitches decreased), work last round in A.2 (= 18 stitches and 1 stitch decreased), work A.1 as before over the next 14-14-14-28-28-28 stitches, work in stockinette stitch over the next 42-50-58-50-58-74 stitches and decrease at the same time 9-9-9-9-9-13 stitches evenly over these 42-50-58-50-58-74 stitches, work A.1 as before over the next 14-14-14-28-28-28 stitches, work last round in A.2 (= 18 stitches and 1 stitch decreased), work last round in A.3 (= 26 stitches and 2 stitches decreased), work last round in A.2 (= 18 stitches and 1 stitch decreased), work A.1 as before over the next 14-14-14-28-28-28 stitches, work in stockinette stitch over the last 21-25-29-25-29-37 stitches and decrease at the same time 5-5-5-5-5-7 stitches evenly over these 21-25-29-25-29-37 stitches = 238-254-270-310-326-350 stitches. Rib is now done. Insert 1 marker in first stitch and 1 marker in the 120th-128th-136th-156th-164th-176th stitch on round (= in the side on body). Move markers upwards when working. Bind off stitches for armholes later on each side of these markers. Switch to circular needle size 4.5 MM = US 7. Pattern begins and first round is worked as follows: Work A.4 over the first 17-21-25-21-25-31 stitches, work A.5 over the next 14-14-14-28-28-28 stitches (= 1-1-1-2-2-2 repetitions of 14 stitches, work A.6 (= 17 stitches), work A.7 (= 24 stitches), work A.6 (= 17 stitches), work A.8 over the next 14-14-14-28-28-28 stitches (= 1-1-1-2-2-2 repetitions of 14 stitches), work A.4 over the next 33-41-49-41-49-61 stitches (marker in the side is in the middle of these stitches), work A.5 over the next 14-14-14-28-28-28 stitches (= 1-1-1-2-2-2 repetitions of 14 stitches), work A.6 (= 17 stitches), work A.7 (= 24 stitches), work A.6 (= 17 stitches), work A.8 over the next 14-14-14-28-28-28 stitches (= 1-1-1-2-2-2 repetitions of 14 stitches), and work A.4 over the last 16-20-24-20-24-30 stitches. Continue this pattern. REMEMBER THE KNITTING GAUGE! When piece measures 26 cm = 10¼" in all sizes, bind off stitches for armholes as explained below - read DECREASE TIP. Approx. 24-26-28-30-32-34 cm = 9½"-10¼"-11"-11¾"-12½"-13⅜" remain until finished measurements Adjust so that next round is an odd number of rows in the diagrams and bind off as follows: Bind off 6-6-7-7-8-8 stitches for armhole, continue pattern as before until 5-5-6-6-7-7 stitches remain before next stitch with marker, bind off 11-11-13-13-15-15 stitches for armhole, work as before until 5-5-6-6-7-7 stitches remain on round, and bind off the last 5-5-6-6-7-7 stitches = 108-116-122-142-148-160 stitches remain for front piece and 108-116-122-142-148-160 stitches remain for back piece. Cut the yarn. Put piece aside, and work the sleeves. SLEEVE: Cast on 60-60-64-64-68-68 stitches on double pointed needles size 3.5 MM = US 4 with DROPS Karisma or DROPS Daisy. Knit 1 round. Then work rib in the round (= knit 2/purl 2) for 10 cm = 4". Knit 1 round while increasing 27-27-25-25-23-23 stitches evenly - remember DECREASE/INCREASE TIP = 87-87-89-89-91-91 stitches. Insert 1 marker in first stitch on round - move marker upwards when working. Use marker later when increasing mid under sleeve. Switch to double pointed needles size 4.5 MM = US 7. Pattern begins and first round is worked as follows: Work A.4 over the first 1-1-2-2-3-3 stitches (marker is in first stitch), work A.5 (= 14 stitches), work A.6 (= 17 stitches), work A.7 (= 24 stitches), work A.6 (= 17 stitches), work A.8 (= 14 stitches), and finish with A.4 over the last 0-0-1-1-2-2 stitches. Continue this pattern. When piece measures 12-12-12-12-14-11 cm = 4¾"-4¾"-4¾"-4¾"-5½"-4⅜", increase 2 stitches mid under sleeve – read INCREASE TIP. Increase like this every 6½-3½-3-2½-2-2 cm = 2½"-1¼"-1⅛"-1"-¾"-¾" 6-10-11-13-14-16 times in total = 99-107-111-115-119-123 stitches. Continue until sleeve measures approx. 48-47-45-45-44-43 cm = 19"-18½"-17¾"-17¾"-17¼"-17" (shorter measurements in the larger sizes because of wider neck and longer yoke). Try the sleeve and work to desired length. Adjust so that next round is an odd number of rows in the diagrams. On next round bind off stitches for armhole as follows: Bind off 6-6-7-7-8-8 stitches, work as before until 5-5-6-6-7-7 stitches remain on round, and bind off the last 5-5-6-6-7-7 stitches = 88-96-98-102-104-108 stitches. Cut the yarn. Work the other sleeve the same way. YOKE: Slip sleeves on to same circular needle size 4.5 MM = US 7 as body where armholes were bind off (without working the stitches first) = 392-424-440-488-504-536 stitches on needle. Insert a marker thread in all transitions between front/back piece and sleeves = 4 marker threads. Move marker threads upwards when working. Use marker threads when decreasing for raglan. Begin round in transition between back piece and left sleeve - insert a marker here to mark the beginning of round. Continue the pattern upwards as before, but work stitch on each side of all the 4 marker threads in stockinette stitch (= 2 stitches in stockinette stitch in every transition between front/back piece and sleeves). Work 1 round with pattern in the round over all stitches. OVERVIEW OF NEXT SECTION: On next round begin decrease for raglan. In the largest sizes decrease unevenly for body and sleeves. Cast in addition off stitch for neck mid front, and work the last rows back and forth from mid front. When there is not enough stitches for cables, work in stockinette stitch over these stitches. Read section RAGLAN and NECK before continuing. RAGLAN – SIZE S, M and L: Decrease for RAGLAN on each side of the 4 markers - read explanation above. Decrease every other round 15-19-21 times in total, and then every round 18-17-17 times in total. RAGLAN – SIZE XL, XXL and XXXL:: Decrease for RAGLAN before/after the 4 markers - read explanation above. EVERY OTHER ROUND: In each side on sleeves: Decrease 25-29-32 times in total. In each side on front and back piece: Decrease 13-17-16 times in total. EVERY ROUND: In each side on sleeves: Decrease 12-9-8 times in total. In each side on front and back piece: Decrease 35-33-40 times in total. NECK (applies to all sizes): When piece measures 47-49-51-53-55-57 cm = 18½"-19¼"-20"-21"-21⅝"-22½" (adjust so that next round is an uneven round in diagram), decrease 6 stitches evenly over the middle 24 stitches (= A.7) – remember DECREASE/INCREASE TIP. Then slip the middle 20-22-24-24-26-26 stitches on front piece on 1 stitch holder for neck. Continue until beginning of round. Cut the yarn. Begin from wrong side at the neck and continue pattern back and forth. AT THE SAME TIME bind off for neck at the beginning of every row from neck as follows: Bind off 2 stitches 2 times and 1 stitch 1 time in each side. After all decreases for raglan and neck, 92-98-96-108-110-110 stitches remain. Cut the yarn. Work neck edge as explained below. NECK EDGE: Begin mid back and pick up approx. 122-130-130-142-146-146 stitches around the neck (including stitches on stitch holders at the front) on a short circular needle size 3.5 MM = US 4. On next round decrease evenly to avoid a wide neck - knit 1 round and decrease at the same time evenly to 92-96-100-104-108-112 stitches. Purl 1 round. On next round increase stitches to avoid the pattern to be worked from contracting - knit 1 round and increase at the same time 28-24-30-26-32-28 stitches evenly = 120-120-130-130-140-140 stitches. Work A.9 in the round (= 12-12-13-13-14-14 repetitions of 10 stitches). Work until neck edge measures approx. approx. 8-8-8-10-10-10 cm = 3⅛"-3⅛"-3⅛"-4"-4"-4" or desired length. On next round decrease 1 stitch over each cable = 108-108-117-117-126-126 stitches remain. Then bind off stitches with knit over knit and purl over purl. ASSEMBLY: Sew the openings under the sleeves tog. |
|||||||||||||||||||||||||||||||
Diagram explanations |
|||||||||||||||||||||||||||||||
|
|||||||||||||||||||||||||||||||
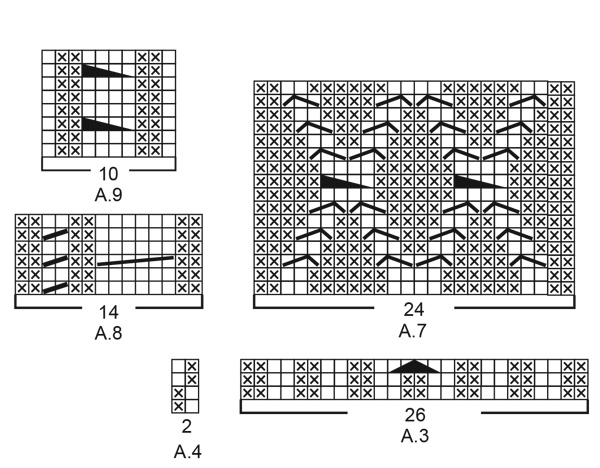 |
|||||||||||||||||||||||||||||||
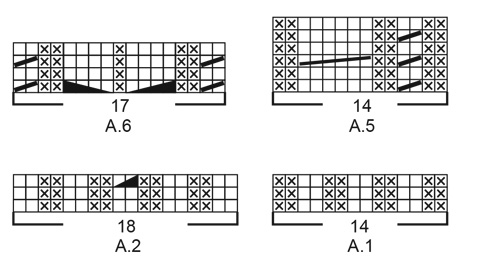 |
|||||||||||||||||||||||||||||||
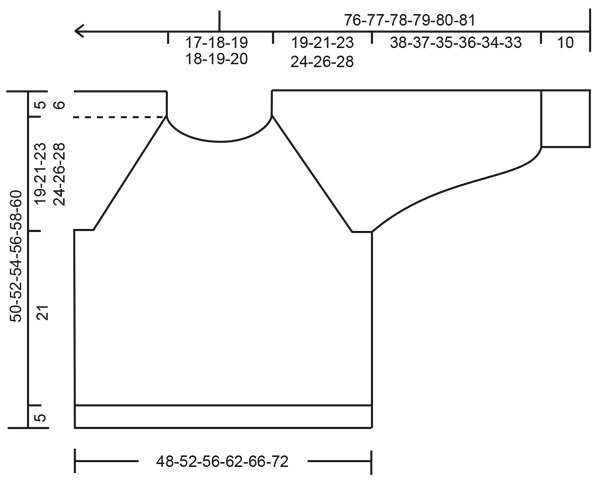 |
|||||||||||||||||||||||||||||||
Have you finished this pattern?Tag your pictures with #dropspattern #snowytrailssweater or submit them to the #dropsfan gallery. Do you need help with this pattern?You'll find 20 tutorial videos, a Comments/Questions area and more by visiting the pattern on garnstudio.com. © 1982-2026 DROPS Design A/S. We reserve all rights. This document, including all its sub-sections, has copyrights. Read more about what you can do with our patterns at the bottom of each pattern on our site. |
|||||||||||||||||||||||||||||||

With over 40 years in knitting and crochet design, DROPS Design offers one of the most extensive collections of free patterns on the internet - translated to 17 languages. As of today we count 333 catalogs and 12537 patterns - 12515 of which are translated into English (US/in).
We work hard to bring you the best knitting and crochet have to offer, inspiration and advice as well as great quality yarns at incredible prices! Would you like to use our patterns for other than personal use? You can read what you are allowed to do in the Copyright text at the bottom of all our patterns. Happy crafting!
Post a comment to pattern DROPS 226-16
We would love to hear what you have to say about this pattern!
If you want to leave a question, please make sure you select the correct category in the form below, to speed up the answering process. Required fields are marked *.