
Popular categories
Looking for a yarn?


Comments / Questions (151)
![]() Patricia wrote:
Patricia wrote:
Hallo, Wil weer beginnen met breien. Bij de patronen staat steeds rondbreinaald kan je dan ook gewone breinaalden gebruiken? Ik heb nog nooit met rondbreinaalden gewerkt. BVD
09.12.2025 - 23:18DROPS Design answered:
Dag Patricia,
Om een patroon aan te passen om op rechte naalden te breien hebben we een instructie gemaakt. Deze vind je hier. Dit is helaas niet voor alle patronen geschikt, bijvoorbeeld voor patronen met een ronde pas.
10.12.2025 - 16:10
![]() Helen wrote:
Helen wrote:
Why does the pattern say to cast off the middle stitches to make the neck on the back, but to put them on a thread to pick up later for the front? Wouldn't it be possible to put both sides on a thread and pick them up all up when you cast on the neck (including the cast off decreases too)?
17.11.2025 - 14:36DROPS Design answered:
Hi Helen, You can of course place the stitches for the back neckline on a stitch holder rather than casting them off if you wish. Regards, Drops Team.
18.11.2025 - 06:53
![]() Andrea Rothfuß wrote:
Andrea Rothfuß wrote:
Habe den Pullover genau wie in der Beschreibung mit der Wolle und den Nadeln in Größe S gestrickt. Die 300 g haben nicht gereicht. Für da Halsbündchen musste ich ein Knäul nachbestellen und hab davon noch 20 g verbraucht Die Anleitung ist gut verständlich.
30.10.2025 - 19:23DROPS Design answered:
Liebe Andrea, das ist natürlich ärgerlich, dass Sie Garn nachkaufen mussten. Haben Sie denn die Maße und die Maschenprobe genau eingehalten? Vielen Dank jedenfalls für Ihr Lob! :-)
30.10.2025 - 22:49
![]() Nathasja wrote:
Nathasja wrote:
Når man har lukket af til ærmerne - skal man så fortsat strikke 1 kantmaske i retstrik eller skal man strikke rent glatstrik uden kantmasken?
13.10.2025 - 23:52DROPS Design answered:
Hej Nathasja. Du fortsätter att sticka 1 kantmaske. Mvh DROPS Design
14.10.2025 - 07:28
![]() Nathasja wrote:
Nathasja wrote:
Når man skal strikke forstykket står der bare at man skal gøre det på samme måde som bagstykket indtil man når 60 cm. Vil det sige at man også skal lukke af til ærmerne ved samme afstand som på bagstykket?
08.10.2025 - 12:04DROPS Design answered:
Hej Nathasja. Ja det stämmer. Mvh DROPS Design
09.10.2025 - 06:55
![]() Jeanette wrote:
Jeanette wrote:
Ikke en veldig god oppskrift for større størrelse dessverre. Strikket denne i en størrelse større enn hva størrelseguiden anbefalte for å få den litt løs og god, men den er tettsittende med for korte ermer. Må gjøre ganske mange justeringer før den kan sys sammen å brukes. (Strikkefastheten er overholdt.)
22.09.2025 - 19:54
![]() Mary-Ann Edsbäcker wrote:
Mary-Ann Edsbäcker wrote:
1)Hur syr man i ärmarna när sidsömmarna inte är ihopsydda först? 2) De 8 cm , när syr man ihop dem? Förstår inte vad sprund innebär.
17.09.2025 - 22:46DROPS Design answered:
Hei Mary-Ann. Ermtoppen (de siste cm) er strikket frem og tilbake, legg da øverste del av ermtoppen mot erm åpningen og sy ermet i. Deretter sys sidesømmen, start med "hullet" under ermet og sy sidesømmen (innenfor 1 kantmaske) til det gjenstår 8 cm. Gjør dette på begge sider og du får en splitt i hver side å genseren. mvh DROPS Design
06.10.2025 - 09:19
![]() Ingela wrote:
Ingela wrote:
Kan man sticka ärmarna på vanliga stickor och sy ihop dem sedan? Jag får inte till det med övningarna. Det blir stora hål.
17.09.2025 - 13:26DROPS Design answered:
Hi Ingela, you can if it is easier for you. Happy knitting!
17.09.2025 - 13:37
![]() Sarah wrote:
Sarah wrote:
Hi, I'm starting on the back piece - it's unclear which bit you continue doing for 8cm. I've cast on, then done a purl row, then done 2 knit stitches knit 1 purl 1 knit 1 and 2 knit stitches. When I go to do the next row doing the 2 knit stitches knit 1 purl 1 knit 1 and knit 2 stitched, the purl and knit stitches don't match up with the last row so wouldn't make ribbing. Is this correct? Or should I be purling every other row too? Thanks
12.09.2025 - 22:47DROPS Design answered:
Hi, the rib has 8 cm in hight. Purl 1 row from the wrong side. Then work as follows – from the right side: 2 edge stitches in GARTER STITCH – see description above, *knit 1, purl 1 *, work from *-* until there are 3 stitches left, knit 1 and 2 edge stitches in garter stitch. Next row (wrong side): 2 edge stitches in garter stitch, *purl 1, knit 1 *, work from *-* until there are 3 stitches left, purl 1 and 2 edge stitches in garter stitch. Happy knitting!
18.09.2025 - 23:24
![]() Rossana Iacuessa wrote:
Rossana Iacuessa wrote:
Salve, Sto provando a realizzare la taglia M di questo progetto ma non capisco il disegno del modello nè la spiegazione. Il dietro: quando dice, dopo avere fatto il bordo iniziale di 8 cm, proseguire a maglia rasata fino a quando il lavoro misura 48 cm, il bordo di 8 cm è compreso oppure no?
12.09.2025 - 13:39DROPS Design answered:
Buongiorno Rossana, se non diversamente indicato le misure si intendono dall'inizio del lavoro. Buon lavoro!
14.09.2025 - 09:25
|
|
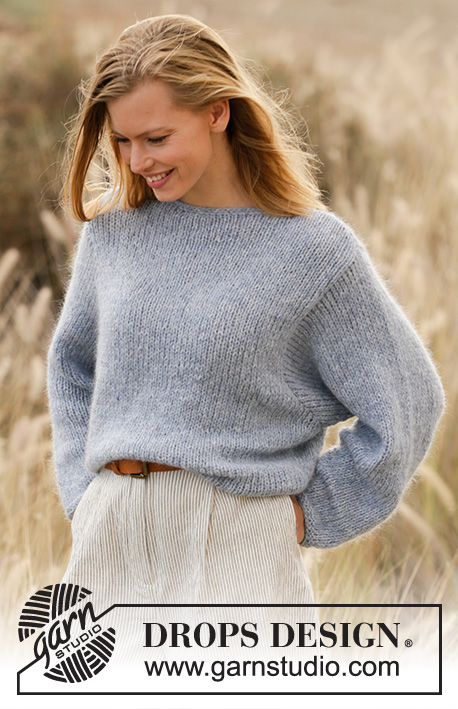
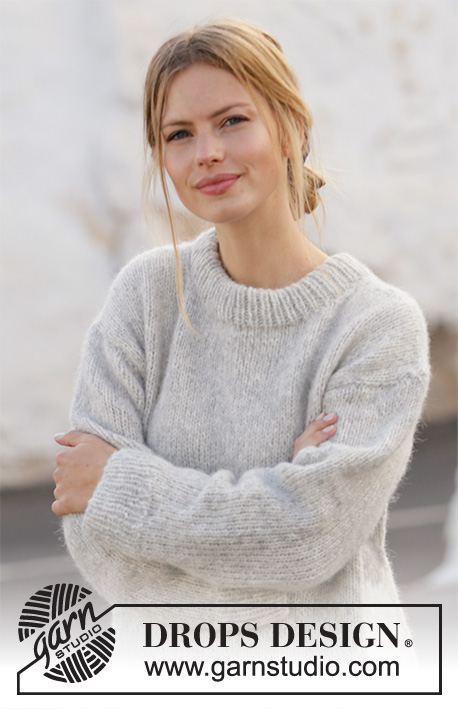
Grey Pearl#greypearlsweater |
|
 |
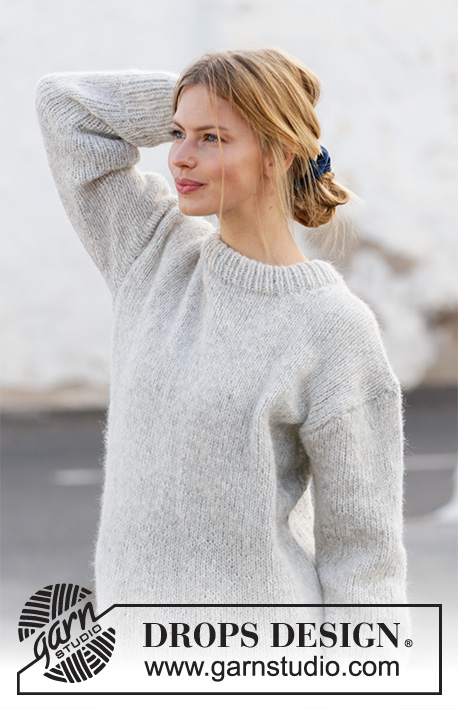 |
Knitted sweater in DROPS Air. Sizes S - XXXL.
DROPS 210-36 |
|
|
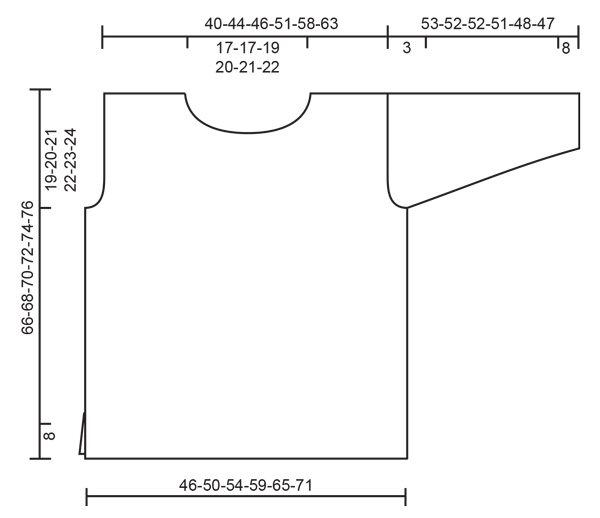
------------------------------------------------------- EXPLANATIONS FOR THE PATTERN: ------------------------------------------------------- RIDGE/GARTER STITCH (worked back and forth): Knit all rows. 1 ridge in height = Knit 2 rows. DECREASE TIP (evenly spaced): To work out how to decrease evenly, count the total number of stitches on needle (e.g. 89 stitches) and divide by number of decreases to be made (e.g. 13) = 6.8. In this example decrease by knitting together alternately each 5th and 6th stitch and each 6th and 7th stitch (approx.). INCREASE TIP (for sleeves): Start 1 stitch before the marker thread, 1 yarn over, work 2 stitches (marker thread sits between these 2 stitches), 1 yarn over. On the next round knit the yarn overs twisted to avoid holes. ------------------------------------------------------- START THE PIECE HERE: ------------------------------------------------------- SWEATER – SHORT OVERVIEW OF THE PIECE: The sweater is worked back and forth in 2 parts which are sewn together to finish. The sleeves are worked in the round with double pointed needles/short circular needle. BACK PIECE: Cast on 89-97-103-113-125-137 stitches with circular needle size 4.5 mm = US 7 and Air. Purl 1 row from the wrong side then work as follows – from the right side: 2 edge stitches in GARTER STITCH – see description above, *knit 1, purl 1 *, work from *-* until there are 3 stitches left, knit 1 and 2 edge stitches in garter stitch. Continue like this until the piece measures 8 cm = 3⅛". Change to circular needle size 5.5 mm = US 9 and knit 1 row from the right side where you decrease 13-15-15-17-19-21 stitches evenly spaced – read DECREASE TIP = 76-82-88-96-106-116 stitches. Continue with stockinette stitch and 1 edge stitch in garter stitch on each side. When the piece measures 47-48-49-50-51-52 cm = 18½"-19"-19¼"-19¾"-20"-20½", bind off for the armholes on both sides at the beginning of each row as follows: Bind off 3 stitches 1-1-1-1-1-1 time, 2 stitches 1-1-1-1-1-1 time and 1 stitch 1-1-2-2-2-3 times = 64-70-74-82-92-100 stitches. Continue with stockinette stitch until the piece measures 64-66-68-70-72-74 cm = 25¼"-26"-26¾"-27½"-28⅜"-29⅛". Now bind off the middle 26-26-28-30-32-34 stitches for the neck and each shoulder is finished separately. Then bind off at the beginning of next row from the neck as follows: 1 stitch 1 time = 18-21-22-25-29-32 stitches on the shoulder. Continue working until the piece measures 66-68-70-72-74-76 cm = 26"-26¾"-27½"-28⅜"-29⅛"-30" and bind off. Work the other shoulder in the same way. FRONT PIECE: Cast on and work as for the back piece until the piece measures 60-62-64-66-68-70 cm = 23⅝"-24⅜"-25¼"-26"-26¾"-27½". Now place the middle 20-20-22-24-26-28 stitches on 1 thread for the neck and finish each shoulder separately. Then bind off at the beginning of each row from the neck as follows: 2 stitches 1 time and 1 stitch 2 times = 18-21-22-25-29-32 stitches left on the shoulder. Continue working until the piece measures 66-68-70-72-74-76 cm = 26"-26¾"-27½"-28⅜"-29⅛"-30", then bind off. Work the other shoulder in the same way. SLEEVE: The sleeves are worked bottom up, in the round, with double pointed needles/short circular needle. The piece is then divided and worked back and forth for the sleeve cap. Cast on 46-48-50-52-52-56 stitches with double pointed needles size 4.5 mm = US 7 and Air. Knit 1 round, then work rib (knit 1 / purl 1) for 8 cm = 3⅛". Change to double pointed needles size 5.5 mm = US 9 and continue with stockinette stitch. On the first round decrease 8-8-8-8-8-10 stitches evenly spaced = 38-40-42-44-44-46 stitches. Insert a marker thread at the beginning of the round = mid under sleeve. Continue with stockinette stitch, AT THE SAME TIME when the piece measures 10-10-10-10-12-12 cm = 4"-4"-4"-4"-4¾"-4¾", increase 1 stitch on each side of the marker thread – read INCREASE TIP. The yarn overs are worked twisted on the next round to avoid holes. Increase like this 3½-3½-3-3-2-2 cm = 1¼"-1¼"-1⅛"-1⅛"-¾"-¾" a total of 11-12-13-13-15-15 times = 60-64-68-70-74-76 stitches. When the sleeve measures 50-49-49-48-45-44 cm = 19¾"-19¼"-19¼"-19"-17¾"-17¼", bind off 3 stitches on each side of the marker thread (= 6 stitches bind off mid under the sleeve), then continue working back and forth. Bind off for the sleeve cap at the beginning of each row on both sides as follows: 2 stitches 1 time, 3 stitches 1 time, then bind off the remaining stitches. Work the other sleeve in the same way. ASSEMBLY: Sew the shoulder seams. Sew in the sleeves and sew the side seams, inside the 1 edge stitch and until there is 8 cm = 3⅛" left at the bottom = split. NECK: Knit up approx. 92-106 stitches with circular needle size 4,5 mm = US 7 around the neck (including the stitches on the thread and the number divisible by 2). Work rib (knit 1 / purl 1) for 9 cm = 3½". Then bind off. Fold the rib at the top to the wrong side and fasten down. To avoid the neck being tight and turning outwards, make sure the seam is elastic. |
|
 |
|
Have you finished this pattern?Tag your pictures with #dropspattern #greypearlsweater or submit them to the #dropsfan gallery. Do you need help with this pattern?You'll find 29 tutorial videos, a Comments/Questions area and more by visiting the pattern on garnstudio.com. © 1982-2026 DROPS Design A/S. We reserve all rights. This document, including all its sub-sections, has copyrights. Read more about what you can do with our patterns at the bottom of each pattern on our site. |
|


With over 40 years in knitting and crochet design, DROPS Design offers one of the most extensive collections of free patterns on the internet - translated to 17 languages. As of today we count 324 catalogs and 12290 patterns - 12280 of which are translated into English (US/in).
We work hard to bring you the best knitting and crochet have to offer, inspiration and advice as well as great quality yarns at incredible prices! Would you like to use our patterns for other than personal use? You can read what you are allowed to do in the Copyright text at the bottom of all our patterns. Happy crafting!
Post a comment to pattern DROPS 210-36
We would love to hear what you have to say about this pattern!
If you want to leave a question, please make sure you select the correct category in the form below, to speed up the answering process. Required fields are marked *.