
Popular categories
Looking for a yarn?












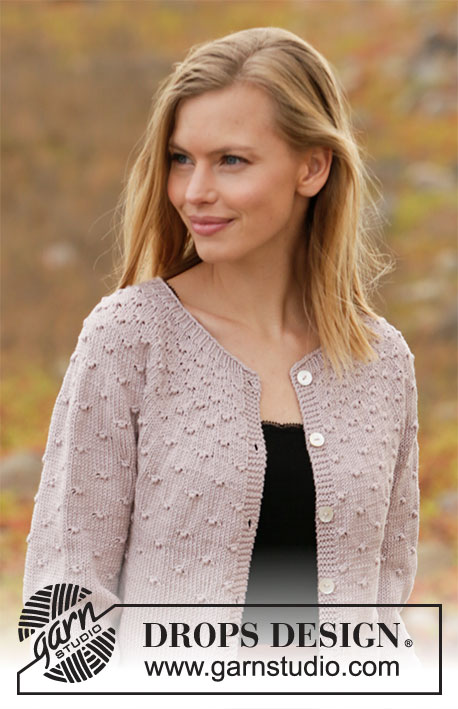
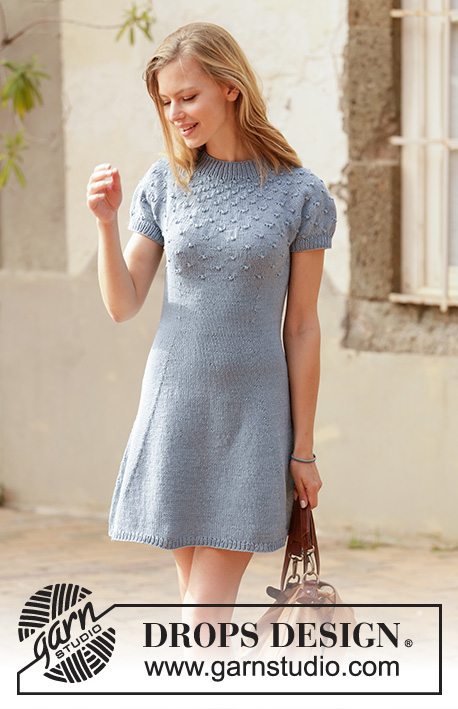








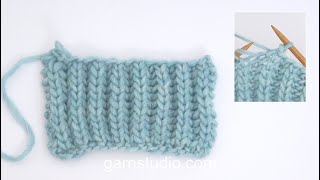
















Comments / Questions (37)
 Sylvie wrote:
Si vous utilisez le même symbole que pour les jetés pour votre augmentation au lieu du losange qui prend la place d’une maille c’est beaucoup plus clair et m’aurait évité l’erreur dont j’ai parlé dans mon autre commentaire . (Si vous tenez au losange il devrait être sur la ligne et plus petit pour ne pas oblitérer la place de la maille)
19.09.2026 - 22:24DROPS Design answered:
Bonjour Sylvie, on n'augmente pas ici en faisant 1 jeté; cette augmentation va se faire en tricotant 1 maille, autrement dit, le losange a toute sa place dans 1 maille car c'est là qu'il va se tricoter et donner l'augmentation voulue. Mais vous pouvez tout à fait changer la façon d'augmenter si besoin. Bon tricot!
21.09.2026 - 09:04
Sylvie wrote:
J’ai du refaire la première augmentation car j’avais 150 mailles au lieu de 144 puisque à chaque Augmentation on augmente de 24 mailles (24 répétitions.) Cependant quand on voit le diagramme avec le losange, où il y a l’augmentation, il y a aussi une maille donc au lieu de faire 4 mailles entre chaque augmentation il faut en faire 5; c’est ce que j’en déduit, mais ce n’est pas clair ;si je n’avais pas vérifié mon nombre de mailles j’aurais pu me rendre à la fin de A1 !
19.09.2026 - 21:08DROPS Design answered:
Bonjour Sylvie, vous devez bien avoir 4 mailles entre chaque augmentation (au 1er tour d'augmentations) car l'augmentation indiquée dans le diagramme se tricote sur 1 maille (et pas entre 2 mailles), autrement dit, on tricote 2 fois une maille pour augmenter 1 maille - cf légende du 3ème symbole. Bon tricot!
21.09.2026 - 08:49
 Adrienn wrote:
Az A1 mintaegyseg szelein, amikor szaporitas van, nem talaltam leirast a szaporitas mikentjehez, csak sima rahajtas kell oda? De akkor 2 db kell egymas melle amikor a mintat ismetlem? Elore is koszonom a valaszt!
28.08.2026 - 21:58
 Chiara wrote:
Credo di aver sbagliato qualcosa perché non capisco perché tagliare il filo alla fine dello sprone… Ho semplicemente continuato e considerato solo un marca giro all’ inizio del giro che considero dietro. Sembra venire bene… il pattern é molto bello (filato belle). Grazie
27.06.2026 - 19:16
 Aleksandra wrote:
Na schemacie sweter zwęża się nieznacznie ku dołowi, na wysokości 21cm, czy to jest konieczne? Czy można nie wykonywać tego zwężenia, tylko kontynuować dzierganie swetra "na prosto"? Po co jest to zwężenie, czy może jest ono do czegoś potrzebne.
19.06.2026 - 20:24DROPS Design answered:
Witaj Aleksandro, tak został ten sweterek zaprojektowany. Oczywiście możesz robić na prosto, jeśli tak bardziej Ci się podoba. Pozdrawiamy!
22.06.2026 - 15:33
 Anja wrote:
Hoe brei ik 3 steken averechts zoals patroon zegt
11.02.2026 - 20:49DROPS Design answered:
Dag Anja,
In één van de video's wordt uitgelegd hoe je een knoop breit zoals in het telpatroon. Klik bovenaan het patroon op 'video's' om de bijbehorende video's te bekijken.
12.02.2026 - 19:30
 Benita Nordin wrote:
Beautiful pattern
07.02.2026 - 19:26
 JULIE wrote:
Love the patterns
14.01.2026 - 18:47
Marijke wrote:
Bedankt! Ik had niet gezien dat er video’s bij het patroon staan. Nu is het helemaal duidelijk.
25.11.2025 - 00:19
Marijke wrote:
Ik begrijp niets van de instructies voor het breien van een stip. Als je steeds de drie steken samen moet breien (‘brei dezelfde 3 steken samen en dan nog een 1 keer averecht samen’), dan houd je toch één steek over? Er staat echter: ‘alle DRIE steken van de linker naald af laten glijden’.
15.11.2025 - 13:23DROPS Design answered:
Dag Marijke,
In een van de video's die bij het patroon staat wordt getoond hoe je de 'stip' breit.
24.11.2025 - 22:09
|
||||||||||
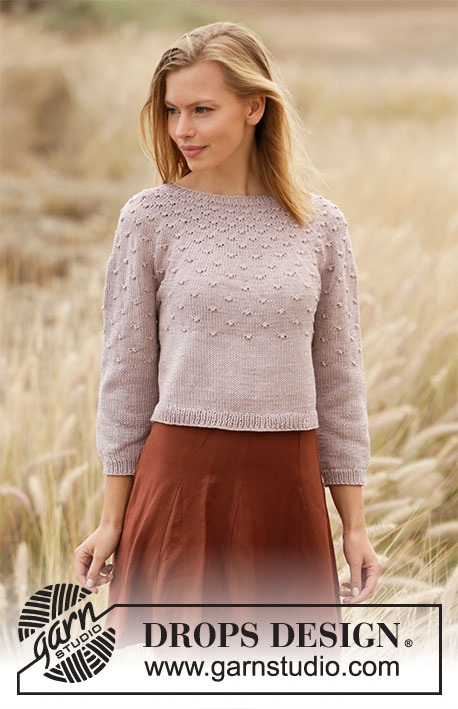
Dots and Drops#dotsanddropssweater |
||||||||||
 |
 |
|||||||||
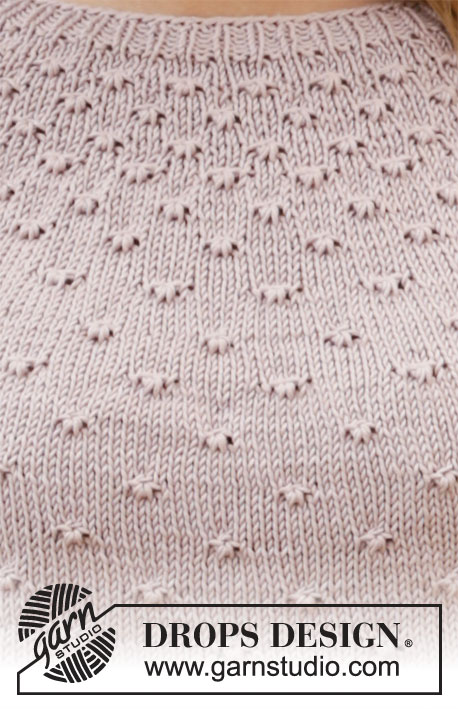
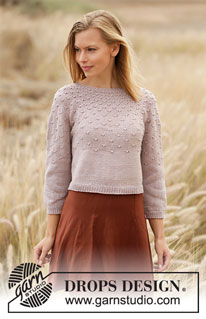
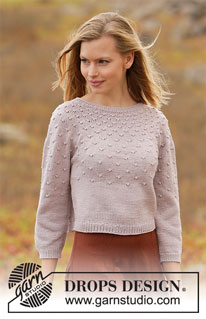
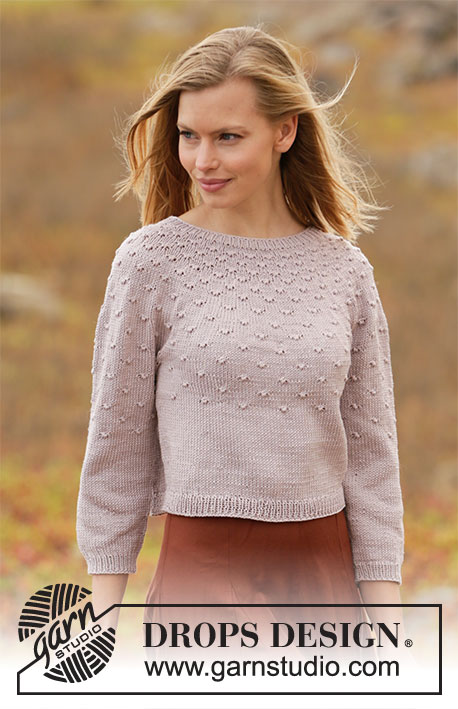
Knitted sweater in DROPS Muskat. The piece is worked top down with round yoke, knotted pattern and ¾-length sleeves. Sizes XS - XXL.
DROPS 213-9 |
||||||||||
|
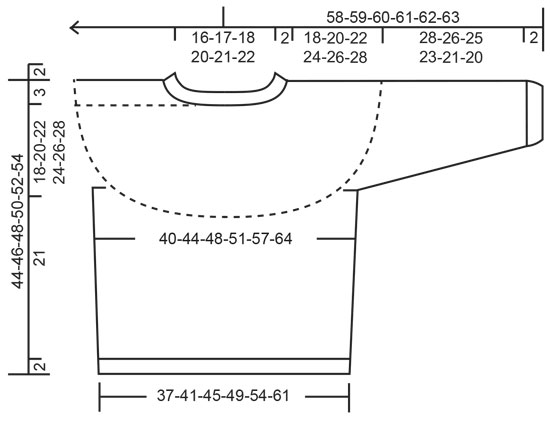
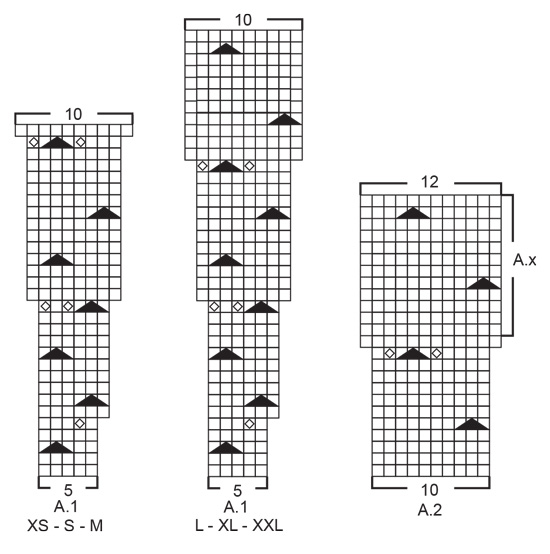
------------------------------------------------------- EXPLANATIONS FOR THE PATTERN: ------------------------------------------------------- PATTERN: See diagrams A.1 and A.2. Choose diagram for your size (applies to A.1). INCREASE TIP (evenly spaced): To work out how to increase evenly, count the total number of stitches on the needle (e.g. 92 stitches) and divide by the number of increases to be made (e.g. 18) = 5.1. In this example, increase by making 1 yarn over after approx. each 5th stitch. On the next round knit the yarn overs twisted to avoid holes. DECREASE TIP (for sides of body and mid under sleeves): Decrease 1 stitch on each side of the marker thread as follows: Work until there are 3 stitches left before the marker thread, knit 2 together, knit 2 (marker thread sits between these 2 stitches) slip 1 stitch as if to knit, knit 1 and pass the slipped stitch over the knitted stitch (= 2 stitches left). BINDING-OFF TIP: To avoid the bind-off edge being tight you can bind off with a larger size needle. If the edge is still tight, make 1 yarn over after approx. each 8th stitch at the same time as binding off and the yarn overs are bind off as normal stitches. ------------------------------------------------------- START THE PIECE HERE: ------------------------------------------------------- SWEATER – SHORT OVERVIEW OF THE PIECE: The neck and yoke are worked in the round with circular needle from mid back and top down. The yoke is divided for body and sleeves and the body continued in the round from the side. The sleeves are worked in the round with double pointed needles/short circular needle, top down. NECK: Cast on 92-96-100-110-114-118 stitches with circular needle size 3 mm = US 2,5 and Muskat. Knit 1 round, then work rib in the round (= knit 1 / purl 1) for 2 cm = ¾". Knit 1 round where you increase 18-24-30-30-41-52 stitches evenly spaced – read INCREASE TIP = 110-120-130-140-155-170 stitches. Knit 1 round (yarn overs are knitted twisted). Insert 1 marker in the middle of the round (= mid front). The yoke is measured from this marker! Then work the yoke as described below. YOKE: Change to circular needle size 4 mm = US 6 and work A.1 in the round (= 22-24-26-28-31-34 repeats of 5 stitches). Continue this pattern and increase as shown in A.1. REMEMBER THE KNITTING GAUGE! When A.1 has been completed there are 220-240-260-280-310-340 stitches on the needle. Continue with A.2 in the round (= 22-24-26-28-31-34 repeats of 10 stitches). Continue this pattern and increase as shown in A.2. After the last increase in A.2 there are 264-288-312-336-372-408 stitches on the needle. Continue working until the piece measures 18-20-22-24-26-28 cm = 7"-8"-8¾"-9½"-10¼"-11" from the marker on the neck – NOTE: In the smallest size A.2 is not finished at this point and in the other sizes A.x needs to be repeated to the correct length (the patterns will continue on the body and sleeves). Now divide the piece for the body and sleeves on the next round as follows: Work 38-42-46-49-55-62 stitches in pattern as before (= ½ back piece), place the next 56-60-64-70-76-80 stitches on 1 thread for sleeve, cast on 8-8-8-10-10-10 new stitches on the needle (= in side under the sleeve), work 76-84-92-98-110-124 stitches in pattern as before (= front piece), place the next 56-60-64-70-76-80 stitches on 1 thread for sleeve, cast on 8-8-8-10-10-10 new stitches on the needle (= in side under the sleeve) and work the remaining 38-42-46-49-55-62 stitches in pattern as before (= ½ back piece). Cut the strand. Body and sleeves are finished separately. THE PIECE IS NOW MEASURED FROM HERE! BODY: = 168-184-200-216-240-268 stitches. Insert 1 marker thread in each side of the body, in the middle of the 8-8-8-10-10-10 stitches cast on under each sleeve. Allow the threads to follow your work onwards; they will be used when decreasing on each side of the body. Now continue the pattern AT THE SAME TIME as decreasing in the sides of the body as described below: Continue A.x in the round making sure you continue on the right row in the diagram after the yoke and make sure the knots are worked above the knots on the yoke. The 8-8-8-10-10-10 stitches cast on under each sleeve are worked in stockinette stitch. When the piece measures approx. 6 cm = 2⅜" from the division in all sizes finish A.x after a round of knots. Continue with stockinette stitch in the round over all stitches. AT THE SAME TIME when the piece measures 6 cm = 2⅜" from the division in all sizes decrease 1 stitch on each side of both marker threads – read INCREASE TIP (= 4 stitches decreased). Decrease like this every 5 cm = 2" a total of 3 times on each side = 156-172-188-204-228-256 stitches. Continue working until the piece measures 21 cm = 8¼" from the division in all sizes (there are 2 cm left to finished length; you can try the sweater on and work to desired length). Knit 1 round where you increase 16-16-18-20-22-24 stitches evenly spaced – remember INCREASE TIP = 172-188-206-224-250-280 stitches (the increase prevents the rib being tight). Change to circular needle size 3 mm = US 2,5 and work rib in the round (= knit 1 / purl 1) for 2 cm. Bind off with knit over knit and purl over purl – read BINDING-OFF TIP! The sweater measures approx. 44-46-48-50-52-54 cm = 17¼"-18"-19"-19¾"-10½"-21¼" from the shoulder down. SLEEVE: Place the 56-60-64-70-76-80 stitches from the thread on the one side of the piece on double pointed needles/short circular needle size 4 mm = US 6 and knit up 1 stitch in each of the 8-8-8-10-10-10 stitches cast on under the sleeve = 64-68-72-80-86-90 stitches. Insert a marker thread in the middle of the 8-8-8-10-10-10 stitches under the sleeve and allow the thread to follow your work onwards; it will be used when decreasing mid under sleeve. Now continue with pattern AT THE SAME TIME as you decrease mid under sleeve as follows: Start the round at the marker thread and work A.x in the round making sure you continue on the right row in the diagram after the yoke and that the knots are worked above the knots on the yoke. The 8-8-8-10-10-10 stitches cast on under the sleeve are worked in stockinette stitch. When the sleeve measures 12 cm = 4¾" from the division in all sizes, finish A.x after a round of knots. Continue with stockinette stitch in the round over all stitches. AT THE SAME TIME when the piece measures 2-2-2-2-3-3 cm = ¾"-¾"-¾"-¾"-1⅛"-1⅛" from the division decrease 2 stitches mid under the sleeve – read DECREASE TIP. Decrease like this every 3½-3-2½-1½-1-1 cm = 1¼"-1⅛"-⅞"-½"-⅜"-⅜" a total of 7-8-9-12-14-15 times = 50-52-54-56-58-60 stitches. Continue working until the piece measures 28-26-25-23-21-20 cm = 11"-10¼"-9¾"-9"-8¼"-8" from the division (there are 2 cm = ¾" left to finished length; you can try the sweater on and work to desired length). NOTE: Shorter measurements in larger sizes due to wider neck and longer yoke. Change to double pointed needles size 3 mm = US 2,5 and work rib in the round (= knit 1 / purl 1) for 2 cm = ¾". Bind off with knit over knit and purl over purl – remember BINDING-OFF TIP. The sleeve measures approx. 30-28-27-25-23-22 cm = 11¾"-11"-10⅝"-9¾"-9"-8¾" from the division. Work the other sleeve in the same way. |
||||||||||
Diagram explanations |
||||||||||
|
||||||||||
 |
||||||||||
 |
||||||||||
Have you finished this pattern?Tag your pictures with #dropspattern #dotsanddropssweater or submit them to the #dropsfan gallery. Do you need help with this pattern?You'll find 17 tutorial videos, a Comments/Questions area and more by visiting the pattern on garnstudio.com. © 1982-2026 DROPS Design A/S. We reserve all rights. This document, including all its sub-sections, has copyrights. Read more about what you can do with our patterns at the bottom of each pattern on our site. |
||||||||||






With over 40 years in knitting and crochet design, DROPS Design offers one of the most extensive collections of free patterns on the internet - translated to 17 languages. As of today we count 333 catalogs and 12525 patterns - 12515 of which are translated into English (US/in).
We work hard to bring you the best knitting and crochet have to offer, inspiration and advice as well as great quality yarns at incredible prices! Would you like to use our patterns for other than personal use? You can read what you are allowed to do in the Copyright text at the bottom of all our patterns. Happy crafting!
Post a comment to pattern DROPS 213-9
We would love to hear what you have to say about this pattern!
If you want to leave a question, please make sure you select the correct category in the form below, to speed up the answering process. Required fields are marked *.