
Popular categories
Looking for a yarn?


Comments / Questions (23)
![]() Maria wrote:
Maria wrote:
Im having trouble understing what's going to happen with the original front pieces? Atm they're just flapping around from where they're attached to at the top of the cardigan-work in progress, from each side. Seemingly without purpose, also how do I know that they're lone enough as I can't increase now that they're on the project. I also don't understand what the meaning of them are?
29.05.2024 - 09:13DROPS Design answered:
Dear Maria, not sure exactly which part you mean, but the body is knitted downwards, in one piece, and the two small piece you started with should be sewn together and then sewn on to the neck (see the very last sentence of the instructions, under ASSEMBLY. I hope this helps. Happy Knitting!
29.05.2024 - 11:29
![]() Lilian Lund wrote:
Lilian Lund wrote:
Vad är det för skillnad på 249-16 respektive 206-34
06.04.2024 - 10:09
![]() Sonny wrote:
Sonny wrote:
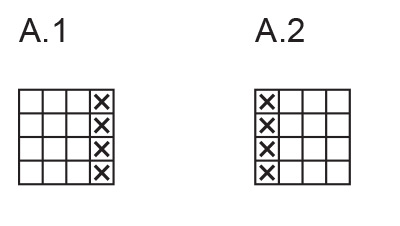
Symbols = knit from right side, purl from wrong side symbols = purl from right side, knit from wrong side Not doing very well as I’m struggling to get started🤣 Does the above mean knit when on right right and then purl when on wrong side please?
04.04.2024 - 17:12DROPS Design answered:
Dear Sonny, the diagrams always show every pattern as you would see it from looking at it from the right side. Thus the stitches represented by the empty square symbol should be knitted from the right side, and purled from the wrong side. The stitches represented by the X symbole should be purled on the right side and knitted from the wrong side. Basically the A.1 is a K3/P1 ribbing, the A.2 is a P1/K3 ribbing. Happy Knitting!
05.04.2024 - 02:17
![]() Rina Tissen wrote:
Rina Tissen wrote:
Ik brei morning-afterpil moon cardigan en moest 2 biezen breien. Moet ik deze opzij leggen? Ik begrijp het breien van de pas niet.
28.03.2024 - 21:49DROPS Design answered:
Dag Rina,
Je breit eerst de rechter voorbies, knipt de draad af en die leg je aan de kant (dus zonder de steken af te kanten). Vervolgens brei je de linker voorbies, maar als je daarmee klaar bent hoef je de draad niet af te knippen. In plaats daarvan zet je steken op aan het einde van de eerstvolgende naald van die bies (zie paragraaf PAS) en daarna brei je verder met de rechter bies. Nu heb je beide biezen op de naald met steken ertussen.
03.04.2024 - 21:06
![]() Karin wrote:
Karin wrote:
Ich möchte die tolle Jacke stricken.Leider stehe ich jetzt schon auf dem Schlauch was das für eine Blende ist. Ist das sozusagen der Kragen hinten?
16.03.2024 - 14:29DROPS Design answered:
Liebe Karin, ja genau, die 2 Blende, die man am Anfang strickt, werden danach zusammengenäht und dann am Halsausschnitt angenäht. Viel Spaß beim Stricken!
18.03.2024 - 08:46
![]() Maria Tuohisto wrote:
Maria Tuohisto wrote:
Koen nämä nyt muotiin tulleet "ylhäältä alas, etu- takakappale yhdessä " -tehtävät neuleet raskaana niskahartia -seudulle. Yhden työn tein ja se riitti.
15.03.2024 - 19:40
![]() Susi wrote:
Susi wrote:
Super... und endlich viele neue Modelle Topdown!!!
01.03.2024 - 13:36
![]() Dorothee wrote:
Dorothee wrote:
Schlicht und einfach..... ein supertolles Basic-Modell
20.01.2024 - 13:26
![]() Nini wrote:
Nini wrote:
Fancy Bella
19.01.2024 - 14:17
![]() Kelly wrote:
Kelly wrote:
Breeze
18.01.2024 - 21:50
|
|||||||
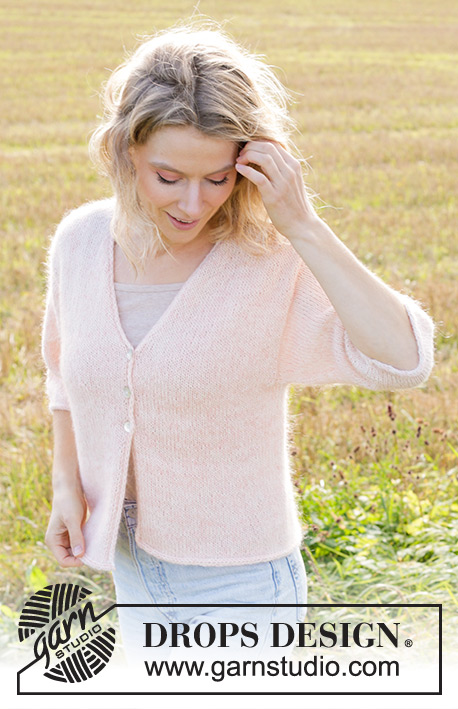
Morning Moon Cardigan#morningmooncardigan |
|||||||
 |
 |
||||||
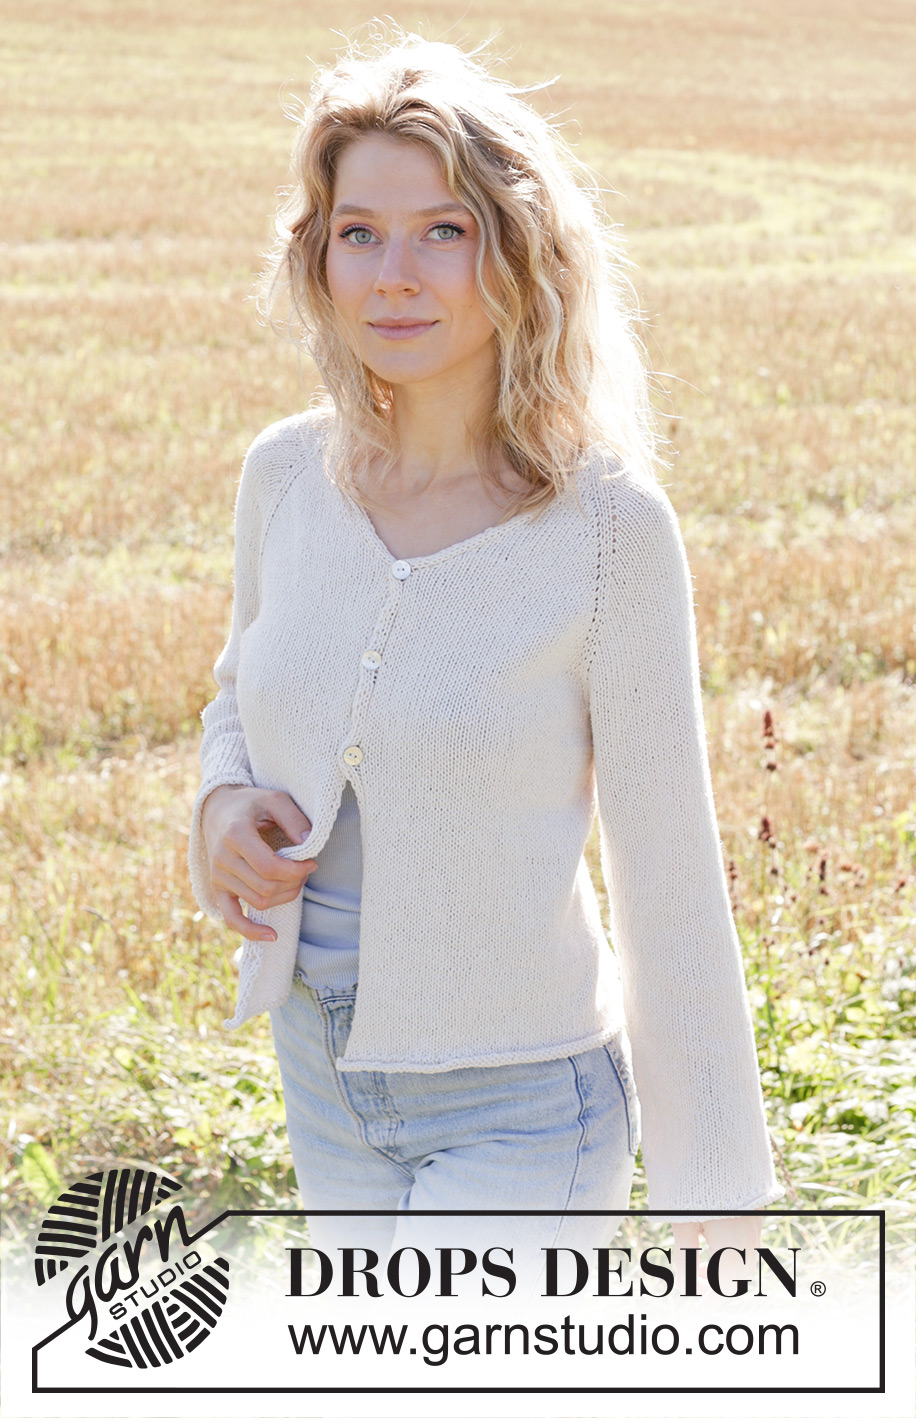
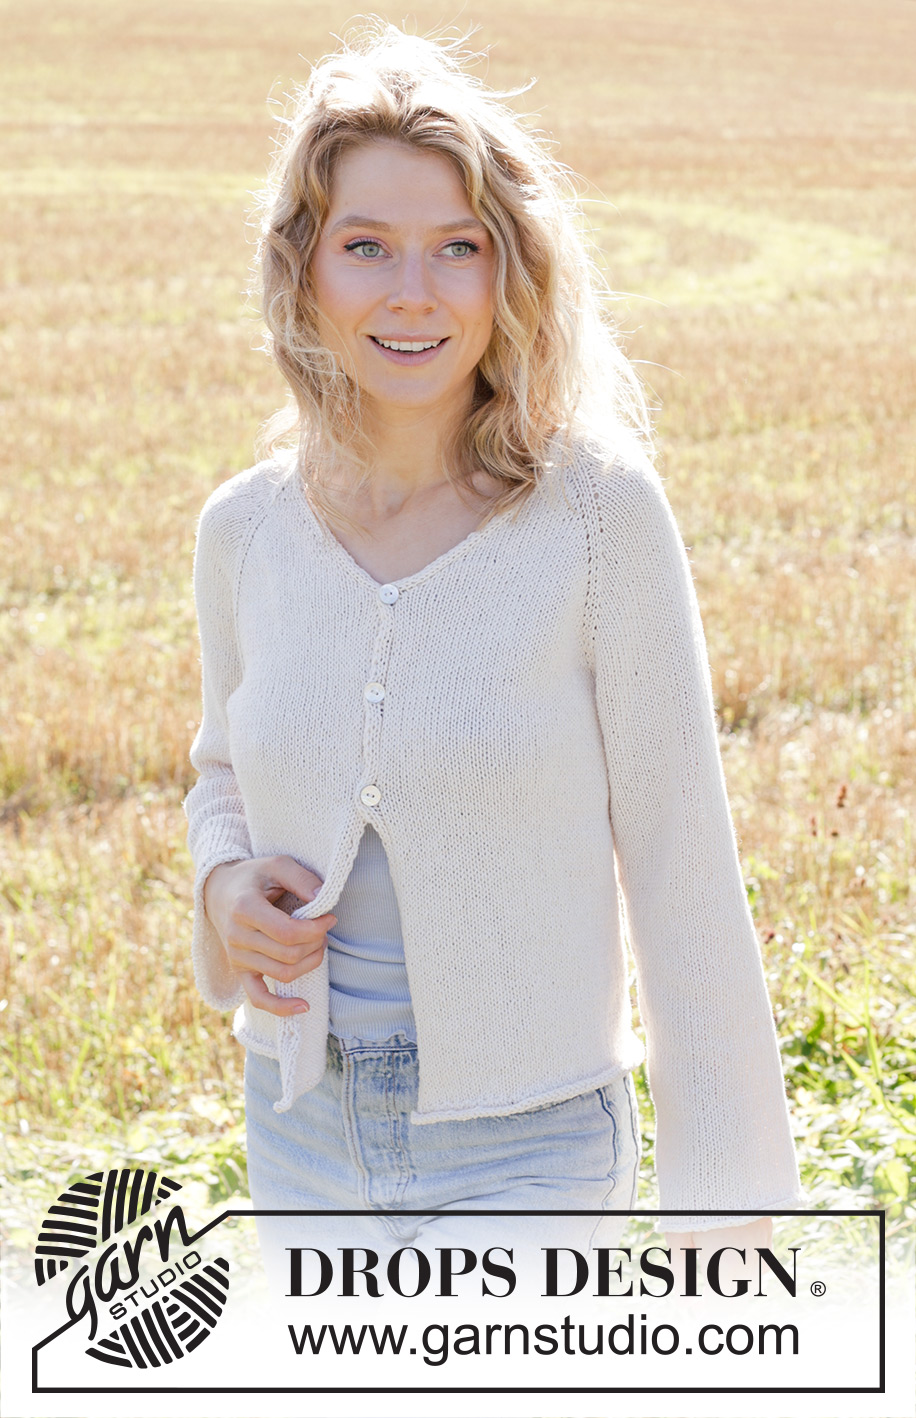
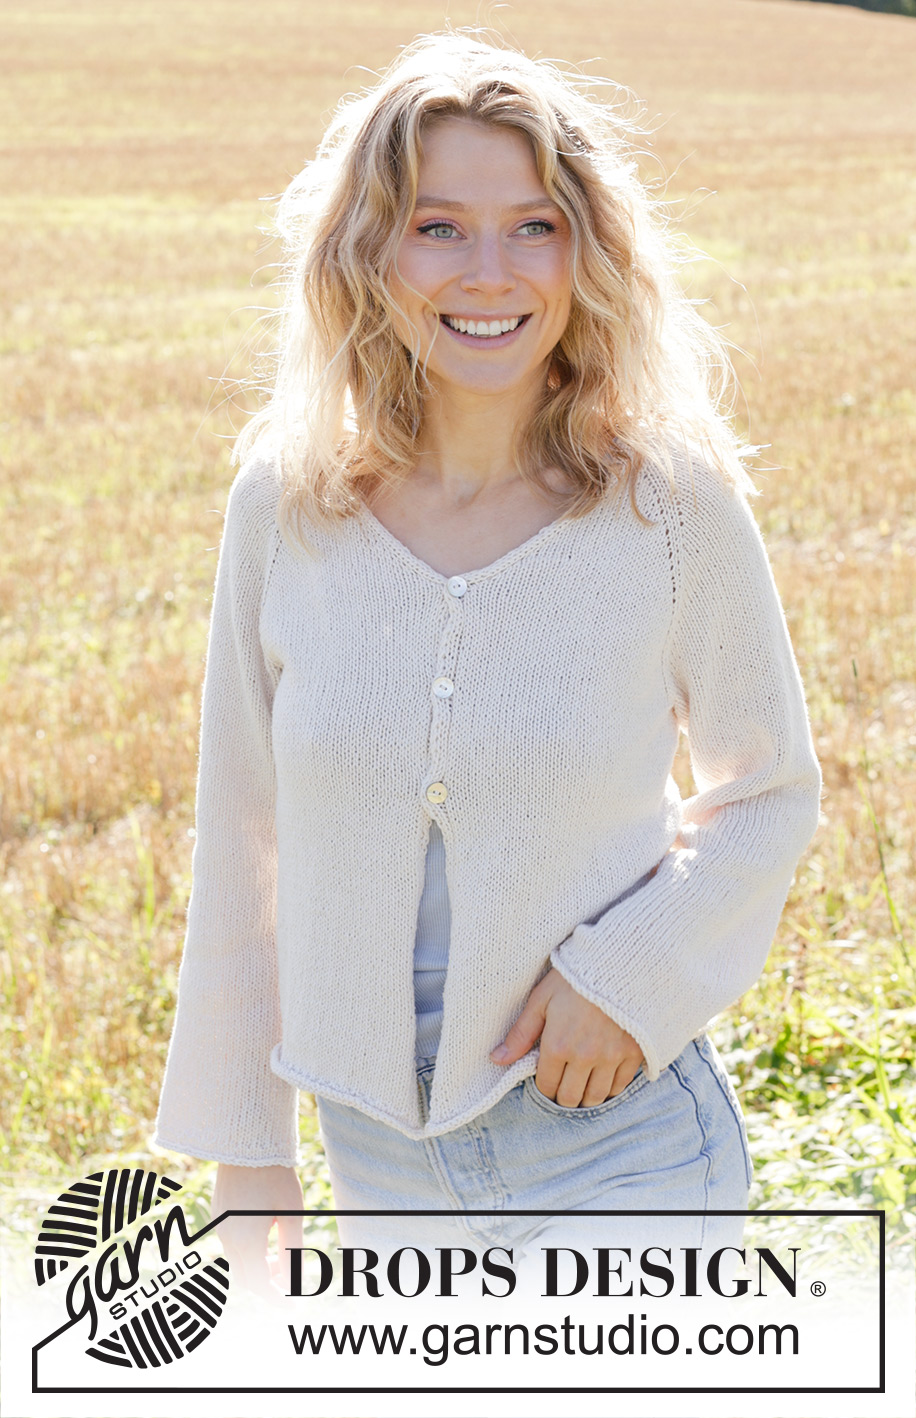
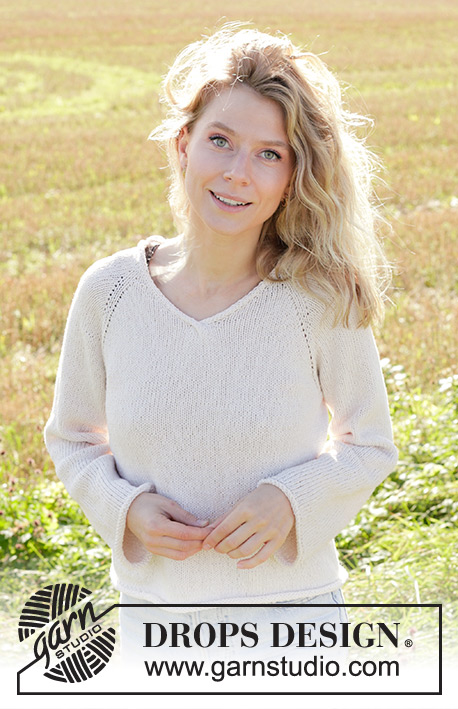
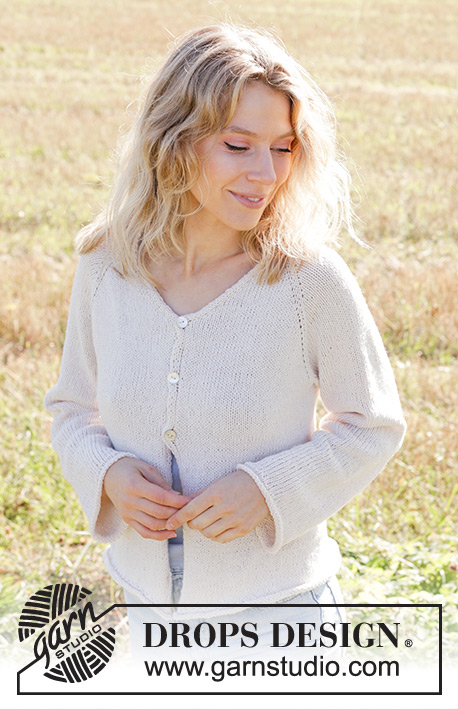
Knitted jacket in DROPS Belle. The piece is worked top down with stockinette stitch, raglan, V-neck and rolled edges. Sizes S-XXXL.
DROPS 249-16 |
|||||||
|
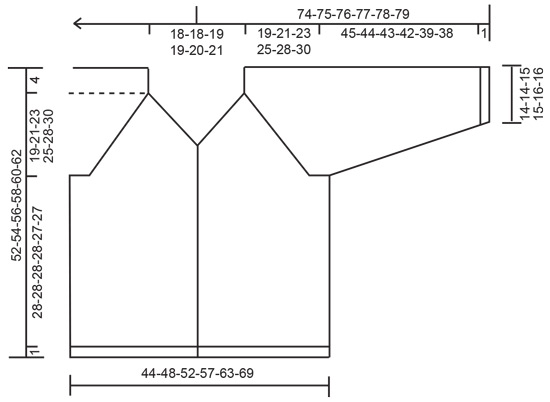
------------------------------------------------------- EXPLANATIONS FOR THE PATTERN: ------------------------------------------------------- PATTERN (for bands): See diagrams A.1 and A.2. The diagrams show all rows in the pattern from the right side. RAGLAN: All increases are worked from the right side! Increase for raglan before/after the marker-thread as follows: Work until there is 1 stitch left before the marker thread, make 1 yarn over, knit 2 (marker thread sits between these 2 stitches) make 1 yarn over. On the next row (wrong side) work the yarn overs as follows: BEFORE MARKER-THREAD: Purl the back loop. AFTER MARKER-THREAD: Slip the yarn-over off the left needle and replace it the other way round (insert left needle through back when replacing it). Purl the front loop. V-NECK: All increases are worked from the right side! Increase as follows: Work the left band as before, make 1 yarn over, work until there are 4 stitches left, make 1 yarn over, work the right band as before. On the next row (= wrong side) work the yarn overs as follows: AFTER RIGHT BAND: Slip the yarn-over off the left needle and replace it the other way round (insert left needle through back when replacing it). Purl the front loop. BEFORE LEFT BAND: Purl the back loop. BUTTONHOLES: Work buttonholes on the right band (when the garment is worn) from the wrong side: Work 4 band stitches as before, make 1 yarn over. On the next row (right side) work until there are 6 stitches left, slip 1 stitch knit-wise, knit the yarn over, pass the slipped stitch over, work 4 band stitches as before. The first buttonhole is worked when the increases for the V-neck are finished (neck measures approx. 14-14-15-15-16-16 cm = 5½"-5½"-6"-6"-6¼"-6¼"). The other 2 buttonholes are worked with approx. 3½-3½-3½-4-4-4½ cm = 1¼"-1¼"-1¼"-1½"-1½"-1⅝" between each one. DECREASE TIP (for sleeves): Decrease 1 stitch on each side of the marker-thread as follows: Work until there are 3 stitches left before the marker-thread, knit 2 together, knit 2 (marker-thread sits between these 2 stitches), slip 1 stitch knit-wise, knit 1 and pass the slipped stitch over the knitted stitch. ------------------------------------------------------- START THE PIECE HERE: ------------------------------------------------------- JACKET – SHORT OVERVIEW OF THE PIECE: The pattern uses both long and short needles; start with the length which fits the number of stitches and change when necessary. The bands are worked first, then stitches are cast on between them and the yoke is worked with circular needle, back and forth from mid-front and top down. When the yoke is finished, it is divided for the body and sleeves. The body is continued back and forth, while the sleeves wait. The sleeves are worked in the round. RIGHT BAND: Cast on 4 stitches with double pointed needles size 4 MM = US 6 and DROPS Belle. Work A.1 back and forth for 17-17-17½-17½-18-18½ cm = 6¾"-6¾"-6⅞"-6⅞"-7"-7⅛". Cut the strand and lay the band to one side. LEFT BAND: Cast on 4 stitches with double pointed needles size 4 MM = US 6 and DROPS Belle. Work A.2 back and forth for 17-17-17½-17½-18-18½ cm = 6¾"-6¾"-6⅞"-6⅞"-7"-7⅛". The last row is from the wrong side. Now cast on stitches as follows: YOKE: Change to circular needle size 4 MM = US 6. Work the left band as before from the right side, cast on 76-76-78-78-80-82 stitches, work the right band as before from the right side = 84-84-86-86-88-90 stitches. Purl 1 row from the wrong side with 4 band-stitches worked as before on each side. Insert 4 marker-threads, without working the stitches: Count 6 stitches (= front piece), insert 1 marker-thread, count 18 stitches (= sleeve), insert 1 marker-thread, count 36-36-38-38-40-42 stitches (= back piece), insert 1 marker-thread, count 18 stitches (= sleeve), insert 1 marker-thread, there are 6 stitches left on the row (= front piece). Work stockinette stitch back and forth with 4 band stitches on each side, AT THE SAME TIME increase for both RAGLAN and V-NECK – read description above. Therefore, read the next section before continuing. REMEMBER THE KNITTING GAUGE! Increase for the V-neck on both front pieces every 2nd row 16-16-17-17-18-19 times, then every 4th row 2 times. A total of 18-18-19-19-20-21 increases for the V-neck on each front piece. Remember the BUTTONHOLES – read description above. Increase for raglan before and after all 4 marker-threads, every 2nd row (= 8 increased stitches) 22-26-29-34-35-36 times. Then only increase on the front and back pieces (= 4 increased stitches) 0-0-0-0-3-6 times = 176-208-232-272-292-312 increased stitches for raglan. When all the increases for both raglan and V-neck are finished, there are 296-328-356-396-420-444 stitches. Continue working without further increases until the yoke measures 19-21-23-25-28-30 cm = 7½"-8¼"-9"-9¾"-11"-11¾" from mid-back. DIVIDE FOR BODY AND SLEEVES: On the next row work as follows: 4 band stitches as before, work 43-47-51-56-61-66 stockinette stitch (= front piece), place the next 60-68-74-84-86-88 stitches on 1 thread for the sleeve, cast on 10-10-12-12-14-16 stitches (in side under sleeve), work 82-90-98-108-118-128 stockinette stitches (= back piece), place the next 60-68-74-84-86-88 stitches on 1 thread for the sleeve, cast on 10-10-12-12-14-16 stitches (in side under sleeve), work 43-47-51-56-61-66 stockinette stitches and 4 band stitches as before (front piece). The body and sleeves are finished separately. The piece is now measured from here! BODY: = 196-212-232-252-276-300 stitches. Continue stockinette stitch back and forth with 4 band stitches as before on each side until the body measures 28-28-28-28-27-27 cm = 11"-11"-11"-11"-10⅝"-10⅝" from the division – remember the BUTTONHOLES. Now work a rolled edge and decrease 1 stitch mid-back by working 2 stitches together (195-211-231-251-275-299 stitches) as follows from the right side: Work the band as before, * knit 1, purl 1 * until there are 4 stitches left, work the band as before. Work 3 rows of stockinette stitch. Bind off. The jacket measures approx. 52-54-56-58-60-62 cm = 20½"-21¼"-22"-22¾"-23⅝"-24⅜" from the shoulder. SLEEVES: Place the 60-68-74-84-86-88 stitches from the thread on the one side of the piece on short circular needle/double pointed needles size 4 MM = US 6 and knit up 1 stitch in each of the 10-10-12-12-14-16 stitches cast on under the sleeve = 70-78-86-96-100-104 stitches. Insert a marker-thread in the middle of the new stitches under the sleeve. This is used when decreasing. The round starts here. Work stockinette stitch in the round for 3-4-3-4-2-4 cm = 1⅛"-1½"-1⅛"-1½"-¾"-1½". Now decrease 2 stitches under the sleeve – read DECREASE TIP. Decrease like this every 6-4-3-2-2-1½ cm = 2⅜"-1½"-1⅛"-¾"-¾"-½" a total of 6-9-12-16-17-18 times = 58-60-62-64-66-68 stitches. Work until the sleeve measures 45-44-43-42-39-38 cm = 17¾"-17¼"-17"-16½"-15¼"-15" (with 1 cm = ⅜" left to finished length). Work rib for 1 round (knit 1, purl 1), then knit 3 rounds. Bind off. The sleeve measures approx. 46-45-44-43-40-39 cm = 18"-17¾"-17¼"-17"-15¾"-15¼". ASSEMBLY: Sew the buttons onto the left band. Sew together the bands from the front pieces (mid-back), then sew the bands to the neckline. |
|||||||
Diagram explanations |
|||||||
|
|||||||
 |
|||||||
 |
|||||||
Have you finished this pattern?Tag your pictures with #dropspattern #morningmooncardigan or submit them to the #dropsfan gallery. Do you need help with this pattern?You'll find 25 tutorial videos, a Comments/Questions area and more by visiting the pattern on garnstudio.com. © 1982-2026 DROPS Design A/S. We reserve all rights. This document, including all its sub-sections, has copyrights. Read more about what you can do with our patterns at the bottom of each pattern on our site. |
|||||||


With over 40 years in knitting and crochet design, DROPS Design offers one of the most extensive collections of free patterns on the internet - translated to 17 languages. As of today we count 324 catalogs and 12290 patterns - 12280 of which are translated into English (US/in).
We work hard to bring you the best knitting and crochet have to offer, inspiration and advice as well as great quality yarns at incredible prices! Would you like to use our patterns for other than personal use? You can read what you are allowed to do in the Copyright text at the bottom of all our patterns. Happy crafting!
Post a comment to pattern DROPS 249-16
We would love to hear what you have to say about this pattern!
If you want to leave a question, please make sure you select the correct category in the form below, to speed up the answering process. Required fields are marked *.