
Popular categories
Looking for a yarn?


Comments / Questions (77)
![]() Griffe Garrigue wrote:
Griffe Garrigue wrote:
Bonjour, Je viens de terminer ce modèle, on me disait qu'il fallait 950 g pour la taille XL, soit 19 pelote. Cette quantité me paraissant trop importante j'en ai commandé un peu moins et malgré tout il me reste encore 6 pelotes. Par contre j'en commence un autre pour lequel on indique 950 g ce qui me paraît bien juste en fonction de la hauteur de tricot réalisée avec la première pelote et je vais donc être obligée d'en recommander !
14.12.2022 - 11:59
![]() Aliki wrote:
Aliki wrote:
After joining the back and front pieces, A.3 needs to be worked in the round, but there are no instructions for that, specifically for how to work the yarn overs on even rows when knitting them from the right side. I worked this out myself after a couple attempts, but it would be so helpful to include this in the instructions.
07.12.2022 - 10:14
![]() Marianna Zacharska wrote:
Marianna Zacharska wrote:
Wykończenie dekoltu - jak zrobię ściągacz 12 cm to zamykam oczka i zaginam na lewą stronę i mocuję na ramionach czy pozostawiam oczka otwarte i je mocuję igłą na lewej stronie ?
01.12.2022 - 17:56DROPS Design answered:
Witaj Marianno, oba sposoby są dobre. Ja bym przyszyła całe wykończenie wokół dekoltu. Pozdrawiamy!
02.12.2022 - 08:42
![]() Marianna Zacharska wrote:
Marianna Zacharska wrote:
Wykończenie dekoltu - jak zrobię ściągacz 12 cm to zamykam oczka i zaginam na lewą stronę i mocuję na ramionach czy pozostawiam oczka otwarte i je mocuję igłą na lewej stronie
01.12.2022 - 17:54
![]() Bänchen wrote:
Bänchen wrote:
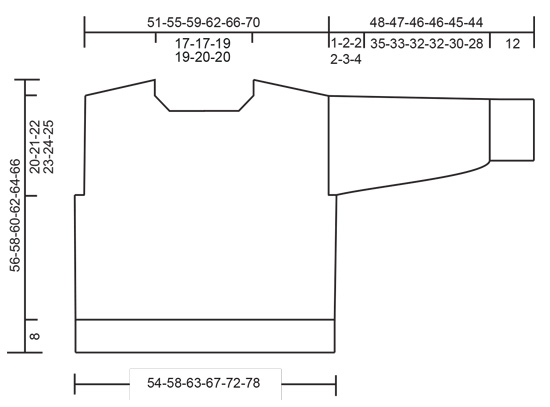
Guten Tag! Das Diagramm zeigt nicht alle Längen und ich bin etwas verwirrt: Die Gesamtlänge des Pullovers ist 56 cm ab der Ärmelspitze/hinterem Kragen (ich stricke die Größe S). Das Rippenmuster unten ist 8 cm lang. Der Armausschnitt ist 20 cm. Was ist 1. die Länge des Rumpfteils und 2. die Schulterlänge (ab der Ärmelspitze und bis zum oberen Armausschnitt)? Es wäre super wenn Sie die cm-Angaben mitteilen könnten. VG aus Berlin
26.11.2022 - 12:10DROPS Design answered:
Liebe Frau Bändchen, diese Maßen sind etwas schwierig abzugeben, aber sollte Ihre Maschenprobe stimmen, dann bekommen Sie alle Maßen wir im Diagram, siehe gesamte Länge (oben am Schulter beim Hals) und Armausschnitt. Viel Spaß beim stricken!
28.11.2022 - 09:09
![]() Anabela wrote:
Anabela wrote:
Hello, I work Body section and there is written ... Finish A.3 - work stitches cast on in each side in stocking stitch until A.3 is finished. .... so should I continue A.3 back and forth or in the round ? Thank you.
14.11.2022 - 15:29DROPS Design answered:
Dear Anabela, body is worked in the round from mid under one sleeve ; work A.3 as before and work the new sts cast on under sleeve on the sidesin stocking stitch . Happy knitting!
14.11.2022 - 16:20
![]() Anna wrote:
Anna wrote:
The pattern says that I should "pick up from right side 36-38-38-40-42-44 stitches from bottom of armhole and up to shoulder", but this side of the armhole has 54 rows/stitches - does it mean that I have to skip some stitches while picking up stitches for a sleeve (I'm making the smallest size)?
11.11.2022 - 14:58DROPS Design answered:
Dear Anna, yes, you will skip some stitches/ rows; you need to spread them evenly (for example, pick up 9 stitches and skip one, or however many you need for your size). Happy knitting!
14.11.2022 - 00:24
![]() Maha Elgarhy wrote:
Maha Elgarhy wrote:
Where is the shoulder located in back peace in order to join the front peace
10.11.2022 - 19:40DROPS Design answered:
Dear Mrs Elgarhy, the stitches for shoulders on front piece are picked up in the rows worked with increasing at the beginning of back piece. You will see in this video how to pick up the stitches for shoulders/front piece along the back piece. Happy knitting!
11.11.2022 - 08:47
![]() Aleksandra wrote:
Aleksandra wrote:
Hei. Jeg hat et spørsmål angående antal masker i begynnelse av strikking på bakside. Rett fra starten det er 43 masker i størrelse L. Jeg strikker vrangen først. Deretter begynner med mønstre A1A, A1B, A1C samtidig med økning av masker. Men det går ikke med antal masker det stemmer ikke. Jeg har 43 fra starten men med første retten med mønstre og økning det er 2 masker mer. Hvordan skal jeg fikse det?
03.11.2022 - 14:03DROPS Design answered:
Hei Aleksandra, Du øker 1 maske på begynnelsen og slutten av hver pinne slik det er beskrevet under Øketips fra Retten/Vrangen. Du strikker A.1A (3 masker), øker 1 maske, A.1B x 9 (36 masker), A.1C og øker 1 maske før de siste 3 maskene (4 masker). Det er 3 + 36 + 4 = 43 masker, plus 2 økte masker som gir deg 45 masker på neste pinnen fra vrangen. Håper dette hjelper og god fornøyelse!
04.11.2022 - 08:42
![]() HARDION wrote:
HARDION wrote:
Bonjour, je souhaite tricoter ce modèle 235-3 en commençant par le bas avec des aiguilles droite et je suis perdue dans les explications.
17.10.2022 - 08:21DROPS Design answered:
Bonjour Mme Hardion, nous ne sommes malheureusement pas en mesure de pouvoir adapter chacun de nos modèles à chaque demande; il peut être parfois plus simple de suivre les indications (de haut en bas comme ici) - retrouvez ici tous nos modèles de pulls tricotés de bas en haut; mais aussi ici comment adapter un modèle sur aiguilles droites. Bon tricot!
17.10.2022 - 10:23
|
||||||||||||||||||||||||||||||||||
Variety#varietysweater |
||||||||||||||||||||||||||||||||||
 |
 |
|||||||||||||||||||||||||||||||||
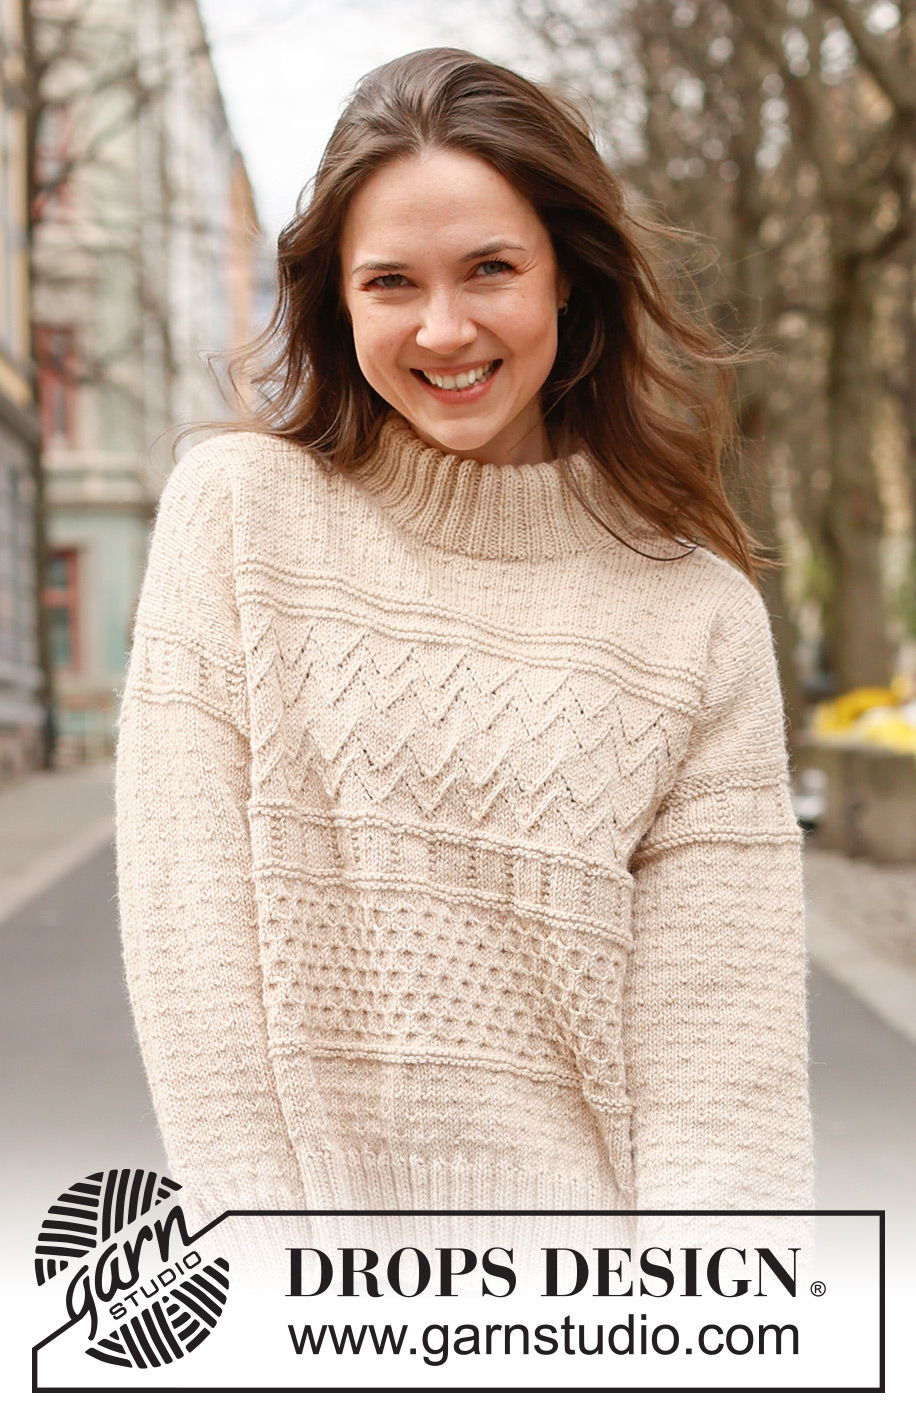
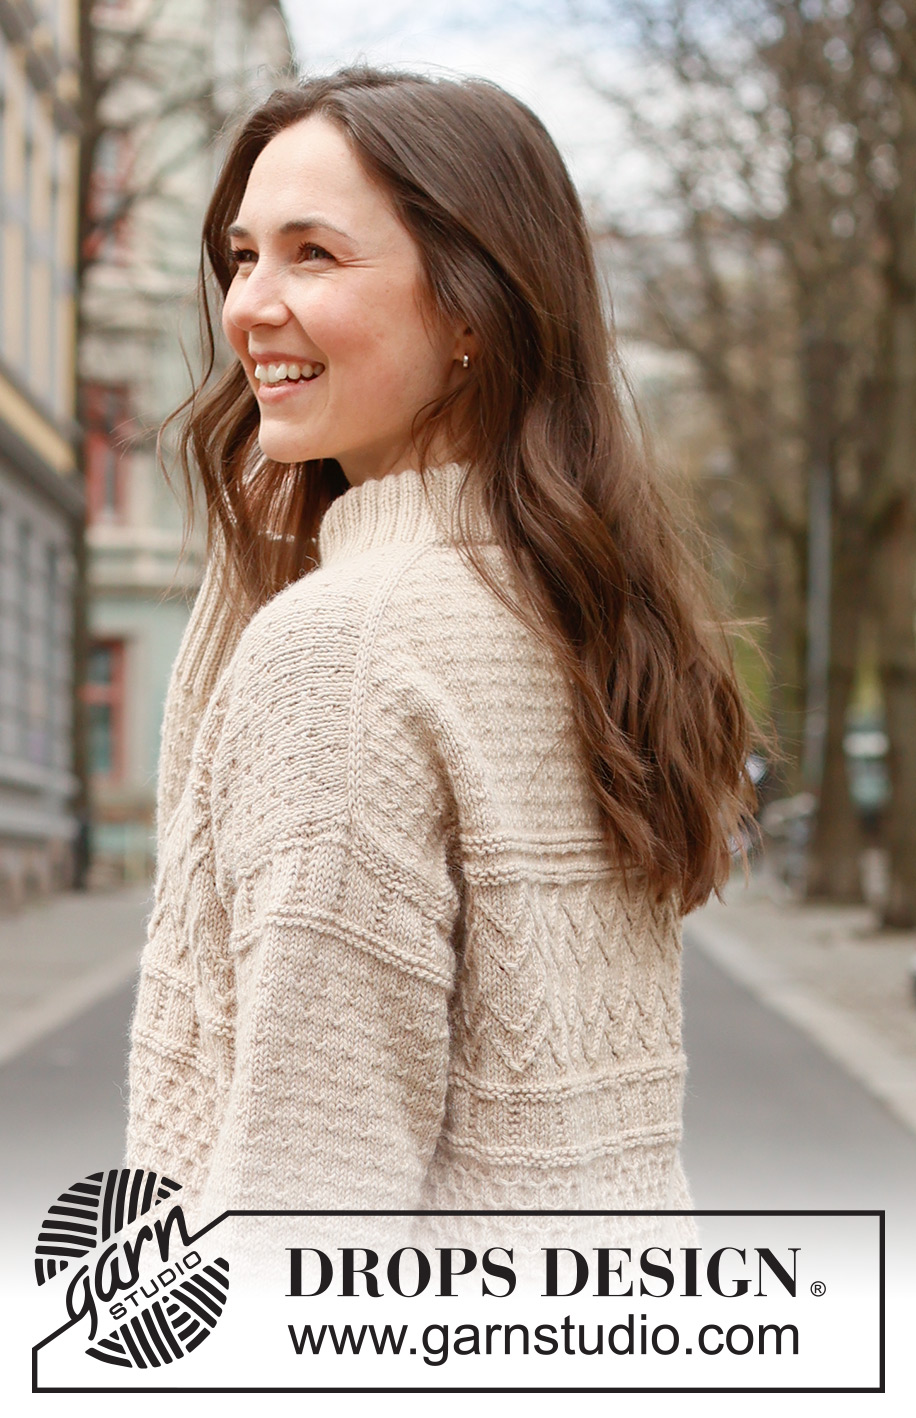
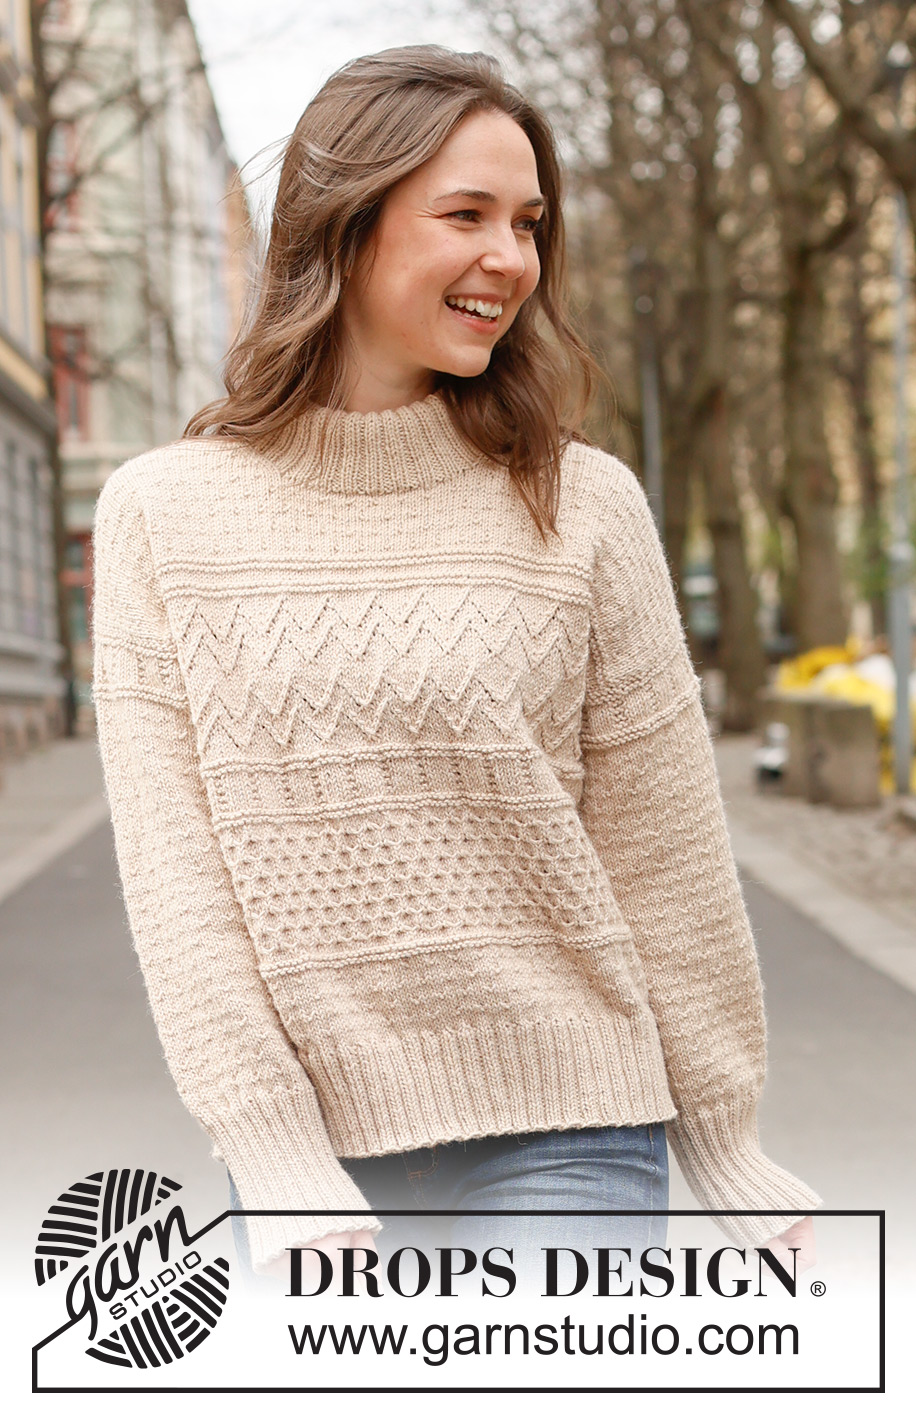
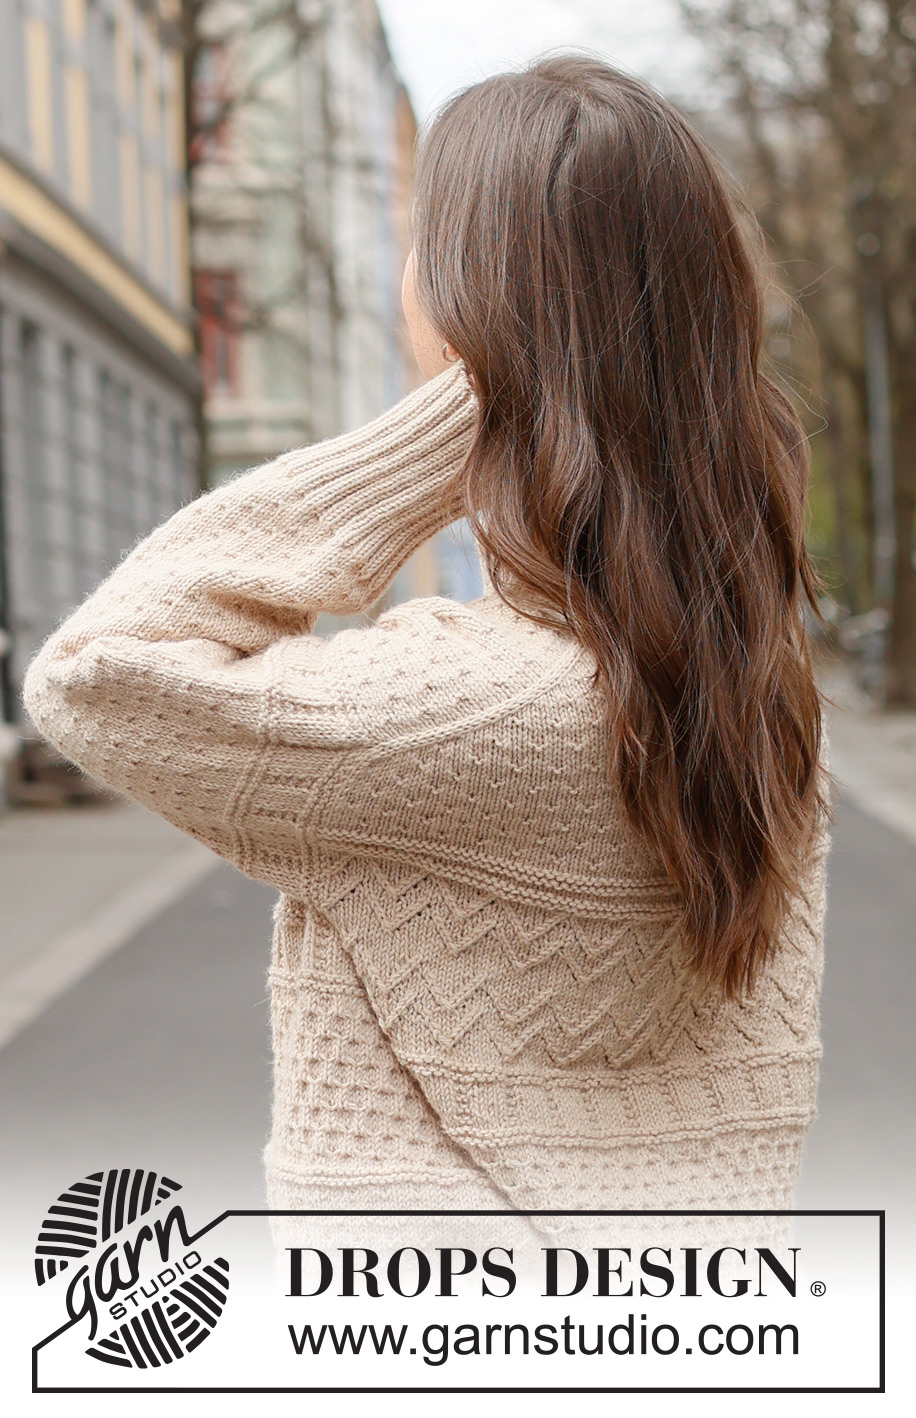
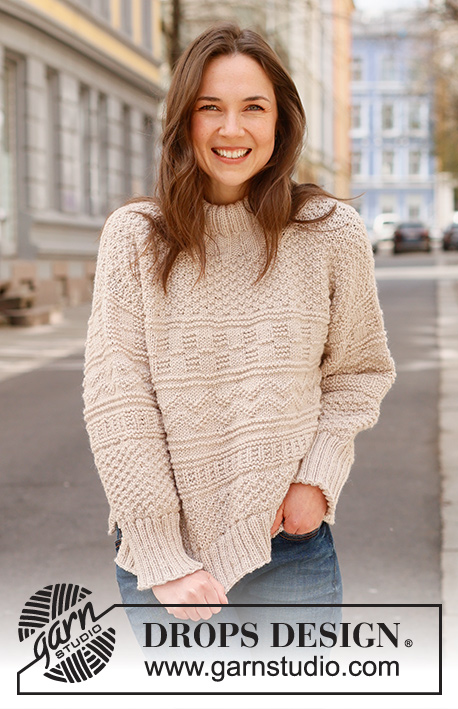
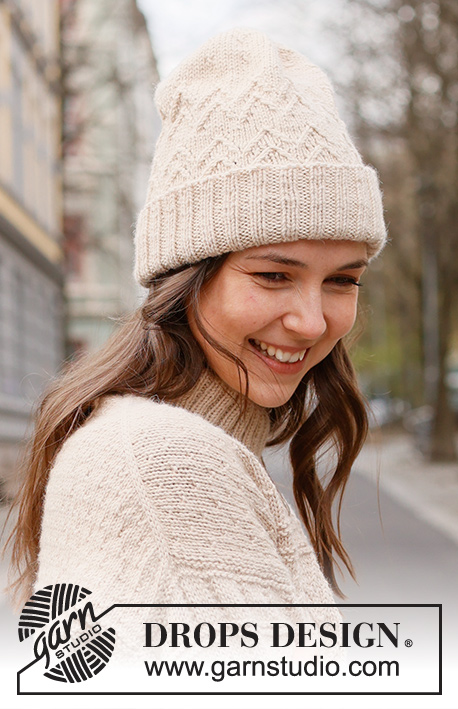
Knitted sweater in DROPS Lima or DROPS Karisma. Piece is knitted top down with European shoulder /diagonal shoulder, relief pattern and double neck edge. Size: S - XXXL
DROPS 235-3 |
||||||||||||||||||||||||||||||||||
|
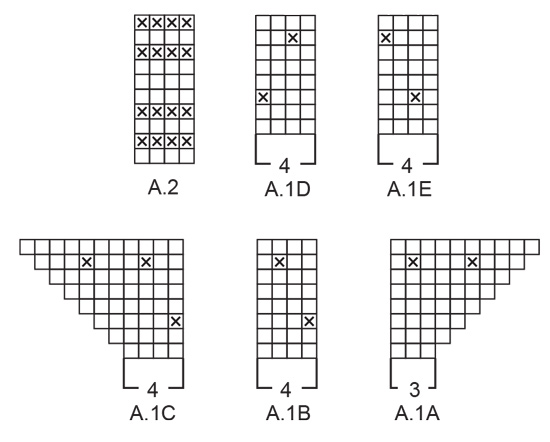
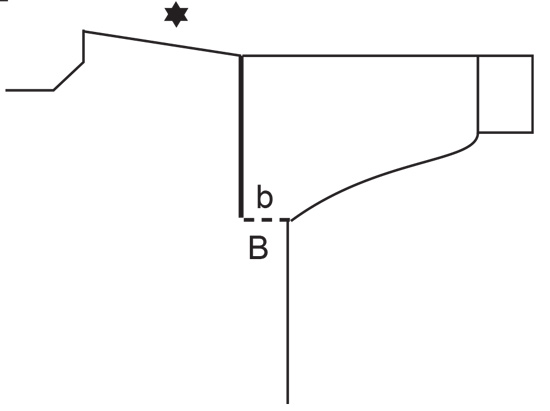
---------------------------------------------------------- EXPLANATION FOR THE PATTERN: ---------------------------------------------------------- PATTERN: See diagrams A.1 to A.6. Diagrams show all rows in pattern seen from the right side. INCREASE TIP FROM THE RIGHT SIDE: Increase towards the left AFTER MARKER: Use left needle to pick up yarn between 2 stitches from row below, pick up yarn from the front and knit in the stitch loop that is on the back of the needle. Increase towards the right BEFORE MARKER: Use left needle to pick up yarn between 2 stitches from row below, pick up yarn from the back and knit in the stitch loop that is on the front side of the needle. INCREASE TIP FROM THE WRONG SIDE: Increase towards the right AFTER MARKER: Use left needle to pick up yarn between 2 stitches from row below, pick up yarn from the back and purl in the stitch loop that is on the front side of the needle. Increase towards the left BEFORE MARKER: Use left needle to pick up yarn between 2 stitches from row below, pick up yarn from the front and purl in the stitch loop that is on the back side of the needle. DECREASE TIP (applies to mid under sleeves): Decrease 1 stitch on each side of marker thread as follows: Work until 3 stitches remain before marker thread and knit 2 together, knit 2 (marker thread is between these 2 stitches), slip 1 stitch knitwise, knit 1, pass slipped stitch over stitch worked. ---------------------------------------------------------- START THE PIECE HERE: ---------------------------------------------------------- SWEATER - SHORT OVERVIEW OF THE PIECE: Work top part of back piece back and forth on circular needle, top down until armholes are done. Then pick up stitches along each shoulder, increase for neck and work front piece back and forth on circular needle, top down until armholes are done. Slip front and back piece together. Work the body in the round on circular needle. Pick up stitches around each armhole. Work sleeve cap back and forth on circular needle, then work the rest of sleeve in the round on double pointed needles/short circular needle. Finish with a double neck edge. BACK PIECE: Cast on 39-39-43-43-47-47 stitches on circular needle size 4 MM = US 6 with DROPS Lima or DROPS Karisma. Purl 1 row from wrong side. Insert 1 marker on the inside of the 3 outermost stitches in each side. Marker should be inside the outermost 3 stitches on every row. Work first row as follows from right side: A.1A, increase AFTER marker at the beginning of row – read INCREASE TIP FROM RIGHT SIDE, work A.1B 8-8-9-9-10-10 times in total, work A.1C and increase at the same time BEFORE marker at the end of row – remember INCREASE TIP FROM RIGHT SIDE. On next row (wrong side) increase the same way – read INCREASE TIP FROM WRONG SIDE. Continue pattern like this and increase the same way from both right and wrong side 34-38-40-44-46-50 times in total – work the increased stitches in A.1B, but make sure that there are always at least 3 stitches in stockinette stitch at the edge in each side. REMEMBER THE KNITTING GAUGE! NOTE! When A.1A, A.1B and A.1C have been worked 1 time vertically, repeat A.1 vertically the same way, i.e. every time A.1 is repeated vertically, there is room for 4 more repetitions of A.1B in width. After last increase there are 107-115-123-131-139-147 stitches on needle and piece measures approx. 12-14-14-16-16-18 cm = 4¾"-5½"-5½"-6¼"-6¼"-7" from cast-on edge. Continue pattern back and forth as before until piece measures 8-10-8-9-9-11 cm = 3⅛"-4"-3⅛"-3½"-3½"-4⅜" measured at the edge along armhole (piece measures approx. 20-24-22-25-25-29 cm = 8"-9½"-8¾"-9¾"-9¾"-11⅜" from cast-on edge mid back) – finish after a row from wrong side. Then work A.2 back and forth over all stitches. When A.2 has been worked, work next row as follows from right side: 1 stitch in stockinette stitch, A.3A, work A.3B 12-13-14-15-16-17 times in total, A.3C, 1 stitch in stockinette stitch. Continue pattern like this. When back piece measures 17-18-18-19-20-21 cm = 6¾"-7"-7"-7½"-8"-8¼" measured at the edge along armhole, cut the yarn, lay the piece to one side on a thread or on an extra needle. Armholes on back piece are now done (A.3 is not done but is finished on body). Work front piece as explained below. FRONT PIECE: Begin with right shoulder (when garment is worn). Pick up from right side 34-38-40-44-46-50 stitches inside 1 stitch along right shoulder on back piece (i.e. pick up 1 stitch in every row from edge at the top of back piece). Purl 1 row from wrong side. Work next row as follows from the right side (i.e. from armhole): S, M, XXL and XXXL: 3 stitches in stockinette stitch, work A.1B until 3 stitches remain, finish with 3 stitches in stockinette stitch. L and XL: 3 stitches in stockinette stitch, work A.1B until 5 stitches, work the 2 first stitches in A.1E, finish with 3 stitches in stockinette stitch. ALL SIZES: Continue pattern back and forth like this. When piece measures 5 cm = 2" from where stitches were picked up, increase stitches towards the neck. Increase 1 stitch for neck inside 3 stitches at the end of every row from right side remember INCREASE TIP FROM THE RIGHT SIDE. Increase for neck the same way 6-6-7-7-8-8 times in total – work the increased stitches in A.1B, but make sure that there are always at least 3 stitches in stockinette stitch towards the neck. After last increase there are 40-44-47-51-54-58 stitches on needle. Cut the yarn when last increase from right side is done. Lay the piece to one side on a thread or on an extra needle then work left shoulder as explained below. Pick up from right side 34-38-40-44-46-50 stitches inside 1 stitch along left shoulder on back piece. Purl 1 row from wrong side. Work next row as follows from the right side (i.e. from neck): S, M, XXL and XXXL: 3 stitches in stockinette stitch, work A.1D until 3 stitches remain, finish with 3 stitches in stockinette stitch. L and XL: 3 stitches in stockinette stitch, work A.1E until 5 stitches, work the 2 first stitches in A.1B, finish with 3 stitches in stockinette stitch. ALL SIZES: Continue pattern back and forth like this. When piece measures 5 cm = 2" from where stitches were picked up, increase stitches towards the neck. Increase 1 stitch for neck inside 3 stitches at the beginning of every row from right side remember INCREASE TIP FROM THE RIGHT SIDE. Increase for neck the same way 6-6-7-7-8-8 times in total – work the increased stitches in A.1D/A.1E, but make sure that there are always at least 3 stitches in stockinette stitch towards the neck. After last increase there are 40-44-47-51-54-58 stitches on needle. Work next row as follows from wrong side: Work pattern as before over the 40-44-47-51-54-58 stitches from left front, cast on 27-27-29-29-31-31 stitches for neck at the end of this row, then work pattern as before over the 40-44-47-51-54-58 stitches from right front piece = 107-115-123-131-139-147 stitches. Continue A.1 back and forth until piece measures approx. 14-16-16-17-17-19 cm = 5½"-6¼"-6¼"-6¾"-6¾"-7½" from where stitches were picked up - finish after a row from wrong side as on back piece. Now insert 1 marker at the edge along armhole, 3-3-4-4-4-4 cm = 1⅛"-1⅛"-1½"-1½"-1½"-1½" from where stitches were picked up. Measure the garment by folding the piece at the top point on the inside of shoulder and at marker on front piece - make sure that A.1 is the same length on front and back piece. This important so that the pattern fits in the sides when piece is put together. Adjust the length of A.1 if needed. Then work A.2 back and forth over all stitches. When A.2 has been worked, work next row as follows from right side: 1 stitch in stockinette stitch, A.3A, work A.3B 12-13-14-15-16-17 times in total, A.3C, 1 stitch in stockinette stitch. Continue the pattern like this until piece measures 23-24-26-27-28-29 cm = 9"-9½"-10¼"-10⅝"-11"-11⅜", measured along the edge of armhole from where stitches were picked up (A.3 is not done but finish front piece on same row in diagram as back piece – this is important so that the pattern fits in the sides when piece is put together). Now put front piece and back piece together for body as explained below. BODY: Work pattern as before over the 107-115-123-131-139-147 stitches from front piece, cast on 6-8-8-10-14-18 new stitches at the end of this row (in the side under sleeve), work pattern as before over the 107-115-123-131-139-147 stitches from back piece and cast on 6-8-8-10-14-18 new stitches on row (in the side under sleeve) = 226-246-262-282-306-330 stitches. Finish A.3 - work stitches cast on in each side in stockinette stitch until A.3 is finished. Now work A.4 in the round - AT THE SAME TIME on first round increase 2-0-2-0-0-0 stitches evenly = 228-246-264-282-306-330 stitches. On next to last round in A.4 increase 32-34-36-38-38-42 stitches evenly = 260-280-300-320-344-372 stitches (this is done because the next pattern contracts the piece). When A.4 has been worked, work A.5 in the round. Repeat A.5 vertically until piece measures 41-43-45-46-46-48 cm = 16⅛"-17"-17¾"-18"-18"-19", measured from the top point on front piece in towards the neck (work A.5 approx. 3-3-4-4-4-4 times vertically and piece measures approx. 18-19-19-19-18-19 cm = 7"-7½"-7½"-7½"-7"-7½" from where stitches were cast on in each side) – AT THE SAME TIME on last round in A.5, decrease 32-36-36-40-40-44 stitches evenly = 228-244-264-280-304-328 stitches. Now work A.6 in the round over all stitches. When A.6 has been worked, work A.1B in the round over all stitches until piece measures approx. 48-50-52-54-56-58 cm = 19"-19¾"-20½"-21¼"-22"-22¾", measures from the top point on front piece in towards the neck – finish when 2 or 3 rounds in stockinette stitch have been worked after a round with purl stitches (piece measures approx. 25-26-26-27-28-29 cm = 9¾"-10¼"-10¼"-10⅝"-11"-11⅜" from where stitches were cast on in each side). Knit 1 round while increasing 56-64-68-76-76-84 stitches evenly = 284-308-332-356-380-412 stitches. Switch to circular needle size 3 MM = US 2.5. Work rib (knit 2/purl 2) for 8 cm = 3⅛". Loosely bind off. Sweater measures approx. 56-58-60-62-64-66 cm = 22"-22¾"-23⅝"-62-64-66, measured from the top point on shoulder on front piece. RIGHT SLEEVE: Use circular needle size 4 MM = US 6, pick up from right side 36-38-38-40-42-44 stitches from bottom of armhole and up to shoulder (along back piece), and 48-50-54-56-58-60 stitches from shoulder and down to the bottom of armhole on the other side (along front piece) = 84-88-92-96-100-104 stitches. Insert 1 marker thread in the middle of row – use marker thread when counting where pattern should begin and where to measure from. Begin from wrong side with 2nd row in A.4, and work A.4 back and forth – marker thread mid on top of sleeve should fit symbol in A.4. When sleeve measures 1-2-2-2-3-4 cm = ⅜"-¾"-¾"-¾"-1⅛"-1½", slip piece together and work the rest of sleeve on a short circular needle/double pointed needles. When A.4 has been worked, work A.1B in the round. AT THE SAME TIME when piece measures 3 cm = 1⅛" from where piece was put together, decrease 2 stitches mid under sleeve - read DECREASE TIP. Decrease like this every 2½-2½-2-2-1½-1½ cm = 1"-1"-¾"-¾"-½"-½" 12-12-14-14-16-16 times in total = 60-64-64-68-68-72 stitches. Work until sleeve measures 35-33-32-32-30-28 cm = 13¾"-13"-12½"-12½"-11¾"-11" from where piece was put together. 12 cm = 4¾" remain until finished measurements. Try the sweater and work to desired length before rib. Knit 1 round while increasing 16-16-16-16-20-20 stitches evenly = 76-80-80-84-88-92 stitches. Switch to double pointed needles size 3 MM = US 2.5. Work rib (knit 2/purl 2) for 12 cm = 4¾". Loosely bind off. Sleeve measures approx. 48-47-46-46-45-44 cm = 19"-18½"-18"-18"-17¾"-17¼" from stitches where knitted up. Sew bottom of armhole - see chart. LEFT SLEEVE: Use circular needle size 4 MM = US 6, pick up from right side 48-50-54-56-58-60 stitches from bottom of armhole and up to shoulder (along front piece) and 36-38-38-40-42-44 stitches from shoulder and down to the bottom of armhole on the other side (along front piece) = 84-88-92-96-100-104 stitches. Insert 1 marker thread in the middle of row – use marker thread when counting where pattern should begin and where to measure from. Work the rest of the sleeve the same way as right sleeve. Sew bottom of armhole - see chart. NECK EDGE: Begin at one shoulder line, and pick up from right side inside 1 edge stitch approx. 116-116-128-128-140-140 stitches on a short circular needle size 3 MM = US 2.5. Number of stitches must be divisible by 4. Work rib in the round (knit 2/purl 2) for 12-12-13-13-14-14 cm = 4¾"-4¾"-5⅛"-5⅛"-5½"-5½". Fold the rib down on inside of garment and fasten it with 1 stitch at each shoulder. |
||||||||||||||||||||||||||||||||||
Diagram explanations |
||||||||||||||||||||||||||||||||||
|
||||||||||||||||||||||||||||||||||
 |
||||||||||||||||||||||||||||||||||
 |
||||||||||||||||||||||||||||||||||
 |
||||||||||||||||||||||||||||||||||
 |
||||||||||||||||||||||||||||||||||
Have you finished this pattern?Tag your pictures with #dropspattern #varietysweater or submit them to the #dropsfan gallery. Do you need help with this pattern?You'll find 33 tutorial videos, a Comments/Questions area and more by visiting the pattern on garnstudio.com. © 1982-2026 DROPS Design A/S. We reserve all rights. This document, including all its sub-sections, has copyrights. Read more about what you can do with our patterns at the bottom of each pattern on our site. |
||||||||||||||||||||||||||||||||||


With over 40 years in knitting and crochet design, DROPS Design offers one of the most extensive collections of free patterns on the internet - translated to 17 languages. As of today we count 324 catalogs and 12290 patterns - 12280 of which are translated into English (US/in).
We work hard to bring you the best knitting and crochet have to offer, inspiration and advice as well as great quality yarns at incredible prices! Would you like to use our patterns for other than personal use? You can read what you are allowed to do in the Copyright text at the bottom of all our patterns. Happy crafting!
Post a comment to pattern DROPS 235-3
We would love to hear what you have to say about this pattern!
If you want to leave a question, please make sure you select the correct category in the form below, to speed up the answering process. Required fields are marked *.