Comments / Questions (15)
![]() Lisa Vögeding wrote:
Lisa Vögeding wrote:
Guten Tag, Wann schließe ich bei den Ärmeln zur Runde? Ich setze den Markierungsfaden zwischen die sechs neuen Maschen. Dort soll ich die Runde beginnen. Was ist mit den anderen 3 Maschen? Vielen Dank für Ihre Hilfe und die vielen tollen Anleitungen und Videos!
09.03.2023 - 10:19DROPS Design answered:
Liebe Frau Vögeding, wenn alle Maschen angeschlagen sind, dh wenn die letzten 6 Maschen am Ende der letzten Hinreihe angeschlagen sind stricken Sie jetzt in der Runde. Der Markierungsfaden setzen Sie in der Mitte von diesen 6 Maschen = neue Rundbeginn. Viel Spaß beim stricken!
09.03.2023 - 12:15
![]() Gerda Jersombeck wrote:
Gerda Jersombeck wrote:
Hallo, für dieses Modell würde ich gerne das Garn " soft Tweed"verwenden, da ich davon noch Material habe. was ist dabei zu beachten? danke im voraus und liebe Grüße. Gerda
11.08.2022 - 13:36DROPS Design answered:
Liebe Frau Jersombeck, beide Garne gehören selbe Garngruppe, so können Sie unseren Garnumrechner benutzen , damit bekommen Sie die neue Garnmenge mit Soft Tweed. Viel Spaß beim stricken!
11.08.2022 - 14:01
![]() Gerda Jersombeck wrote:
Gerda Jersombeck wrote:
Hallo, kann ich bei diesem hohen Maschenanschlag auch einen magicloop machen? meine Rundnadel ist nur 80 cm lang? Danke und lg, gerda
08.08.2022 - 17:39DROPS Design answered:
Liebe Frau Jersombeck, ja sicher können Sie hier die Maschen mit dem Magicloop stricken - Sie brauchen dann nur eine 80 cm Rundnadel. Viel Spaß beim stricken!
09.08.2022 - 08:36
![]() Undine wrote:
Undine wrote:
Kann ich bei diesem Topdown Modell die Ärmel nicht wie üblich direkt anstricken? Warum muß ich sie bei diesem Pullover getrennt arbeiten und dann extra annähen ? Die Ärmelnaht sieht gar nicht gut aus.
27.07.2022 - 16:55DROPS Design answered:
Liebe Undine, Dies ist ein Sattelschultermodell. Die übliche Möglichkeit ist, die Ärmel nachträglich zu nähen. Sie können jedoch Maschen abketten und aufnehmen, obwohl dies etwas schwieriger als gewöhnlich ist.
31.07.2022 - 19:56
![]() Margret Scipio wrote:
Margret Scipio wrote:
Bij Meerderen-2 staat 1x st naar rechts gedraaid en 1x st naar links gedraaid. Maar de uitleg is precies hetzelfde! Ook krijg ik geen mooi randje bovenop de schouder maar aan de binnenkant terwijl ik aan de achterkant de steek ophaal. Moet dit niet aan de voorkant zijn?
11.06.2022 - 15:57DROPS Design answered:
Dag Margret,
Het meerderen bij 'Meerderen-2' was inderdaad niet goed beschreven. Het is nu gecorrigeerd.
12.06.2022 - 21:00
Sweet History#sweethistorysweater |
||||||||||||||||||||||
 |
 |
|||||||||||||||||||||
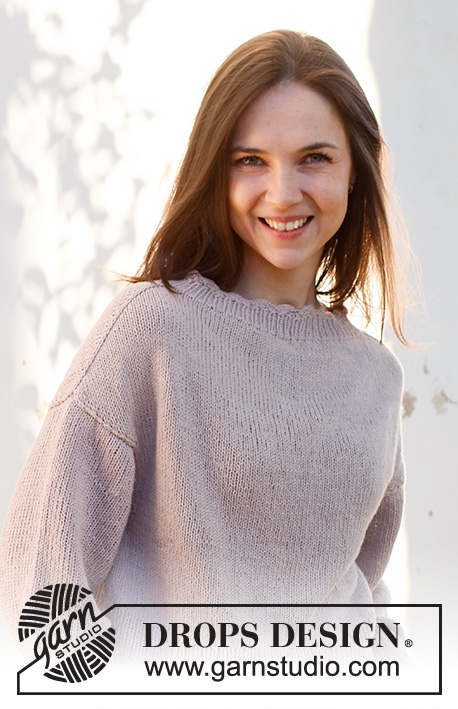
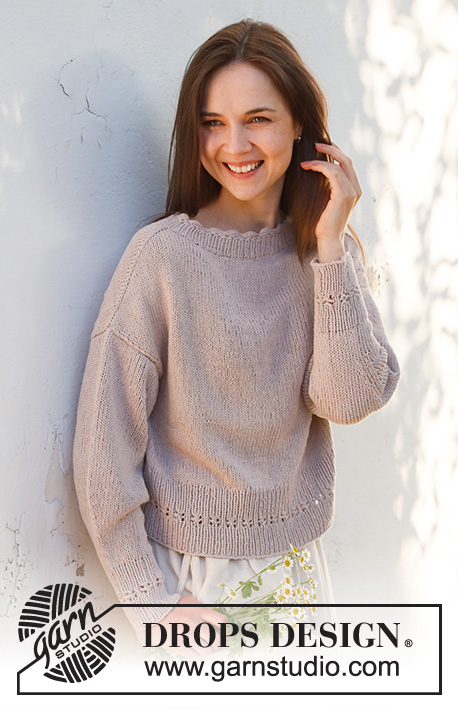
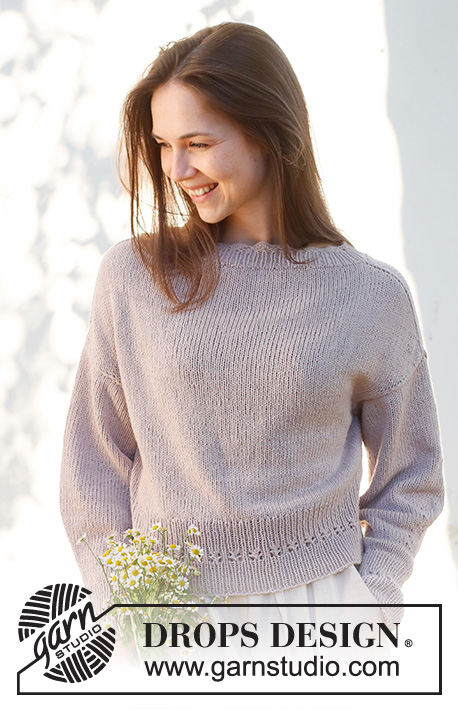
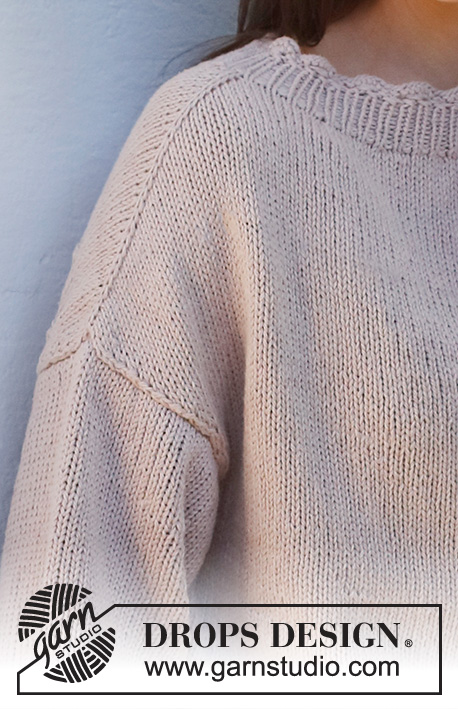
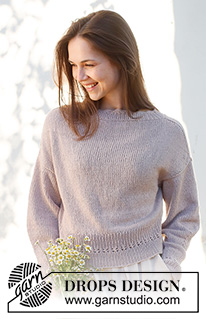
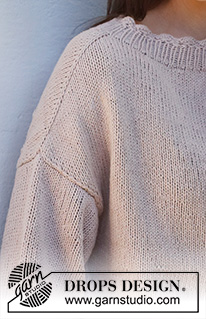
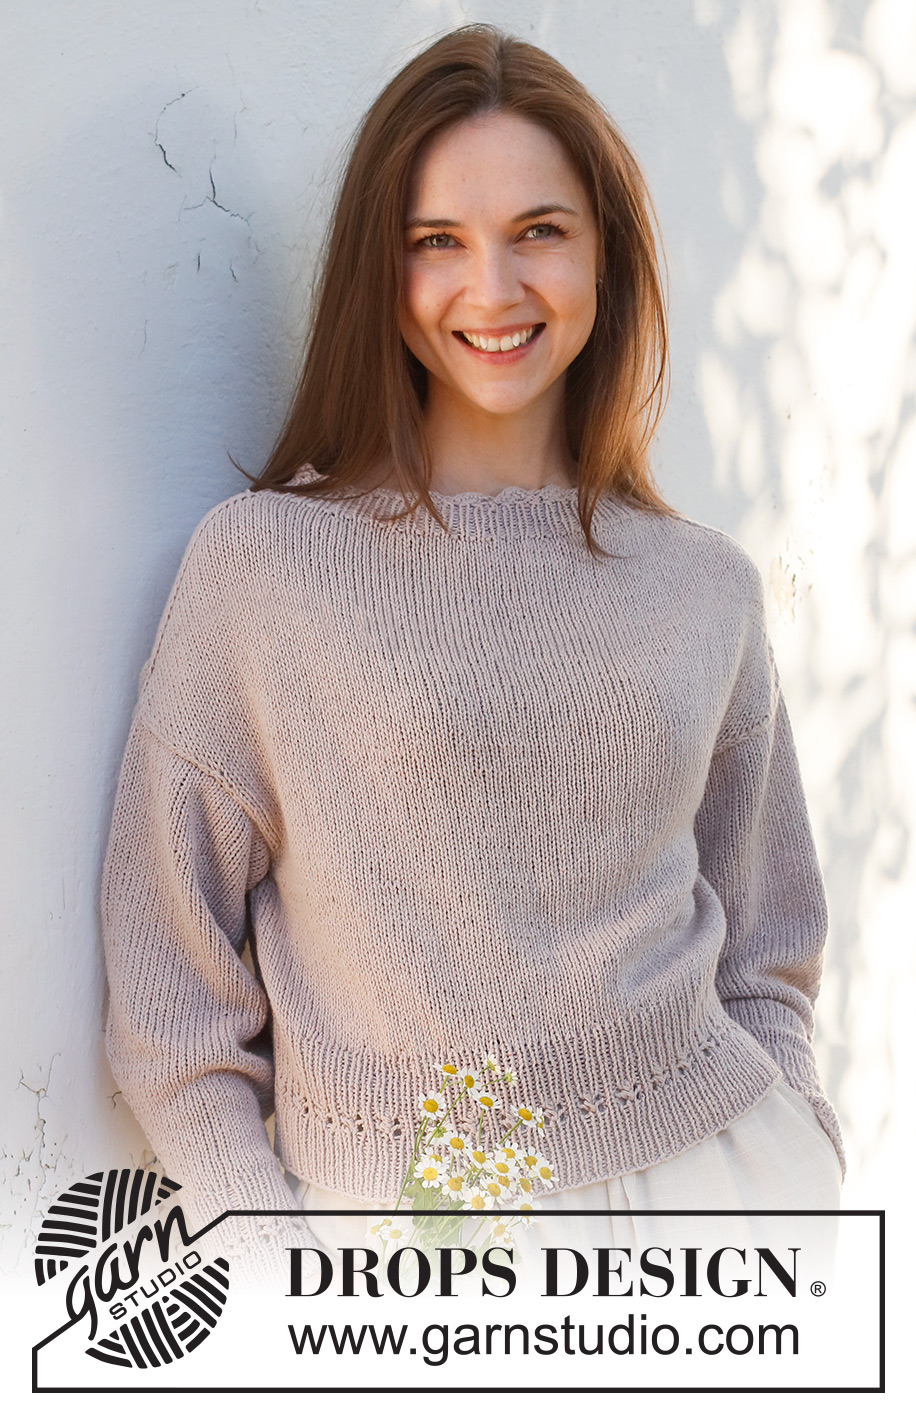
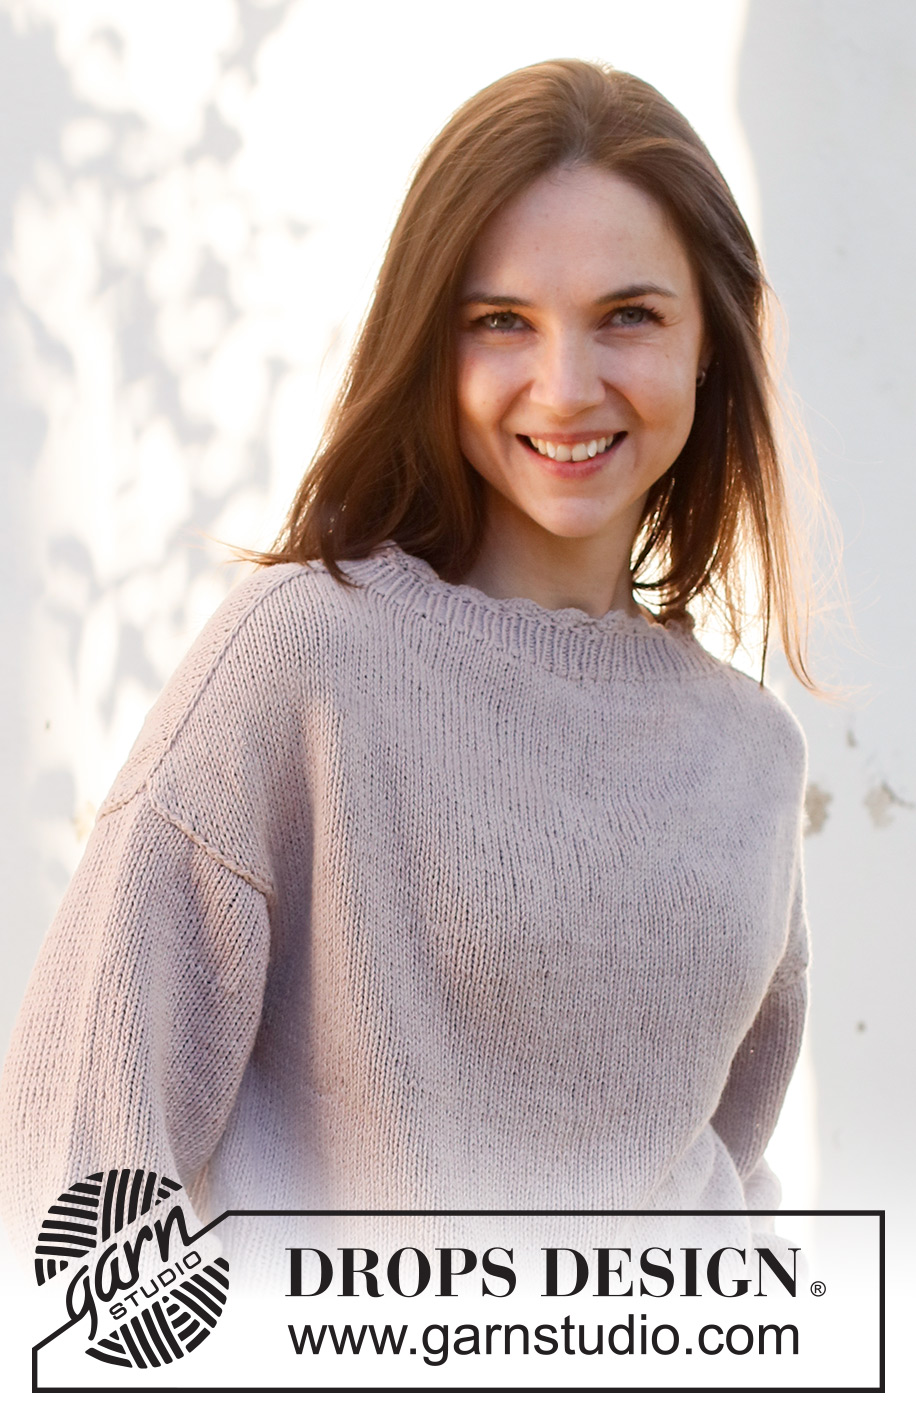
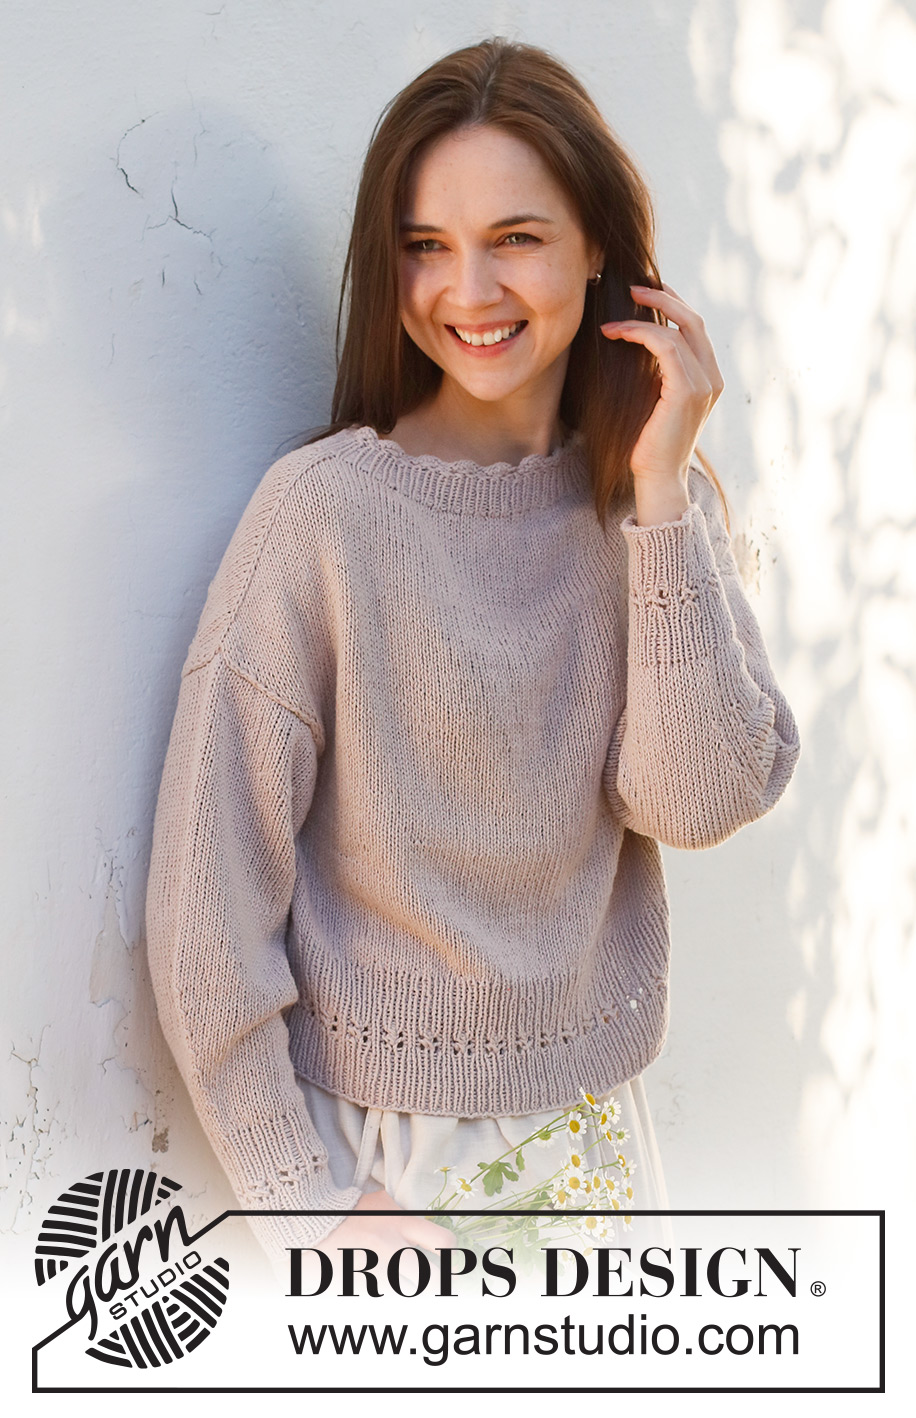
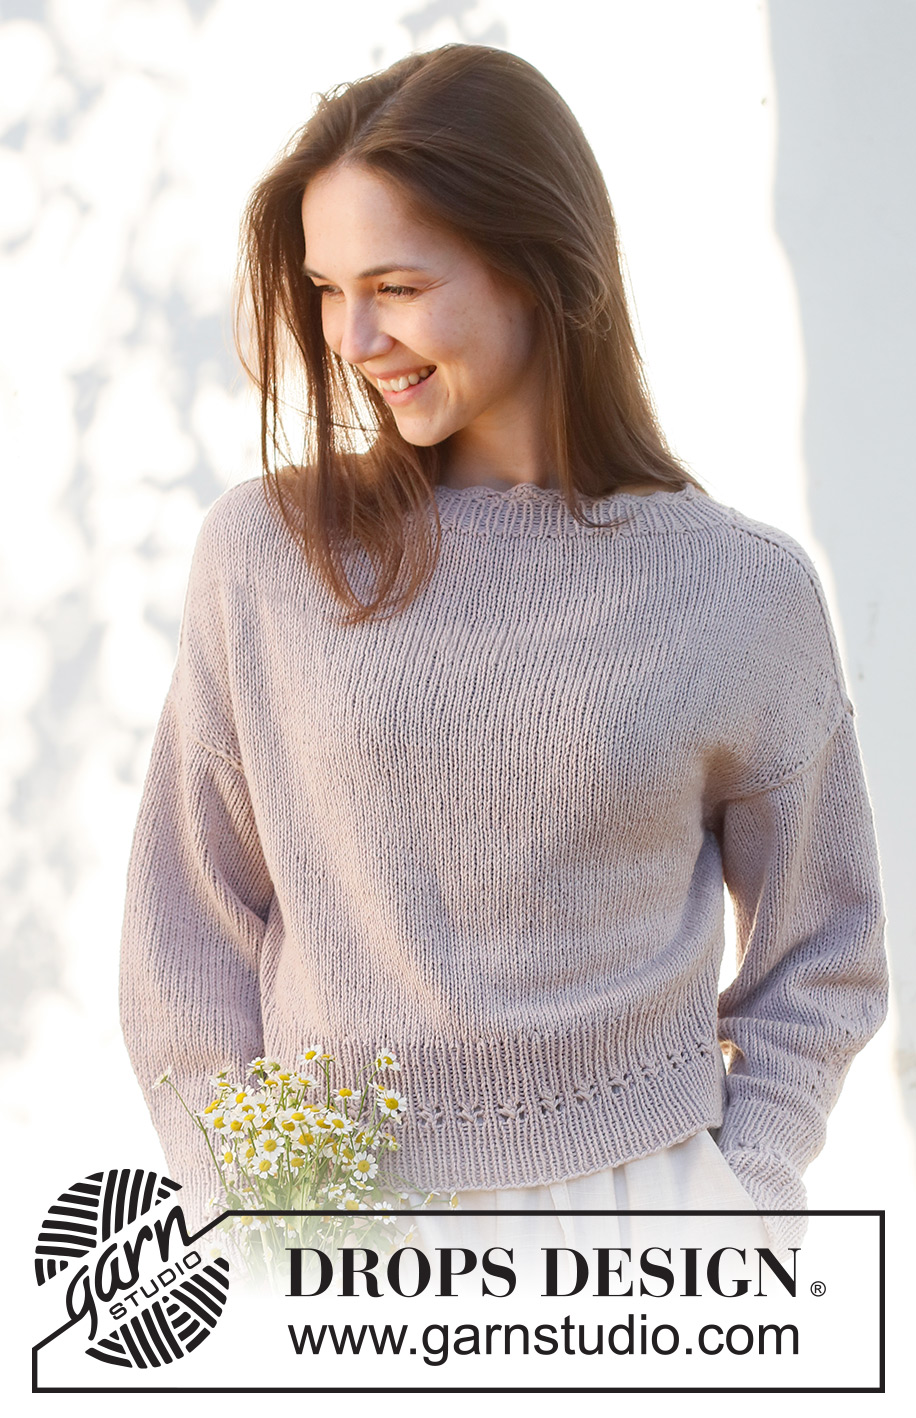
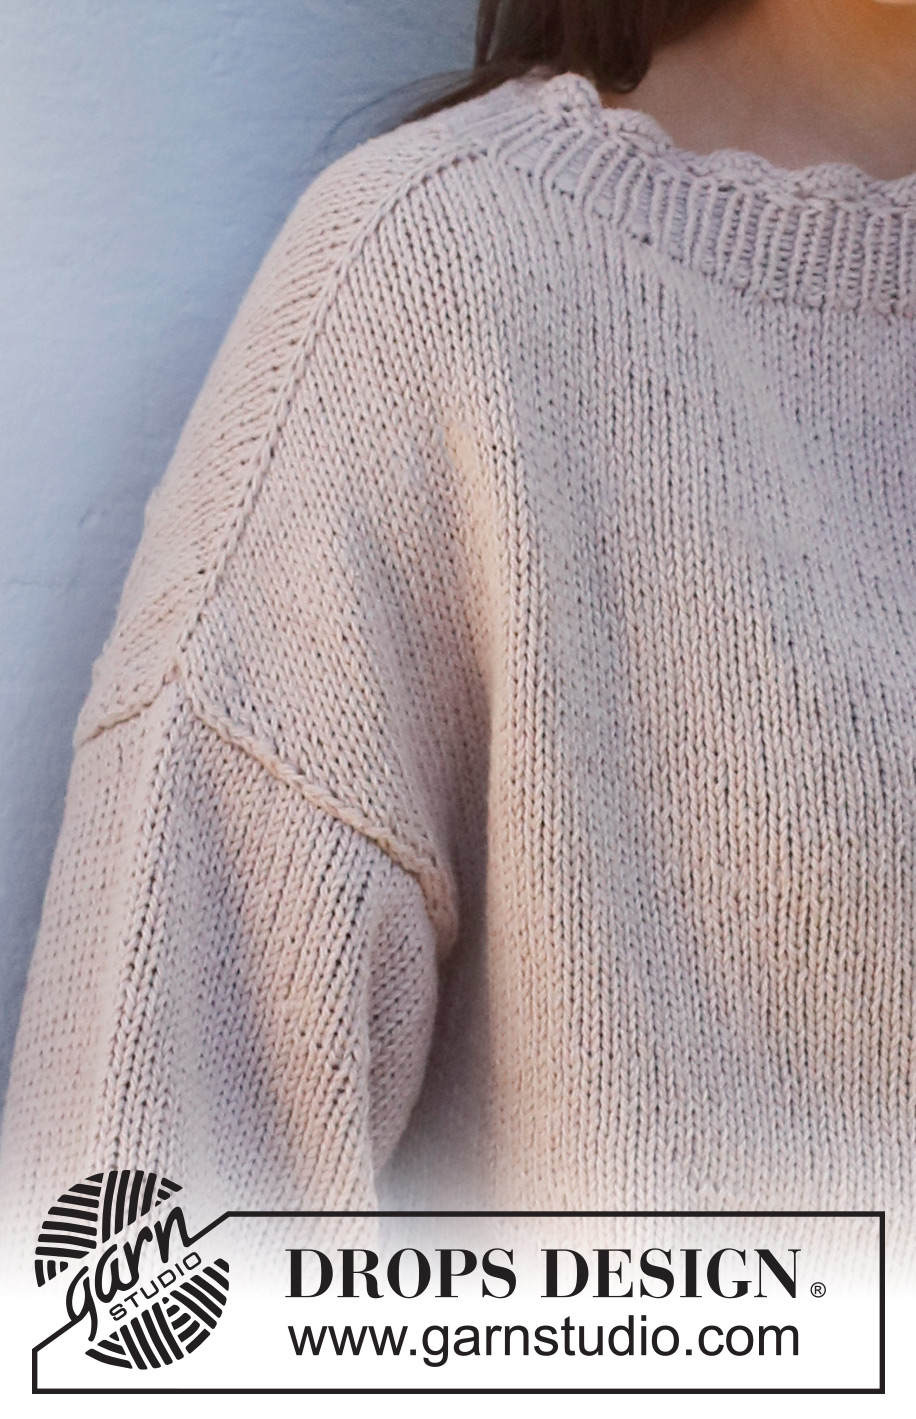
Knitted sweater in DROPS Belle. Piece is knitted top down in stockinette stitch with saddle shoulders. Size: S - XXXL
DROPS 232-44 |
||||||||||||||||||||||
|
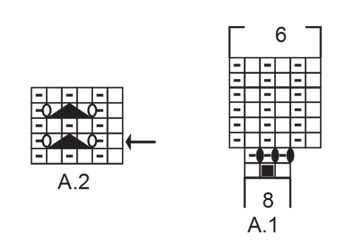
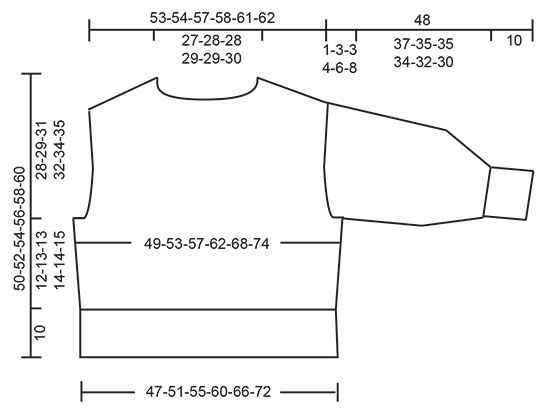
---------------------------------------------------------- EXPLANATION FOR THE PATTERN: ---------------------------------------------------------- GARTER STITCH (back and forth): Knit all rows. 1 ridge vertically = knit 2 rows. PATTERN: See diagrams A.1 and A.2. INCREASE TIP-1 (evenly): To calculate how to increase evenly, use the total number of stitches on row (e.g. 102 stitches) and divide stitches by number of increases to be done (e.g. 12) = 8.5. In this example increase by making 1 yarn over after alternately every 8th and 9th stitch. On next round work yarn overs twisted to avoid holes. INCREASE TIP-2: BEFORE MARKER: Work until stitch with marker, The new stitch is twisted towards the right. Use left needle to pick up yarn between 2 stitches from round below, pick up yarn from the back and knit stitch in front loop of stitch. AFTER MARKER: The new stitch is twisted towards the left. Use left needle to pick up yarn between 2 stitches from round below, pick up yarn from the front and knit stitch in back loop of stitch. DECREASE TIP-1(applies to front and back piece): All decreases are done from the right side. Work 1 edge stitch in garter stitch, slip 1 stitch knitwise, knit 1, pass slipped stitch over stitch worked(= 1 stitch decreased), work until 3 stitches remain, knit 2 together(= 1 stitch decreased), work 1 edge stitch in garter stitch. DECREASE TIP-2 (applies to body and sleeves): Work until 3 stitches remain before marker thread, knit 2 together (= 1 stitch decreased), knit 2 stitches (marker thread is between these stitches), slip 1 stitch knitwise, knit 1, pass slipped stitch over stitch worked (= 1 stitch decreased). BIND-OFF TIP: To avoid a tight bind-off edge when binding off, you may use a larger needle. If this still is too tight make 1 yarn over after approx. every 4th stitch while binding off (bind off yarn overs as stitches). ---------------------------------------------------------- START THE PIECE HERE: ---------------------------------------------------------- SWEATER - SHORT OVERVIEW OF THE PIECE: Work neck edge in the round on a short circular needle. Work yoke in the round on circular needle until saddle shoulders are done. Then finish back piece and front piece back and forth on circular needle separately down until increase for armholes are done. Then slip front piece and back piece on to same circular needle and work body in the round on circular needle until finished measurements. Work sleeves first back and forth until sleeve cap is done, then work in the round on a short circular needle/double pointed needles the top and down. Sew in the sleeves as explained in pattern. NECK EDGE: Cast on 136-144-144-152-152-160 stitches on short circular needle size 3 MM = US 2.5 with DROPS Belle. Knit 1 row from wrong side, turn piece and work in the round as follows: Work A.1 (= 17-18-18-19-19-20 repetitions of 8 stitches). When entire A.1 has been worked, there are 102-108-108-114-114-120 stitches on round. Then work knit over knit and purl over purl until piece measures 4 cm = 1½" at the shortest (where arches in the edge turns inwards in rib). Knit 1 round while increasing 12-10-10-8-8-6 stitches evenly - read INCREASE TIP-1 = 114-118-118-122-122-126 stitches. YOKE: Switch to circular needle size 4 MM = US 6. Now insert 1 marker thread and 2 markers in the piece. Insert marker threads between 2 stitches and markers in a stitch as follows: Insert 1 marker thread at beginning of round (= mid back), yoke is measured from this marker thread, skip the next 28-29-29-30-30-31 stitches, insert a marker in next stitch (= shoulder stitch), skip the next 56-58-58-60-60-62 stitches (= front piece), insert a marker in next stitch (= shoulder stitch), 28-29-29-30-30-31 stitches remain on round after last marker. Move markers upwards when working, increase on each side of stitches with markers. SADDLE SHOULDER INCREASE: Work in stockinette stitch in the round. AT THE SAME TIME on first round increase 4 stitches for saddle shoulder as follows: Increase 1 stitch in each side of stitches with marker - READ INCREASE TIP-2. Increase only on front piece and back piece, and number of shoulder stitches (= 1 stitch) stays the same. Continue in the round like this, and increase on every round 28-28-31-31-34-34 times in total = 226-230-242-246-258-262 stitches. After last increase piece measures approx. 10-10-11-11-12-12 cm = 4"-4"-4⅜"-4⅜"-4¾"-4¾" from marker thread by the neck. Work next round as follows from mid back: Work the first 56-57-60-61-64-65 stitches (= half back piece), bind off stitch in the middle of shoulder, work the next 112-114-120-122-128-130 stitches before slipping them on a thread (= front piece), bind off stitch in the middle of shoulder, work the last 56-57-60-61-64-65 stitches (= half back piece). Cut the yarn. BACK PIECE: = 112-114-120-122-128-130 stitches. Insert a marker here - NOW MEASURE PIECE FROM HERE! Now work in stockinette stitch with 1 edge stitch in GARTER STITCH - read explanation above, in each side. When 2 cm = ¾" have been worked from division, decrease 1 stitch in each side of piece - read DECREASE TIP-1. Decrease like this every other row 8-7-6-5-5-4 times in total = 96-100-108-112-118-122 stitches. Continue to work until piece measures 17-17-18-19-18-17 cm = 6¾"-6¾"-7"-7½"-7"-6¾". Now cast on stitches for armholes at the end of every row in each side as follows: Cast on 1 stitch 1-3-3-3-5-9 times = 98-106-114-118-128-140 stitches. Piece now measures 18-19-20-21-22-23 cm = 7"-7½"-8"-8¼"-8¾"-9" from marker. Cut the yarn, put piece aside and work the front piece. FRONT PIECE: Slip stitches from thread back on circular needle size 4 MM = US 6 = 112-114-120-122-128-130 stitches. Work as on back piece. When increases for armholes are done, there are 98-106-114-118-128-140 stitches on the needle. BODY: Now work next row from right side as follows: Work in stockinette stitch over all stitches on front piece, cast on 4-6-6-12-14-16 new stitches on needle (= in the side under sleeve), work in stockinette stitch over stitches on back piece, cast on 4-6-6-12-14-16 new stitches on needle = 204-224-240-260-284-312 stitches for body. Move the marker here – NOW MEASURE PIECE FROM HERE! Insert a marker thread in the middle of the new stitches cast-on in the side under the sleeves (= 2-3-3-6-7-8 new stitches on each side of marker thread). Move the marker threads upwards when working; they are used for decreases in the sides later. Continue in the round in stockinette stitch. When piece measures 3 cm = 1⅛", decrease 1 stitch on each side of marker threads – read DECREASE TIP-2. Repeat decrease when piece measures 8-9-9-10-10-11 cm = 3⅛"-3½"-3½"-4"-4"-4⅜" = 196-216-232-252-276-304 stitches. Work until piece measures 12-13-13-14-14-15 cm = 4¾"-5⅛"-5⅛"-5½"-5½"-6" from marker. Try the sweater on and work until desired length (approx. 10 cm = 4" with rib remain before finished measurements). To stop the rib from contracting increase 32-36-38-42-48-50 stitches evenly = 228-252-270-294-324-354 stitches. Switch to circular needle size 3 MM = US 2.5. Now work rib (= knit 1/purl 1) for 4½ cm = 1⅝". Then work from arrow in diagram A.2. When A.2 has been worked vertically, continue with knit over knit and purl over purl until rib measures 10 cm = 4" in total. Bind off with knit over knit and purl over purl - read BIND-OFF TIP. Sweater measures approx. 50-52-54-56-58-60 cm = 19¾"-20½"-21¼"-22"-22¾"-23⅝" (measured on the inside at the neck edge) and down. SLEEVES: Sleeve is worked top down. Cast on 62-62-64-60-54-50 stitches on circular needle size 4 MM = US 6 with DROPS Belle (cast on fewer stitches in the larger sizes because of more increases in each side for sleeve cap). Work stockinette stitch back and forth, at the same time cast on stitches at the end of every row in each side as follows: Cast on 3-1-1-1-1-1 stitches 1-4-4-5-8-11 times, then on next row from right side, cast on 4-6-6-12-14-16 stitches = 72-76-78-82-84-88 stitches. Insert a marker thread in the middle of the 4-6-6-12-14-16 stitches that were cast on under sleeve (= mid under sleeve). Move marker thread upwards when working. Use it later when decreasing under sleeve. NOW MEASURE PIECE FROM HERE! Begin round at the marker thread and work stockinette stitch in the round on a short circular needle/double pointed needles size 4 MM = US 6. When piece measures 4 cm = 1½", decrease 1 stitch on each side of both marker threads – remember DECREASE TIP-2. In size M, L and XXXL, repeat decrease when piece measures 10 cm = 4" = 70-72-74-80-82-84 stitches. Continue to work in stockinette stitch until sleeve measures 27-25-25-23-21-19 cm = 10⅝"-9¾"-9¾"-9"-8¼"-7½". Now insert a new marker thread in the middle of sleeve so that there are 35-36-37-40-41-42 stitches between the 2 marker threads. Work stockinette stitch in the round, at the same time decrease 1 stitch on each side of both marker threads - remember DECREASE TIP-2. Decrease like this every 4th round 7-7-7-8-8-8 times = 42-44-46-48-50-52 stitches. Work in stockinette stitch until sleeve measures approx. 37-35-35-34-32-30 cm = 14½"-13¾"-13¾"-13⅜"-12½"-11¾" – or desired length (approx. 10 cm = 4" now remain with rib until finished measurements and shorter measurements in the larger sizes because of wider shoulders). Knit 1 round while increasing 6-4-8-6-10-8 stitches evenly = 48-48-54-54-60-60 stitches. Switch to double pointed needles size 3 MM = US 2.5. Work rib (knit 1/purl 1) in the round for 4½ cm = 1⅝". Now work from round with arrow in A.2 in the round. When A.2 has been worked, work rib until rib measures 10 cm = 4" in total. Bind off with knit over knit and purl over purl - remember BIND-OFF TIP. Work the other sleeve the same way. ASSEMBLY: Sew sleeves in body inside 1 edge stitch in garter stitch on body and inside cast-on edge on sleeves. |
||||||||||||||||||||||
Diagram explanations |
||||||||||||||||||||||
|
||||||||||||||||||||||
 |
||||||||||||||||||||||
 |
||||||||||||||||||||||
Have you finished this pattern?Tag your pictures with #dropspattern #sweethistorysweater or submit them to the #dropsfan gallery. Do you need help with this pattern?You'll find 32 tutorial videos, a Comments/Questions area and more by visiting the pattern on garnstudio.com. © 1982-2026 DROPS Design A/S. We reserve all rights. This document, including all its sub-sections, has copyrights. Read more about what you can do with our patterns at the bottom of each pattern on our site. |
||||||||||||||||||||||





Post a comment to pattern DROPS 232-44
We would love to hear what you have to say about this pattern!
If you want to leave a question, please make sure you select the correct category in the form below, to speed up the answering process. Required fields are marked *.