
Popular categories
Looking for a yarn?


Comments / Questions (7)
![]() Jenny wrote:
Jenny wrote:
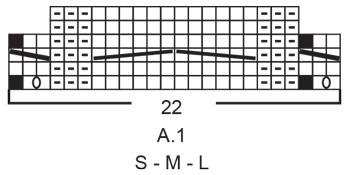
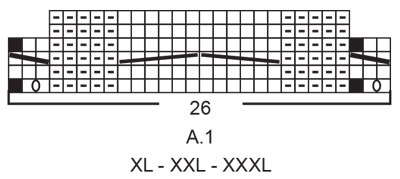
Hej! Jag förstår inte diagrammet A1. På varv 5 ”försvinner ” 3 maskor i början och slutet från diagrammet .Hur ska dessa stickas?
28.02.2026 - 15:39DROPS Design answered:
Hei Jenny. Du gjentar de 3 første og 3 siste maskene i høyden på diagrammet (= strikk pinnene slik: 1.-2.-3.-4.-1.-2.-3.-4 .-1.-2.-3.-4 osv i høyden), mens de 20 midterste maskene så skal man strikke pinne 1.-2.-3.-4.-5.-6.-1.-2.-3.-4.-5.-6.-1.-2.-3.-4.-5.-6. osv. Når det strikkes slik er det viktig å huske hvilken pinne man er på når de 3 første / 3 siste pinnne strikkes samtidig som man strikker de midterste maskene. mvh DROPS Design
23.03.2026 - 10:22
![]() Mirela wrote:
Mirela wrote:
Please help me to understand: "Move the 4 markers so each marker sits in the outermost stitch on each side of the front and back pieces." That means I pick up the same strand to do increases before and after marker? If that is corect is normal to create a ridge on the right side. It is a video that shows how to do the yoke increases? Thank you in advance for the answer.
25.11.2025 - 20:50DROPS Design answered:
Dear Mirela, the markers were previously inserted between stitches, before increasing for yoke, you need the markers to be each in one stitch, this means the first marker should be inserted in the last stitch on left front piece, the 2nd marker in the first stitch on back piece, the 3rd marker in the last stitch on back piece and the 4th marker in the first stitch on right front piece. Happy knitting!
26.11.2025 - 09:06
![]() Madeleine Beaumier wrote:
Madeleine Beaumier wrote:
J'ai de la difficulté à comprendre A1 à la 5e ligne. Comment s'y prend t'on pour commencer avec 3 mailles envers sans inclure la torsade? Que fait-on des 2 mailles envers de la torsade avant ces 3 mailles du tour précédent?
30.03.2023 - 07:01DROPS Design answered:
Bonjour Mme Beaumier, les différents motifs se répètent sur un nombre différent de rangs; autrement dit, au 5ème rang, reprenez la 1ère + la dernière torsade au 1er rang et tricotez les autres mailles comme indiqué par le diagramme. Répétez les 4 rangs des petites torsades et tricotez la grande torsade tous les 6 rangs. Bon tricot!
11.04.2023 - 09:38
![]() Jonna wrote:
Jonna wrote:
Hej! Jag undrar om garnet DROPS Sky och DROPS Kid-Silk är "stickigt" så att det kan irritera huden eller om det är mjukt. Mvh Jonna
26.03.2023 - 17:30DROPS Design answered:
Hei Jonna. Det er ganske personlig om man syns et garn klør eller ikke. Men jeg mener at disse 2 kvalitetene er utolig myke og deilig. mvh DROPS Design
27.03.2023 - 14:10
![]() Christel Kvist wrote:
Christel Kvist wrote:
Är det något fel i detta mönster? Läste att det var så . Skrivet med rött men hittar inte det nu när jag letar. Jag har aldrig stickat uppifrån o ner. Är det något särskilt jag ska tänka på ?
19.01.2023 - 15:23DROPS Design answered:
Hei Christel Vi har ikke fått noen tilbakemeldinger på at det skal være noe feil med denne oppskriften. Om det har vært en rettelse vil det ha vært en rød tekstlinje med link under Montering / over diagramteksten. Anbefaler deg å lese oppskriften godt før du starter og se gjerne på instruksjonsvideoene som er lagt til. Denne jakken strikkes ovenfra og ned, og den har sadelskulder. Så ta en ekstra titt på de 3 hjelpevideoene som er til sadelskulder. Selv om ikke maskeantallet er det sammen og det strikkes rundt, er teknikken den samme. Husk å lese øketips 2 og 3 gost. Lykke til :) mvh DROPS Design
23.01.2023 - 08:40
![]() Ilaria wrote:
Ilaria wrote:
Buongiorno, cosa vuol dire lavorare "1 capo di ogni qualità (= 2 capi)" ? Grazie mille
11.01.2022 - 17:58DROPS Design answered:
Buonasera Ilaria, deve lavorare con 1 filo di Sky e 1 filo di Kid-Silk. Buon lavoro!
11.01.2022 - 21:38
![]() Catherine wrote:
Catherine wrote:
Bonsoir pouvez vous m’envoyer les explications pour faire ce pull en français ? Merci
02.11.2021 - 18:02
|
||||||||||||||||||||||||||||||||||
Sky Feather#skyfeatherjacket |
||||||||||||||||||||||||||||||||||
 |
 |
|||||||||||||||||||||||||||||||||
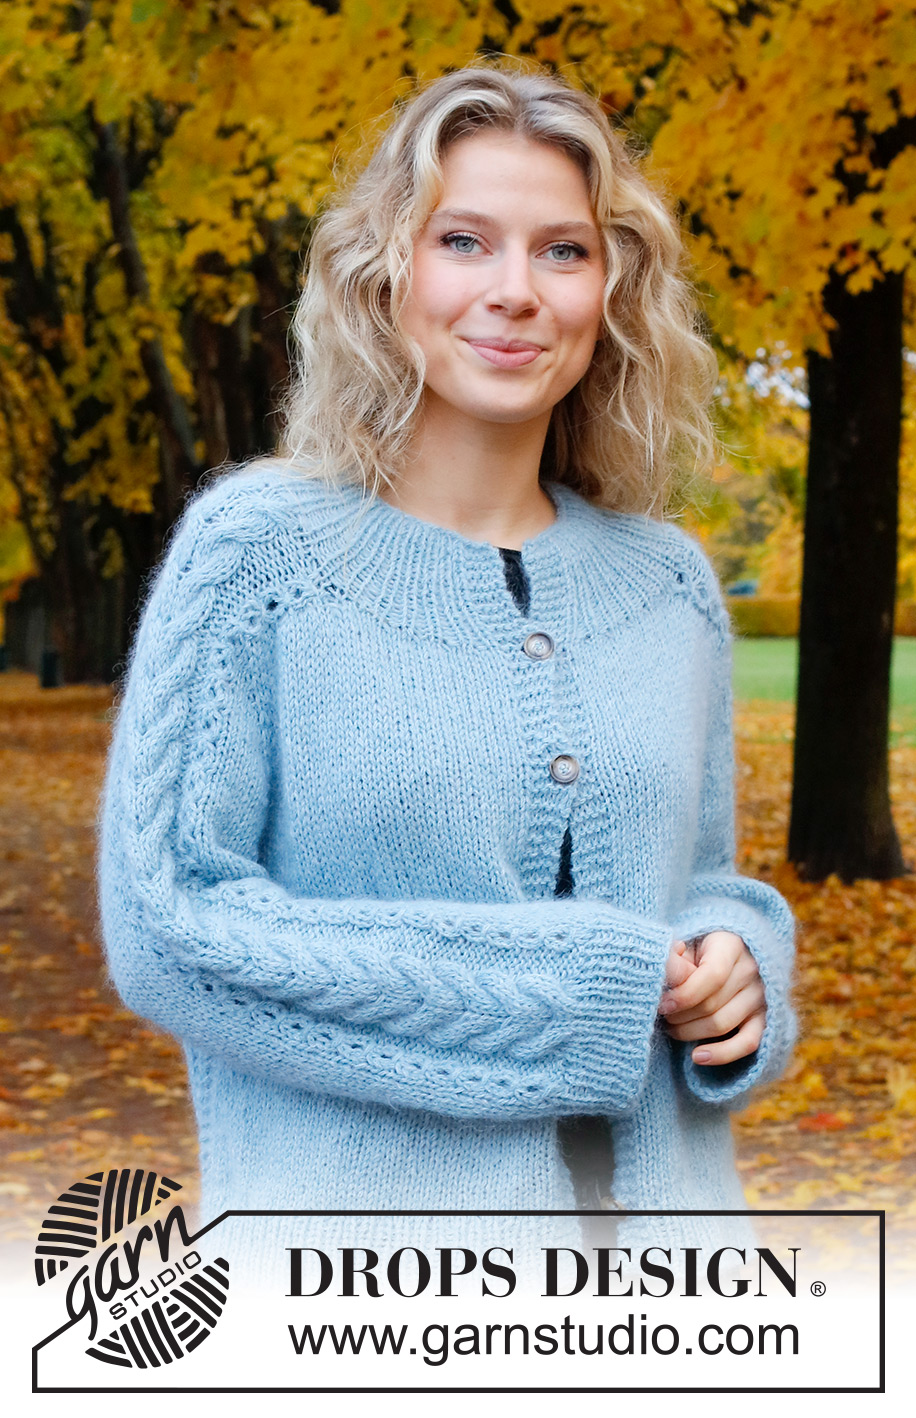
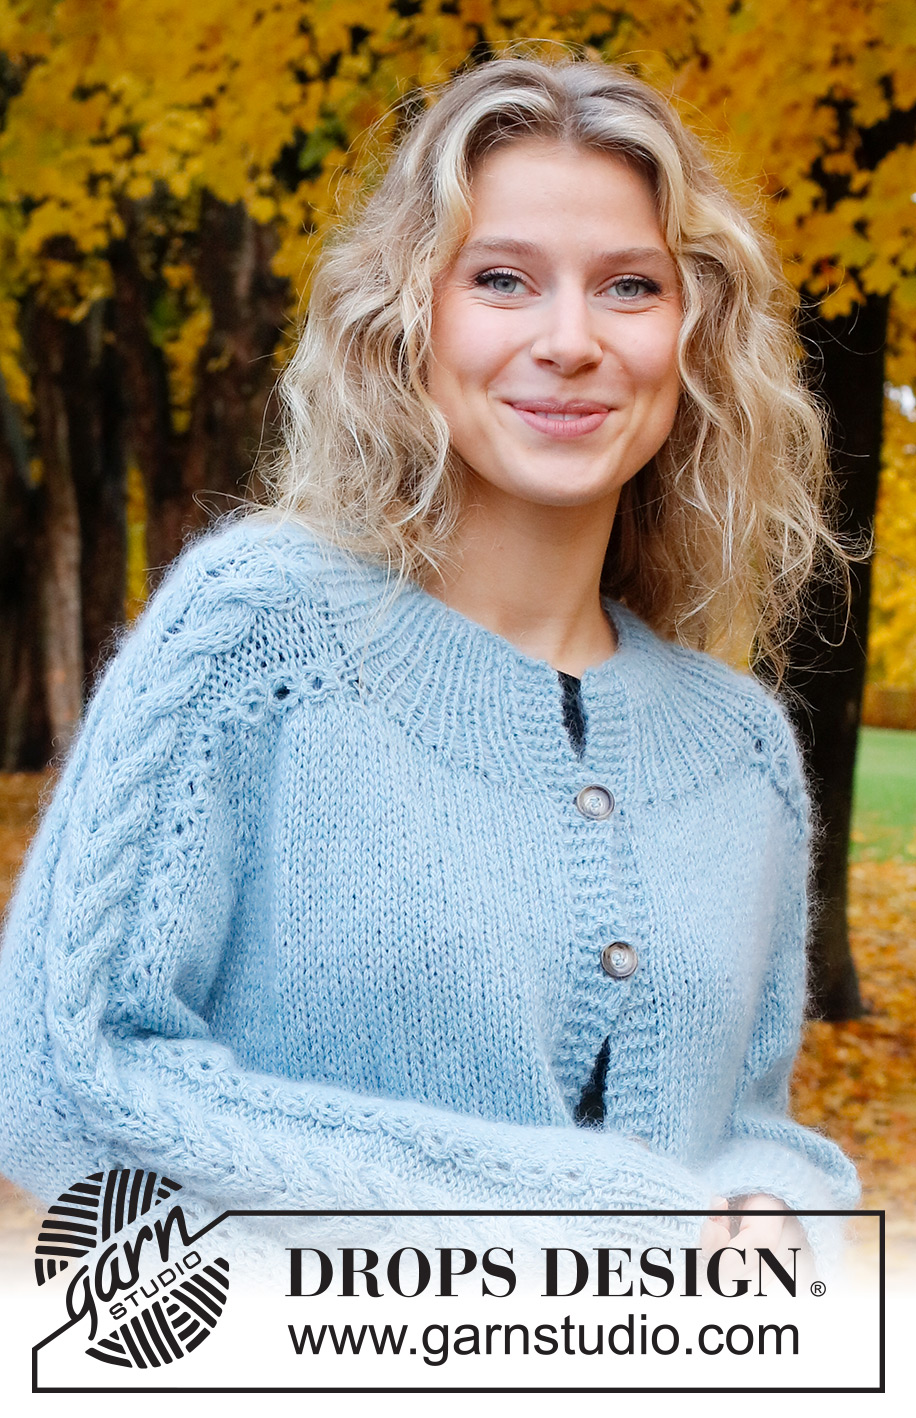
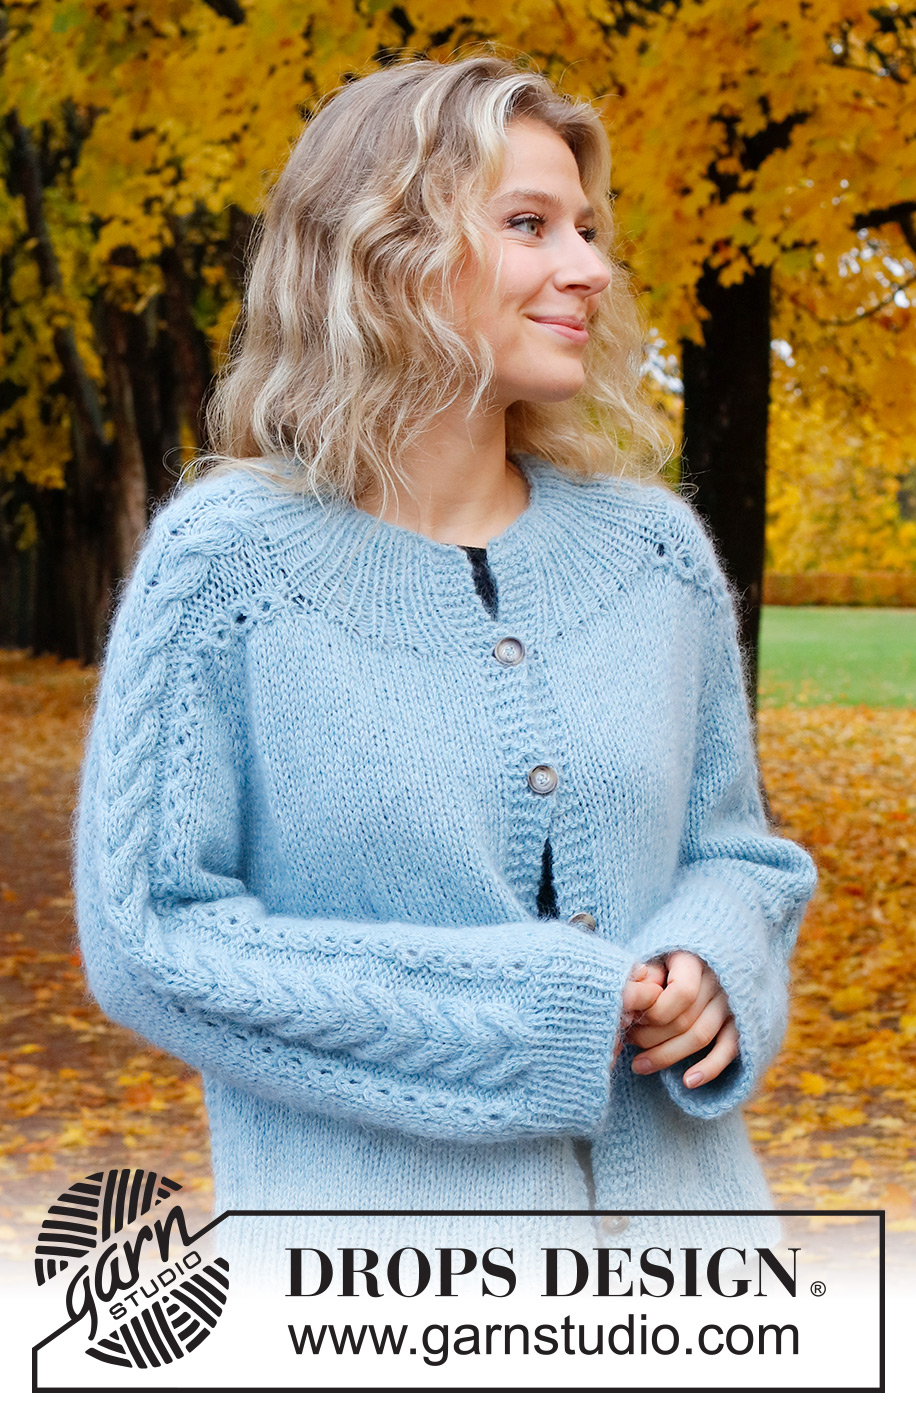
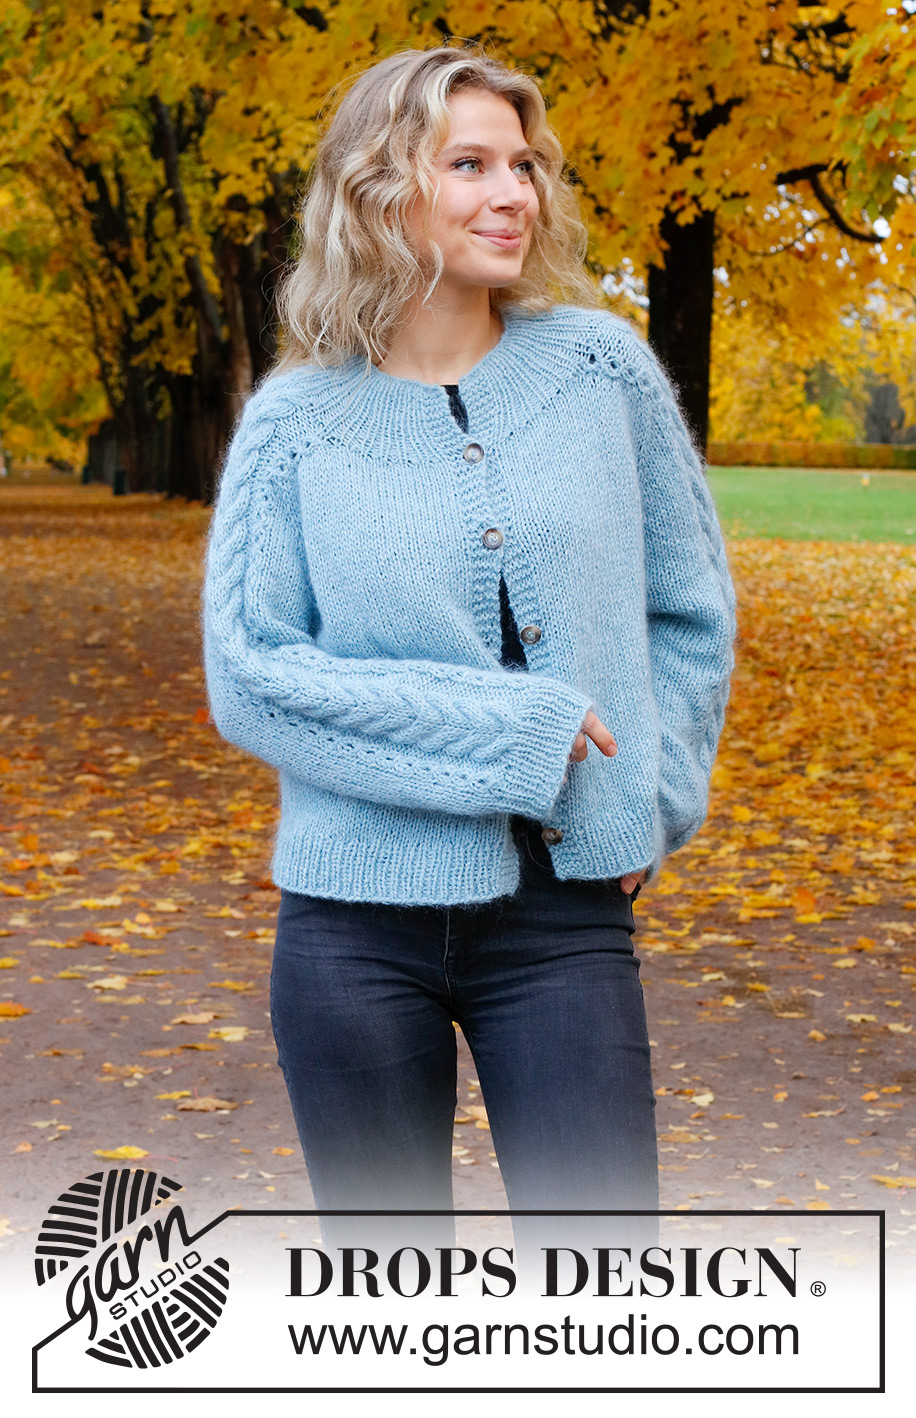
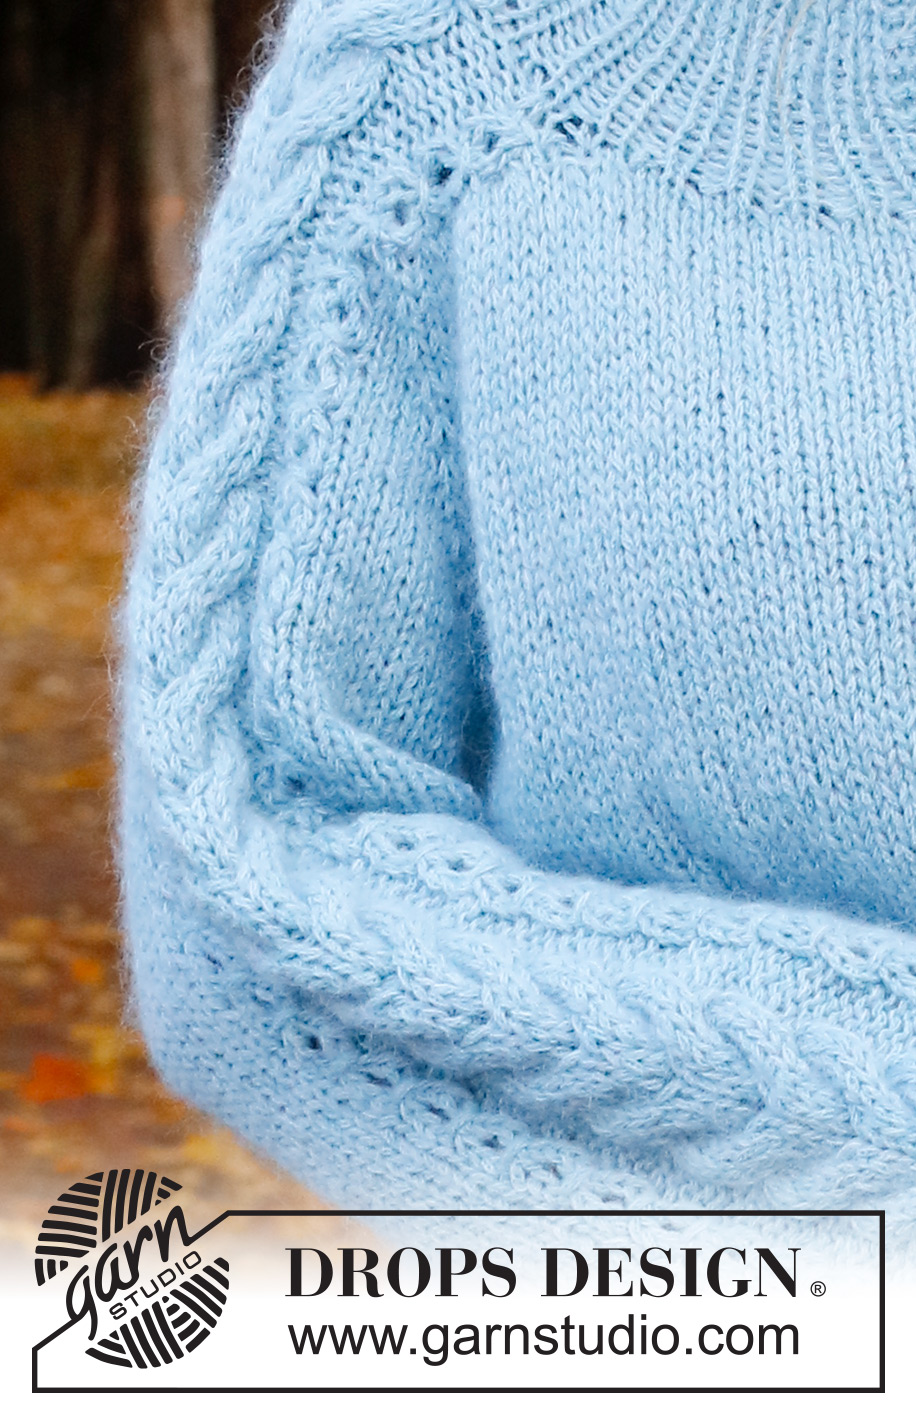
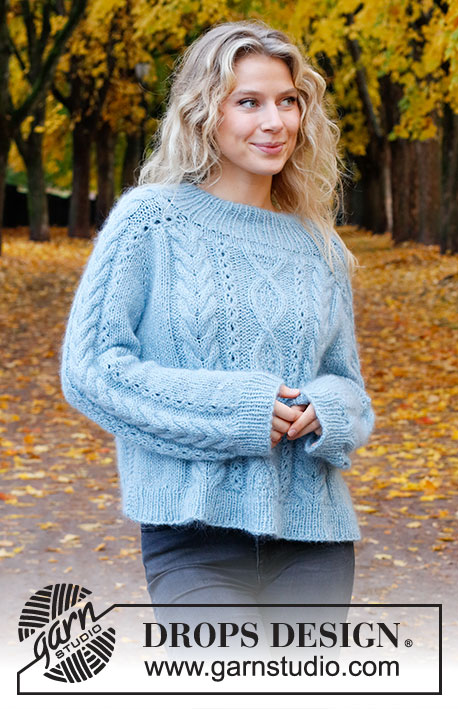
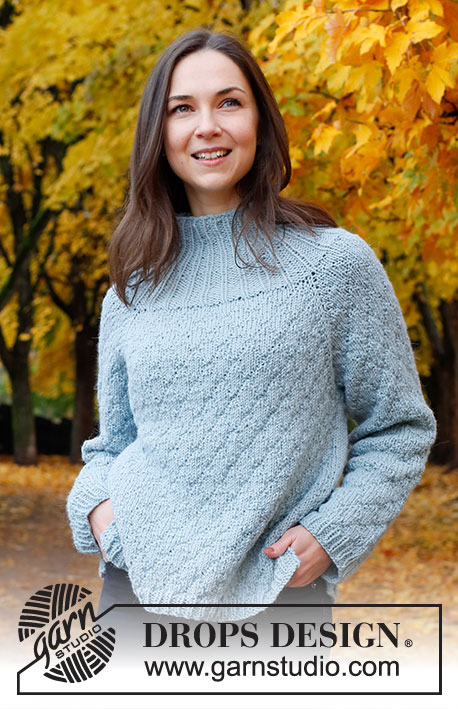
Knitted jacket in DROPS Sky and DROPS Kid-Silk. The piece is worked top down with saddle-shoulders and cables. Sizes S - XXXL.
DROPS 226-45 |
||||||||||||||||||||||||||||||||||
|
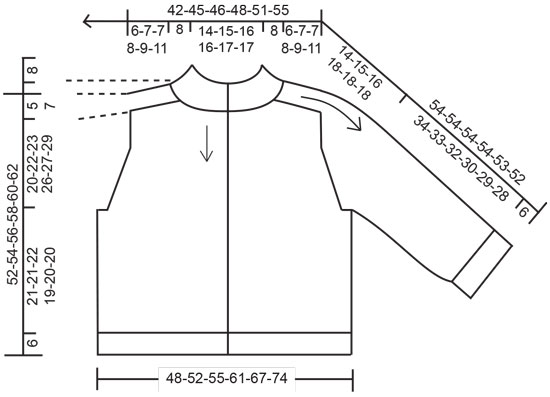
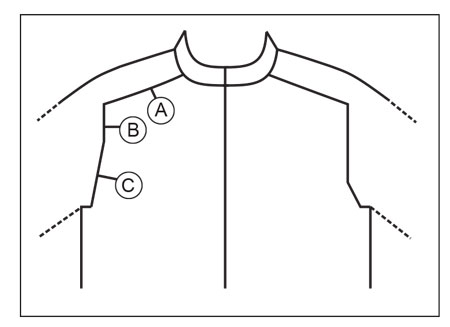
------------------------------------------------------- EXPLANATIONS FOR THE PATTERN: ------------------------------------------------------- RIDGE/GARTER STITCH (worked back and forth): Knit all rows. 1 ridge = knit 2 rows. PATTERN: See diagram A.1. Choose diagram for your size. The diagram shows all rows in the pattern from the right side. INCREASE/DECREASE TIP (evenly spaced): To work out how to increase/decrease evenly, count the total number of stitches on needle (e.g. 155 stitches), minus the bands (e.g. 10 stitches) and divide the remaining stitches by the number of increases/decreases to be made (e.g. 24) = 6. In this example, increase by making 1 yarn over after each 6th stitch. On the next row work the yarn overs twisted to avoid holes. When decreasing, knit together each 5th and 6th stitch. INCREASE TIP-1 (neck): Increase all purl-1 to purl-2 from the right side by making 1 yarn over after each purled stitch. On the next row (wrong side) knit the yarn overs twisted to avoid holes. INCREASE TIP-2 (right side): BEFORE MARKER: The new stitch twists to the right. Use the left needle to pick up the strand between 2 stitches from the previous row, pick up the back strand and knit in the front loop. AFTER MARKER: The new stitch twists to the left. Use the left needle to pick up the strand between 2 stitches from the previous row, pick up the front strand and knit in the back loop. INCREASE TIP-3 (wrong side): BEFORE MARKER: The new stitch twists to the right. Use the left needle to pick up the strand between 2 stitches from the previous row, pick up the front strand and purl in the back loop. AFTER MARKER: The new stitch twists to the left. Use the left needle to pick up the strand between 2 stitches from the previous row, pick up the back strand and purl in the front loop. DECREASE TIP (for sleeves): Decrease 1 stitch on either side of the marker thread as follows: Work until there are 3 stitches left before the marker thread, knit 2 together, knit 2 (marker thread sits between these 2 stitches), slip 1 stitch as if to knit, knit 1 and pass the slipped stitch over the knitted stitch (2 stitches decreased). BUTTONHOLES: Work buttonholes on the right band (when the garment is worn). Work from the right side when there are 4 stitches left on the row as follows: Make 1 yarn over, knit 2 together and knit 2. On the next row (wrong side), knit the yarn over to leave a hole. The first buttonhole is worked when the rib on the neck measures 8 cm = 3⅛". Then work the other 4-4-5-5-5-5 buttonholes with approx. 10-10-9-9-9½-10 cm = 4"-4"-3½"-3½"-3⅝"-4" between each one. BINDING-OFF TIP: To avoid the bind-off edge being tight you can bind off with a larger size needle. If the edge is still tight, make 1 yarn over after approx. each 6th stitch at the same time as binding off; the yarn overs are bind off as normal stitches. ------------------------------------------------------- START THE PIECE HERE: ------------------------------------------------------- JACKET – SHORT OVERVIEW OF THE PIECE: The neck and yoke are worked back and forth with circular needle, top down. Stitches are increased for the shoulders, the sleeves and then the yoke. The yoke is divided for the body and sleeves and the body continued back and forth, with circular needle. The sleeves are worked in the round with short circular needle/double pointed needles, top down. The whole piece is worked with 1 strand of each quality (= 2 strands). NECK: Cast on 75-79-83-87-91-91 stitches (including 5 band stitches on each side towards mid-front) with circular needle size 4.5 MM = US 7 and 1 strand of each quality (= 2 strands). Purl 1 row (= wrong side). The next row is worked as follows from the right side: 5 band stitches in GARTER STITCH – read description above, * knit 1, purl 1 *, work from *-* until there are 6 stitches left, knit 1 and 5 band stitches in garter stitch. Continue this rib until there is 1 row left before the piece measures 8 cm = 3⅛" and the next row is from the right side. On the next row (right side) increase all purl-1 to purl-2 – read INCREASE TIP-1 = 107-113-119-125-131-131 stitches – remember the BUTTONHOLE on the right band – read description above. The neck edge is done now. Purl 1 row from the wrong side (bands in garter stitch and yarn overs purled twisted). YOKE: Change to circular needle size 5.5 MM = US 9 . Insert a marker after the band at the beginning of the row from the right side – THE PIECE IS NOW MEASURED FROM HERE! In addition, insert 4 other markers without working the stitches and inserting each marker between 2 stitches. The markers are used when increasing for the shoulders. Marker 1: Count 18-20-21-21-22-22 stitches (= front piece), insert marker before the next stitch. Marker 2: Count 22-22-22-26-26-26 stitches from marker 1 (= shoulder), insert marker before the next stitch. Marker 3: Count 27-29-33-31-35-35 stitches from marker 2 (= back piece), insert marker before the next stitch. Marker 4: Count 22-22-22-26-26-26 stitches from marker 3 (= shoulder), insert marker before the next stitch. There are 18-20-21-21-22-22 stitches left for the front piece after marker 4. Allow these 4 markers to follow your work onwards. INCREASES TO SADDLE-SHOULDERS: Read the whole section before continuing! Continue with stockinette stitch and 5 band stitches in garter stitch on each side – in addition, work A.1 over the 22-22-22-26-26-26 shoulder-stitches on each side (between markers 1 and 2 and markers 3 and 4). AT THE SAME TIME on the first row from the right side increase 4 stitches for the shoulders as follows: Increase BEFORE markers 1 and 3 and AFTER markers 2 and 4 – read INCREASE TIP-2. You are only increasing on the front and back pieces; the number of shoulder-stitches remains the same. On the next row (from the wrong side) increase 4 stitches for the shoulders as follows: Increase BEFORE markers 4 and 2 and AFTER markers 3 and 1 – read INCREASE TIP-3. You are therefore increasing EVERY row, differently from the right and wrong side, so the stitches lie neatly. Continue this pattern and increase like this every row (both from the right and wrong side) a total of 10-12-12-14-16-18 times = 147-161-167-181-195-203 stitches (the increased stitches are worked in stockinette stitch). REMEMBER THE KNITTING GAUGE! After the last increase, the piece measures approx. 6-7-7-8-9-11 cm = 2⅜"-2¾"-2¾"-3⅛"-3½"-4⅜" from the marker on the neck. Sizes M, L, XL and XXL go to sleeve increases. Sizes S and XXXL go straight to yoke increases (no increases on the sleeves). SLEEVE INCREASES (Sizes M, L, XL and XXL): Work stockinette stitch and pattern as before. AT THE SAME TIME increase 4 stitches for the sleeves as follows: Increase AFTER markers 1 and 3 and BEFORE markers 2 and 4 – remember INCREASE TIP-2. You are now increasing only on the sleeves; the number of stitches on the front and back pieces remains the same. The increased stitches are worked in stockinette stitch. Increase like this every 2nd row (each row from the right side) a total of 3-3-3-3 times = 173-179-193-207 stitches. Continue with yoke increases as explained below. YOKE INCREASES (all sizes): The piece measures approx. 6-11-11-12-13-11 cm = 2⅜"-4⅜"-4⅜"-4¾"-5⅛"-4⅜" from the marker on the neck. Move the 4 markers so each marker sits in the outermost stitch on each side of the front and back pieces. There are 22-28-28-32-32-26 stitches between the markers on each sleeve. On the next row from the right side, increase 8 stitches by increasing both before and after all 4 marker-stitches – remember INCREASE TIP-2. You are now increasing on the front/back pieces and on the sleeves; the increased stitches are worked in stockinette stitch. Increase like this every 2nd row (each row from the right side) a total of 12-10-11-12-12-15 times = 243-253-267-289-303-323 stitches. When all the increases are finished, the piece measures approx. 20-22-23-26-27-29 cm = 8"-8¾"-9"-10¼"-10⅝"-11⅜" from the marker on the neck. If it is shorter than this, continue working to the correct length. Now divide for the body and sleeves on the next row as follows: Work 38-40-41-45-48-52 stitches as before (= front piece), place the next 50-52-56-60-60-62 stitches on a thread for the sleeve, cast on 6-8-10-12-14-16 stitches (= in side under sleeve), work 67-69-73-79-87-95 stitches (= back piece), place the next 50-52-56-60-60-62 stitches on a thread for the sleeve, cast on 6-8-10-12-14-16 stitches (= in side under sleeve), work 38-40-41-45-48-52 stitches (= front piece). Remove all markers. The body and sleeves are finished separately. THE PIECE IS NOW MEASURED FROM HERE! BODY: = 155-165-175-193-211-231 stitches. Insert 1 marker 41-44-46-51-55-60 stitches in from each side (= sides of body). There are 73-77-83-91-101-111 stitches between the markers on the back piece. Continue stockinette stitch back and forth with 5 band stitches in garter stitch on each side towards mid front – in addition, work 6 garter stitches over both the markers (3 garter stitches on each side of the markers). Continue working until the piece measures 21-21-22-19-20-20 cm = 8¼"-8¼"-8¾"-7½"-8"-8" from the division. There is approx. 6 cm = 2⅜" left to finished length; try the jacket on and work to desired length. To avoid the following rib being tight, work 1 row from the right side where you increase 24-24-26-28-32-34 stitches evenly spaced – read INCREASE/DECREASE TIP = 179-189-201-221-243-265 stitches. Change to circular needle size 4.5 MM = US 7 and work as follows from the wrong side: 5 band stitches in garter stitch, * purl 1, knit 1 *, work from *-* until there are 6 stitches left, purl 1 and 5 band stitches in garter stitch. Continue this rib for 6 cm = 2⅜". Bind off with garter stitch over garter stitch, knit over knit and purl over purl – read BINDING-OFF TIP. The jacket measures approx. 52-54-56-58-60-62 cm = 20½"-21¼"-22"-22¾"-23⅝"-24⅜" from the shoulder down. SLEEVES: Place the 50-52-56-60-60-62 stitches from the thread on the one side of the piece on short circular needle size 5.5 MM = US 9 and knit up 1 stitch in each of the 6-8-10-12-14-16 stitches cast on under the sleeve, using 1 strand of each quality = 56-60-66-72-74-78 stitches. Insert a marker thread in the middle of the 6-8-10-12-14-16 stitches under the sleeve. Allow the thread to follow your work onwards; it will be used when decreasing under the sleeve. Start the round at the marker thread and work stockinette stitch in the round, with A.1 continuing over the middle 22-22-22-26-26-26 stitches on the sleeve. When the sleeve measures 3-3-3-2-2-2 cm = 1⅛"-1⅛"-1⅛"-¾"-¾"-¾" from the division, decrease 2 stitches under the sleeve – read DECREASE TIP. Decrease like this every 3-3-3-2½-2½-2½ cm = 1⅛"-1⅛"-1⅛"-1"-1"-1" a total of 3-3-4-6-6-6 times = 50-54-58-60-62-66 stitches. Continue working without further decreases until the sleeve measures 34-33-32-30-29-28 cm = 13⅜"-13"-12½"-11¾"-11⅜"-11" from the division (shorter measurements in larger sizes due to wider shoulders). Knit 1 round where you decrease 10 stitches evenly spaced = 40-44-48-50-52-56 stitches. Change to double pointed needles size 4.5 MM = US 7 and work rib (knit 1, purl 1) for 6 cm = 2⅜". Bind off with knit over knit and purl over purl – remember BINDING-OFF TIP. The sleeve measures approx. 40-39-38-36-35-34 cm = 15¾"-15¼"-15"-14¼"-13¾"-13⅜" from the division. Work the other sleeve in the same way. ASSEMBLY: Sew the buttons onto the left band. |
||||||||||||||||||||||||||||||||||
Diagram explanations |
||||||||||||||||||||||||||||||||||
|
||||||||||||||||||||||||||||||||||
 |
||||||||||||||||||||||||||||||||||
 |
||||||||||||||||||||||||||||||||||
 |
||||||||||||||||||||||||||||||||||
 |
||||||||||||||||||||||||||||||||||
Have you finished this pattern?Tag your pictures with #dropspattern #skyfeatherjacket or submit them to the #dropsfan gallery. Do you need help with this pattern?You'll find 37 tutorial videos, a Comments/Questions area and more by visiting the pattern on garnstudio.com. © 1982-2026 DROPS Design A/S. We reserve all rights. This document, including all its sub-sections, has copyrights. Read more about what you can do with our patterns at the bottom of each pattern on our site. |
||||||||||||||||||||||||||||||||||


With over 40 years in knitting and crochet design, DROPS Design offers one of the most extensive collections of free patterns on the internet - translated to 17 languages. As of today we count 324 catalogs and 12290 patterns - 12280 of which are translated into English (US/in).
We work hard to bring you the best knitting and crochet have to offer, inspiration and advice as well as great quality yarns at incredible prices! Would you like to use our patterns for other than personal use? You can read what you are allowed to do in the Copyright text at the bottom of all our patterns. Happy crafting!
Post a comment to pattern DROPS 226-45
We would love to hear what you have to say about this pattern!
If you want to leave a question, please make sure you select the correct category in the form below, to speed up the answering process. Required fields are marked *.