
Popular categories
Looking for a yarn?


Comments / Questions (29)
![]() Nicole Saulnier wrote:
Nicole Saulnier wrote:
J’ai acheté 6 balles de 50 gr, soit 300 gr. Je tricote la grandeur M qui nécessire 250 gr. je suis loin d’avoir fini et je vais manquer de fil. Y a t il une erreur sur le grammage???
19.08.2020 - 06:01DROPS Design answered:
Bonjour Mme Saulnier, tricotez-vous bien en DROPS Safran? Avez-vous bien le bon échantillon en largeur et en longueur? Vous trouverez ici plus d'infos sur l'échantillon. Bon tricot!
19.08.2020 - 08:14
![]() Kasaundra Chaney wrote:
Kasaundra Chaney wrote:
Do you have to use marker threads or can you switch to stitch markers?
14.07.2020 - 18:51DROPS Design answered:
Hi Kasaundra, You can use markers or marker threads, as you wish. Happy crafting!
15.07.2020 - 07:29
![]() Gitte Høi wrote:
Gitte Høi wrote:
Jeg forstår ikke helt hvad jeg skal gøre i ærmet Er det fordi jeg skal samle de 8 m op der er slået op på trøjen Mvh Gitte
19.06.2020 - 12:39
![]() Margret wrote:
Margret wrote:
Hallo ,liebes Dropsteam,möchte gern beim von oben nach unten stricken,dass der rückwärtige Halsausschnitt höher wird,kann das Video dazu nicht finden,danke euch,
08.05.2020 - 19:16DROPS Design answered:
Liebe Margret, dann sollten Sie sich von einem ähnlichen Modell mit Erhöhung inspirieren lassen. Ihr DROPS Laden kann Ihnen sicher damit weiterhelfen. Viel Spaß beim stricken!
11.05.2020 - 08:23
![]() Joanne Healy wrote:
Joanne Healy wrote:
I would like to put the A.2 detail into another sweater I am knitting that is knit bottom up. Do the stitches work out if you knit them from the point to the top? Or do they translate to something else?
15.04.2020 - 22:33DROPS Design answered:
Hi Joanne, To get the V-shape pointing down, you will need to work A.2 from the top and downwards when working bottom up. Happy knitting!
16.04.2020 - 07:20
![]() Linda wrote:
Linda wrote:
Flot sommerbluse! Men jeg savner opskrifter oppefra og ned med venderækker, så blusen går højere op i nakken. Kunne der komme en tilføjelse? Eller måske en ny opskrift?
25.04.2019 - 10:45DROPS Design answered:
Hei Linda. Denne oppsrkiften er skrevet uten forhøyning, men du må gjerne legg til en forhøyning selv, om du ønsker det. Du kan se på en lignende oppskrift i samme garn, feks 178-45, her, og følge anvisningen der. Strikk forhøyningen før du begynner med hullmønsteret. God fornøyelse
30.04.2019 - 14:04Marylin Estrada wrote:
Quisiera hacer la parte d atrás sin calados sólo en punto derecho es posible?
05.11.2018 - 21:43DROPS Design answered:
Hola Marylin. Puedes trabajar la espalda sin calados sustituyendo los puntos trabajados junto al diagrama A.1 por puntos en punto jersey.
19.11.2018 - 22:40
![]() Beverly wrote:
Beverly wrote:
I figured out what was wrong, i was misreading the chart. Now my second question. Is the pattern to knit all stitches every other row? As every other row on the chart is blank
28.09.2018 - 18:37DROPS Design answered:
Dear Beverly,the even numbered rows (every other row) is knit all the way around. Happy Knitting!
30.09.2018 - 09:02
![]() Beverly wrote:
Beverly wrote:
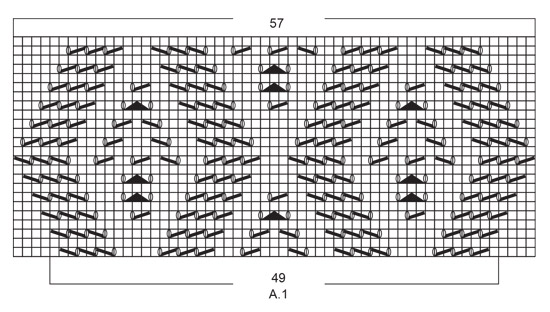
I am knitting size M. I have done the 3 garter ridges and added the 39 stitches. My problem is that as i am working the middle 49 stitches of A1, i run out of stitches before i finish the pattern. I am able to finish about 44 stitches of the pattern. What am i doing wrong?
28.09.2018 - 14:49DROPS Design answered:
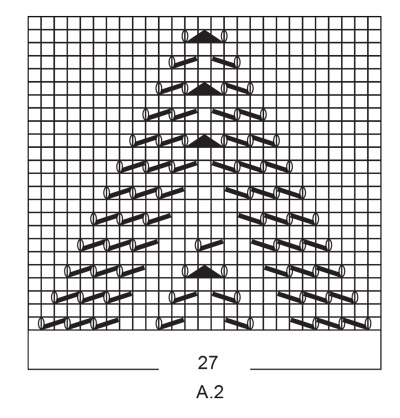
Dear Berverly, work 1st row in pattern while inc for raglan as follows: Knit 2, 1 YO, work the middle 49 stitches in A.1, (= back piece), 1 YO, knit 4, 1 YO, knit 20 (= sleeve), 1 YO, knit 4, 1 YO, knit 11, A.2 (= 27 stitches), knit 11, 1 YO, knit 4, 1 YO, knit 20 (= sleeve), 1 YO, knit 2. = 2+49+4+20+4+11+27+11+4+20+2= 154+8 YOs = 162 sts. Happy Knitting!
01.10.2018 - 07:45
![]() Friedgund Thum wrote:
Friedgund Thum wrote:
Ich habe mir diesen Pulli in schwarz und das n blau gestrickt! Er sitzt super und ist ein echtes Allround-Teil. Großartig!!!! Nun habe ich schon den ersten Auftrag einer Freundin bekommen, ihr auch einen zu stricken 😊
24.07.2018 - 16:31
|
||||||||||||||||
Diamonds in Lace#diamondsinlacetop |
||||||||||||||||
 |
 |
|||||||||||||||
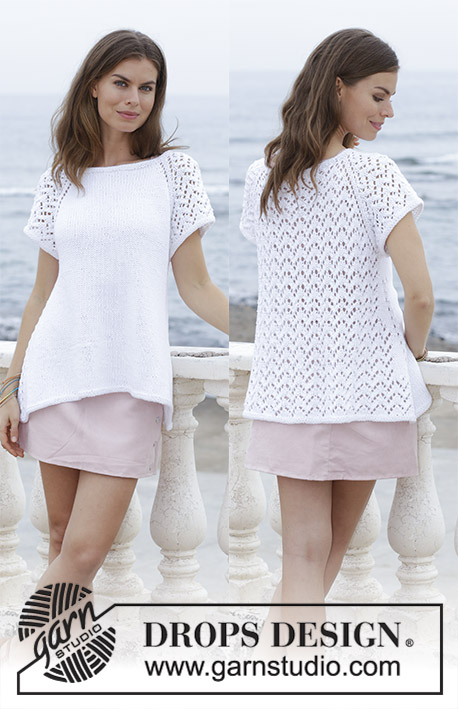
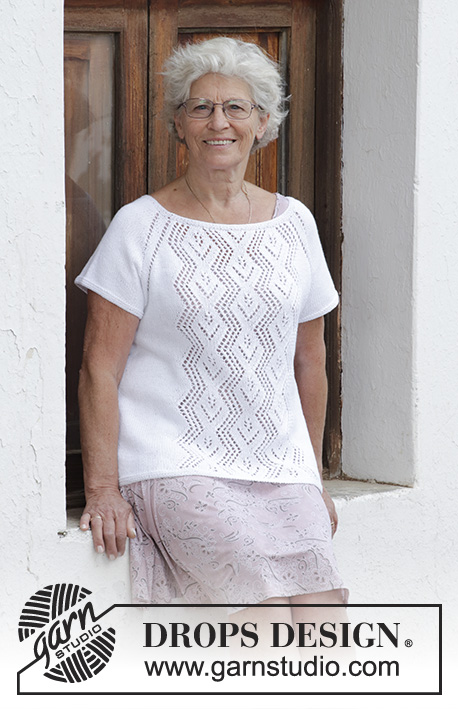
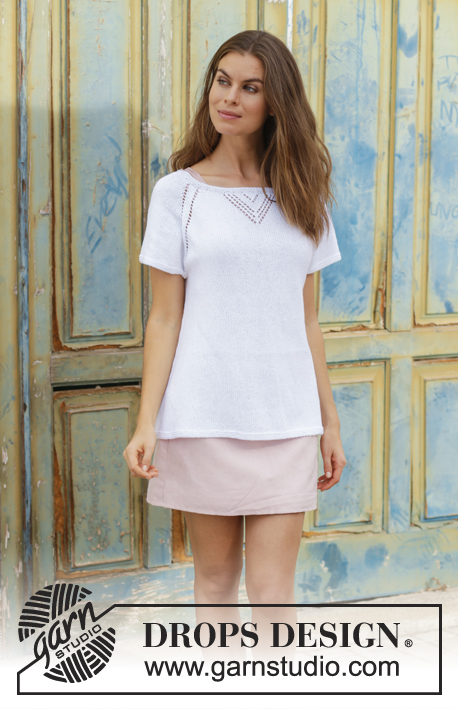
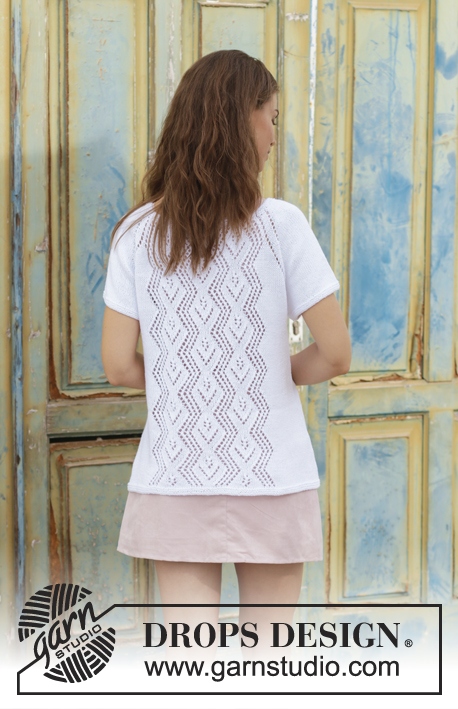
Top with lace pattern, raglan and A-shape, knitted top down. Size: S - XXXL Piece is knitted in DROPS Safran.
DROPS 187-30 |
||||||||||||||||
|
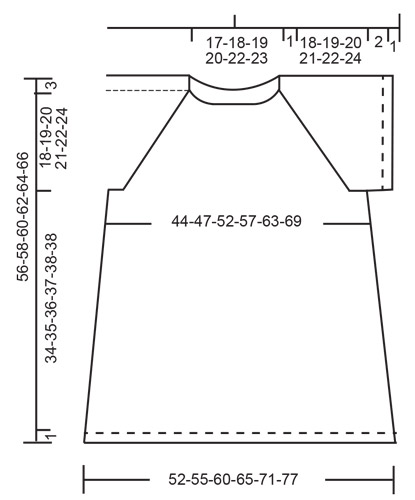
INFORMATION FOR PATTERN: GARTER STITCH (worked in the round): 1 ridge = 2 rounds. Knit 1 round and purl 1 round. INCREASE TIP (evenly): To calculate how to increase evenly, use number of stitches on row (e.g. 110 stitches) and divide number of stitches by number of increases to be done (e.g. 44) = 2.5. In this example increase by making a yarn over after alternately approx. every 2nd and 3rd stitch. On next round work yarn overs twisted to avoid holes. PATTERN: See diagrams A.1 and A.2. Diagrams show all rows in pattern seen from the right side. RAGLAN: Increase in every transition between body and sleeves (= 8 stitches increased on round). Work until 2 stitches remain before marker thread, make 1 yarn over, knit 4 (marker thread is in the middle of these 4 stitches), make 1 yarn over (= 2 stitches increased). On next round knit the yarn overs to make holes. Then knit the new stitches. INCREASE TIP (applies to sides of body): Work until 2 stitches remain before marker thread, make 1 yarn over, knit 4 (marker thread is in the middle of these 4 stitches), make 1 yarn over. Repeat in the other side (= 4 stitches increased on round). On next round knit yarns over twisted to avoid holes. ---------------------------------------------------------- TOP: Worked in the round on circular needle, top down. Sleeves are worked in the round on double pointed needles. YOKE: Cast on 110-115-120-125-130-137 stitches on circular needle size 3 mm with Safran. Work 3 ridges in GARTER STITCH - see explanation above. Knit 1 round while increasing 44-39-38-41-56-65 stitches evenly - read INCREASE TIP (evenly spaced) = 154-154-158-166-186-202 stitches. Switch to circular needle size 3.5 mm. Insert 4 marker threads in piece without working as follows: Insert a marker thread at beginning of round (= in transition between sleeve and back piece), insert next marker thread after 53-53-55-59-69-77 stitches, (= back piece), insert next marker thread after another 24 stitches (= sleeve), insert next marker thread after another 53-53-55-59-69-77 stitches (= front piece), 24 stitches (= sleeve) now remain after last marker thread. Round begins in transition between sleeve and back piece. Now work pattern as follows: Knit 2, make 1 yarn over, knit 0-0-1-3-8-12, work the middle 49 stitches in A.1 (i.e. skip the outermost 4 stitches in each side of diagram), knit 0-0-1-3-8-12 (= back piece), make 1 yarn over, knit 4 (marker thread is in the middle of these 4 stitches), make 1 yarn over, knit 20 (= sleeve), make 1 yarn over, knit 4 (marker thread is in the middle of these stitches), make 1 yarn over, knit 11-11-12-14-19-23, A.2 (= 27 stitches), knit 11-11-12-14-19-23, make 1 yarn over, knit 4 (marker thread is in the middle of these 4 stitches), make 1 yarn over, knit 20 (= sleeve), make 1 yarn over, knit 2. REMEMBER THE KNITTING TENSION. First increase for RAGLAN - explanation above, is now done (= 8 stitches increased on round). Continue pattern like this and increase every other round 20-24-28-31-33-36 times in total (including first increase explained above) = 314-346-382-414-450-490 stitches. NOTE! For every increase for raglan there is room for one more stitch of pattern A.1 towards raglan lines on back piece. When enough stitches have been increased to work all stitches in diagram A.1, 16-20-24-27-29-32 increases remain for raglan – knit these stitches. Repeat diagram A.1 vertically until finished measurements. Work A.2 one time vertically, then work in stocking stitch over stitches in A.2. When all increases are done, the piece should measure 15-17-20-22-23-25 cm from cast-on edge mid front. Continue without increase for raglan until piece measures 19-20-21-22-23-25 cm from cast-on edge mid front (if the knitting tension is correct vertically this measurement is already achieved in size XL, XXL, and XXXL). Work next row as follows: Work first 93-101-111-121-135-149 stitches (= back piece), slip the next 64-72-80-86-90-96 stitches on a stitch holder (= sleeve), cast on 8-8-8-10-10-10 new stitches in the side under sleeve, work the next 93-101-111-121-135-149 stitches (= front piece), slip the next 64-72-80-86-90-96 stitches on a stitch holder (= sleeve), cast on 8-8-8-10-10-10 new stitches in the side under sleeve. NOW MEASURE PIECE FROM HERE! BODY: = 202-218-238-262-290-318 stitches. Insert a marker thread in each side, i.e. in the middle of the 8-8-8-10-10-10 new stitches cast on in each side under sleeves (= 101-109-119-131-145-159 stitches on both back and front piece). Continue in the round with pattern A.1 on back piece as before and work in stocking stitch over the remaining stitches on round. When piece measures 4 cm, increase 2 stitches in each side - read INCREASE TIP. Increase like this approx. every 3-3-3-4-4-4 cm 9 times in total = 238-254-274-298-326-354 stitches. When piece measures approx. 34-35-36-37-38-38 cm from division, switch to circular needle size 3 mm. Work 3 ridges. Cast off. To avoid at tight cast-off edge cast off with a larger sized needle. Top measures approx. 56-58-60-62-64-66 cm from shoulder and down. SLEEVE: Slip the 64-72-80-86-90-96 stitches from stitch holder in one side of piece on double pointed needles size 3.5 mm and pick in addition up 1 stitch in each of the 8-8-8-10-10-10 new stitches cast on under sleeve = 72-80-88-96-100-106 stitches. Insert 1 marker thread in the middle of the 8-8-8-10-10-10 new stitches under sleeve. Begin round here and work in stocking stitch in the round. When sleeve measures 2 cm from division, switch to double pointed needles size 3 mm. Work 3 ridges. Cast off. To avoid at tight cast-off edge cast off with a larger sized needle. Work the other sleeve the same way. |
||||||||||||||||
Diagram explanations |
||||||||||||||||
|
||||||||||||||||
 |
||||||||||||||||
 |
||||||||||||||||
 |
||||||||||||||||
Have you finished this pattern?Tag your pictures with #dropspattern #diamondsinlacetop or submit them to the #dropsfan gallery. Do you need help with this pattern?You'll find 26 tutorial videos, a Comments/Questions area and more by visiting the pattern on garnstudio.com. © 1982-2026 DROPS Design A/S. We reserve all rights. This document, including all its sub-sections, has copyrights. Read more about what you can do with our patterns at the bottom of each pattern on our site. |
||||||||||||||||


With over 40 years in knitting and crochet design, DROPS Design offers one of the most extensive collections of free patterns on the internet - translated to 17 languages. As of today we count 324 catalogues and 12290 patterns translated into English (UK/cm). 12290
We work hard to bring you the best knitting and crochet have to offer, inspiration and advice as well as great quality yarns at incredible prices! Would you like to use our patterns for other than personal use? You can read what you are allowed to do in the Copyright text at the bottom of all our patterns. Happy crafting!
Post a comment to pattern DROPS 187-30
We would love to hear what you have to say about this pattern!
If you want to leave a question, please make sure you select the correct category in the form below, to speed up the answering process. Required fields are marked *.