How to work a jumper top down
Several of our jumpers are worked top-down, and this is primarily because it provides more flexibility in terms of adjusting the jumper to personal measurements or preferences. It is easier to adjust the length of sleeves, body and especially the yoke. Working top-down also makes it easier to try the piece on while working.
In this lesson we show you how to work a jumper with a simple raglan increase. Start by picking the pattern you want to knit and use this lesson to guide you. If you want to work on a pattern with a different kind of raglan just follow the instructions for increases in you pattern - you’ll notice that the principle of top-down is the same as in this example. Similarly, this technique can also be used when working a round yoke, just follow the increase instructions for the round yoke instead of the raglan showed here.
Additionally, If you’re working a jacket top-down the technique will be the same, but you’ll work the piece back and forth on needle, starting mid front (a marker at the back will not be necessary).
Let’s get started
1) We have started this example by casting on 48 stitches and working 3 cm rib (knit 2, purl 2), before starting the raglan increases.
After the rib edge, continue in stocking stitch and place a marker mid-back. Continue by placing 4 marker threads for raglan in the transition between body and sleeves (from 1. mark to 1. marker thread = half back piece. From 1. to 2. marker thread = 1. sleeve. From 2. to 3. marker thread = front piece. From 3. to 4. marker thread = 2. sleeve. The remaining stitches between 4. marker thread and 1. mark = half back piece).
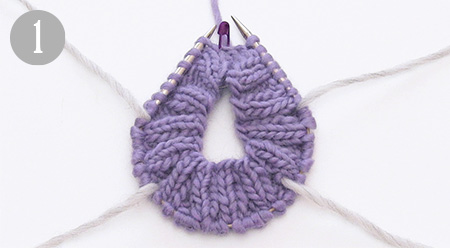
2) Start increasing for raglan on each side of the 4 marker threads.

3) Increase as follows: start 1 stitches before marker thread, make 1 yarn over on right needle.

4) Work 2 stitches (marker thread sits between these stitches), make 1 yarn over on right needle.

5) First increases (yarn overs) before and after 1. marker thread is now complete. Repeat increases at each marker thread (=8 stitches increased on round).

6) On next round, knit the yarn overs twisted (work in the back loop of stitch) to avoid holes.
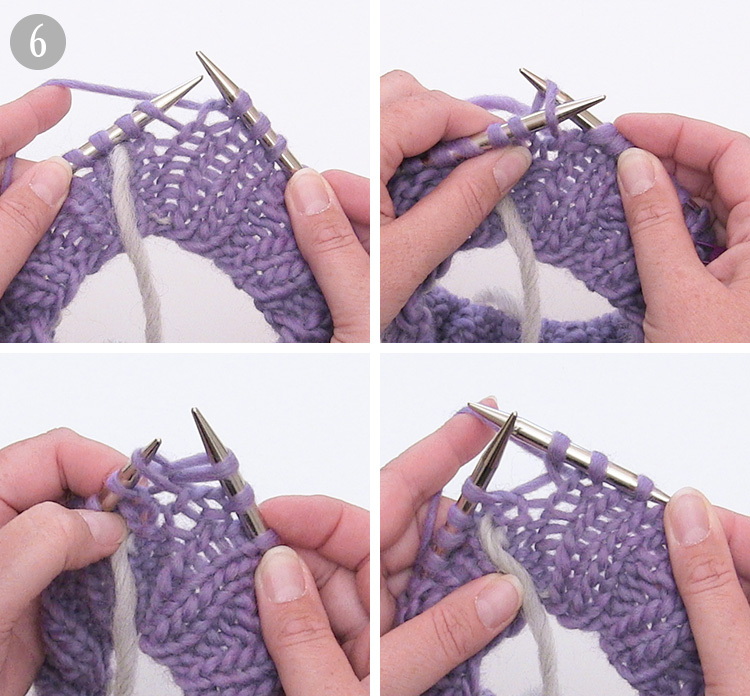
7) Continue with pattern, and increase for raglan as explained.

8) When all increases for raglan are complete, continue working until you reach the measurements for where piece is divided for body and sleeves.

9) Divide piece for sleeves and front/back piece, and finish each part separately. Work until 1. marker thread (=half back piece).

10) Place stitches between 1. and 2. marker thread on a thread/stitch holder (= 1. sleeve).

11) Cast on new stitches under sleeve.
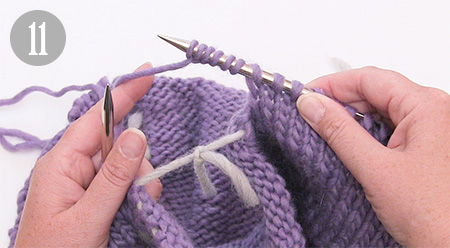
12) Work stitches between 2. and 3. marker thread (=front piece).
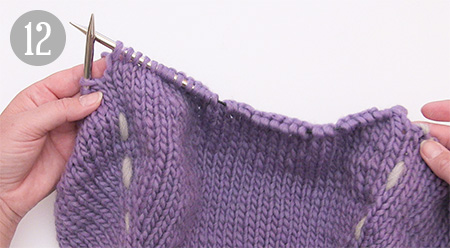
13) Place stitches between 3. and 4. marker thread on a thread/stitch holder (= 2. sleeve).

14) Cast on new stitches under sleeve (same number of stitches as cast on under 1. sleeve).
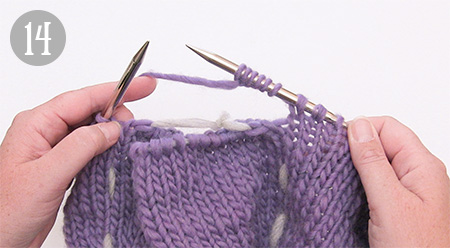
15) Work remaining stitches on back piece (until 1. marker).

16) Work the body in the round, follow instructions for increases, decreases, length and rib edge in your pattern. If you’re unsure about the length of piece, or considering shortening/lengthening it, you can easily try the jumper on while working (TIP: when trying the piece on, distribute stitches over several circular needles to minimise the risk of losing any stitches).

17) Work sleeves: place stitches from one of the threads/stitch holders back on the needle.

18) Cast on new stitches under sleeve, see picture A) or pick up 1 stitch in each stitch of the stitches cast on under the sleeve, see picture B) - see pattern for exact number and place a marker. The piece is now measured from here.

19) Work the length stated in the pattern, place a new marker in the middle of the new stitches cast on. Decrease 1 stitch on each side of the marker.

20) Work until 2 stitches remain before the stitch with marker, slip 1 stitch onto right needle, knit 1, pass the slipped stitch over (= 1 stitch decreased).

21) Work stitch with marker.

22) Knit 2 stitches together (=1 stitch decreased).
You have now decreased 1 stitch before and 1 stitch after marker (= 2 stitches decreased).

23) Follow instructions in pattern regarding the number of decreases and cm/rounds in-between each decrease.

24) When both sleeves have been completed, sew the hole under sleeves.
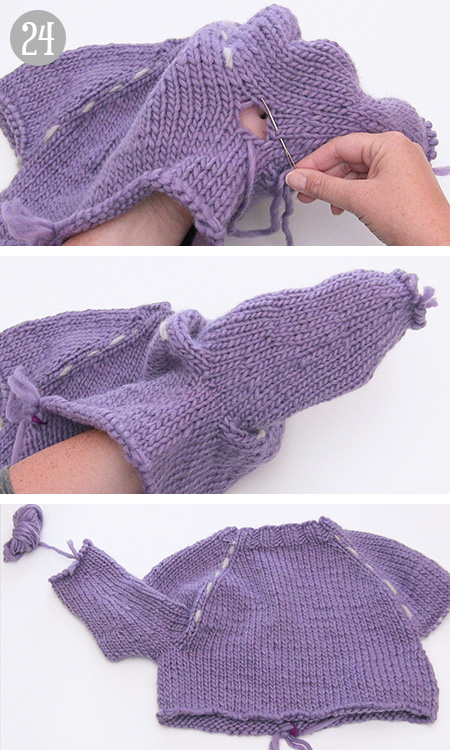
When the body and sleeves are completed according to the pattern, remove all markers and marker threads, and fasten all strands. The jumper is now finished!
Still haven’t chosen a top down pattern? Find some inspiration below:


Over het brei-patroon Campus Rally vest 240-28 maat s. Er staat dat het met rondbreinaalden gebreid moet worden, maar het voor en achterpand vervolgens wel aan elkaar moeten worden genaaid. Als ik de rondbreinaalden gebruik, brei ik rond, zodat ik niet twee losse voor en achter pand krijg. Ook zijn 68 steken niet genoeg om een hele spencer mee te maken. Moet je de rondbreinaalden gebruiken alsof het normale naalden zijn? Waarom moet je dan die rondbreinaalden gebruiken?
09.12.2024 - 12:38