Comments / Questions (25)
![]() Gunvor wrote:
Gunvor wrote:
När man börjar mönster stickningen på oket, står det i mönstret att man börjar med A1 efter de 5 kantmaskorna. Det innebär att på v 3 stickar gör man omslag direkt knappslån. Det blir ju ett hål sedan och det ser mycket konstigt ut , dpecieypå den sidan man har knapphålet. Ska det verkligen vara så?
28.05.2025 - 07:42DROPS Design answered:
Hej Gunvor. Ja det stämmer att det kommer ett omslag direkt efter de 5 kantmaskorna på varv 3 i diagram A.1. Mvh DROPS Design
28.05.2025 - 08:41
![]() Lena wrote:
Lena wrote:
Hej! Jag undrar samma sak som Marie Engström tidigare, mönstret är inte symmetriskt fram mot höger och vänster framkant. Man borde börja och sluta med A1. Står att mönstret ska rättas, men jag ser inte att det är gjort?
08.06.2024 - 22:30DROPS Design answered:
Hej Lena, jeg kan se hvad du mener. Jakken på billedet er ikke symmetrisk, så det er nok derfor det ikke er rettet. Vi skal høre hvad design siger om det :)
11.06.2024 - 15:05
![]() Eva Larsen wrote:
Eva Larsen wrote:
Fejl i opskrift. Jeg strikker str. L Der er mønster A. 2, som skal strikkes 23 gange, men der er masker til 25 gange, så der bliver for mange masker, når bærestykket er færdigt
13.03.2024 - 06:58
![]() Marie Engström wrote:
Marie Engström wrote:
Mönsterstickningen på oket blir inte lika på båda sidor. Man börjar med A.1 och slutar varvet med A.2. Det innebär att hålmönstret hamnar en bit in på ena sidan. Inte snyggt. Borde man inte sluta med A.1?
10.08.2023 - 10:31DROPS Design answered:
Hej Marie, jo det bör man. Vi skall göra en rättelse. Tack för info!
16.08.2023 - 10:38
![]() Mary wrote:
Mary wrote:
Hi, I am knitting Mayan Moon Shine. I am up to the yoke but do not understand the instruction after the 5 plain stitches for the band ie 'A.1 over the next 3 stitches. A.2 (=3 stitches on the first row). Can you explain it to me in a different way. I just don't get it. Thankyou
22.07.2023 - 11:51DROPS Design answered:
Dear Mary, it means that you need to work row 1 of the charts A.1 and A.2 (remember that A.2 is different for each size). So you work 5 stitches for the band, the 3 stitches of A.1 and the 3 stitches of A.2 and continue working the row alternating between both charts. Here you can find more information on how to read knitting charts: https://www.garnstudio.com/lesson.php?id=68&cid=19. Happy knitting!
23.07.2023 - 19:31
![]() Hanneke Geervliet wrote:
Hanneke Geervliet wrote:
Klopt het dat het patroon aan de rechter- en linkerkant naast de voorbies niet symmetrisch is? De rechterkant is A2, de linkerkant A1. Ik brei het vest in maat S.
21.03.2023 - 22:30DROPS Design answered:
Dag Hanneke,
Het klopt inderdaad dat het patroon niet symmetrisch is; je begint met A.1 en eindigt met A.2
22.03.2023 - 20:19
![]() Pia wrote:
Pia wrote:
Strikker str M Har strikket 2 p mønster Skal nu til 3. p …. Passer med maskes tal og i venstre side vil hulmønsteret ligge fint op af ret kanten ….. Men i venstre side ender mønsteret med 4 ret, så her vil hulmønstret ende et lille stykke før tet kanten …. Skal det ikke være ens i begge sider? Forstår ikke hvad jeg gør forkert😌
01.06.2022 - 17:12
![]() Hanneke Broekman wrote:
Hanneke Broekman wrote:
Hallo, Graag zou ik de stekenverhouding op naald 4 en 3 ook weten. Mijn proeflapjes kloppen nl niet altijd. Klopt het dat naald 4 21 steken op 10 cm heeft en naald 3 23 steken? Ik kom nl uit op 24 steken op naald 3... Wel 21 steken op naald 4.
14.12.2021 - 17:14DROPS Design answered:
Dag Hanneke,
De stekenverhouding is per persoon anders, dus ik kan voor jou niet zeggen wat de stekenverhouding op naald 4 en 3 zal zijn. Dit is gewoon een kwestie van ook op die naalden een proeflapje maken. Zelf heb ik ook altijd dunnere naalden nodig om de stekenverhouding van het patroon te krijgen.
15.12.2021 - 17:18
![]() Elke wrote:
Elke wrote:
Hallo liebes Drops Team Leider erschließt sich auch mir die Maschenprobe nicht. Mit welcher Nadelstärke haben sie die Maschenprobe gestrickt? Es sind 3 Nadelstärken angegeben jedoch fehlt mir die Angabe mit welcher von den Nadelstärken IHRE Maschenprobe gestrickt wurde. Lg Elke
30.11.2021 - 07:33DROPS Design answered:
Liebe Elke, die Maschenprobe (= 20 M x 26 Reihen) werden hier mit den grösseren Nadeln = 4,5 gestrickt. Viel Spaß beim stricken!
30.11.2021 - 08:38
![]() Jeg Forstår Ikke A1 Og A2 wrote:
Jeg Forstår Ikke A1 Og A2 wrote:
Jeg forstår ikke A1 og A2? Strikkes det først A1 over 3 også resten A2?
16.05.2021 - 07:29DROPS Design answered:
Hej, Efter de 5 kantmasker, strikker du skiftevis A.1 og A.2 hele vejen rundt og afslutter med 5 kantmasker i den anden side. Allerede på første pind i A.2 tager du 1 masker ud mellem 2. og 3. maske også hele pinden rundt. God fornøjelse!
17.05.2021 - 13:18
Mayan Moon Shine#mayanmoonshinecardigan |
||||||||||||||||
 |
 |
|||||||||||||||
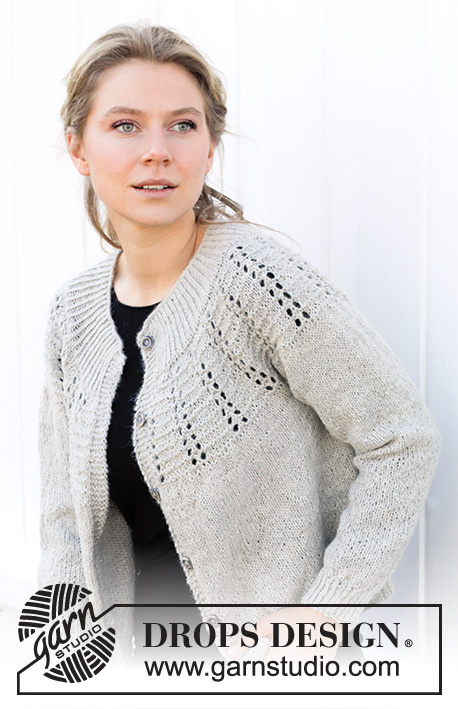
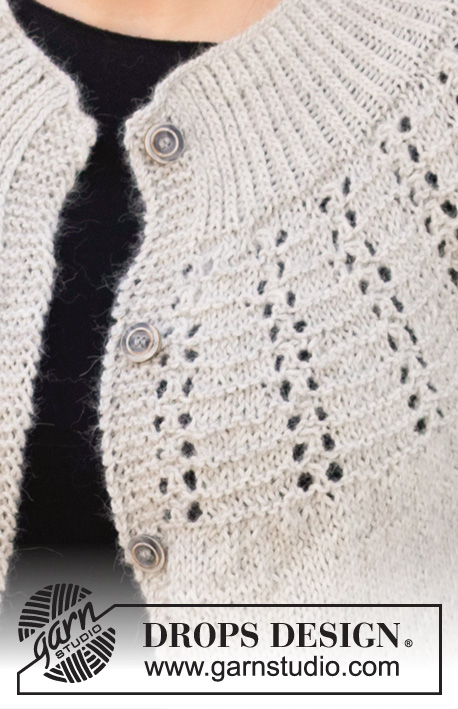
Knitted jacket in DROPS Puna. The piece is worked top down with round yoke, textured pattern and lace pattern. Sizes S - XXXL.
DROPS 217-33 |
||||||||||||||||
|
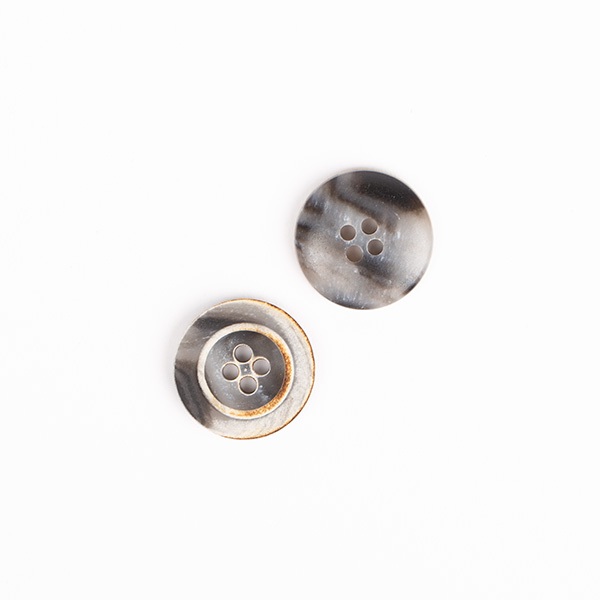
------------------------------------------------------- EXPLANATIONS FOR THE PATTERN: ------------------------------------------------------- RIDGE/GARTER STITCH (worked back and forth): Knit all rows. 1 ridge in height = Knit 2 rows. PATTERN: See diagrams A.1 and A.2 (choose diagram for your size – applies to A.2). The diagrams show all rows in the pattern from the right side. INCREASE TIP (evenly spaced): To work out how to increase evenly, count the total number of stitches on the needle (e.g. 241 stitches) minus bands (e.g. 10 stitches) and divide the remaining stitches by the number of increases to be made (e.g. 24) = 9.6. In this example, increase by making 1 yarn over after alternately each 9th and 10th stitch. Do not increase on bands. On the next row work the yarn overs twisted to avoid holes. DECREASE TIP (for sleeves): Decrease 1 stitch on either side of the marker thread as follows: Work until there are 3 stitches left before the marker thread, knit 2 together, knit 2 (marker thread sits between these 2 stitches), slip 1 stitch as if to knit, knit 1 and pass the slipped stitch over the knitted stitch. BUTTONHOLES: Work buttonholes on the right band (when the garment is worn). Work from the right side when there are 3 stitches left on the row as follows: Make 1 yarn over, knit 2 together and knit 1. On the next row (wrong side), knit the yarn over to leave a hole. The first buttonhole is worked when the rib on the neck measures approx. 1½-2 cm = ½"-¾". Then work the other 5-5-6-6-6-6 buttonholes with approx. 8-8½-9-8-8-8½ cm = 3⅛"-3¼"-3½"-3⅛"-3⅛"-3¼" between each one. BINDING-OFF TIP: To avoid the bind-off edge being tight you can bind off with a larger size needle. If the edge is still tight, make 1 yarn over after approx. each 4th stitch at the same time as binding off; the yarn overs are bind off as normal stitches. ------------------------------------------------------- START THE PIECE HERE: ------------------------------------------------------- JACKET – SHORT OVERVIEW OF THE PIECE: The neck and yoke are worked back and forth with circular needle from mid front and top down. The yoke is divided for body and sleeves and the body continued back and forth. The sleeves are worked in the round with short circular needle/double pointed needles, top down. NECK: Cast on 135-141-147-153-159-165 stitches (including 5 band stitches on each side towards mid front) with circular needle size 3 mm = US 2,5 and Puna. Purl 1 row (= wrong side). Then work rib as follows: ROW 1 (right side): 5 band stitches in GARTER STITCH – read description above, * knit 1 twisted, purl 1 *, work from *-* until there are 6 stitches left on the row, knit 1 twisted and finish with 5 band stitches in garter stitch. ROW 2 (wrong side): 5 band stitches in garter stitch * purl 1 twisted, knit 1 *, work from *-* until there are 6 stitches left on the row, purl 1 twisted and finish with 5 band stitches in garter stitch. Repeat rows 1 and 2 until the rib measures 8 cm = 3⅛" – remember the BUTTONHOLES on the right band – read description above. When the rib is finished, knit 1 row from the right side, AT THE SAME TIME increase 4 stitches evenly – read INCREASE TIP= 139-145-151-157-163-169 stitches. Work 1 row from the wrong side (purl the yarn overs twisted and front band stitches in garter stitch as before). Change to circular needle size 4 mm = US 6. YOKE: Work pattern as follows: 5 band stitches in garter stitch, * A.1 over the next 3 stitches, A.2 (= 3 stitches on the first row) *, work from *-* 21-22-23-24-25-26 times in width, work A.1. Continue back and forth like this. REMEMBER THE KNITTING GAUGE! When A.2 have been completed in height, there are 244-255-289-325-338-351 stitches on the needle. Continue the pattern (without further increases in A.2) until the yoke measures 17-19-20-22-24-26 cm = 6¾"-7½"-8"-8¾"-9½"-10¼" from the cast-on edge – adjust so you finish on a row like the last row in A.2. Change to circular needle size 4.5 mm = US 7. Continue with stockinette stitch with 5 band stitches in garter stitch on each side. AT THE SAME TIME on the first row from the right side increase 22-28-23-23-28-38 stitches evenly spaced – read INCREASE TIP = 266-283-312-348-366-389 stitches. When the piece measures 19-21-22-24-26-28 cm = 7½"-8¼"-8¾"-9½"-10¼"-11" increase 24-31-26-26-32-41 stitches = 290-314-338-374-398-430 stitches. Continue working until the yoke measures 20-22-23-25-27-29 cm = 8"-8¾"-9"-9¾"-10⅝"-11⅜" from the cast-on edge. Now divide the piece for body and sleeves, on the next row from the wrong side, as follows: 5 band stitches in garter stitch, purl 41-45-48-53-58-64 stitches (= right front piece), place the next 58-62-68-76-78-82 stitches on 1 thread for the sleeve and cast on 10-10-12-12-14-14 new stitches on the needle (= in side under sleeve), purl 82-90-96-106-116-128 stitches (= back piece), place the next 58-62-68-76-78-82 stitches on 1 thread for the sleeve and cast on 10-10-12-12-14-14 new stitches on the needle (= in side under sleeve), purl 41-45-48-53-58-64 stitches and work 5 band stitches in garter stitch (= left front piece). Body and sleeves are finished separately. THE PIECE IS NOW MEASURED FROM HERE! BODY: = 194-210-226-246-270-294 stitches. Work stockinette stitch with 5 band stitches in garter stitch on each side. When the piece measures 24-24-25-25-25-25 cm = 9½"-9½"-9¾"-9¾"-9¾"-9¾" from the division, increase 37-41-43-47-53-57 stitches evenly spaced = 231-251-269-293-323-351 stitches. Change to circular needle size 3 mm = US 2,5 and work rib as follows: ROW 1 (right side): 5 band stitches in garter stitch, * knit 1 twisted, purl 1 *, work from *-* until there are 6 stitches left on the row, knit 1 twisted and finish with 5 band stitches in garter stitch. ROW 2 (wrong side): 5 band stitches in garter stitch * purl 1 twisted, knit 1 *, work from *-* until there are 6 stitches left on the row, purl 1 twisted and finish with 5 band stitches in garter stitch. Repeat rows 1 and 2 until the rib measures 4 cm = 1½". Bind off with knit over knit and purl over purl – read BINDING-OFF TIP. The jacket measures approx. 52-54-56-58-60-62 cm = 20½"-21¼"-22"-22¾"-23⅝"-24⅜" from the shoulder down. SLEEVE: Place the 58-62-68-76-78-82 stitches from the thread on the one side of the piece on double pointed needles/short circular needle size 4.5 mm = US 7 and knit up 1 stitch in each of the 10-10-12-12-14-14 stitches cast on under the sleeve = 68-72-80-88-92-96 stitches. Insert a marker thread in the middle of the new stitches under the sleeve (= 5-5-6-6-7-7 new stitches on each side of marker thread). Allow the marker thread to follow your work onwards; it will be used when decreasing under the sleeve. Work stockinette stitch in the round. When the piece measures 4-4-4-4-4-3 cm = 1½"-1½"-1½"-1½"-1½"-1⅛" from the division, decrease under the sleeve – read DECREASE TIP. Decrease like this every 3-3-2-1½-1½-1 cm = 1⅛"-1⅛"-¾"-½"-½"-⅜" a total of 11-12-15-18-19-20 times = 46-48-50-52-54-56 stitches. When the sleeve measures 40-39-38-37-36-34 cm = 15¾"-15¼"-15"-14½"-14¼"-13⅜" (shorter measurements in larger sizes due to longer yoke), increase 6-6-8-8-10-10 stitches evenly spaced = 52-54-58-60-64-66 stitches. Change to double pointed needles size 3 mm = US 2,5 and work rib (= knit 1 twisted, purl 1) for 5 cm = 2". Bind off with knit over knit and purl over purl – remember BINDING-OFF TIP. The sleeve measures approx. 45-44-43-42-41-39 cm = 17¾"-17¼"-17"-16½"-16⅛"-15¼". Work the other sleeve in the same way. ASSEMBLY: Sew the buttons onto the left band. |
||||||||||||||||
Diagram explanations |
||||||||||||||||
|
||||||||||||||||
 |
||||||||||||||||
 |
||||||||||||||||
Have you finished this pattern?Tag your pictures with #dropspattern #mayanmoonshinecardigan or submit them to the #dropsfan gallery. Do you need help with this pattern?You'll find 28 tutorial videos, a Comments/Questions area and more by visiting the pattern on garnstudio.com. © 1982-2026 DROPS Design A/S. We reserve all rights. This document, including all its sub-sections, has copyrights. Read more about what you can do with our patterns at the bottom of each pattern on our site. |
||||||||||||||||








Post a comment to pattern DROPS 217-33
We would love to hear what you have to say about this pattern!
If you want to leave a question, please make sure you select the correct category in the form below, to speed up the answering process. Required fields are marked *.