
Popular categories
Looking for a yarn?


Comments / Questions (48)
![]() Anja wrote:
Anja wrote:
Habe ein Frage zum schliessen der Weste. Es werden ja Bindebänder angehäkelt, verstehe aber das Prinzip des zubindens leider nicht. Auf dem Bild sieht´s aus wie zugeknöpft. Was muß ich tun?
10.09.2013 - 10:02DROPS Design answered:
Liebe Anja, es wird jeweils die Spitze (innen und aussen) mit der Seitennaht verbunden. Sie sehen auf dem Foto ein Stück der dunkelgelben Schleife, das ist kein Knopf.
11.09.2013 - 08:12
![]() Louise wrote:
Louise wrote:
Hej, På vesten står der at der skal hækles 25 cm bånd på hver spids af de to sider. Men hvordan skal de bindes sammen, båndet er jo indenunder vesten for den ene spids? Venlig hilsen Louise
02.06.2013 - 17:24DROPS Design answered:
Hej Louise. Du haekler 1 baand fast paa hver spids paa det höjre og venstre forstykke - og du haekler 1 baand fast i hver sidesöm - den höjre paa indersiden og den venstre paa ydersiden. Saa kan du binde vesten: Venstre spids paa indersiden af höjre sidesöm og höjre spids paa ydersiden af venstre sidesöm.
04.06.2013 - 15:49
![]() Florence Maurincomme wrote:
Florence Maurincomme wrote:
Bonsoir ''Tricoter 10 rangs endroit après la dernière augmentation'' sur le modèle ils ne paraissent pas, et le travail mesure bien 11 cm sans ces 10 rangs. '' Répéter ces diminutions 0-0-11 (19-21) fois au total tous les rangs,'' ne serait ce pas 10-10-11 (19-21) ? merci de me répondre
25.01.2013 - 19:50DROPS Design answered:
Bonjour Madame Maurincomme, en taille 1/3 mois, on augmente 18 fois tous les 2 et 3 rangs alternativement, soit 9 fois (1 rang, 1 augm, 2 rangs, 1 augm = 5 rangs) soit 45 rangs, soit 9 cm (avec l'échantillon de 48 rangs = 10 cm), 10 rangs end = 2 cm environ soit un total de 11 cm. Bon tricot !
26.01.2013 - 10:37
![]() Nancy wrote:
Nancy wrote:
Hallo! Die Frage hat sich erübrigt, keine Antwort mehr nötig! Habe es dann doch verstanden!
01.01.2013 - 21:27
![]() Nancy wrote:
Nancy wrote:
Ich habe eine Frage zur Weste, rechte Seite. Und zwar weiss ich nicht genau was damit gemeint ist: Weiter bei jeder 2. R. (auf der Vorderseite total 28-29-25 (21-23) Mal (- 28-29-36 (40-44) M.). Um eine baldige Antwort wäre ich sehr dankbar!
01.01.2013 - 15:02
![]() Rosamaria wrote:
Rosamaria wrote:
Me pueden aclarar aum 1 nuevo pt de lado del centro del frente
23.09.2012 - 23:46DROPS Design answered:
Rosamaria, gracias por la observación. Debe leerse "aum 1 pt en el lado del centro del frente". Favor imprimir nuevamente todo el patrón, para las correcciones efectuadas.
24.09.2012 - 00:54
![]() Kirsten Krøyer wrote:
Kirsten Krøyer wrote:
Har stadig ikke fået svar på mit spørgsmål af d. 4.8. om montering af bindebånds placering.Den ligger stadig og venter
01.09.2012 - 19:53DROPS Design answered:
Bindebåndet sætter du i hulkanten som du har lavet på sokken.
13.12.2012 - 11:58
![]() Ludmilla wrote:
Ludmilla wrote:
Stickar denna väst i strl 68/74. Mönstret stämmer inte riktigt. Man skall avmaska för ärmhål vid 18 cm och sticka upp till 27cm. Detta ger ett armhål på 9cm höjd. Men när man stickar bakstycket skall man lägga upp ärmhålsmaskorna vid 7,5 cm längd från axeln, 1,5 cm kortare än framstycket.
21.08.2012 - 22:38DROPS Design answered:
Mönstret stämmer. Du startar vid 18 cm och så tar det ett par varv innan du är färdig med avm = 1½ cm, så på bakst så startar du vid 7,5 cm för att vara färdig med ökn vid 9 cm.
25.08.2012 - 02:44
![]() Kirsten Krøyer wrote:
Kirsten Krøyer wrote:
Jeg har lige strikket denne søde sag færdig og skal nu til bindebånd. Det forstår jeg ikke rigtigt - hvor skal de monteres på stykkerne- rund om eller i tipperne?
04.08.2012 - 05:33DROPS Design answered:
I mönstret staar der: Træk snoren op og ned gennem hulkanten på tøflen.
19.09.2012 - 11:32
![]() Mette wrote:
Mette wrote:
Rigtig fin model. Jeg forstår ikke formuleringen "mod midt foran", kan I mon hjælpe?
06.07.2012 - 08:06DROPS Design answered:
Midt foran = kant forstykke. Dvs, saat der "luk 5.og 6.m af fra midt foran" saa skal du taelle fra kanten/1. maske fra forstykket.
10.07.2012 - 14:40
|
|
Honey Suckle#honeysuckleset |
|
 |
 |
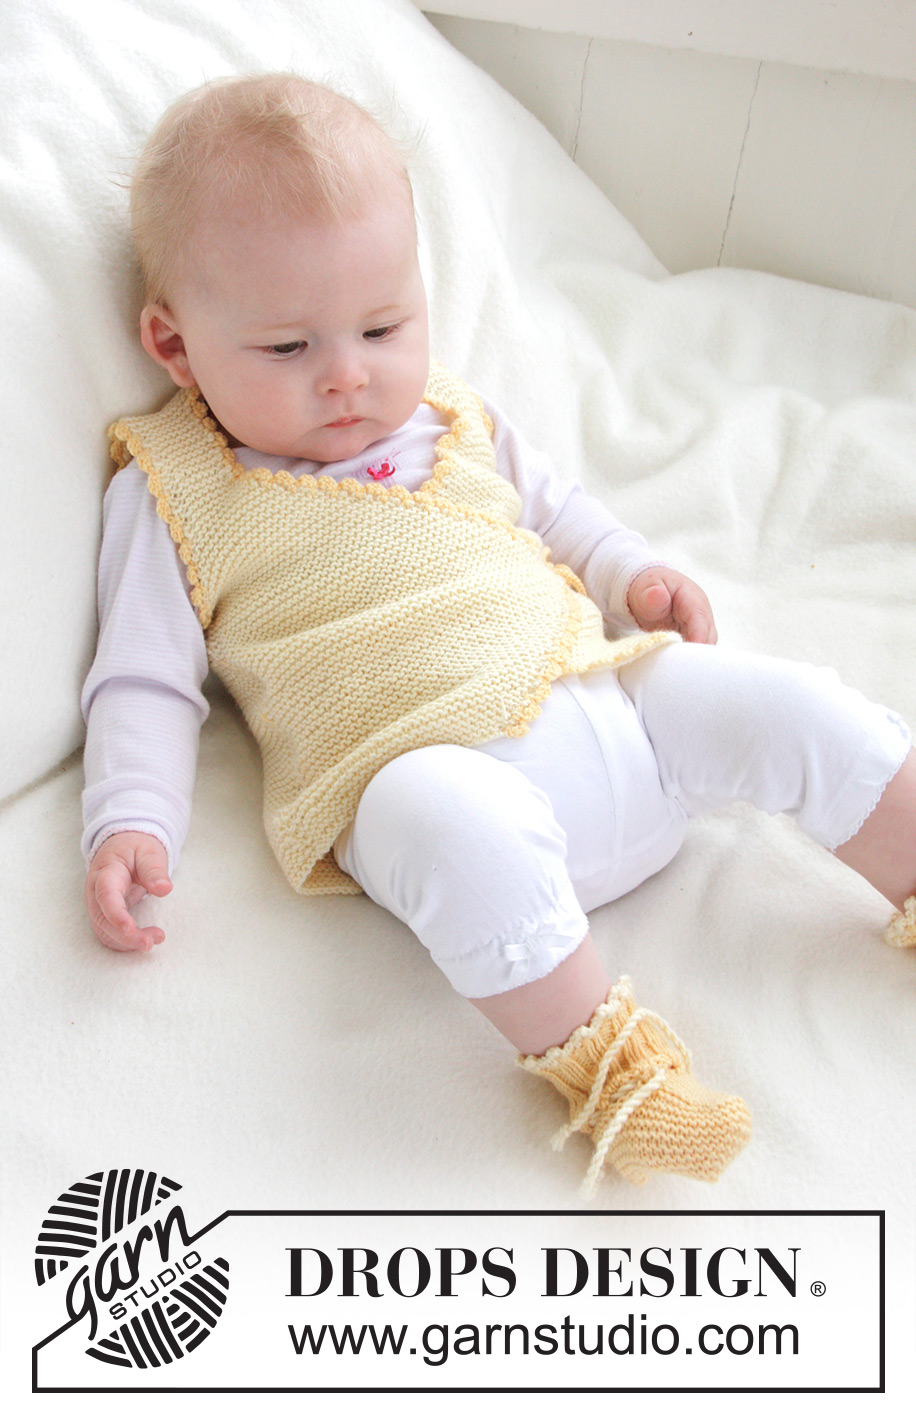
Set of knitted vest and booties in garter st with crochet borders for baby and children in DROPS BabyMerino
DROPS Baby 21-12 |
|
|
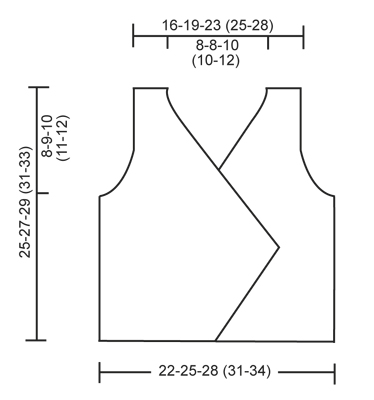
GARTER ST (back and forth on needle): K all rows. INCREASE TIP (applies to front piece): Inc on every other and every 3rd row as follows: Work * 1 row without inc, 1 row with inc towards mid front, 2 rows without inc, 1 row with inc towards mid front *, repeat from *-*. Inc 1 st by working 2 sts in the last st towards mid front. --------------------------------------------------------- VEST: Worked back and forth on needle. Beg with one front piece, work up to shoulder. Work the other front piece, place both front pieces tog and work down the back piece. RIGHT FRONT PIECE: LOOSELY cast on 26-30-34 (37-41) sts on needle size 3 mm / US 2or3 with light yellow. Work in GARTER ST - see explanation above. AT THE SAME TIME on 2nd row cast on 1 new st towards mid front. Repeat inc towards mid front alternately on every other and every 3rd row – READ INCREASE TIP - a total of 18-19-24 (28-30) times = 44-49-58 (65-71) sts. K 10 rows after last inc. Piece measures approx. 11-12-15 (17-18) cm / 4⅜"-4¾"-6" (6¾"-7"). READ ALL OF THE FOLLOWING SECTION BEFORE CONTINUING! On next row dec 1 st towards mid front by K the outermost 2 sts tog. Repeat dec on every row (i.e. at end of rows from RS and in beg of rows WS): a total of 0-0-11 (19-21) times and then on every other row (i.e. at the end of rows from RS): a total of 28-29-25 (21-23) times (28-29-36 (40-44) sts dec in total). AT THE SAME TIME when piece measures 17-18-19 (20-21) cm / 6¾"-7"-7½" (8"-8¼"), bind off for armholes, bind off at the beg of every row from the side: 3 sts 1 time, 2 sts 1 time and 1 st 2 times. After all bind offs there are 9-13-15 (18-20) sts on the needle for shoulder, continue to work. When piece measures 25-27-29 (31-33) cm / 9¾"-10⅝"-11⅜" (12¼"-13"), insert a marker = mid on top of shoulder. Continue to work down the back piece – AT THE SAME TIME cast on 2 new sts at the end of row towards neck, repeat inc at the end of next row towards neck = 13-17-19 (22-24) sts. Slip all sts on a stitch holder – 1st row when continuing on back piece will now beg from RS. LEFT FRONT PIECE: Cast on and work as right front piece but reversed – adjust so that first row when continuing on back piece is worked from RS. BACK PIECE: Work one front piece on to needle (work from armhole and in towards neck), cast on 12-12-16 (16-20) new sts (= back of neck) and work the other front piece on to needle (work from neck out towards armhole) = 38-46-54 (60-68) sts. NOW MEASURE PIECE FROM MARKERS ON SHOULDERS. Continue to work in garter st back and forth on needle. When piece measures 6½-7½-8½ (9½-10½) cm / 2½"-2⅞"-3¼" (3¾"-4¼"), cast on new sts at the end of every row in each side for armholes: 1 st 2 times, 2 sts 1 time and 3 sts 1 time = 52-60-68 (74-82) sts on needle. Continue until piece measures approx. 25-27-29 (31-33) cm / 9¾"-10⅝"-11⅜" (12¼"-13") – fold piece double at markers on shoulders and make sure that front and back pieces are the same length – bind off. ASSEMBLY: Sew side seams tog edge to edge in front loop of outermost sts. CROCHET BORDER: Crochet with yellow on hook size 2 mm / B/1 around the entire opening on vest as follows (do not crochet along the bottom edge): 1 sc in first st, * ch 3, 1 dc in first ch, skip 2 sts / 4 rows in garter st, 1 sc in next st *, repeat from *-*, when you get to the tip on front piece, crochet a tie as follows: 1 sc in tip, then ch for approx. 25 cm / 9¾", turn and work 1 sl st in every ch on return row, then work 1 sc in tip of front piece again, continue crochet border around the neck of vest until the tip of the other front piece, crochet another tie as on first front piece and continue until bottom edge. Work the same way around both armholes. Then work another tie, similar to the one in each tip, on the inside of the seam in the right side and on the outside of the seam in the left side – make sure that the ties are at the same height as tips on front pieces. ---------------------------------------------------------- BOOTIES: Size: 1/3 - 6/9 - 12/18 months (2) years To fit foot length: 10-11-12 (14) cm / 4"-4⅜"-4¾" (5½") The bootee is worked back and forth from mid back. Cast on 48-52-56 (56) sts on needle size 2.5 mm / US 1or2 with 2 strands yellow Baby Merino. Remove 1 strand and work rib (= K 2/P 2) for 5-6-6 (7) cm / 2"-2½"-2½" (2¾") – adjust so that next row is worked from WS. P 1 row from WS while at the same time dec 14-14-18 (14) sts evenly = 34-38-38 (42) sts. On next row work an eyelet row as follows from RS: K 1, *K 2 tog, 1 YO *, repeat from *-* and finish with K 1. P 1 row from WS. Slip the outermost 12-13-13 (15) sts in each side on a stitch holder. Work 4-4½-5½ (6½) cm / 1½"-1¾"-2¼" (2½") in stockinette st over the middle 10-12-12 (12) sts. Slip sts from stitch holders back on needle and knit up 10-11-13 (16) sts on each side of mid piece = 54-60-64 (74) sts on needle. K every row over all sts for 3-4-5 (5) cm / 1⅛"-1½"-2" (2") while at the same time after 1½-2-2½ (3) cm / ½"-¾"-⅞" (1⅛"), start dec on every other row as follows until completed: Dec 1 st at the beg and the end of row and K 2 tog on each side of the 2 mid sts. Bind off and sew tog mid under foot and continue up mid back in front loop of outermost sts to avoid a chunky seam. Knit another bootee the same way. TIES: Cut 3 strands light yellow of approx. 1 meter/1.1 yds each, twine them tightly tog, fold them double and they will twine again, tie a knot in each end. Thread tie up and down through the eyelet row on booties . CROCHET BORDER: With hook size 2.5 mm/B/1 and light yellow crochet a border at the top of booties as follows: 1 sc in first st, * ch 3, 1 dc in 1st ch, 1 sc in each of the 3 next sts on bootee *, repeat from *-* and finish with 1 sl st in sc from beg of round. |
|
 |
|
Have you finished this pattern?Tag your pictures with #dropspattern #honeysuckleset or submit them to the #dropsfan gallery. Do you need help with this pattern?You'll find 16 tutorial videos, a Comments/Questions area and more by visiting the pattern on garnstudio.com. © 1982-2026 DROPS Design A/S. We reserve all rights. This document, including all its sub-sections, has copyrights. Read more about what you can do with our patterns at the bottom of each pattern on our site. |
|


With over 40 years in knitting and crochet design, DROPS Design offers one of the most extensive collections of free patterns on the internet - translated to 17 languages. As of today we count 325 catalogs and 12298 patterns - 12288 of which are translated into English (US/in).
We work hard to bring you the best knitting and crochet have to offer, inspiration and advice as well as great quality yarns at incredible prices! Would you like to use our patterns for other than personal use? You can read what you are allowed to do in the Copyright text at the bottom of all our patterns. Happy crafting!
Post a comment to pattern DROPS Baby 21-12
We would love to hear what you have to say about this pattern!
If you want to leave a question, please make sure you select the correct category in the form below, to speed up the answering process. Required fields are marked *.