
Popular categories
Looking for a yarn?


Comments / Questions (46)
![]() Lisa wrote:
Lisa wrote:
Bonjour Je trouve que vos explications ne sont pas assez claires . J'ai tricoté le devant droit , monté 2m puis 22m côté encolure, et là , j'avoue que je suis perdue ... Que dois-je faire maintenant ? Ce n'est pas très détaillé ! Merci pour votre réponse .
19.04.2020 - 16:43DROPS Design answered:
Bonjour Lisa, je suis désolée, je ne comprends pas votre question, quelle taille tricotez-vous? Où en êtes-vous rendue exactement? Merci pour ces informations complémentaires qui seront utiles pour vous aider, à bientôt!
20.04.2020 - 10:32
![]() Laura Menegatti wrote:
Laura Menegatti wrote:
Scusate, nell'ultima frase della mia domanda appena inviata, volevo dire "dopo di che si andrà a fare le diminuzioni". Grazie
29.06.2017 - 18:52
![]() Laura Menegatti wrote:
Laura Menegatti wrote:
Buon pomeriggio. Per favore, cosa significa aumentare 1 m. verso il centro? Vuol dire lavorare 2 volte 1 m. davanti e dietro (con un kf&b o altro tipo di aumento) in modo che il davanti (la parte che sta sopra, per intenderci) deve andare ad allargarsi fino ad un certo punto, che si comincerà diminuire? Grazie e buon lavoro
29.06.2017 - 18:50DROPS Design answered:
Buonasera Laura. Sì è corretto. Devo aumentare come indicato nel suggerimento per gli aumenti in modo da formare la punta. Buon lavoro!
29.06.2017 - 21:02
![]() Marie wrote:
Marie wrote:
Die ersten 19 Maschen, die man aufnehmen soll ab der 2. Reihe, sind die dann jede Reihe oder alle Zwei Reihen? Danke
23.06.2017 - 19:22DROPS Design answered:
Liebe Marie, diese Zunahmen (gegen die Mitte) sollen abwechselnd in jeder 2. und 3. Reihe gestrickt (siehe hier. Anleitung wird korrigiert, danke. Viel Spaß beim stricken!
26.06.2017 - 09:30
![]() Nicki wrote:
Nicki wrote:
Hallo, beim rechten Vorderteil, nach den 18 cm soll man an der Seite Maschen abketten. Ist damit der Seitenrand und nicht hin zur vorderen Mitte gemeint? Sollen die letzten 2 Maschen am Rand abgkettet werden? Und in welchem Abstand? 1 Mal 2M, 1 Mal 3M.. wieviele Reihen soll dazwischen normal gestrickt werden? Ich freue mich auf badige Antwort.
15.05.2017 - 23:16DROPS Design answered:
Liebe Nicki, die Abnahmen werden gegen die vordere Mitte gearbeitet, bei jeder R. (also bei der Hin- und Rückreihe = dh die 2 ersten oder die 2 letzten M. zs stricken) wiederholen: Total 0-0-11 (19-21) Mal. Dann bei jeder 2. R. (auf der Vorderseite = die 2 ersten M zs stricken)) total 28-29-25 (21-23) Mal. Viel Spaß beim stricken!
16.05.2017 - 08:46Maria Gold-Tajalli wrote:
Ich habe zwei Fragen:am Ende der Anleitung für die rechten Seite was heißt das mit dem markieren, auf welcher Seite? und wo soll ich die zusätzlichen 4 Maschen anschlagen, in der Mitte oder an einem Ende? Danke, Maria
15.03.2017 - 11:59DROPS Design answered:
Liebe Frau Gold-Tajalli, der Markierer muss die Länge markieren, so er muss zwischen den Maschen eingesetzt werden. Die 2 x 2 M sollen gegen den Halsausschnit angeschlagen, dh bei dem rechten Vorderteil schlagen Sie diese Maschen am Ende einer Rückreihe an. Viel Spaß beim stricken!
15.03.2017 - 12:03
![]() Stephanie wrote:
Stephanie wrote:
Hallo Drops-Team, bitte erklärt mir doch kurz die Zunahmen - ist es richtig, dass sich sich die Zunahmen mal am Anfang einer Hin-Reihe befinden und mal am Ende einer Rück-Reihe? Oder nimmt man am Anfang jeder 2. und 3. Hin-Reihe auf? Danke und liebe Grüße!
03.08.2016 - 10:55DROPS Design answered:
Liebe Stephanie, ja, da abwechselnd 1 und 2 Reihen ohne Zunahmen über die Zunahmereihe gestrickt werden, muss die Zunahme auch je nachdem in der Hin- oder Rück-R gemacht werden.
08.08.2016 - 09:38
![]() Selam wrote:
Selam wrote:
Thanks Then does that mean it can be done from both RS or WS?
01.07.2015 - 10:18DROPS Design answered:
Yes Selam, that's correct, you will inc towards mid front, so that it can be either from RS or from WS, depending on the inc row (every 3rd row). Happy knitting!
01.07.2015 - 12:47Selam wrote:
Hi does the increase on the front piece occur on the first stich? Thanks
01.07.2015 - 08:26DROPS Design answered:
Dear Selam, that's right, you inc 1 st by working 2 sts in the outermost st towards mid front (see also Increase tip). Happy knitting!
01.07.2015 - 09:57
![]() Aurelie wrote:
Aurelie wrote:
Bonjour, Vaut-il mieux tricoter ce modèle avec le petit pull en baby merinos ou en babysilk alpaga pour la douceur? Le nombre de pelote reste t il le même? Merci
01.05.2015 - 08:08DROPS Design answered:
Bonjour Aurélie, tout est question de choix personnel, Baby Alpaca Silk conviendrait également (Groupe A toutes les 2), demandez conseil à votre magasin, il pourra vous aider et vous orienter. Cliquez ici pour savoir comment calculer la quantité d'une équivalence.. Bon triccot!
02.05.2015 - 14:21
|
|
Honey Suckle#honeysuckleset |
|
 |
 |
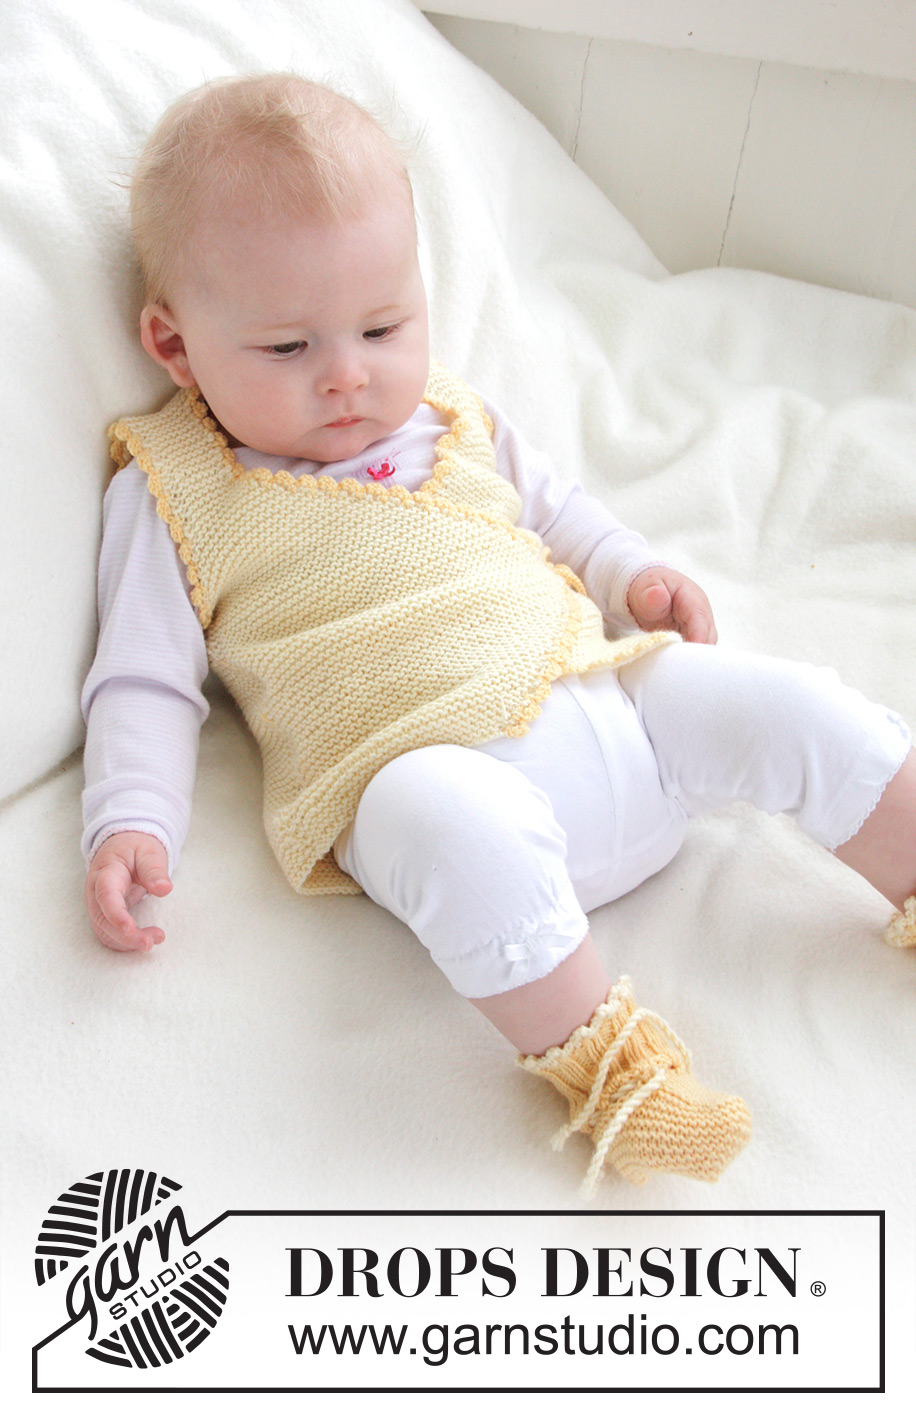
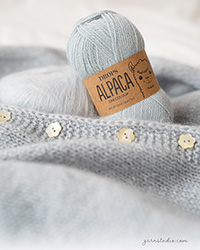
Set of knitted vest and booties in garter st with crochet borders for baby and children in DROPS BabyMerino
DROPS Baby 21-12 |
|
|
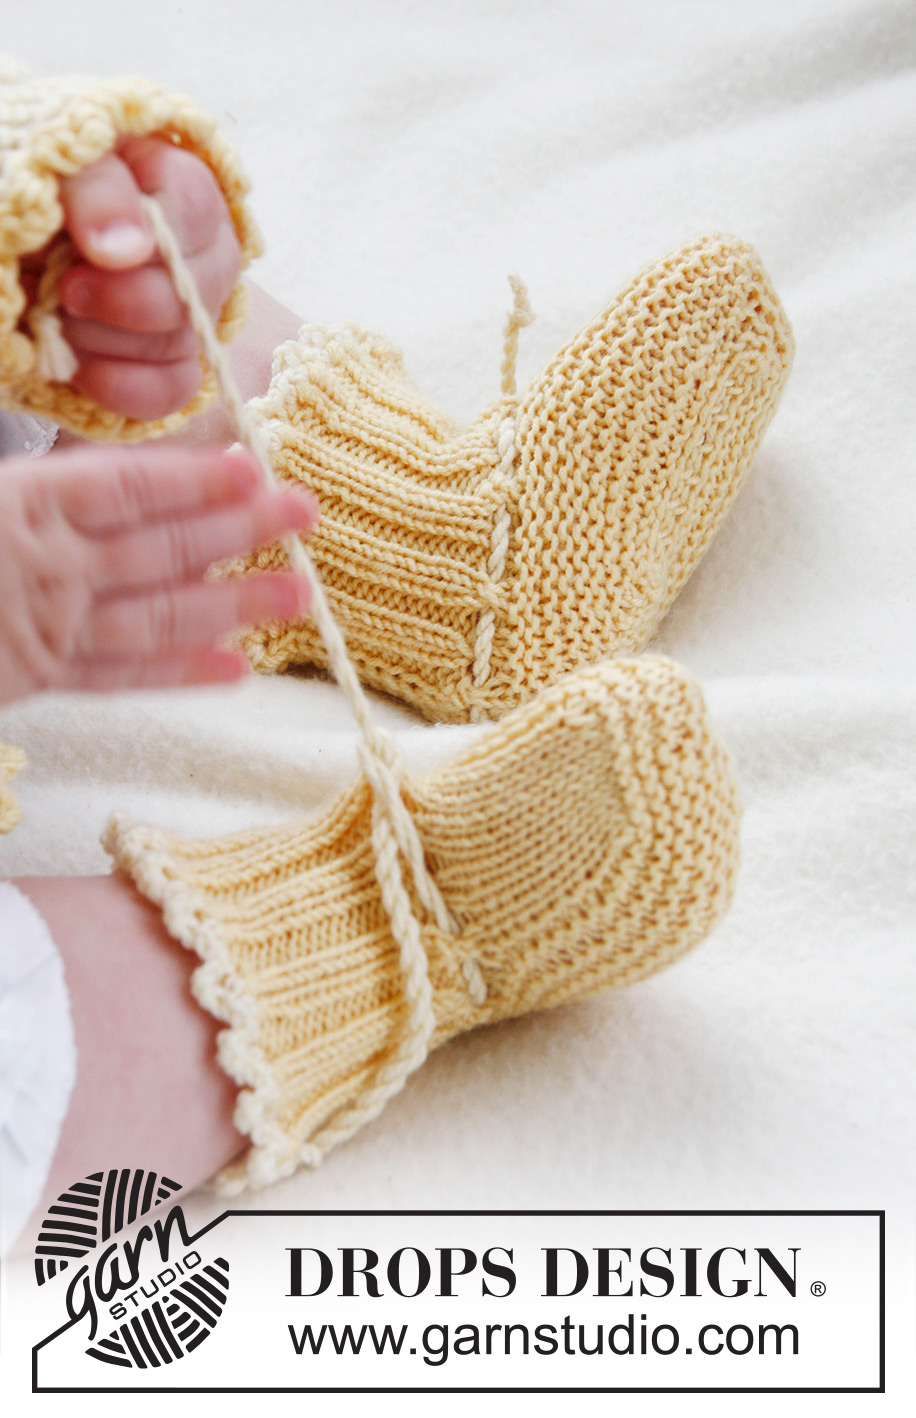
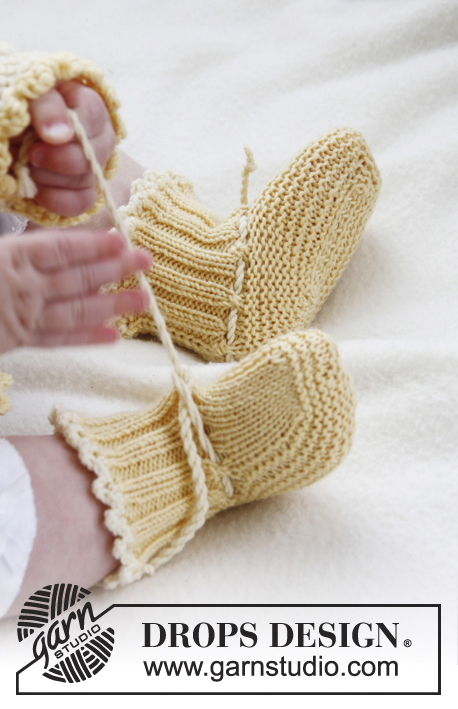
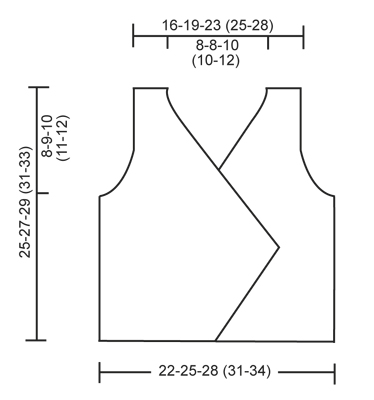
GARTER ST (back and forth on needle): K all rows. INCREASE TIP (applies to front piece): Inc on every other and every 3rd row as follows: Work * 1 row without inc, 1 row with inc towards mid front, 2 rows without inc, 1 row with inc towards mid front *, repeat from *-*. Inc 1 st by working 2 sts in the last st towards mid front. --------------------------------------------------------- VEST: Worked back and forth on needle. Beg with one front piece, work up to shoulder. Work the other front piece, place both front pieces tog and work down the back piece. RIGHT FRONT PIECE: LOOSELY cast on 26-30-34 (37-41) sts on needle size 3 mm / US 2or3 with light yellow. Work in GARTER ST - see explanation above. AT THE SAME TIME on 2nd row cast on 1 new st towards mid front. Repeat inc towards mid front alternately on every other and every 3rd row – READ INCREASE TIP - a total of 18-19-24 (28-30) times = 44-49-58 (65-71) sts. K 10 rows after last inc. Piece measures approx. 11-12-15 (17-18) cm / 4⅜"-4¾"-6" (6¾"-7"). READ ALL OF THE FOLLOWING SECTION BEFORE CONTINUING! On next row dec 1 st towards mid front by K the outermost 2 sts tog. Repeat dec on every row (i.e. at end of rows from RS and in beg of rows WS): a total of 0-0-11 (19-21) times and then on every other row (i.e. at the end of rows from RS): a total of 28-29-25 (21-23) times (28-29-36 (40-44) sts dec in total). AT THE SAME TIME when piece measures 17-18-19 (20-21) cm / 6¾"-7"-7½" (8"-8¼"), bind off for armholes, bind off at the beg of every row from the side: 3 sts 1 time, 2 sts 1 time and 1 st 2 times. After all bind offs there are 9-13-15 (18-20) sts on the needle for shoulder, continue to work. When piece measures 25-27-29 (31-33) cm / 9¾"-10⅝"-11⅜" (12¼"-13"), insert a marker = mid on top of shoulder. Continue to work down the back piece – AT THE SAME TIME cast on 2 new sts at the end of row towards neck, repeat inc at the end of next row towards neck = 13-17-19 (22-24) sts. Slip all sts on a stitch holder – 1st row when continuing on back piece will now beg from RS. LEFT FRONT PIECE: Cast on and work as right front piece but reversed – adjust so that first row when continuing on back piece is worked from RS. BACK PIECE: Work one front piece on to needle (work from armhole and in towards neck), cast on 12-12-16 (16-20) new sts (= back of neck) and work the other front piece on to needle (work from neck out towards armhole) = 38-46-54 (60-68) sts. NOW MEASURE PIECE FROM MARKERS ON SHOULDERS. Continue to work in garter st back and forth on needle. When piece measures 6½-7½-8½ (9½-10½) cm / 2½"-2⅞"-3¼" (3¾"-4¼"), cast on new sts at the end of every row in each side for armholes: 1 st 2 times, 2 sts 1 time and 3 sts 1 time = 52-60-68 (74-82) sts on needle. Continue until piece measures approx. 25-27-29 (31-33) cm / 9¾"-10⅝"-11⅜" (12¼"-13") – fold piece double at markers on shoulders and make sure that front and back pieces are the same length – bind off. ASSEMBLY: Sew side seams tog edge to edge in front loop of outermost sts. CROCHET BORDER: Crochet with yellow on hook size 2 mm / B/1 around the entire opening on vest as follows (do not crochet along the bottom edge): 1 sc in first st, * ch 3, 1 dc in first ch, skip 2 sts / 4 rows in garter st, 1 sc in next st *, repeat from *-*, when you get to the tip on front piece, crochet a tie as follows: 1 sc in tip, then ch for approx. 25 cm / 9¾", turn and work 1 sl st in every ch on return row, then work 1 sc in tip of front piece again, continue crochet border around the neck of vest until the tip of the other front piece, crochet another tie as on first front piece and continue until bottom edge. Work the same way around both armholes. Then work another tie, similar to the one in each tip, on the inside of the seam in the right side and on the outside of the seam in the left side – make sure that the ties are at the same height as tips on front pieces. ---------------------------------------------------------- BOOTIES: Size: 1/3 - 6/9 - 12/18 months (2) years To fit foot length: 10-11-12 (14) cm / 4"-4⅜"-4¾" (5½") The bootee is worked back and forth from mid back. Cast on 48-52-56 (56) sts on needle size 2.5 mm / US 1or2 with 2 strands yellow Baby Merino. Remove 1 strand and work rib (= K 2/P 2) for 5-6-6 (7) cm / 2"-2½"-2½" (2¾") – adjust so that next row is worked from WS. P 1 row from WS while at the same time dec 14-14-18 (14) sts evenly = 34-38-38 (42) sts. On next row work an eyelet row as follows from RS: K 1, *K 2 tog, 1 YO *, repeat from *-* and finish with K 1. P 1 row from WS. Slip the outermost 12-13-13 (15) sts in each side on a stitch holder. Work 4-4½-5½ (6½) cm / 1½"-1¾"-2¼" (2½") in stockinette st over the middle 10-12-12 (12) sts. Slip sts from stitch holders back on needle and knit up 10-11-13 (16) sts on each side of mid piece = 54-60-64 (74) sts on needle. K every row over all sts for 3-4-5 (5) cm / 1⅛"-1½"-2" (2") while at the same time after 1½-2-2½ (3) cm / ½"-¾"-⅞" (1⅛"), start dec on every other row as follows until completed: Dec 1 st at the beg and the end of row and K 2 tog on each side of the 2 mid sts. Bind off and sew tog mid under foot and continue up mid back in front loop of outermost sts to avoid a chunky seam. Knit another bootee the same way. TIES: Cut 3 strands light yellow of approx. 1 meter/1.1 yds each, twine them tightly tog, fold them double and they will twine again, tie a knot in each end. Thread tie up and down through the eyelet row on booties . CROCHET BORDER: With hook size 2.5 mm/B/1 and light yellow crochet a border at the top of booties as follows: 1 sc in first st, * ch 3, 1 dc in 1st ch, 1 sc in each of the 3 next sts on bootee *, repeat from *-* and finish with 1 sl st in sc from beg of round. |
|
 |
|
Have you finished this pattern?Tag your pictures with #dropspattern #honeysuckleset or submit them to the #dropsfan gallery. Do you need help with this pattern?You'll find 16 tutorial videos, a Comments/Questions area and more by visiting the pattern on garnstudio.com. © 1982-2026 DROPS Design A/S. We reserve all rights. This document, including all its sub-sections, has copyrights. Read more about what you can do with our patterns at the bottom of each pattern on our site. |
|


With over 40 years in knitting and crochet design, DROPS Design offers one of the most extensive collections of free patterns on the internet - translated to 17 languages. As of today we count 324 catalogs and 12190 patterns - 12180 of which are translated into English (US/in).
We work hard to bring you the best knitting and crochet have to offer, inspiration and advice as well as great quality yarns at incredible prices! Would you like to use our patterns for other than personal use? You can read what you are allowed to do in the Copyright text at the bottom of all our patterns. Happy crafting!
Post a comment to pattern DROPS Baby 21-12
We would love to hear what you have to say about this pattern!
If you want to leave a question, please make sure you select the correct category in the form below, to speed up the answering process. Required fields are marked *.