
Popular categories
Looking for a yarn?


Comments / Questions (4)
![]() Elke Griesel wrote:
Elke Griesel wrote:
Dank ihrer freundlichen Hilfe habe ich den linken Handschuh fertig. Eine letzte Frage noch: Unterscheiden sich der rechte und linke beim stricken. Auch beim rechten wird ja der Marker für den Daumen zu Beginn der Reihe gesetzt?
03.12.2025 - 23:41DROPS Design answered:
Liebe Frau Griesel, es freut mich :) beim linken Handschuh hat man die letzte Masche der Runde markiert, beim rechten Handschuh wird man die erste Masche markieren, sonnst sind sie gleich. Viel Spaß beim Stricken!
04.12.2025 - 09:21
![]() Elke Griesel wrote:
Elke Griesel wrote:
Leider hab ich noch eine Frage. Im Vidio erfolgt nach der Zeichnung der Daumenzunahme und so wird es dort auch getrickt, in jeder Reihe eine Zunahme links und rechts der markierten Masche. In der Anleitung steht "In dieser Weise in jeder 3. Runde insgesamt 5-6-7 x in der Höhe zunehmen = 54-58-62 Maschen." Also abweichend von dem Vidio nur in jeder 3. Reihe zunehmen für den Daumenkeil? Herzlichen Dank bereits jetzt für die nochmalige Hilfe.
02.12.2025 - 15:11DROPS Design answered:
Liebe Frau Griesel, im Video zeigen wir nur die Technik, dann je nach dem Modell können die Zunahmen anders gestrickt werden, so hier sollen Sie für den Daumen in jeder 3. Runde zunehmen. Viel Spaß beim Stricken!
02.12.2025 - 17:36
![]() Elke Griesel wrote:
Elke Griesel wrote:
Vielen Dank, ich hab noch mal aufgetrennt, da ich tatsächlich nicht bedacht habe, daß das Bündchen nach dem Filzen noch kürzer wird. Könnten Sie mir bitte noch sagen, wie breit der Handschuh vor dem Filzen ist? Leider wird nur die Länge angegeben.
02.12.2025 - 13:38DROPS Design answered:
Liebe Griesel, so was haben wir leider nicht, aber sollte Ihre Maschenprobe in der Breite stimmen, dann sollten die Handschuhen wie beim Foto aussehen- wenn Sie dann 44-46-48 Maschen Glattrechts haben, dann sind es ca 28-29-30 cm Umfang vor dem Filzen und ca 18-19-22 cm danach - siehe Maschenprobe vor/nach Filzen. Viel Spaß beim Stricken!
02.12.2025 - 17:29
![]() Elke Griesel wrote:
Elke Griesel wrote:
Kann an nach dem Bündchen auch glatt rechts stricken? Außerdem erschein mir das Bündchen sehr weit. Legt es nicht eng am Handgelenk an?
01.12.2025 - 16:56DROPS Design answered:
Liebe Frau Griesel, das Bündchen ist 7 oder 8 cm hoch (mit Abnahmen nach 3 cm), dann wird man Glattrechts stricken - wenn Sie das Bündchen kürzer stricken, denken Sie daran, daß es nach Filzen noch kürzer wird. Viel Spaß beim Stricken!
02.12.2025 - 08:56
|
|
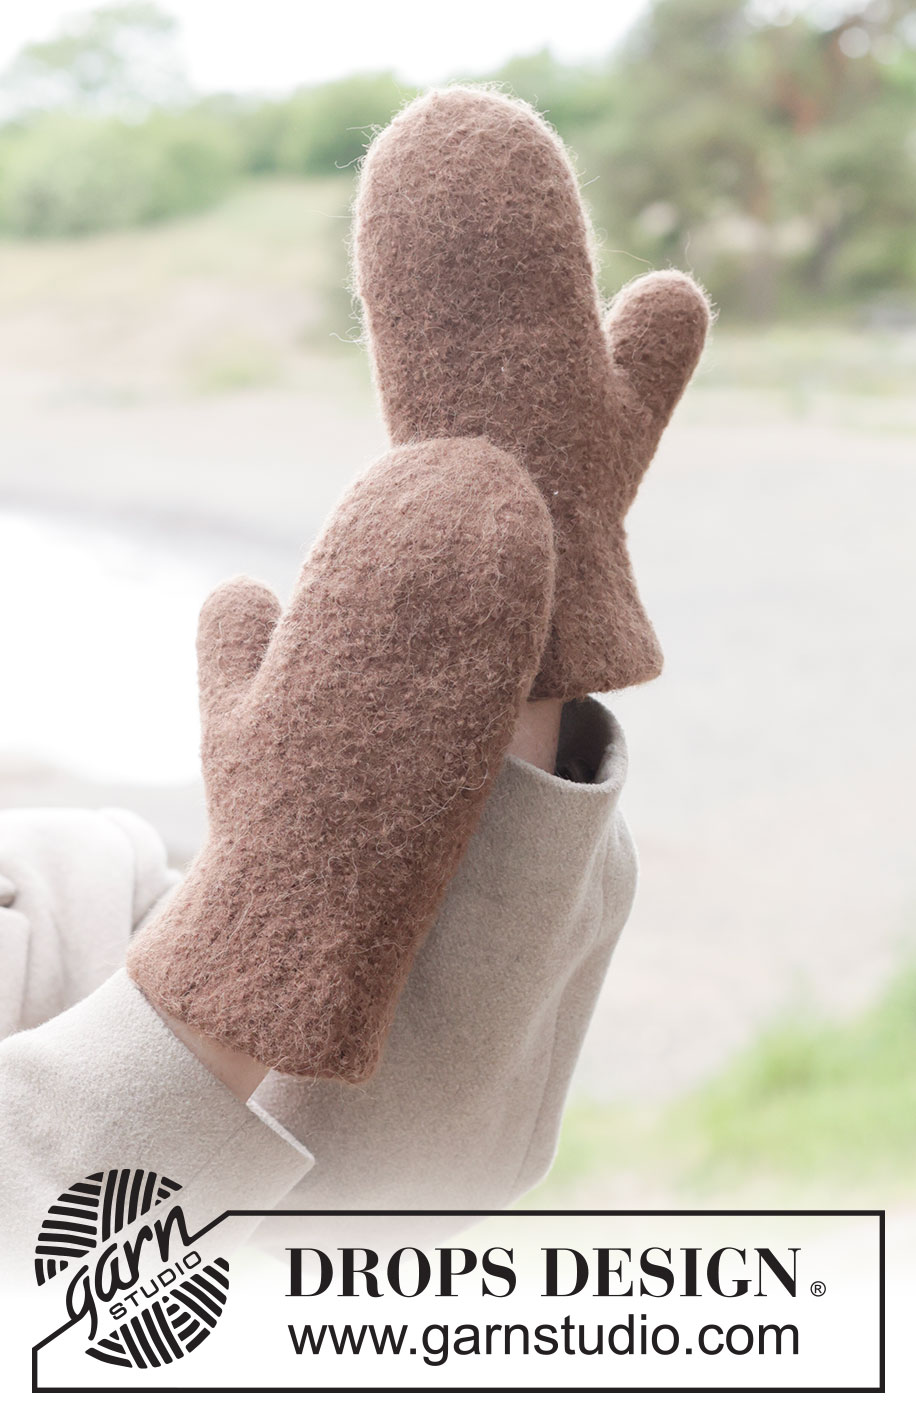
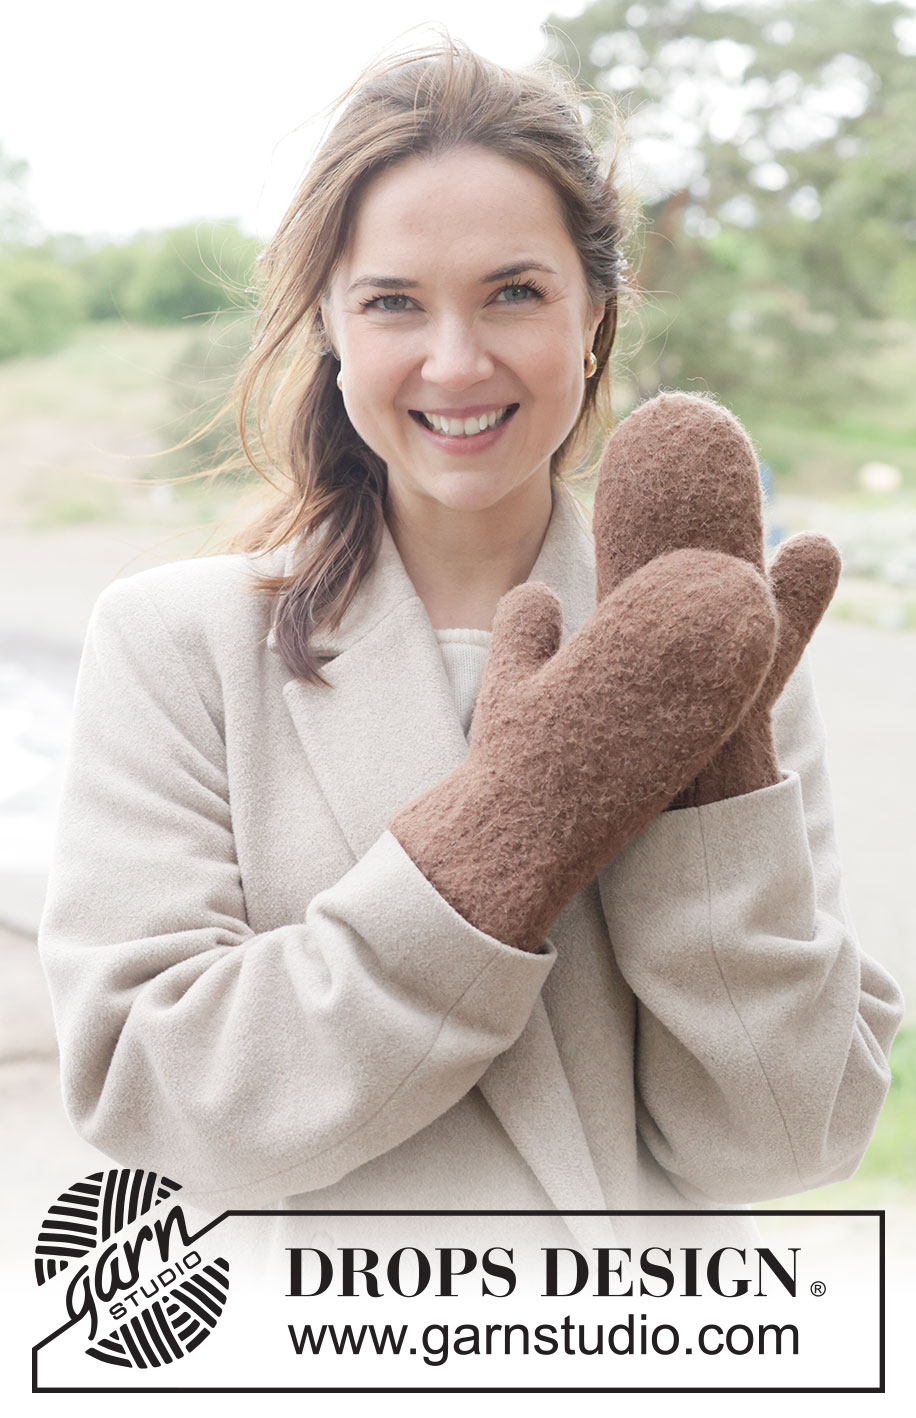
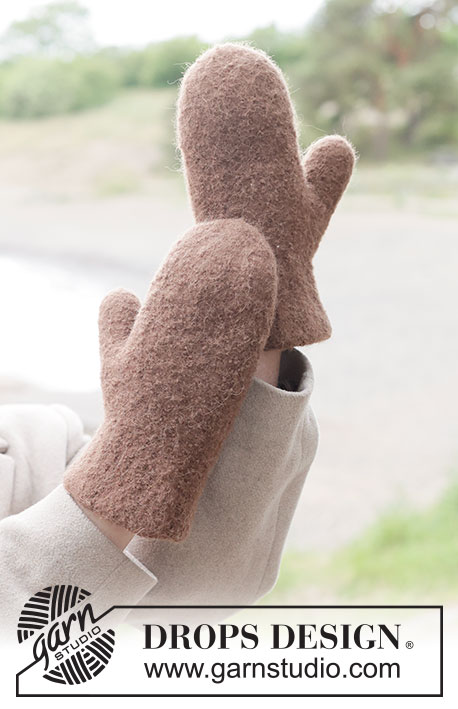
Chestnut Cuddle Mittens#chestnutcuddlemittens |
|
 |
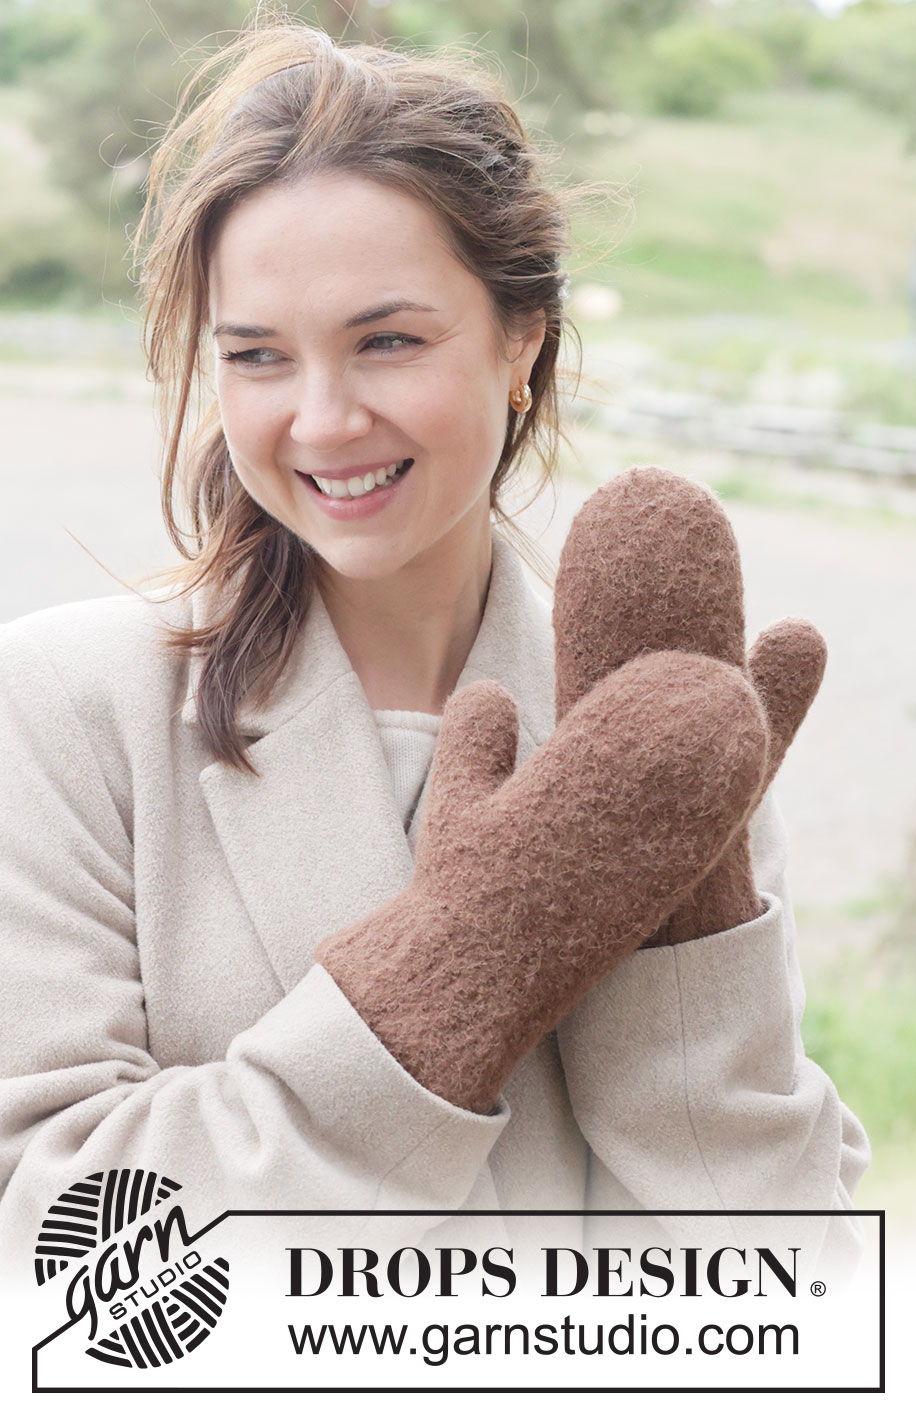 |
Knitted and felted mittens in DROPS Nepal.
DROPS 261-52 |
|
|
------------------------------------------------------- EXPLANATIONS FOR THE PATTERN: ------------------------------------------------------- INCREASE TIP (for thumb-gusset): Increase by making 1 yarn over which is knitted twisted on the next round. Subsequent increases are worked on the outside of the earlier increases. DECREASE TIP: Start 3 stitches before the marker-stitch, knit 2 together, knit 3 (marker-stitch middle of these 3 stitches). slip 1 stitch knit-wise, knit 1 and pass the slipped stitch over the knitted stitch (2 stitches decreased). ------------------------------------------------------- START THE PIECE HERE: ------------------------------------------------------- MITTENS – SHORT OVERVIEW OF THE PIECE: The piece is worked in the round with double pointed needles, from the cuff upwards. If there is a «0» in your chosen size, skip the information and go straight to the next instruction. LEFT MITTEN: Cast on 48-48-54 stitches with double pointed needles size 5.5 MM = US 9 and DROPS Nepal. Work rib in the round (knit 3 twisted, purl 3) for 3 cm = 1⅛". Now decrease while working rib as follows: * Knit 1 twisted, knit 2 twisted together, purl 3 *, work from *-* to end of round = 40-40-45 stitches. Continue this rib (knit 2 twisted, purl 3) until the piece measures 7-8-8 cm = 2¾"-3⅛"-3⅛". Insert 1 marker in the last stitch on the round (= thumb-stitch). Knit 1 round and increase 4-6-3 stitches evenly spaced = 44-46-48 stitches. Work stockinette stitch and increase 1 stitch on each side of the marker-stitch for the thumb-gusset (2 increased stitches) – read INCREASE TIP. Increase like this every 3rd round a total of 5-6-7 times = 54-58-62 stitches. Remember to maintain the knitting gauge. Continue working until the piece measures 15-17-18 cm = 6"-6¾"-7", the increases for the thumb-gusset should be finished. Place the marker-stitch, the 10-12-14 increased stitches and 1 stitch on each side of these stitches on a thread/stitch holder = 13-15-17 thumb-stitches. Continue stockinette stitch in the round, casting on 3 stitches behind the thumb-stitches = 44-46-48 stitches. Work until the piece measures 13-13-13½ cm = 5⅛"-5⅛"-5⅜" from the 3 cast-on stitches. The mitten measures approx. 28-30-31½ cm = 11"-11¾"-12⅜" from the cast-on edge. Now decrease for the top of the mitten. Insert 1 marker in the first stitch and 1 marker in the 23rd-24th-25th stitch, with 21-22-23 stitches between the marker-stitches both on top of and underneath the mitten. On the next round decrease 1 stitch on each side of both marker-stitches – read DECREASE TIP (4 decreased stitches). Decrease like this every 2nd round a total of 3-3-3 times, then every round 5-6-6 times = 12-10-12 stitches. On the next round knit all stitches together 2 and 2 = 6-5-6 stitches. Cut the strand, thread it through the remaining stitches, tighten and fasten well. The mitten measures approx. 33-35½-37 cm = 13"-13⅞"-14½". THUMB: The thumb is worked in the round in stockinette stitch. Place the 13-15-17 thumb-stitches on double pointed needles size 5.5 MM = US 9. In addition, knit up 3 stitches in each of the cast-on stitches behind the thumb = 16-18-20 stitches. Work stockinette stitch in the round for 8-8½-9½ cm = 3⅛"-3¼"-3⅝". On the next round knit all stitches together 2 and 2 = 8-9-10 stitches. Cut the strand, thread it through the remaining stitches, tighten and fasten well. RIGHT MITTEN: Cast on 48-48-54 stitches with double pointed needles size 5.5 MM = US 9 and DROPS Nepal. Work rib in the same way as the left mitten until the piece measures 7-8-8 cm = 2¾"-3⅛"-3⅛". Insert 1 marker in the first stitch on the round (= thumb-stitch). Knit 1 round and increase 4-6-3 stitches evenly spaced = 44-46-48 stitches. Finish in the same way as the left mitten. FELTING: To avoid the thumb being felted to the mitten, turn it inside out and fasten a small plastic bag/silk ribbon over the top of the thumb with a safety pin. The opening of the safety pin should point towards the tip of the thumb so it is easy to remove after felting. Turn the mitten back to the right side, with the bag/ribbon inside the thumb. The piece can be felted either in the washing machine or the tumble dryer – read description below. Remember: Subsequent washes are as for a normal wool garment. IN WASHING MACHINE: Washing machines will vary when felting. If the piece is not felted enough, it can be felted again. If it is felted too much, it can be stretched to the correct size while still wet. DO THE FOLLOWING: Lay the piece in the washing machine and use a programme of approx. 40 minutes (not a wool programme). Wash at 40 degrees C = 104 degrees F without pre-wash, detergent is optional. After washing, shape the piece while it is still wet. IN TUMBLE DRYER: Felting in a tumble dryer gives good control over the degree of felting. The tumble dryer can be opened during drying to check the size of the piece. If it is not felted enough it can be thoroughly wetted and felted again. If it is felted too much it can be stretched to the correct size while still wet. DO THE FOLLOWING: Lay the piece in water so it becomes completely wet, then place it in the tumble dryer and begin the drying process. Dry to the desired size, checking regularly. |
|
Have you finished this pattern?Tag your pictures with #dropspattern #chestnutcuddlemittens or submit them to the #dropsfan gallery. Do you need help with this pattern?You'll find 23 tutorial videos, a Comments/Questions area and more by visiting the pattern on garnstudio.com. © 1982-2026 DROPS Design A/S. We reserve all rights. This document, including all its sub-sections, has copyrights. Read more about what you can do with our patterns at the bottom of each pattern on our site. |
|


With over 40 years in knitting and crochet design, DROPS Design offers one of the most extensive collections of free patterns on the internet - translated to 17 languages. As of today we count 325 catalogs and 12298 patterns - 12288 of which are translated into English (US/in).
We work hard to bring you the best knitting and crochet have to offer, inspiration and advice as well as great quality yarns at incredible prices! Would you like to use our patterns for other than personal use? You can read what you are allowed to do in the Copyright text at the bottom of all our patterns. Happy crafting!
Post a comment to pattern DROPS 261-52
We would love to hear what you have to say about this pattern!
If you want to leave a question, please make sure you select the correct category in the form below, to speed up the answering process. Required fields are marked *.