
Popular categories
Looking for a yarn?


Comments / Questions (25)
![]() Bea wrote:
Bea wrote:
Ein Verbesserungsvorschlag: die Zunahmen in den re gestrickten Bereichen ergeben ein schöneres Gesamtbild, wenn sie jeweils 1 M nach der ersten bzw. 1 M vor der letzten M gestrickt würden (evtl. auch aus dem Querfaden der Vorreihe jeweils re/li geneigt). So wie angegeben entsteht ein unschöner Ansatz. Auch macht ein doppeltes Bündchen glatt rechts gestrickt zum einfädeln eines Gummibandes ein schöneres Gesamtbild und eine bessere Passform (Halt)
12.03.2026 - 09:50
![]() Malin wrote:
Malin wrote:
Kan man använda 2trådar med baby merino istället för 1tråd baby merino och 1 tråd kid silk?
15.12.2025 - 19:43DROPS Design answered:
Hei Malin. Ja, så lenge du får den oppgitte strikkefastheten. mvh DROPS Design
22.12.2025 - 10:33
![]() Shcherbakova Inna wrote:
Shcherbakova Inna wrote:
How to tighten the strand ?
15.11.2025 - 12:23DROPS Design answered:
Hi Shcherbakova, You just pull the strand so the stitch is tighter than normal. Regards, Drops Team.
17.11.2025 - 07:26
![]() Katia wrote:
Katia wrote:
Ciao, all' inizio degli aumenti si dice di cominciare a 3 cm dal centro dietro dopo le coste. Ma con alzata il centro dietro e più alto già di 5cm dalle coste! Forse si intende 5+3???
02.09.2025 - 11:22DROPS Design answered:
Buongiorno Katia, può iniziare gli aumenti durante la lavorazione a ferri accorciati. Buon lavoro!
07.09.2025 - 15:42
![]() Tone Grethe wrote:
Tone Grethe wrote:
Hei. Jeg ønsker å strikke skjørtet i en bruntone, som lys beige, beige eller gråbeige - kanskje lys eik. Har dere fargeforslag i Kid-Silk som matcher eller er ton-i-ton?
26.08.2025 - 21:18DROPS Design answered:
Hej Tone. Kid-Silk nr 20, lys beige passar fint med Baby merino nr 23, lys beige. Mvh DROPS Design
27.08.2025 - 08:38
![]() BAYE wrote:
BAYE wrote:
Bonjour j' aimerais réaliser ce modèle mais pouvoir le mettre en machine,hors zvec le kit silk ce ne sera pas possible.Que pensez vous de prendre 2 fils baby merino,ou avez vous une autre suggestion Merci
30.06.2025 - 16:31DROPS Design answered:
Bonjour Mme Baye, vous perdrez également les qualités de DROPS Kid-Silk en la retirant des fournitures, vous pouvez vous orienter sur une laine superwash type Fabel ou même un coton par exemple, au choix. Pensez à utiliser le convertisseur pour voir les alternatives possibles. Votre magasin saura vous conseiller, même par mail ou téléphone si besoin. Bon tricot!
01.07.2025 - 07:55
![]() Therése wrote:
Therése wrote:
Hej. Varför ska det vara två olika längder på rundstickorna för storlekarna XS-S-M? Alltså både 60 och 80 cm? Jag kan inte se i beskrivningen när vilken längd på rundsticka ska användas…
22.03.2025 - 07:13DROPS Design answered:
Hei Therése. Du starter med 60 cm og bytter til 80 cm når du har nok masker / bytter ved behov, altså når du selv syns det er bedre å bruke 80 cm istedenfor 60 cm. mvh DROPS Design
24.03.2025 - 13:11
![]() Claire wrote:
Claire wrote:
Bonjour, Pouvez-vous me confirmer que l'échantillon se fait avec les aiguilles 4,5 ?
20.03.2025 - 10:57DROPS Design answered:
Bonjour Claire, tout à fait, pensez juste à ajuster la taille des aiguilles si besoin, tant que votre échantillon est juste en largeur et en hauteur. Bon tricot!
20.03.2025 - 15:34
![]() Elaine wrote:
Elaine wrote:
Hej, Hur räknar jag ut storleken? Vilken storlek passar när stussmåttet är 93 cm? Har ni någon tabell?
08.02.2025 - 22:36DROPS Design answered:
Hej Elaine, du finder størrelsen på kjolen i måttskissen nederst i mönsteret. Den mindste størrelse er da 44x2= 88 cm og næste er 49x2=98 cm i omkreds :)
12.02.2025 - 12:37
![]() Karen wrote:
Karen wrote:
Hei. Forstår jeg riktig i oppskriften at man strikker 1 omgang av de 4 mønsterlinjer (en runde glattstrikk) før man starter på vendepinner? Skal man ha med mønsteret i de 5 cm med forhøyning/vendepinner, eller skal disse være i glattstrikk? Jeg har strikket hele forhøyningen i glattstrikk så langt.
16.01.2025 - 21:07DROPS Design answered:
Hei Karen. Du strikker 1. omgang av A.1 før du starter med forhøyning. Har du fått vårt svar fra 13. januar der vi skrev: I oppskriften står det at man skal strikke A.1 samtidig som det strikkes en forhøyning. Du vil da få mønstret hele veien bak også og ikke bare foran. mvh Drops Design
20.01.2025 - 08:07
|
|||||||
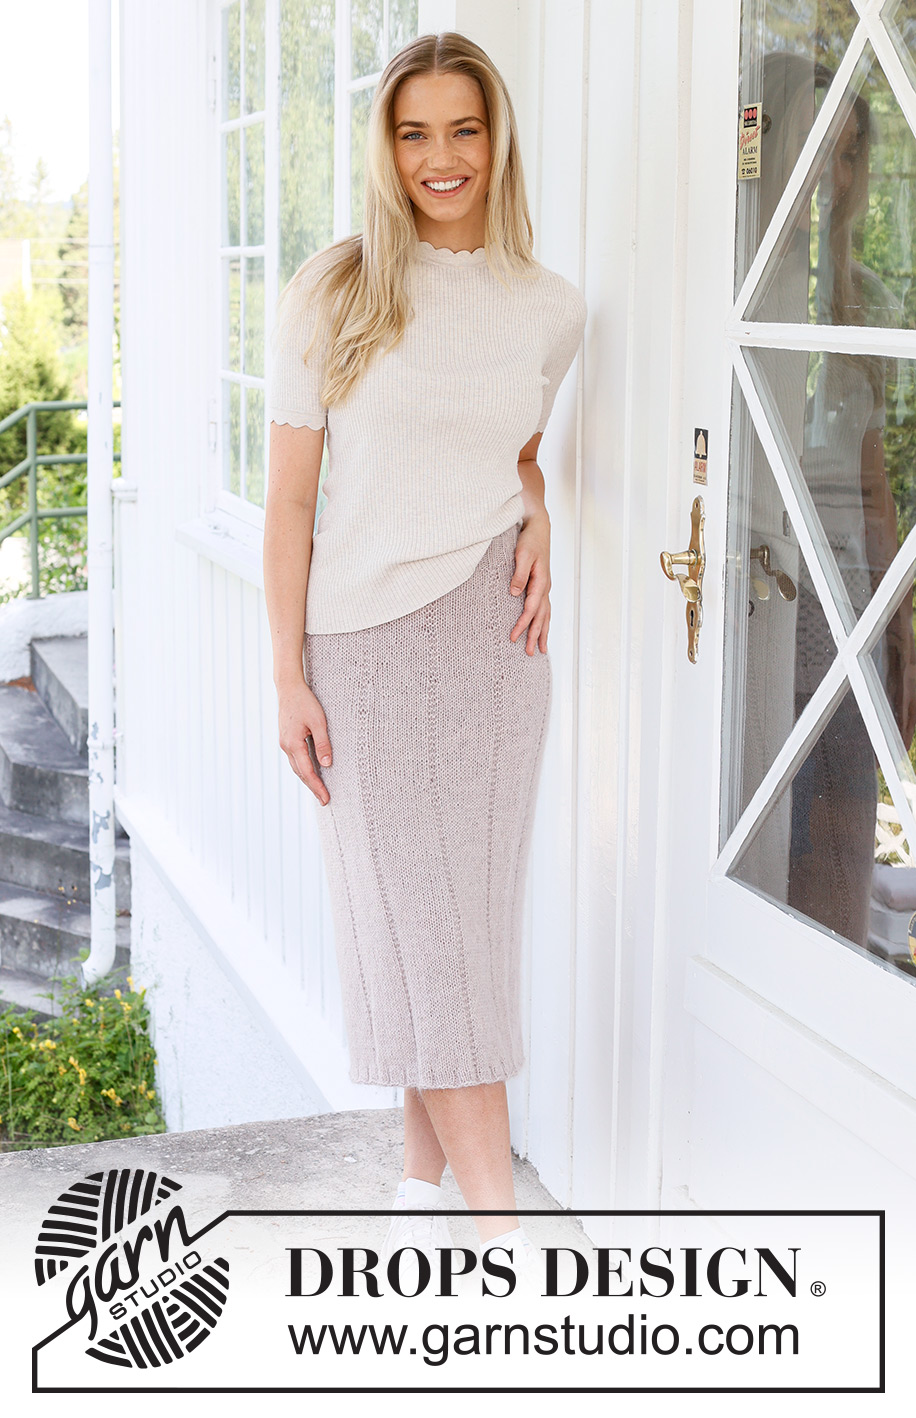
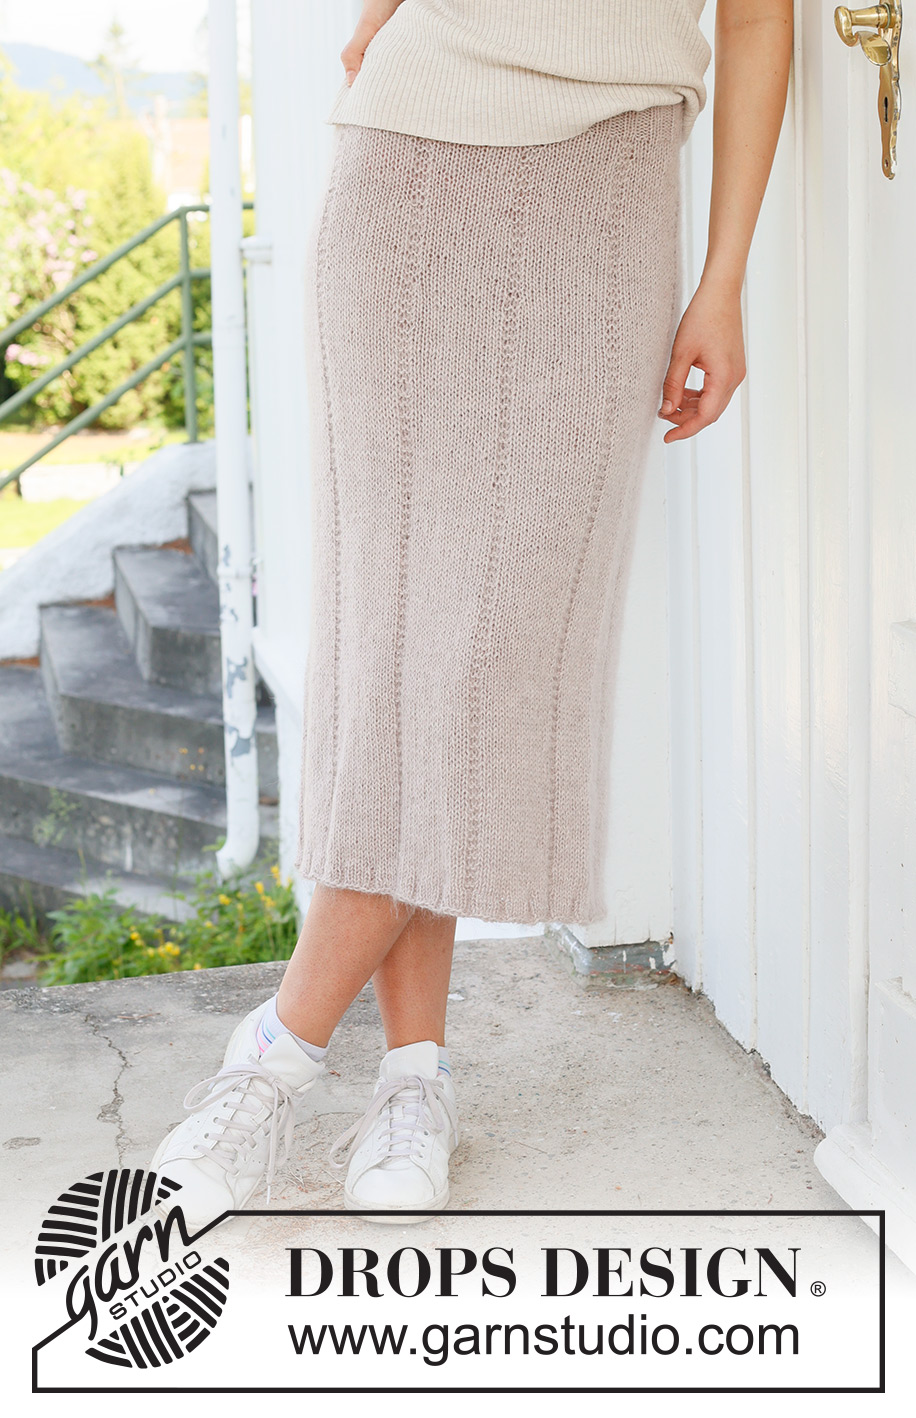
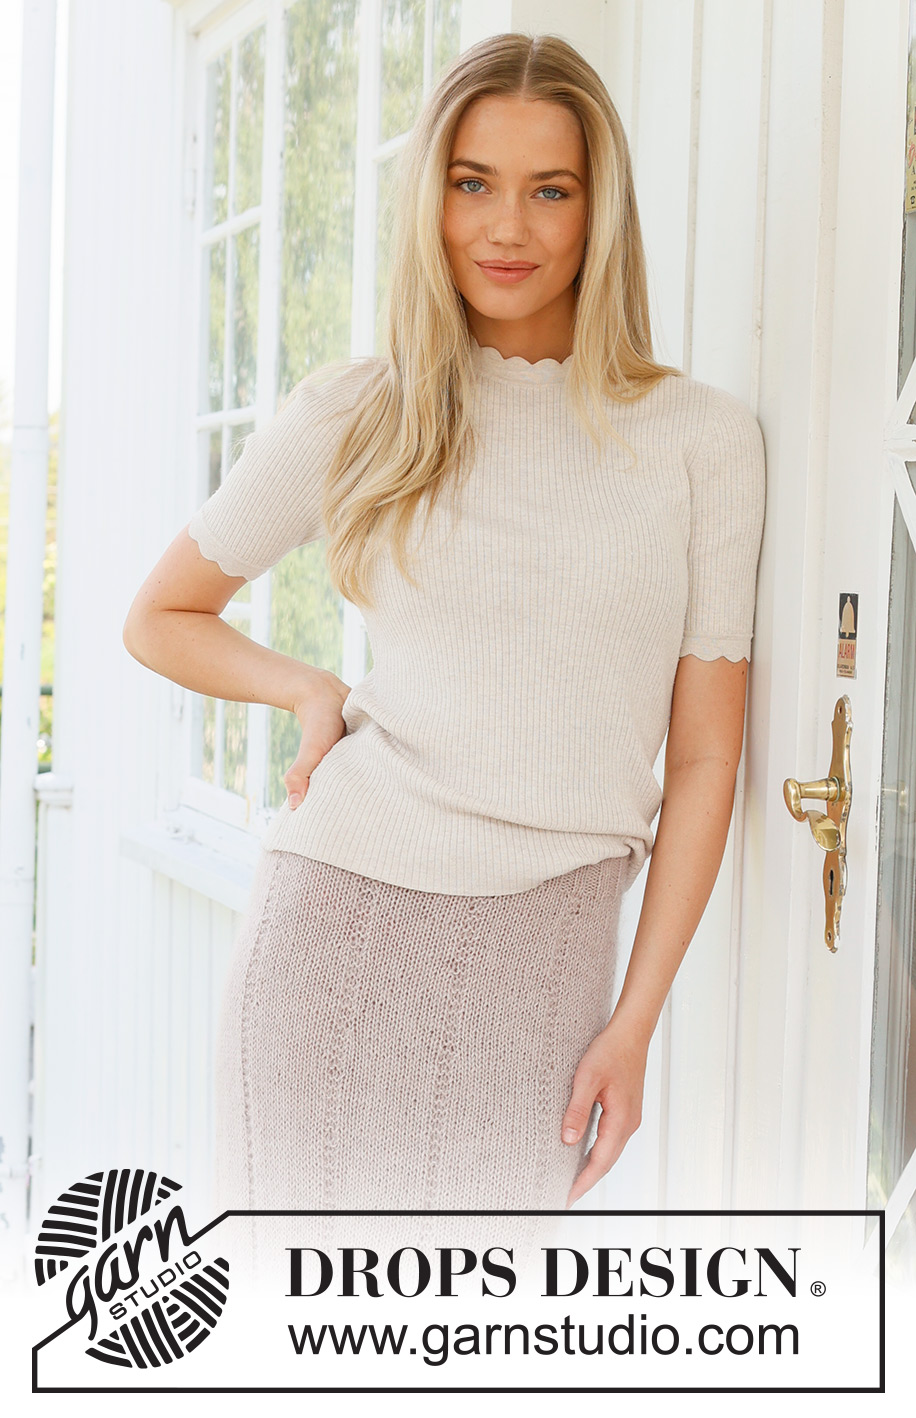
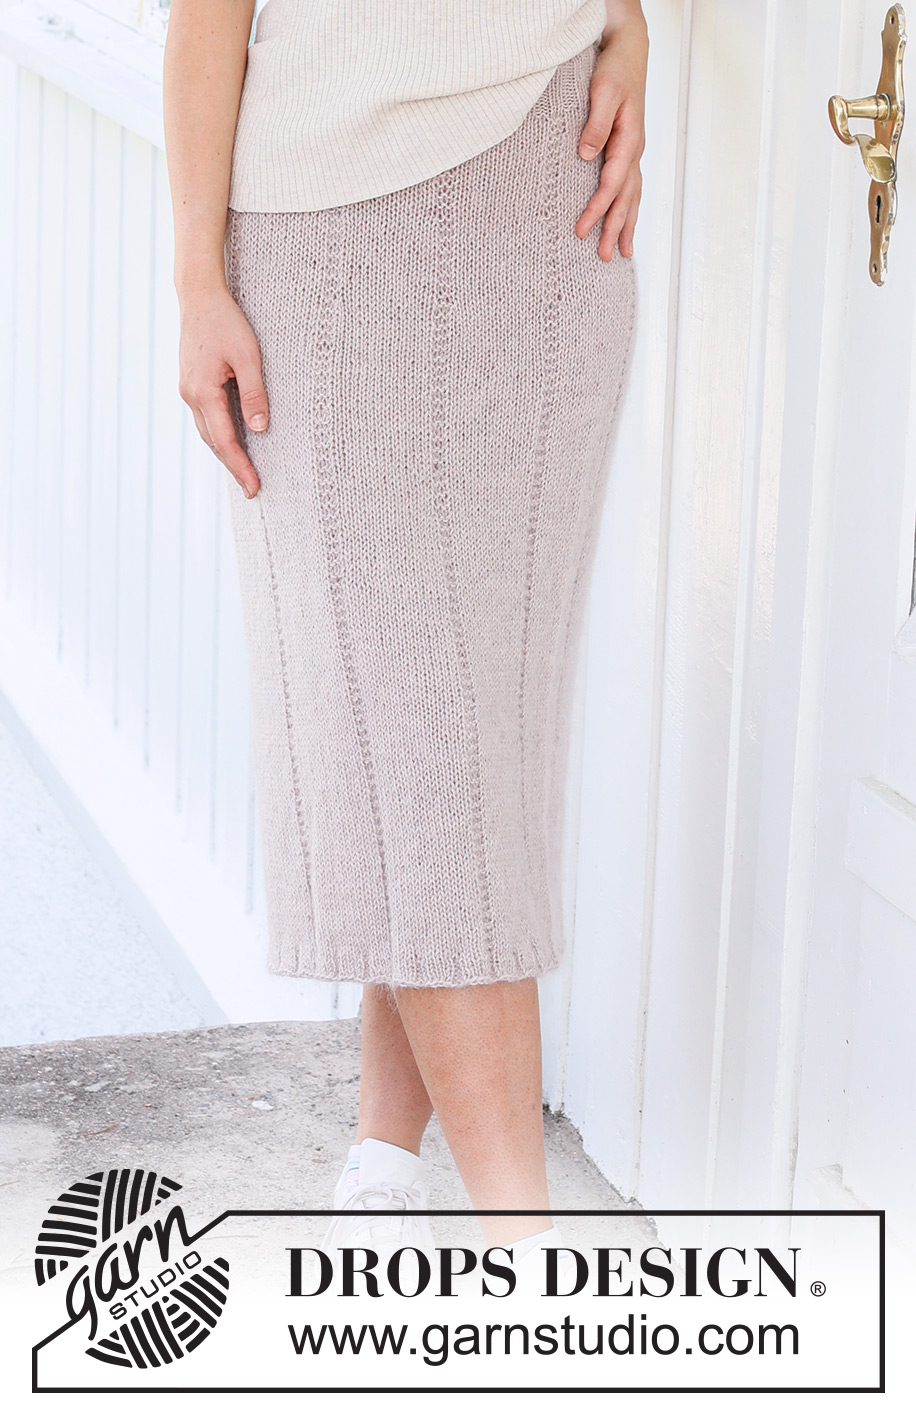
Golden Years Skirt#goldenyearsskirt |
|||||||
 |
 |
||||||
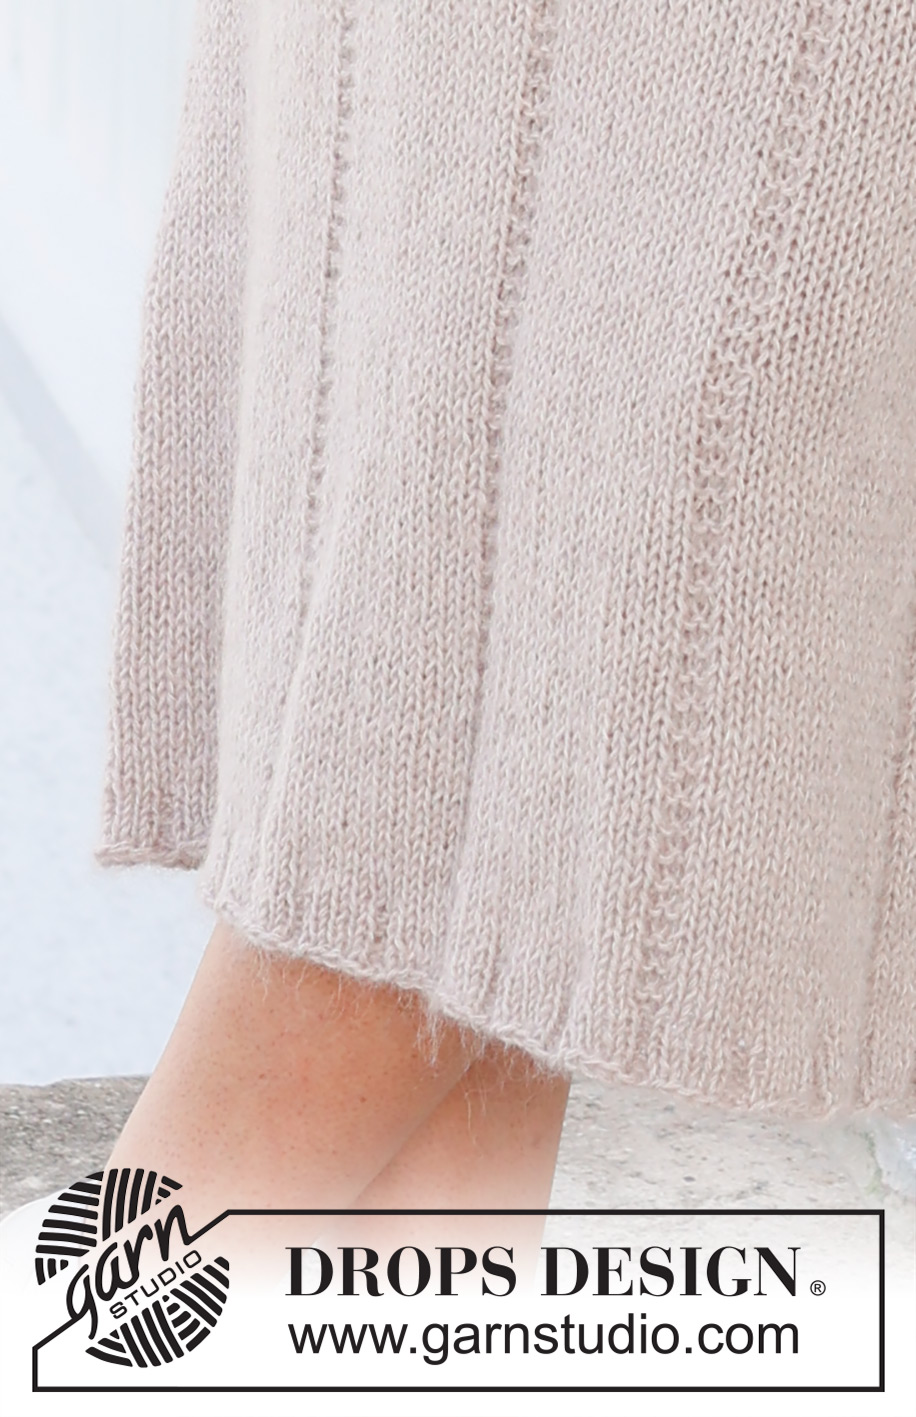
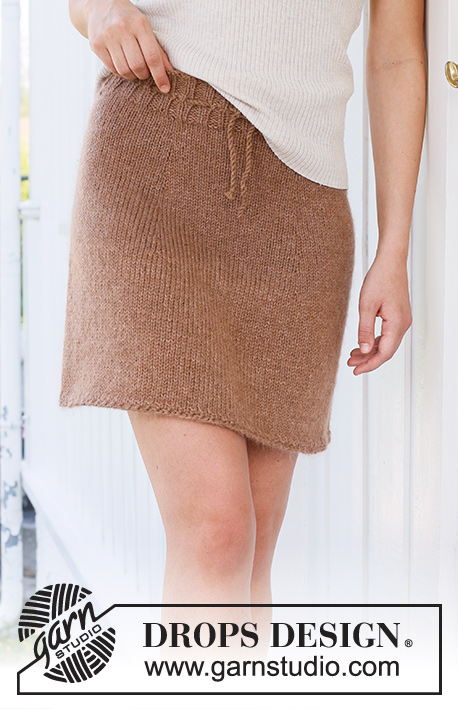
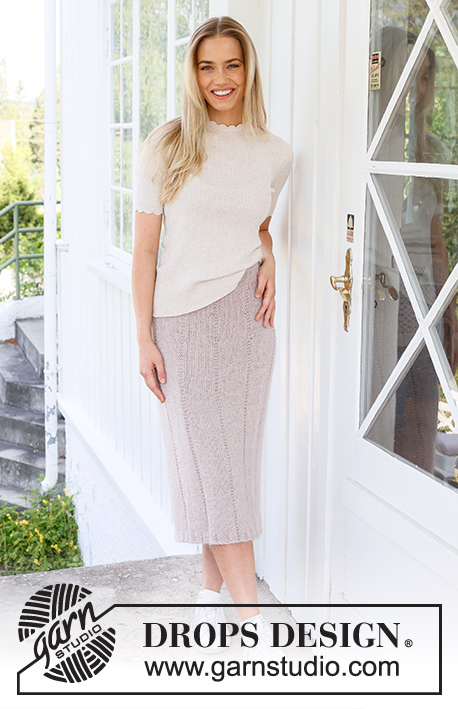
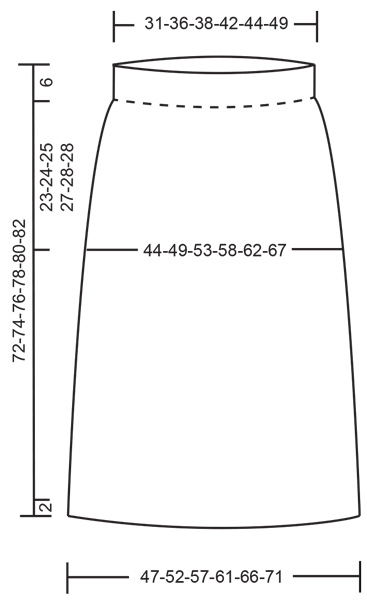
Knitted skirt in DROPS BabyMerino and DROPS Kid-Silk. The piece is worked top down. Sizes XS - XXL.
DROPS 237-26 |
|||||||
|
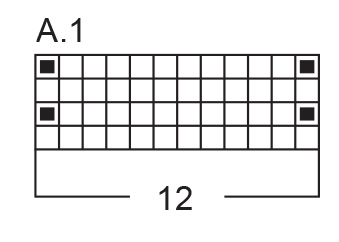
------------------------------------------------------- EXPLANATIONS FOR THE PATTERN: ------------------------------------------------------- PATTERN: See diagram A.1. INCREASE TIP: Increase alternately at the beginning and end of the stockinette stitch section. Increase 1 stitch by making 1 yarn over, which is worked as follows on the next round: AT BEGINNING OF STOCKINETTE STITCH SECTION: Slip the yarn over onto the right needle as if to knit, place it twisted back on the left needle, knit the front loop (stitch twists to the right). No hole. AT END OF STOCKINETTE STITCH SECTION: Knit the back loop (stitch twists to the left). No hole. Work the new stitches in stockinette stitch. ------------------------------------------------------- START THE PIECE HERE: ------------------------------------------------------- SKIRT – SHORT OVERVIEW OF THE PIECE: The piece is worked in the round with circular needle, top down. So the skirt is higher at the back, you work an elevation. A twisted cord is worked for the row of holes in the waistband. WAIST-BAND: Cast on 112-128-136-152-160-176 stitches with circular needle size 3.5 MM = US 4 and 1 strand of each quality (2 strands). Knit 1 round then work rib as follows: Knit 1, * purl 2, knit 2 *, work from *-* until there are 3 stitches left, purl 2 and knit 1. When the rib measures 3 cm = 1⅛", work a row of holes for the cord as follows: Knit 1, * 1 yarn over, purl 2 together, knit 2 *, work from *-* until there are 3 stitches left, 1 yarn over, purl 2 together, knit 1. Continue the rib (knit 2, purl 2) until the piece measures 6 cm = 2⅜" from the cast on edge. Knit 1 round and increase 8-4-8-4-8-4 stitches evenly spaced = 120-132-144-156-168-180 stitches. SKIRT: Change to circular needle size 4.5 MM = US 7. Insert 1 marker at the beginning of the round = mid-back. Work A.1 10-11-12-13-14-15 times on the round. AT THE SAME TIME after the first round of pattern, work an elevation as follows: Work 8-9-10-11-12-13 stitches from the right side, turn, tighten the strand, work 16-18-20-22-24-26 stitches from the wrong side. Turn, tighten the strand and work 24-27-30-33-36-39 stitches from the right side, turn, tighten the strand, work 32-36-40-44-48-52 stitches from the wrong side. Turn, tighten the strand and work 40-45-50-55-60-65 stitches from the right side, turn, tighten the strand, work 48-54-60-66-72-78 stitches from the wrong side. Turn, tighten the strand and work 56-63-70-77-84-91 stitches from the right side, turn, tighten the strand, work 64-72-80-88-96-104 stitches from the wrong side. Turn, tighten the strand and work 72-81-90-99-108-117 stitches from the right side, turn, tighten the strand, work 80-90-100-110-120-130 stitches from the wrong side. Turn, tighten the strand and work 88-99-110-121-132-143 stitches from the right side, turn, tighten the strand, work 96-108-120-132-144-156 stitches from the wrong side. Turn, tighten the strand and work to mid-back. The skirt is now 5 cm = 2" higher mid-back. Continue the pattern in the round with 10 stitches in stockinette stitch/2 garter stitches. AT THE SAME TIME when the piece measures 2-3-3-3-4-4 cm = ¾"-1⅛"-1⅛"-1⅛"-1½"-1½" after the rib, mid-front, increase 1 stitch at the beginning of each stockinette stitch section – read INCREASE TIP (10-11-12-13-14-15 stitches increased) = 130-143-156-169-182-195 stitches. When the piece measures 9-10-10-11-12-12 cm = 3½"-4"-4"-4⅜"-4¾"-4¾" after the rib, mid-front, increase 1 stitch at the end of each stockinette stitch section - remember INCREASE TIP = 140-154-168-182-196-210 stitches. When the piece measures 16-17-17-19-20-20 cm = 6¼"-6¾"-6¾"-7½"-8"-8" after the rib, mid-front, increase 1 stitch at the beginning of each stockinette stitch section = 150-165-180-195-210-225 stitches. When the piece measures 23-24-25-27-28-28 cm = 9"-9½"-9¾"-10⅝"-11"-11" after the rib, mid-front, increase 1 stitch at the end of each stockinette stitch section = 160-176-192-208-224-240 stitches. When the piece measures 33-34-36-38-40-40 cm = 13"-13⅜"-14¼"-15"-15¾"-15¾" after the rib, mid-front, increase 5-6-6-7-7-8 stitches by increasing 1 stitch at the beginning of every other stockinette stitch section = 165-182-198-215-231-248 stitches. When the piece measures 47-48-50-52-54-54 cm = 18½"-19"-19¾"-20½"-21¼"-21¼" after the rib mid-front, increase 5-5-6-6-7-7 stitches by increasing 1 stitch at the end of the other stockinette stitch section so there are 15 stitches in each section = 170-187-204-221-238-255 stitches. Continue working until the piece measures 70-72-74-76-78-80 cm = 27½"-28⅜"-29⅛"-29½"-30¾"-31½" from the cast-on edge mid-front. On the next round increase 1 stitch in each stockinette stitch section as before = 180-198-216-234-252-270 stitches. Change to circular needle size 3.5 MM = US 4. Work as follows from mid-back: Purl 1, * knit 4, purl 2 *, work from *-* until there are 5 stitches left, knit 4 and purl 1. Continue this rib for 2 cm = ¾". Bind off a little loosely with knit over knit and purl over purl. The skirt measures approx. 74-76-78-80-82-84 cm = 29⅛"-29½"-30¾"-31½"-32¼"-33" from the cast-on edge mid-front. TWISTED CORD: Cut 3 strands of Baby Merino, each 4-4-4½-4½-5-5 metres in length. Twist the strands together until they begin to resist, fold double and the cord will continue to twist. Tie a knot in each end. Start mid-front on the inside of the skirt and thread the cord up and down through the holes in the waistband. Tie the ends together on the inside of the skirt. |
|||||||
Diagram explanations |
|||||||
|
|||||||
 |
|||||||
 |
|||||||
Have you finished this pattern?Tag your pictures with #dropspattern #goldenyearsskirt or submit them to the #dropsfan gallery. Do you need help with this pattern?You'll find 17 tutorial videos, a Comments/Questions area and more by visiting the pattern on garnstudio.com. © 1982-2026 DROPS Design A/S. We reserve all rights. This document, including all its sub-sections, has copyrights. Read more about what you can do with our patterns at the bottom of each pattern on our site. |
|||||||


With over 40 years in knitting and crochet design, DROPS Design offers one of the most extensive collections of free patterns on the internet - translated to 17 languages. As of today we count 324 catalogs and 12290 patterns - 12280 of which are translated into English (US/in).
We work hard to bring you the best knitting and crochet have to offer, inspiration and advice as well as great quality yarns at incredible prices! Would you like to use our patterns for other than personal use? You can read what you are allowed to do in the Copyright text at the bottom of all our patterns. Happy crafting!
Post a comment to pattern DROPS 237-26
We would love to hear what you have to say about this pattern!
If you want to leave a question, please make sure you select the correct category in the form below, to speed up the answering process. Required fields are marked *.