
Popular categories
Looking for a yarn?


Comments / Questions (99)
![]() Barbara Beck wrote:
Barbara Beck wrote:
Ich stricke die Größe 12/18 Monate
20.02.2025 - 15:31DROPS Design answered:
Liebe Frau Beck, so haben sie: 5 Blenden-Maschen, 8 Maschen rechts, (1 Umschlag), A.1 =5 M, (1 Umschlag), 6 Maschen rechts, (1 Umschlag), A.1 = 5 M, (1 Umschlag), 19 Maschen rechts, (1 Umschlag), A.1 = 5 M, (1 Umschlag), 6 Maschen rechts, (1 Umschlag), A.1 = 5 M, (1 Umschlag), 8 Maschen rechts, 5 Blenden-Maschen=5+8+5+6+5+19+5+6+5+8+5=77 Maschen (+8 Umschläge nach der 1. Reihe). Viel Spaß beim Stricken!
21.02.2025 - 09:53
![]() Barbara Beck wrote:
Barbara Beck wrote:
Ich komme mit der Mascheneinteilung bei der Passe nicht zurecht. Irgendwie geht das nicht auf.
19.02.2025 - 21:07DROPS Design answered:
Liebe Frau Beck, vergessen Sie nicht die 6 Maschen für jedem A.1/jede Raglanlinie damitzurechnen - welche Größe stricken Sie?
20.02.2025 - 11:34
![]() Joelle wrote:
Joelle wrote:
Pour l empiècement vous mettez qu'il faut augmenter à chaque rang à l'endroit avant et après A1 et répéter le nombre de mailles Ne faut-il pas modifier le nombre de mailles endroit?
17.02.2025 - 12:51DROPS Design answered:
Bonjour Joëlle, lorsque l'on augmente pour le raglan, le nombre de mailles de chaque partie augmentée (devants, dos et manches) va augmenter de 2 mailles (manches et dos) et d'1 m (chacun des devants). Le rang détaillé n'est que le 1er rang, vous devez ensuite juste tricoter comme cela: en jersey avec A.1 à chaque raglan et augmenter de chaque côté de A.1 comme vous l'avez fait au 1er rang/la 1ère fois. Bon tricot!
17.02.2025 - 14:42
![]() Solvej wrote:
Solvej wrote:
Baby 42-6 Jeg har strikket de omgange, jeg skal, med udtagning til raglan. Jeg mangler stadig et par centimeter, før jeg skal dele til ryg og forstykke/ærmer. Strikker jeg dette stykke i glatstrikning, eller fortsætter jeg med A1, bare uden udtagninger?
12.02.2025 - 11:10DROPS Design answered:
Hej Solvej, det sidste strikker du bare i glatstrik :)
18.02.2025 - 09:08
![]() Marais wrote:
Marais wrote:
Bonjour, Je suis désolée mais vous n’avez pas répondu à ma question. Ma question ne concerne pas les augmentations raglan mais les augmentations de l’empiecement (du corps après les raglans) Merci ! Merci !
10.02.2025 - 12:06DROPS Design answered:
Bonjour Mme Marais, désolée d'avoir mal compris votre question, pensez-vous aux augmentations en bas du gilet, juste avant les côtes? Ces augmentations sont faites pour éviter que la bordure côtes ne resserre le bas du gilet car il faut plus de mailles en côtes avec les aiguilles 3 qu'en jersey avec les aiguilles 4, on doit donc augmenter pour conserver les bonnes mesures/proportions. En espérant avoir bien compris cette fois. Bon tricot!
11.02.2025 - 10:10
![]() Marais wrote:
Marais wrote:
Bonjour, Pourriez-vous me préciser : - où placer les augmentations de l’empiècement dos&devant. Est-ce juste après et avant la bordure au point mousse. - Avez-vous une vidéo tuto qui recommande la technique du point d’augmentation. Je vous remercie vivement Anne M.
09.02.2025 - 17:10DROPS Design answered:
Bonjour Anne, dans cette vidéo, nous montrons comment augmenter avec 1 jeté tricoté torse à l'envers sur l'envers. Pour augmenter 8 mailles pour le raglan, augmentez avant et après chaque A.1 (= 7 mailles pour les raglans). Ainsi, vous augmentez 1 maille avant le 1er A.1 (devant gauche), 1 maille après le 1er A.1 + 1 maille avant le 2ème A.1 (manche), 1 maille après le 2ème A.1 + 1 maille avant le 3ème A.1 (dos), 1 maille après le 3ème A.1 + 1 maille avant le 4ème A.1 (manche) et 1 maille après le 4ème A.1 (devant droit). Bon tricot!
10.02.2025 - 11:04
![]() Martina wrote:
Martina wrote:
Oket: ”Omslagen stickas vridet aviga på nästa varv och sedan i slätstickning.” Betyder detta att det bara är på det första varvet man stickar vridet avigt och resterande avigt?
17.11.2024 - 23:04DROPS Design answered:
Hej Martina. Ja det är bara på första varvet man stickar omslaget vridet sedan stickas det i slätstickning, dvs rät från rätsidan och avigt från avigsidan. Mvh DROPS Design
19.11.2024 - 13:56
![]() Penny wrote:
Penny wrote:
Does “A1” mean add a stitch marker? I notice the little diagram below with coloured dots; two black dots, white dot, two black dots but I don’t know what that means. I wish this pattern was written differently so it spells it out.
16.09.2024 - 16:23DROPS Design answered:
Dear Penny, A.1 refers to the diagrams worked over 5 sts that you will work 2 sts in reversed stocking stitch, 1 st in stocking stitch, 2 sts in reversed stocking st, this means from RS work P2, K1, P2 and from RS work K2, P1, K2. (see also diagram key). A.1 is worked a total of 4 times in the row, at each raglan /each transition between body and sleeves. Happy knitting!
17.09.2024 - 08:56
![]() Dorothea wrote:
Dorothea wrote:
Thank you for answering. I watched your videos but I don't know how to do the A.1 5 stitch increases. Are they also yarn overs, like the two Yarn overs which bracket the A.1? How do I make those 5 increases in the A.1? Thank you!
13.09.2024 - 05:04DROPS Design answered:
Hi Dorothea, You do not increase within A.1, only on each side with 1 yarn over each time. There are 4 sections of A.1 and increasing 1 stitch on each side of these 4 sections gives you the 8 increases on the row. All subsequent increases are also on each side of each A.1. Happy knitting!
13.09.2024 - 06:28
![]() Dorothea VolpeBrowne wrote:
Dorothea VolpeBrowne wrote:
I am making size 2 and have 81 sets in neckband. Following yoke directions for first row, it adds up to 61 sets, not counting increases. What am I doing wrong? 5+8+8+19+8+8+5 (not counting increases made in that row) totals up to 61. Thank you!
12.09.2024 - 06:02DROPS Design answered:
Hi Dorothea, You work 5 band stitches, knit 8, 1 yarn over, A.1 (= 5 stitches), 1 yarn over, knit 8, 1 yarn over, A.1, 1 yarn over, knit 19, 1 yarn over, A.1, 1 yarn over, knit 8, 1 yarn over, A.1, 1 yarn over, knit 8 and 5 band stitches. Your missing stitches are the 5 x A.1 = 20 stitches. Hope this helps and happy knitting!
12.09.2024 - 06:54
|
|||||||
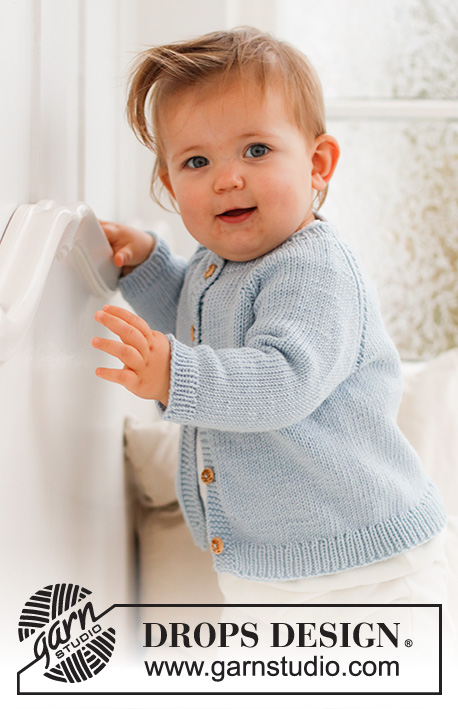
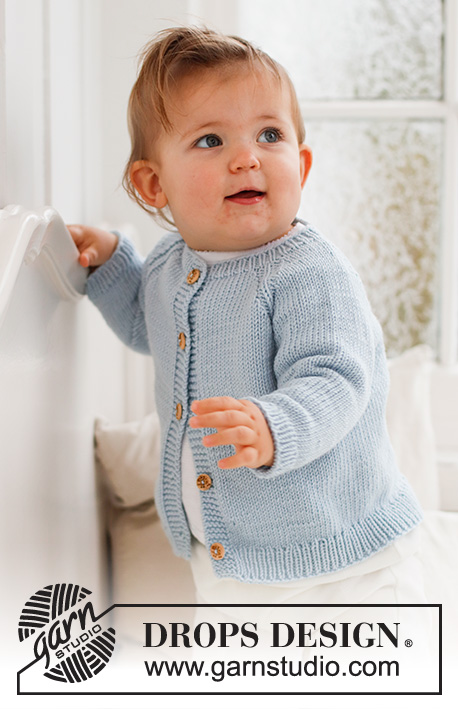
Dream in Blue Cardigan#dreaminbluecardigan |
|||||||
 |
 |
||||||
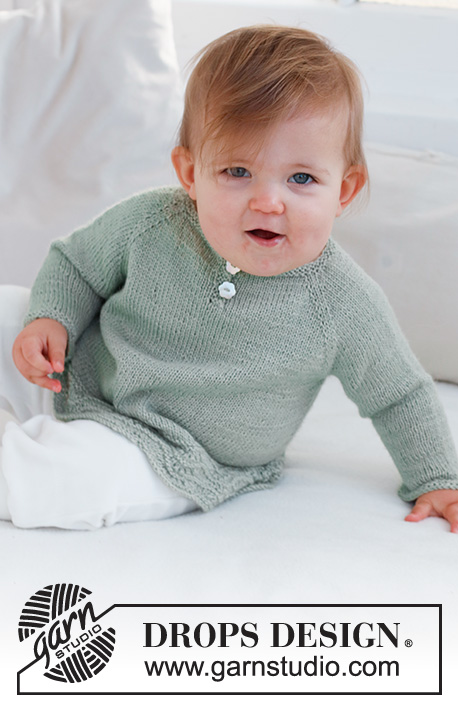
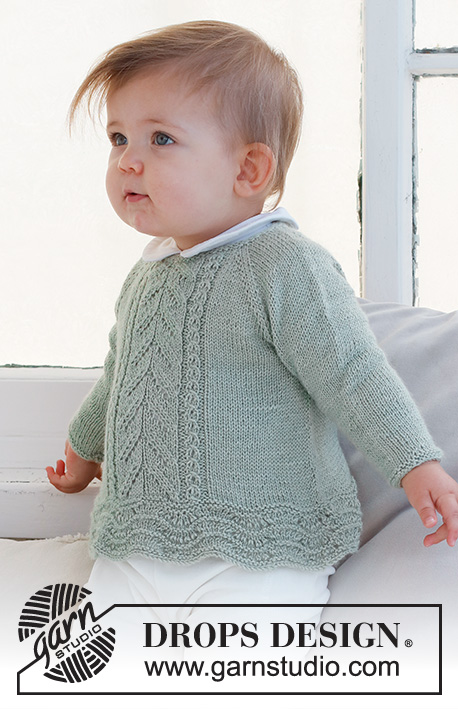
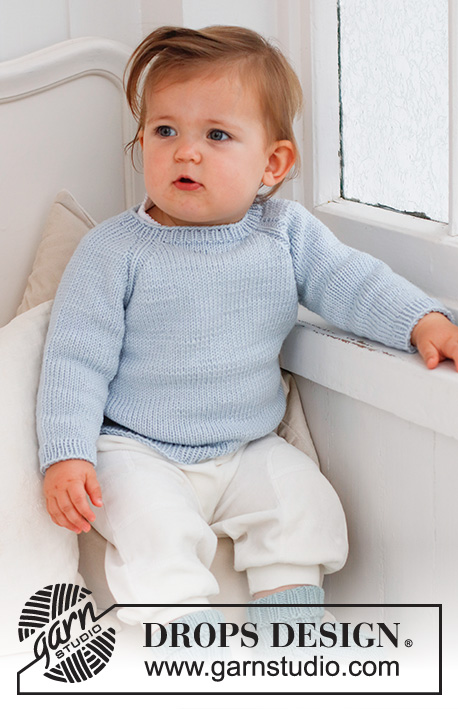
Knitted jacket for babies and children in DROPS Merino Extra Fine. The piece is worked top down with raglan. Sizes 0 - 4 years.
DROPS Baby 42-6 |
|||||||
|
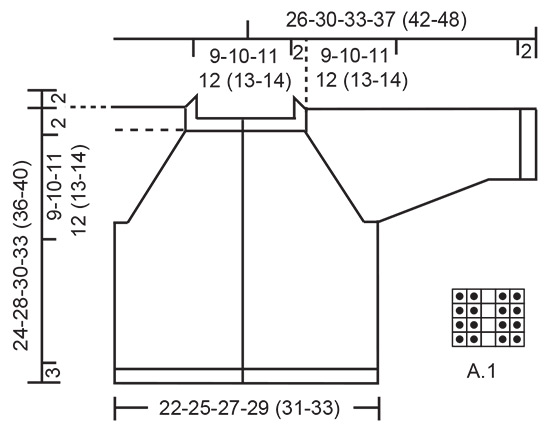
------------------------------------------------------- EXPLANATIONS FOR THE PATTERN: ------------------------------------------------------- RIDGE/GARTER STITCH (worked back and forth): Knit all rows. 1 ridge = knit 2 rows. PATTERN: See diagram A.1. The diagram shows all rows in the pattern from the right side. DECREASE TIP (sleeves): Decrease 1 stitch on either side of the marker as follows: Work until there are 3 stitches left before the marker, knit 2 together, knit 2 (marker sits between these 2 stitches), slip 1 stitch as if to knit, knit 1 and pass the slipped stitch over the knitted stitch. BUTTONHOLES: Work buttonholes on the right band (when the garment is worn). Work from the right side when there are 3 stitches left on the row as follows: Make 1 yarn over, knit 2 together and knit 1. On the next row, knit the yarn over to leave a hole. The first buttonhole is worked when the rib on the neck measures 1½-2 cm = ½"-¾". Then work the other 4-4-4-4 (5-5) buttonholes with approx. 5-6-6½-7 (6½-7) cm = 2"-2⅜"-2½"-2¾" (2½"-2¾") between each one. ------------------------------------------------------- START THE PIECE HERE: ------------------------------------------------------- JACKET – SHORT OVERVIEW OF THE PIECE: The neck and yoke are worked back and forth with circular needle. The yoke is divided for the body and sleeves and the body continued back and forth. The sleeves are worked in the round with double pointed needles. NECK: Cast on 65-69-73-77 (81-87) stitches with circular needle size 3 MM = US 2.5 and DROPS Merino Extra Fine. Purl 1 row from the wrong side with 5 band stitches in GARTER STITCH – read description above, on each side. Then work rib as follows: 5 band stitches in garter stitch, * knit 1, purl 1 *, work from *-* until there are 6 stitches left, knit 1 and 5 band stitches in garter stitch. Remember the BUTTONHOLES – read description above. When the rib measures 2 cm = ¾", change to circular needle size 4 MM = US 6. Insert 1 marker after the band at the beginning of the row; the yoke is measured from this marker! YOKE: Work the next row from the right side as follows: 5 band stitches in garter stitch, knit 5-6-7-8 (8-10), 1 yarn over, A.1, 1 yarn over, knit 6-6-6-6 (8-8), 1 yarn over, A.1, 1 yarn over, knit 13-15-17-19 (19-21), 1 yarn over, A.1, 1 yarn over, knit 6-6-6-6 (8-8), 1 yarn over, A.1, 1 yarn over, knit 5-6-7-8 (8-10) and 5 band stitches in garter stitch. You have increased 8 stitches for raglan. The yarn overs are purled twisted on the next row and continued in stockinette stitch. Continue the pattern and increase on each side of A.1 on each row from the right side a total of 11-13-14-15 (17-18) times = 153-173-185-197 (217-231) stitches. REMEMBER THE KNITTING GAUGE! When the piece measures 9-10-11-12 (13-14) cm = 3½"-4"-4⅜"-4¾" (5⅛"-5½") from the marker, divide the yoke for the body and sleeves as follows: 5 band stitches in garter stitch, work 19-22-24-26 (29-32) stitches in stockinette stitch, place the next 32-36-38-40 (44-46) stitches on a thread for the sleeve, cast on 6-6-8-8 (6-6) stitches, work 41-47-51-55 (61-65) stitches in stockinette stitch, place the next 32-36-38-40 (44-46) stitches on a thread for the sleeve, cast on 6-6-8-8 (6-6) stitches, work 19-22-24-26 (29-32) stitches in stockinette stitch and 5 band stitches in garter stitch. BODY: = 101-113-125-133 (141-151) stitches. Continue back and forth with stockinette stitch and 5 band stitches in garter stitch on each side until the body measures 10-13-14-16 (18-21) cm = 4"-5⅛"-5½"-6¼" (7"-8¼") from the division. Now increase 10-12-14-14 (16-16) stitches evenly spaced on the next row from the right side (do not increase over the bands) = 111-125-139-147 (157-167) stitches. Change to circular needle size 3 MM = US 2.5 and work rib, starting from the wrong side as follows: 5 band stitches in garter stitch, * purl 1, knit 1 *, work from *-* until there are 6 stitches left, purl 1 and 5 band stitches in garter stitch. Bind off when the rib measures 3 cm = 1⅛". The jacket measures approx. 24-28-30-33 (36-40) cm = 9½"-11"-11¾"-13" (14¼"-15¾") from the shoulder down. SLEEVES: Place the 32-36-38-40 (44-46) stitches from the thread on the one side of the piece on double pointed needles size 4 MM = US 6 and knit up 1 stitch in each of the 6-6-8-8 (6-6) stitches cast on under the sleeve = 38-42-46-48 (50-52) stitches. Insert a marker in the middle of the new stitches under the sleeve (= mid-under sleeve). Start at the marker and work stockinette stitch in the round. When the sleeve measures 2 cm = ¾" from the division, decrease 1 stitch on each side of the marker - read DECREASE TIP! Decrease like this every 3-3-2-2½ (3-4) cm = 1⅛"-1⅛"-¾"-1" (1⅛"-1½") a total of 2-3-5-5 (5-5) times = 34-36-36-38 (40-42) stitches. When the sleeve measures 8-11-12-15 (18-23) cm = 3⅛"-4⅜"-4¾"-6" (7"-9"), increase 4-4-4-4 (4-6) stitches evenly spaced = 38-40-40-42 (44-48) stitches. Change to double pointed needles size 3 MM = US 2.5 and work rib (knit 1, purl 1) for 2 cm = ¾". Bind off. The sleeve measures approx. 10-13-14-17 (20-25) cm = 4"-5⅛"-5½"-6¾" (8"-9¾"). Work the other sleeve in the same way. |
|||||||
Diagram explanations |
|||||||
|
|||||||
 |
|||||||
Have you finished this pattern?Tag your pictures with #dropspattern #dreaminbluecardigan or submit them to the #dropsfan gallery. Do you need help with this pattern?You'll find 27 tutorial videos, a Comments/Questions area and more by visiting the pattern on garnstudio.com. © 1982-2026 DROPS Design A/S. We reserve all rights. This document, including all its sub-sections, has copyrights. Read more about what you can do with our patterns at the bottom of each pattern on our site. |
|||||||


With over 40 years in knitting and crochet design, DROPS Design offers one of the most extensive collections of free patterns on the internet - translated to 17 languages. As of today we count 324 catalogs and 12290 patterns - 12280 of which are translated into English (US/in).
We work hard to bring you the best knitting and crochet have to offer, inspiration and advice as well as great quality yarns at incredible prices! Would you like to use our patterns for other than personal use? You can read what you are allowed to do in the Copyright text at the bottom of all our patterns. Happy crafting!
Post a comment to pattern DROPS Baby 42-6
We would love to hear what you have to say about this pattern!
If you want to leave a question, please make sure you select the correct category in the form below, to speed up the answering process. Required fields are marked *.