
Popular categories
Looking for a yarn?


Comments / Questions (23)
![]() Silje D wrote:
Silje D wrote:
I oppskriften står det at etter at A2, A4 og A5 er strikket en gang så skal en fortsette å øke A2, A4 og A5 i tillegg til at A3 skal økes i hver side totalt 14 ganger. Men det klarer jeg ikke å få til å stemme - da ender jeg opp med mer enn 300 masker. Eneste jeg kan se som fungerer for å få 212 masker er å øke A2, A4 og A5 3 ganger og A3 6 ganger. Er det noe jeg leser feil ved oppskriften?
10.11.2018 - 21:38DROPS Design answered:
Hei Silje, Du skal øke totalt 8 masker 2. hver omgang totalt 14-16-19-21-24-27 ganger som inkluderer økningene i A.2, A.4 og A.5. Da du er ferdig har du økt 112-128-152-168-192-216 masker og har 212-232-260-280-308-336 masker på pinnen. God fornøyelse!
12.11.2018 - 08:15
![]() Silje wrote:
Silje wrote:
Er det mulig å sende mail til dere med spørsmål? 🙂 Spørsmålet mitt er for langt for kommentarboksen 🙄
04.11.2018 - 21:12DROPS Design answered:
Hei Silje. Vi har dessverre ingen mailadresse for dette, men om du skriver spørsmålet ditt over flere spørsmålsbokser på siden vår skal vi lese dem som 1 spørsmål. Det går helt fint
06.11.2018 - 07:49
![]() Susanne wrote:
Susanne wrote:
Ang. bærestykke, forstår jeg det så rigtigt, at A.2, A.4 og A.5, kun skal strikkes en gang i højden?
02.10.2018 - 22:11DROPS Design answered:
Hei Susanne. Du fortsetter å øke som i diagrammene (hver 2 omgang) til du har økt totalt 14-16-19-21-24-27 ganger (inkludert økningene i A.2, A.4 og A.5). Du strikker altså mønster som i diagrammene til det totale maskeantallet er 212-232-260-280-308-336. God fornøyelse
03.10.2018 - 08:04
![]() Shelley wrote:
Shelley wrote:
What is meant by the "marker thread" in the Increase tip? I Have worked the pattern to the end of the diagrams and get those but now I will be working the increases w/o the diagram.
19.08.2018 - 18:32DROPS Design answered:
Hi Shelley, The marker threads are inserted in the middle of the stitches cast on under the sleeves - 1 marker thread in each side. You increase 1 stitch on each side of both marker threads as described in the increase tip - 4 stitches increased each time. Happy knitting!
21.08.2018 - 07:49
![]() Nina wrote:
Nina wrote:
Liebes DROPS Design Team, danke für die Beantwortung meiner Frage. Leider funktioniert der von Ihnen angegebene Link nicht. Könnten Sie den bitte neu setzen? Danke!
02.07.2018 - 10:38DROPS Design answered:
Liebe Nina, danke für den Hinweis, Link wurde korrigiert. Viel Spaß beim stricken!
02.07.2018 - 10:47Oksana wrote:
For sleeve rib it is said: 38-37-36-34-33-31 cm change to double pointed needles size 4.5 mm and work rib (purl 1, 2 stitches in GARTER STITCH – see description above) in the round from the wrong side, AT THE SAME TIME as on the first round you decrease 0-1-1-0-0-1 stitch = 39-42-42-45-45-48 stitches. The final quantity of 39-42-42-45-45-48 doesnt correspond to 38-37-36-34-33-31+ 0-1-1-0-0-1. What do I miss, please?
22.04.2018 - 14:43DROPS Design answered:
Dear Oksana, after all dec are done there are 39-43-43-45-45-49 stitches left and you dec depending on the size either 1 or no st: on the first round you decrease 0-1-1-0-0-1 stitch, ie you dec only in 2nd, 3rd and last size = 39-42-42-45-45-48 sts. Happy knitting!
23.04.2018 - 09:31
![]() N Bellasalma wrote:
N Bellasalma wrote:
The knit/purl etc. diagrams for patterns are blank. In other words, I cannot tell which square should be knit and which should be purl. It is not just for this particular pattern but for all patterns. Can you please help me?
24.02.2018 - 13:23DROPS Design answered:
Dear N Bellasalma, the diagrams shows up on our side, so we see no problem, however we will check it. Until the problem solved can you please try to check the diagrams for the different languages? First try the British version. If you see the diagrams, but not the explanations, the empty square means a knit stitch, an X in the square means a purl. Happy crafting!
24.02.2018 - 23:29
![]() Yolanda wrote:
Yolanda wrote:
Precioso jersey. He probado el convertidor de hilos, es genial muchas gracias.
15.02.2018 - 10:50
![]() Randveig wrote:
Randveig wrote:
Når kommer denne ut som gratis oppskrift?
03.02.2018 - 16:08DROPS Design answered:
Hej Randveig, det her er opskriften, og det er bare at skrive ud, helt gratis. God fornöjelse!
12.02.2018 - 15:53
![]() Marie wrote:
Marie wrote:
Nyyydeli! Denne vil jeg strikke
20.01.2018 - 01:21
|
||||||||||
Sweet Pearl#sweetpearlsweater |
||||||||||
 |
 |
|||||||||
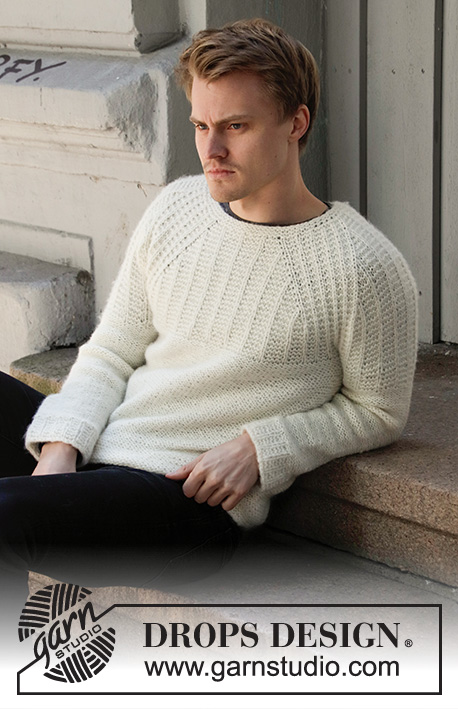
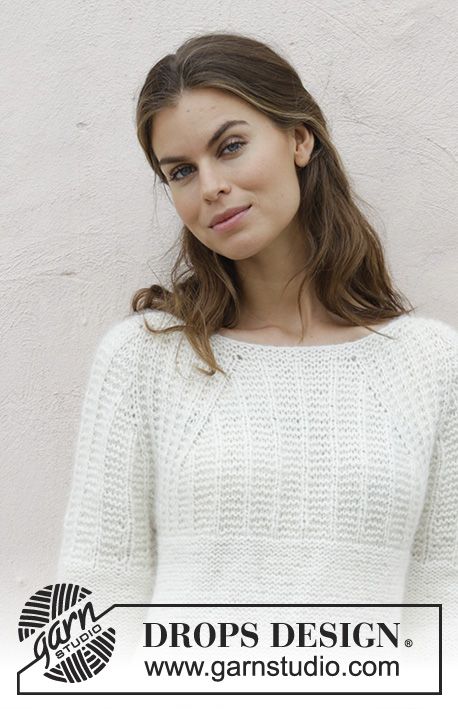
Knitted sweater with garter stitch and raglan, worked top down. Sizes S - XXXL. The piece is worked in DROPS Air.
DROPS 187-37 |
||||||||||
|
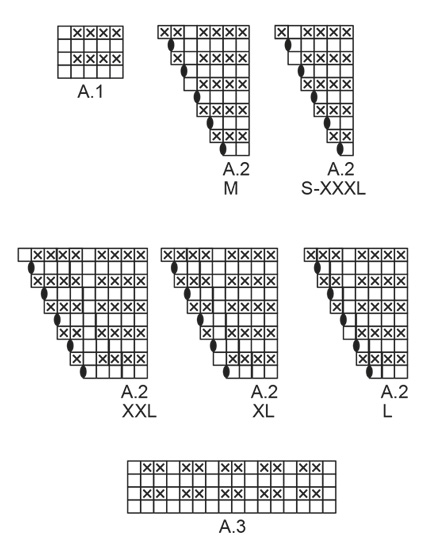
INFORMATION FOR THE PATTERN: RIDGE/GARTER STITCH (worked in the round): 1 ridge = 2 rounds. Knit 1 round and purl 1 round. PATTERN: See diagrams A.1 to A.5. Choose diagram for your size in A.2 and A.5. INCREASE TIP (for body): Work until there are 2 stitches left before the marker thread, 1 yarn over, work 4 stitches (the marker thread sits in the middle of these 4 stitches), 1 yarn over (= 2 stitches increased). Repeat at both marker threads (= 4 stitches increased). DECREASE TIP (for sleeves): Decrease 1 stitch on each side of the marker thread as follows: Work until there are 3 stitches left before the marker thread, slip 1 stitch as if to knit, knit 1, pass the slipped stitch over the knitted stitch, knit 2 stitches (the marker thread sits in the middle of these 2 stitches), knit the next 2 stitches together (= 2 stitches decreased). ---------------------------------------------------------- SWEATER: The yoke and body are worked in the round with circular needle, top down. The sleeves are worked in the round with double pointed needles. YOKE: Cast on 76-80-84-88-92-96 stitches with circular needle size 4.5 mm / US 7. Work 2 RIDGES – see description above. Change to circular needle SIZE 5.5 mm/US 9. Knit 1 round and increase 24 stitches evenly on the round by making yarn overs = 100-104-108-112-116-120 stitches. Purl 1 round; the yarn overs are purled twisted to avoid holes. Then work pattern from mid back as follows: Work as follows over half of the back piece: Work A.1 (= 5 stitches) over the first 5-5-5-5-5-10 stitches (= 1-1-1-1-1-2 times in width), A.2 (= 1-2-3-4-5-1 stitches). Work as follows over the right sleeve: Work A.3 (= 16 stitches), A.4 (= 5 stitches), A.3 over 16 stitches. Work as follows over the front piece: Work A.5 (= 2-3-4-5-1-2 stitches), A.1 over 10-10-10-10-15-20 stitches, A.2 over 1-2-3-4-5-1 stitches. Work as follows over the left sleeve: Work A.3 over 16 stitches, A.4 over 5 stitches, A.3 over 16 stitches. Work as follows over half of the back piece: Work A.5 over 2-3-4-5-1-2 stitches and A.1 over the last 5-5-5-5-10-10 stitches. Continue the pattern and increase as shown in A.2, A.4 and A.5 (i.e. increase 1 stitch on each side of each A.3 = a total of 8 stitches increased every 2nd round). The increased stitches are worked twisted into the pattern as you go; there should not be holes. REMEMBER THE GAUGE! Diagrams A.1 and A.3 are repeated in height. When A.2, A.4 and A.5 have been worked 1 time in height, continue to increase every 2nd round and the increased stitches are worked into the pattern as before. Increase on each side of each A.3 a total of 14-16-19-21-24-27 times (including the increases in A.2, A.4 and A.5) = 212-232-260-280-308-336 stitches. Then continue with garter stitch over garter stitch and knit over knit until the piece measures 20-22-23-25-27-29 cm / 8"-8¾"-9"-9¾"-10½"-11½" from the neck edge. Now divide for the sleeves and body as follows: Purl 31-33-36-40-45-51 stitches (= half back piece), place the next 43-49-57-59-63-65 stitches on a thread (= sleeve), cast on 8-10-10-10-10-8 stitches under the sleeve, purl 63-67-73-81-91-103 stitches (= front piece), place the next 43-49-57-59-63-65 stitches on a thread (= sleeve), cast on 8-10-10-10-10-8 stitches under the sleeve, purl 32-34-37-41-46-52 stitches (= half back piece). Body and sleeves are finished separately. BODY: = 142-154-166-182-202-222 stitches. Now continue working in stockinette stitch, but with the wrong side out, i.e. turn the piece and knit from the wrong side in the round. Insert 1 marker thread in the middle of the 8-10-10-10-10-8 stitches under each sleeve (= 71-77-83-91-101-111 stitches on each side of the marker threads). When the piece measures 4 cm / 1½" from where the body was separated from the sleeves, increase 1 stitch on each side of the marker threads (= 4 stitches increased) – read INCREASE TIP! Increase like this every 4 cm / 1½" a total of 6-6-7-7-6-6 times = 166-178-194-210-226-246 stitches. When the piece measures 34-34-35-35-35-35 cm / 13½"-13½"-13¾"-13¾"-13¾"-13¾" from where the body was separated from the sleeves, change to circular needle size 4.5 mm / US 7 and work 3 ridges. Bind off. Make sure you bind off loosely; you can use a needle 1 size larger if necessary. The piece measures a total of approx. 60-62-64-66-68-70 cm / 23⅝"-24⅜"-25¼"-26"-26¾"-27½" from the shoulder. SLEEVE: The piece is worked in the round with double pointed needles. Place the 43-49-57-59-63-65 stitches from the thread on the one side of the piece onto double pointed needles SIZE 5.5 mm/US 9 and knit up 1 stitch in each of the 8-10-10-10-10-8 stitches cast onto body under the sleeve = 51-59-67-69-73-73 stitches. Insert a marker thread in the middle of the new stitches. Continue with garter stitch over garter stitch and knit over knit; the 8-10-10-10-10-8 new stitches under the sleeve are worked in garter stitch. When the piece measures 3 cm / 1" from where the sleeve was separated from the body, decrease 2 stitches mid under sleeve – read DECREASE TIP! Decrease every 5½-4-2½-2-2-2 cm / 2¼"-1½"-⅞"-¾"-¾"-¾" a total of 6-8-12-12-14-12 times = 39-43-43-45-45-49 stitches. AT THE SAME TIME when the sleeve measures 5 cm / 2" from where the sleeve was separated from the body, continue working in stockinette stitch from the wrong side, i.e. turn the piece and knit from the wrong side in the round. When the piece measures 38-37-36-34-33-31 cm / 15"-14½"-14¼"-13½"-13"-12¼" change to double pointed needles size 4.5 mm / US 7 and work rib (purl 1, 2 stitches in GARTER STITCH – see description above) in the round from the wrong side, AT THE SAME TIME as on the first round you decrease 0-1-1-0-0-1 stitch = 39-42-42-45-45-48 stitches. Bind off when the piece measures 43-42-41-39-38-36 cm / 17"-16½"-16"-15¼"-15"-14¼" where the sleeve was separated from the body. Make sure you bind off loosely; you can use a needle 1 size larger if necessary. The piece measures a total of 63-64-64-64-65-65 cm / 24¾"-25¼"-25¼"-25¼"-25½"-25½" from the neck edge. Work the other sleeve in the same way. |
||||||||||
Diagram explanations |
||||||||||
|
||||||||||
 |
||||||||||
 |
||||||||||
 |
||||||||||
Have you finished this pattern?Tag your pictures with #dropspattern #sweetpearlsweater or submit them to the #dropsfan gallery. Do you need help with this pattern?You'll find 25 tutorial videos, a Comments/Questions area and more by visiting the pattern on garnstudio.com. © 1982-2026 DROPS Design A/S. We reserve all rights. This document, including all its sub-sections, has copyrights. Read more about what you can do with our patterns at the bottom of each pattern on our site. |
||||||||||


With over 40 years in knitting and crochet design, DROPS Design offers one of the most extensive collections of free patterns on the internet - translated to 17 languages. As of today we count 324 catalogs and 12290 patterns - 12280 of which are translated into English (US/in).
We work hard to bring you the best knitting and crochet have to offer, inspiration and advice as well as great quality yarns at incredible prices! Would you like to use our patterns for other than personal use? You can read what you are allowed to do in the Copyright text at the bottom of all our patterns. Happy crafting!
Post a comment to pattern DROPS 187-37
We would love to hear what you have to say about this pattern!
If you want to leave a question, please make sure you select the correct category in the form below, to speed up the answering process. Required fields are marked *.