
Popular categories
Looking for a yarn?



























Comments / Questions (15)
 Ana wrote:
I place the marker after the first 12 stitches and cut the strand. After the marker, I knit in garter stitch, what do I do with the first 12 stitches, knit in garter or stocking stitch, or not knit the first 12 stitches?
05.10.2019 - 10:37DROPS Design answered:
Dear Ana, you work now in garter stitch, in rows, starting from the stitch after the marker, over all stitches, until the finished measurement. Happy knitting!
07.10.2019 - 08:51
 Carol Conklin wrote:
Sew together the hole at front of toe with grafting stitches - sew the 14 stitches on top of foot to the 14 stitches under the foot. What do I do with these stitches when starting garter back and forth? When it says cut the yarn do I start with a new piece at stitch 14? It seems to be making up a little small to felt. I have paid attention to the gauge. Thanks.
07.04.2019 - 18:54DROPS Design answered:
Dear Mrs Conklin, the toe = the 28 sts cast on at the beginning of the slippers, you have cast off 28 sts and worked in the round for toe part of slipper. Then you insert a marker after the first 13 sts of the round and start working back and forth in the 14th st of the round = first stitch of row from now on. Happy knitting!
08.04.2019 - 10:09
 Anna wrote:
Jag krånglade till det mer än nödvändigt. Nu förstår jag monteringen 😀.
02.12.2018 - 13:31DROPS Design answered:
Hei Anna. Så bra at du fikk det til. Tips til neste gang: om du velger å stille "spørsmål" istedet for en "kommentar" ser vi spørsmålet ditt raskere. God fornøyelse
05.12.2018 - 09:21
Anna wrote:
Hej, jag förstår inte monteringsanvisningen. Kan ni beskriva lite närmare för jag får inte ihop min till en toffla som på bilden.
02.12.2018 - 13:10
 Freja wrote:
Skal tåen stikkes i glatstrik, som der står i opskriften, eller skal hele tøflen strikkes i retstrik inden inden den filtes?
04.09.2018 - 16:02DROPS Design answered:
Hej Freja, ja vi har strikket tåen i glatstrik, du kan se det på billedet. Men vælger du at strikke hele tøflen i retstrik så gør du bare det. God fornøjelse!
05.09.2018 - 15:54
|
|
Winter Comfy#wintercomfyslippers |
|
 |
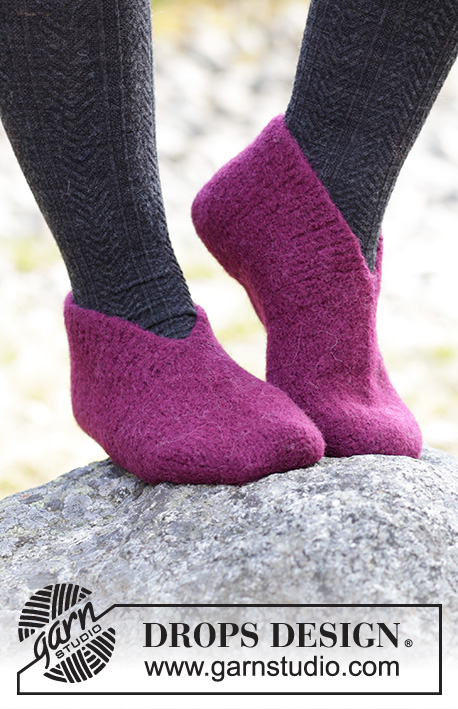 |
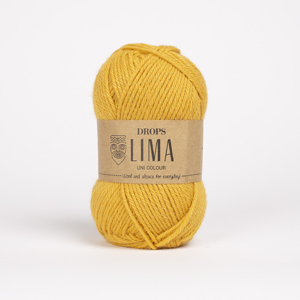
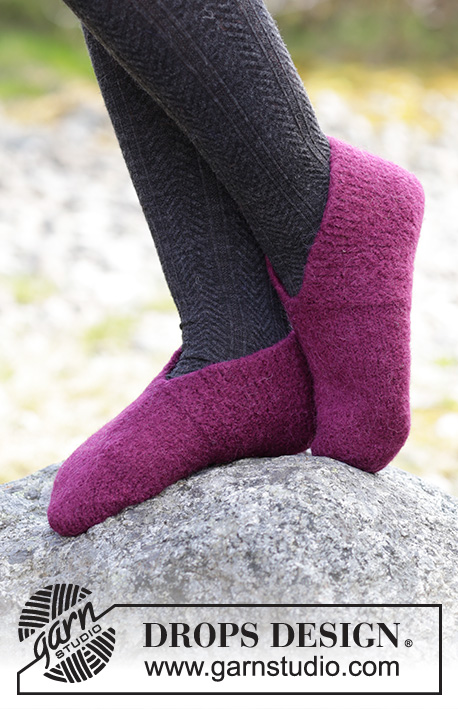
Felted slippers with garter stitch and stockinette stitch, worked from the toe backwards. The piece is worked in DROPS Lima.
DROPS 182-16 |
|
|
INFORMATION FOR THE PATTERN: RIDGE/GARTER STITCH (worked in the round): 1 ridge = 2 rounds. Knit 1 round and purl 1 round. RIDGE/GARTER STITCH (worked back and forth): 1 ridge = Knit 2 rows. INCREASE TIP: Increase 1 stitch by making 1 yarn over. On next round knit yarn over twisted to avoid a hole. ---------------------------------------------------------- SLIPPER: The piece is worked in the round, from the toe backwards, then worked back and forth over heel. The piece is sewn together mid back and mid front of toe afterwards. Cast on 28 stitches with double pointed needles size 4 mm / US 6 and Lima. Knit 1 round and insert 1 marker in the first and 15th stitch (= the sides). Continue with stockinette stitch AT THE SAME TIME on the next round increase 1 stitch on each side of both markers (= 4 stitches increased on round) - read INCREASE TIP! Repeat the increase in each side every 2nd round 3-4-4 more times, then increase 1 stitch before each marker (= 2 stitches increased on round) 0-0-1 time = 44-48-50 stitches. REMEMBER THE GAUGE! Continue with stockinette stitch until the piece measures 13-14-15½ cm / 5"-5½"-6¼". Now work 2 RIDGES in the round - see description above, AT THE SAME TIME as you insert a marker mid top of foot after the first 11-12-13 stitches. Cut the strand. Start after the marker and work GARTER STITCH back and forth - see description above. Bind off when piece measures approx. 26-28½-31½ cm / 10¼"-11¼"-12⅜" (leave a strand end of approx. 20 cm / 8", this is used for assembly). ASSEMBLY: Fold the bind-off edge double and sew together mid back - sew in the outermost loop of the outermost stitch so the seam is not thick. Sew together the hole at front of toe with grafting stitches - sew the 14 stitches on top of foot to the 14 stitches under the foot. Work another slipper in the same way. FELTING: The piece can be felted either in the washing machine or the tumble dryer – read description below. Remember: Subsequent washes are as for a normal wool garment. IN WASHING MACHINE: Washing machines will vary when felting. If the piece is not felted enough, it can be felted again. If it is felted too much, it can be stretched to the correct size while still wet. DO THE FOLLOWING: Lay the piece in the washing machine, using a programme of approx. 40 minutes (not a wool programme). Wash at 40 degrees C = 104 degrees F without pre-wash, detergent is optional. After washing, shape the piece while it is still wet. IN TUMBLE DRYER: Felting in a tumble dryer gives good control over the degree of felting. The tumble dryer can be opened during drying to check the size of the piece. If it is not felted enough it can be thoroughly wetted and felted again. If it is felted too much it can be stretched to the correct size while still wet. DO THE FOLLOWING: Lay the piece in water so it becomes completely wet, then place it in the tumble dryer and begin the drying process. Dry to the desired size, checking regularly. |
|
Have you finished this pattern?Tag your pictures with #dropspattern #wintercomfyslippers or submit them to the #dropsfan gallery. Do you need help with this pattern?You'll find 10 tutorial videos, a Comments/Questions area and more by visiting the pattern on garnstudio.com. © 1982-2026 DROPS Design A/S. We reserve all rights. This document, including all its sub-sections, has copyrights. Read more about what you can do with our patterns at the bottom of each pattern on our site. |
|






With over 40 years in knitting and crochet design, DROPS Design offers one of the most extensive collections of free patterns on the internet - translated to 17 languages. As of today we count 333 catalogs and 12532 patterns - 12522 of which are translated into English (US/in).
We work hard to bring you the best knitting and crochet have to offer, inspiration and advice as well as great quality yarns at incredible prices! Would you like to use our patterns for other than personal use? You can read what you are allowed to do in the Copyright text at the bottom of all our patterns. Happy crafting!
Post a comment to pattern DROPS 182-16
We would love to hear what you have to say about this pattern!
If you want to leave a question, please make sure you select the correct category in the form below, to speed up the answering process. Required fields are marked *.