
Looking for a yarn?


Comments / Questions (14)
![]() Edith Pedersen wrote:
Edith Pedersen wrote:
Kan man få vist en billede hvor dan man syer de her tøfler sammen skal de syes under bunden eller ovn over
29.01.2023 - 17:02DROPS Design answered:
Hej Edith, tøflerne strikkes rundt fra tåen og bagud, deler arbejdet over vristen og strikker frem og tilbage. Du syr sammen bag på hælen. Se den her video: Sutsko - montering
31.01.2023 - 11:29
![]() Lena wrote:
Lena wrote:
Jag vill sticka från hälen och framåt istället. Det hade underlättat mycket om det hade funnits en måttskiss på arbetet så som det finns till beskrivningarna för andra plagg. En måttskiss före tovning då eftersom exakta måtten efter tovning kan vara svårt att beräkna. Kan ni lägga till en sådan måttskiss i beskrivningen?
04.12.2022 - 15:53DROPS Design answered:
Hei Lena. Vi oppgir målene før og etter toving i forbinnelse med strikkefastheten, som du finner øverst i oppskriften.- Ønske om målskisse er overlevert til design avd. så må de avgjøre om det evnt. kan være aktuellt. mvh DROPS Design
05.12.2022 - 13:42
![]() Chris wrote:
Chris wrote:
Bonjour, J ai aussi un problème avec ce modèle. Il semble que quelques explications soient manquantes. Ces 12 mailles correspondent a quel endroit du chausson ? Un coté du pied? Mais alors quand les reprendre ? Suis un peu perdue, pouvez vous m'éclairée. Merci d'avance
23.11.2021 - 20:19DROPS Design answered:
Bonjour Chris, les chaussons se tricotent d'abord en rond, à partir du côté, avant de séparer l'ouvrage et de continuer en allers et retours, on va marquer la partie du dessus du pied qui va servir de repère pour commencer maintenant à tricoter à partir de ce marqueur sur toutes les mailles et tricoter ainsi la partie du pied à partir du milieu jusqu'à l'autre côté pour faire l'ouverture. Suivez attentivement les explications, tout prendra forme progressivement. Bon tricot!
24.11.2021 - 07:43
![]() Audrey wrote:
Audrey wrote:
Bonjour, je ne comprends pas le nombre de mailles à monter avant feutrage pour obtenir la bonne taille après feutrage ? Votre explication (nb de mailles + augmentations) se lit elle avant feutrage ? Merci ;-)
03.10.2021 - 20:49DROPS Design answered:
Bonjour Audrey, pour obtenir les mesures indiquées pour chaque taille, votre échantillon doit être de 21 m x 28 rangs avant feutrage et 23m x 32 rangs après feutrage. Tricotez par ex. un échantillon (plus de mailles/rangs), vérifiez votre tension avant feutrage et délimitez un carré de 23 m x 32 rangs en passant/faufilant un fil - feutrez votre échantillon en machine et vérifiez les mesures. Bon tricot!
04.10.2021 - 08:39
![]() Brugere wrote:
Brugere wrote:
Bonjour, J ai un problème avec ce modèle 'après les côtes mousse je ne comprends pas. Ou faut il couper le fil ? Je commence les rangs aller retour au point mousse sur combien de maille ? Que dois-je faire de c est 12 mailles ? Je fais le modèle 38/40 Pouvez vous m expliquer merci cordialement
01.03.2021 - 16:35DROPS Design answered:
Bonjour Mme Brugere, vous coupez le fil à la fin de votre dernière côte mousse (= côté extérieur du chausson). Glissez les 12 premières mailles de l'aiguille sur l'aiguille droite sans les tricoter, et commencez maintenant à tricoter à partir d'ici (= milieu du dessus du pied), en rangs, pour l'ouverture du pied (à partir de la fin du cou-de-pied jusqu'au talon). Vous tricotez maintenant toutes les mailles, en commençant après les 12 mailles glissées, ces 12 mailles seront tricotées en fin de rang sur l'endroit (et en début de rang sur l'envers). En espérant que cela vous aide. Bon tricot!
02.03.2021 - 07:33
![]() Robbin Vokes wrote:
Robbin Vokes wrote:
It certainly is unclear what to do with the 12/13 instep stitches. Going from rounds to rows? Does that require a circular needle? I suggest correcting the pattern instead of leaving us scratching our heads.
02.01.2021 - 20:41
![]() Monica Blasiusson wrote:
Monica Blasiusson wrote:
Jag har tovat provrutor jag stickat och det det blev knappt 40% kvar.
18.11.2019 - 15:08DROPS Design answered:
Hej Monica, smart att testa din maskin först! Om den tovar för mycket får du testa med lägre temperatur, men det går att dra ganska mycket i bløta tovade tofflor :)
19.11.2019 - 13:28
![]() Monica Blasiusson wrote:
Monica Blasiusson wrote:
Är det meningen att dessa totalt 44 maskor ska räcka runt en fot? Jag har exakt stickfasthet. Måste vara något som fattas.
17.11.2019 - 19:14DROPS Design answered:
Hei Monica. Ja, det er 44 masker i den minste str. Det er fra tåen og mot risten (strikkes rundt), åpningen til foten strikkes frem og tilbake og vil være påca 30 cm. God Fornøyelse!
18.11.2019 - 14:54
![]() Ana wrote:
Ana wrote:
Hi, what about the first 12 stitches? You say to start knitting after the marker. Whay do I do with the first 12?
07.10.2019 - 10:47DROPS Design answered:
Dear Ana, you now work all the stitches as before but now in rows (and not in the round anymore) starting at the marker, ie rounds started mid under foot, rows are now starting mid upper foot: join the yarn with the stitch after the marker and work all stitches in rows. Happy knitting!
07.10.2019 - 11:00
![]() Ana wrote:
Ana wrote:
I place the marker after the first 12 stitches and cut the strand. After the marker, I knit in garter stitch, what do I do with the first 12 stitches, knit in garter or stocking stitch, or not knit the first 12 stitches?
05.10.2019 - 10:37DROPS Design answered:
Dear Ana, you work now in garter stitch, in rows, starting from the stitch after the marker, over all stitches, until the finished measurement. Happy knitting!
07.10.2019 - 08:51
|
|
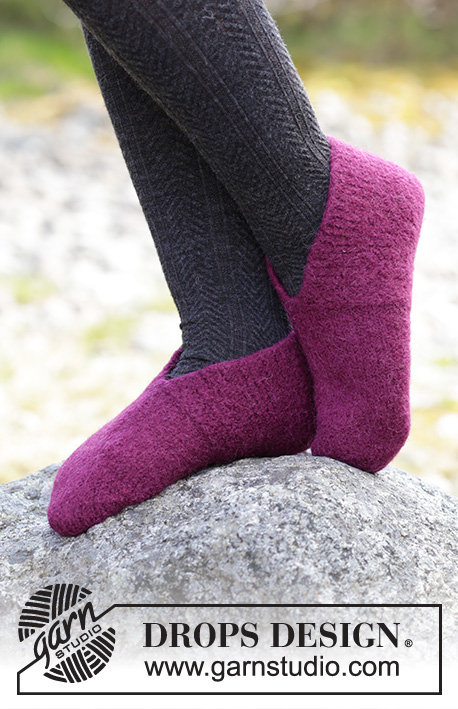
Winter Comfy#wintercomfyslippers |
|
 |
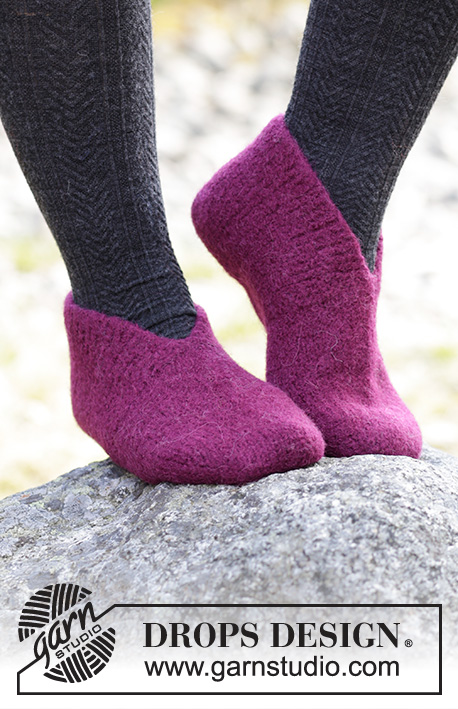 |
Felted slippers with garter stitch and stockinette stitch, worked from the toe backwards. The piece is worked in DROPS Lima.
DROPS 182-16 |
|
|
INFORMATION FOR THE PATTERN: RIDGE/GARTER STITCH (worked in the round): 1 ridge = 2 rounds. Knit 1 round and purl 1 round. RIDGE/GARTER STITCH (worked back and forth): 1 ridge = Knit 2 rows. INCREASE TIP: Increase 1 stitch by making 1 yarn over. On next round knit yarn over twisted to avoid a hole. ---------------------------------------------------------- SLIPPER: The piece is worked in the round, from the toe backwards, then worked back and forth over heel. The piece is sewn together mid back and mid front of toe afterwards. Cast on 28 stitches with double pointed needles size 4 mm / US 6 and Lima. Knit 1 round and insert 1 marker in the first and 15th stitch (= the sides). Continue with stockinette stitch AT THE SAME TIME on the next round increase 1 stitch on each side of both markers (= 4 stitches increased on round) - read INCREASE TIP! Repeat the increase in each side every 2nd round 3-4-4 more times, then increase 1 stitch before each marker (= 2 stitches increased on round) 0-0-1 time = 44-48-50 stitches. REMEMBER THE GAUGE! Continue with stockinette stitch until the piece measures 13-14-15½ cm / 5"-5½"-6¼". Now work 2 RIDGES in the round - see description above, AT THE SAME TIME as you insert a marker mid top of foot after the first 11-12-13 stitches. Cut the strand. Start after the marker and work GARTER STITCH back and forth - see description above. Bind off when piece measures approx. 26-28½-31½ cm / 10¼"-11¼"-12⅜" (leave a strand end of approx. 20 cm / 8", this is used for assembly). ASSEMBLY: Fold the bind-off edge double and sew together mid back - sew in the outermost loop of the outermost stitch so the seam is not thick. Sew together the hole at front of toe with grafting stitches - sew the 14 stitches on top of foot to the 14 stitches under the foot. Work another slipper in the same way. FELTING: Put the slippers in the washing machine with a detergent without enzymes or optic bleaches. Wash at hot 40C/104F degrees with normal centrifuge but without pre-wash. Afterwards, put the slippers on and shape them to the right measurements while they are still wet. Later wash as normal wool garment. AFTER FELTING: If the piece is not felted enough and is too big: Wash the piece one more time in the washing machine while it is still wet add a terry towel that measures approx. 50 x 70 cm = 19¾" x 27½" - NOTE: Do not use a short program. If the piece has been felted too much and is too small: While the piece is still wet stretch it to the correct measurements, if the piece is dry, make sure to soak it first. Remember: All subsequent washes are as a normal wool garment. |
|
Have you finished this pattern?Tag your pictures with #dropspattern #wintercomfyslippers or submit them to the #dropsfan gallery. Do you need help with this pattern?You'll find 18 tutorial videos, a Comments/Questions area and more by visiting the pattern on garnstudio.com. © 1982-2025 DROPS Design A/S. We reserve all rights. This document, including all its sub-sections, has copyrights. Read more about what you can do with our patterns at the bottom of each pattern on our site. |
|


With over 40 years in knitting and crochet design, DROPS Design offers one of the most extensive collections of free patterns on the internet - translated to 17 languages. As of today we count 314 catalogs and 11822 patterns - 11812 of which are translated into English (US/in).
We work hard to bring you the best knitting and crochet have to offer, inspiration and advice as well as great quality yarns at incredible prices! Would you like to use our patterns for other than personal use? You can read what you are allowed to do in the Copyright text at the bottom of all our patterns. Happy crafting!
Post a comment to pattern DROPS 182-16
We would love to hear what you have to say about this pattern!
If you want to leave a question, please make sure you select the correct category in the form below, to speed up the answering process. Required fields are marked *.