
Popular categories
Looking for a yarn?


Comments / Questions (25)
![]() Nicole wrote:
Nicole wrote:
Bonjour. Cette vidéo est difficile à comprendre, il faut en deviner le sens. Le schéma manque d'explications. Je ne comprends pas pourquoi aux 1 er et 3eme rg, les jetés ne sont pas indiqués en augmentation sur le schéma? Ceux ci se situent avant et après la maille centrale ? Je vous que plusieurs personnes ont des difficultés aussi. Il aurait été judicieux de le corriger au vu de tous ces commentaires. Merci pour votre aide.
08.01.2026 - 22:47DROPS Design answered:
Bonjour Nicole, désolée de la réponse tardive et de lire que vous avez eu des soucis avec la vidéo, les augmentations formés par les jetés de A.1 / A.3 figurent sous forme de maille supplémentaire / carré supplémentaire de chaque côté de A.1 / à la fin de A.3. En espérant que vous ayez réussi à déchiffrer les diagrammes et la vidéo, sinon n'hésitez pas à nous indiquer quelle partie vous pose encore problème pour que nous puissions vous aider. Bon tricot!
27.02.2026 - 13:56
![]() Annicka wrote:
Annicka wrote:
Mijn vorige opmerking kan verwijderd worden, zie dat het de Noorse av steek is. Maar heb nog wel een vraag over de vier kantsteken. Zoals ik de instructies lees is zowel de heengaande als de teruggaande naald r-r-av-av en eind av-av-r-r. Dus boordsteek. Maar dan komt er geen v-vorm in de kant. Hoe moet de teruggaande naald? r-av-r-av?
25.10.2025 - 15:54
![]() Anne wrote:
Anne wrote:
Wilde de hoofdband haken. Helaas ben ik gestopt toen ik bij A2 kwam. Al bij de eerste helft viel me op dat mijn 4 kantsteken anders uitpakken dan op de foto. Op de video doen jullie iets totaal raadselachtigs bij de averechtse steken. Op de video wordt me niet duidelijk hoe ik die moet breien. De draad wordt wel naar voren gehaald maar achter de linkernaald opgepakt en dan wordt de rechternaald onder de linker door gehaald en dan wordt nog eens de draad opgepakt??? Kunt u uitleg geven?
25.10.2025 - 15:23DROPS Design answered:
Dag Anne,
Ik begrijp dat het er raadselachtig uitziet op de video, maar het is een hele gewone averechte steek. Hij wordt in de video alleen op de Scandinavische manier gebreid, waarbij de draad anders wordt vastgehouden. Het resultaat is hetzelfde; gewoon een averechte steek.
25.10.2025 - 16:32
![]() Marian wrote:
Marian wrote:
Can this be converted to a crochet pattern? I saw a movie called Dangerous Waters (I think that's what it's called) and this young woman was wearing this adorable headband that looks like this one (only it sported a flower with bling) and I have been dying to make one. But, I prefer crochet to knitting,..I'd have to dust off the knitting needles!
21.09.2019 - 00:36DROPS Design answered:
Dear Marian, we do not have any experience converting knitted pattern into crochet pattern; for any individual assistance please contact your store or any crochet forum. Happy crocheting!
23.09.2019 - 08:14
![]() Joanne M Fishman wrote:
Joanne M Fishman wrote:
I agree with Bonny 23.11.2014. Your patterns are confusing and therefore not enjoyable to some of us. I will drop this pattern.
26.02.2019 - 03:36DROPS Design answered:
Dear Mrs Fishman, we are sorry to hear that you have worries with our patterns. There might be as many differrent way to write pattern as there are knitters, and it's most of the time just a matter of how to read them. You will find some videos showing how to work the beg. ofo shoulder piece + diagrams A.1 to A.3. You are welcome to ask your question here, or contact the store where you bought the yarn for any individual assistance. Happy knitting!
26.02.2019 - 11:39
![]() Mimi wrote:
Mimi wrote:
Hi there, the instructions in diagram for the two sts decrease in A.2 are incomplete. You keep referring knitters to the videos. Yes, they're super helpful but it would be nice if you could update the pattern with a full sentence in the instructions. It won't take a long time to do and you would have solved a problem. Some knitters may be tech-challenged and rely on written instructions.... Thank you. Other than this observation, I made the headband twice in one evening and loved the results!
24.01.2019 - 06:22DROPS Design answered:
Dear Mimi, thanks for your feedback, text will be updated under US-pattern. Happy knitting!
24.01.2019 - 10:41
![]() Béatrice DF wrote:
Béatrice DF wrote:
J'enrage. La solution est sans doute simple mais en suivant vos indications la ligne de côte est toujours brisée... Je ne comprends pas... Désolée...
22.01.2018 - 12:50DROPS Design answered:
Bonjour Béatrice, au rang1, *placez le fil devant l'ouvrage, glissez la m suiv à l'env, ramenez le fil entre les 2 aiguilles (il va se placer au-dessus de la m glissée)*, tric la m env suiv à l'env. Au rang 2, tric ens. à l'env ce jeté et la m glissée. Au rang 3 (= augm), répétez de *-* pour la 1ère m de A.3, puis faites 1 jeté (enroulez le fil encore 1 fois autour de l'aiguille) = vous devez avoir 1 jeté autour de la m glissée + 1 jeté (= augm) et tric la m envers suiv. Au rang 4, tric le jeté (= augm) torse à l'end (dans le brin arrière) et tric le jeté au-dessus de la m glissée ens à l'env avec cette même maille, comme au rang 2. Bon tricot!
22.01.2018 - 13:53
![]() Béatrice DF wrote:
Béatrice DF wrote:
Je ne comprends pas la vidéo de A3. Le problème vient en partie du fait que je tiens mon fil de la main droite. Au rang 1 J'ai cru identifier que le jeté est à l'envers de ce que je fais habituellement mais au rang 2 je n'arrive pas à voir comment la maille et le jeté sont tricotés ensemble. Ce n'est pas une simple maille à l'envers. Pouvez-vous m'expliquer?
21.01.2018 - 09:34DROPS Design answered:
Bonjour Béatrice, regardez bien les mailles et le fil dans la vidéo, (que l'on tienne le fil dans la main droite ou dans la gauche): pour tricoter 1 maille en côte anglaise, au rang 1 de A.3, on va passer le fil devant l'ouvrage, glisser la m suivante comme pour la tricoter à l'envers, enroulez le fil 1 fois autour de l'aiguille droite pour tricoter la maille suivante à l'envers (= le fil forme un jeté au-dessus de la m glissée) et tricotez la m suiv à l'envers. Au rang 2, tricotez ensemble à l'envers le jeté et la m glissée du rang précédent. Bon tricot!
22.01.2018 - 09:55
![]() Béatrice DF wrote:
Béatrice DF wrote:
Un grand merci pour votre réponse rapide et... meilleurs vœux pour la nouvelle année.
03.01.2018 - 06:34
![]() Béatrice DF wrote:
Béatrice DF wrote:
Quand vous dites de faire l'échantillon en point fantaisie, qu'entendez-vous? Aucun diagramme n'a le nombre de mailles correspondant. Un point équivalent? Des côtes? Merci pour votre aide
29.12.2017 - 22:35DROPS Design answered:
Bonjour Béatrice, au regard de modèles tricotés en Eskimo avec la même tension, vous devez avoir 11 m x 15 rangs jersey = 10 x 10 cm. Bon tricot!
02.01.2018 - 10:25
|
|||||||||||||||||||||||||
Raquel#raquelset |
|||||||||||||||||||||||||
 |
 |
||||||||||||||||||||||||
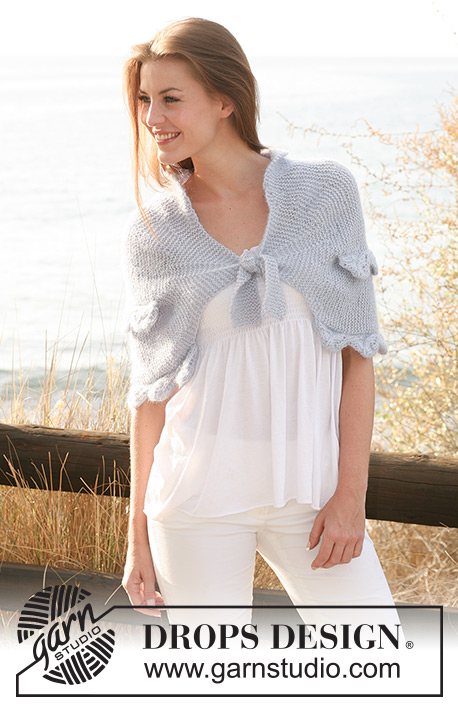
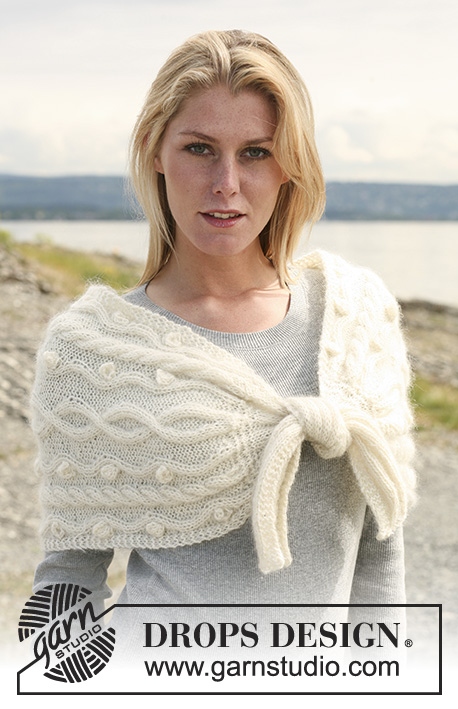
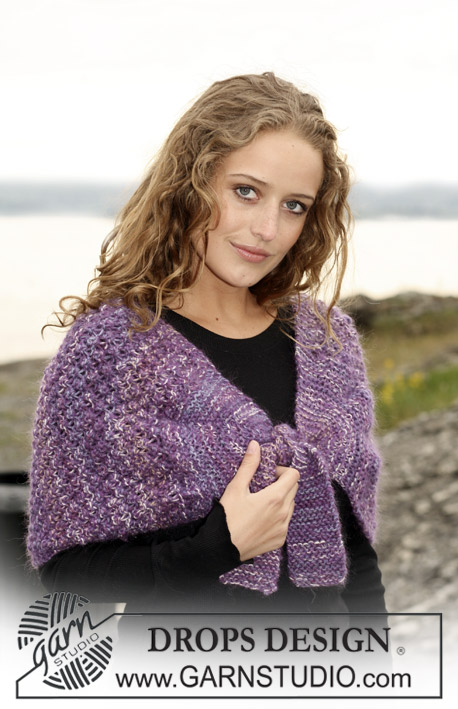
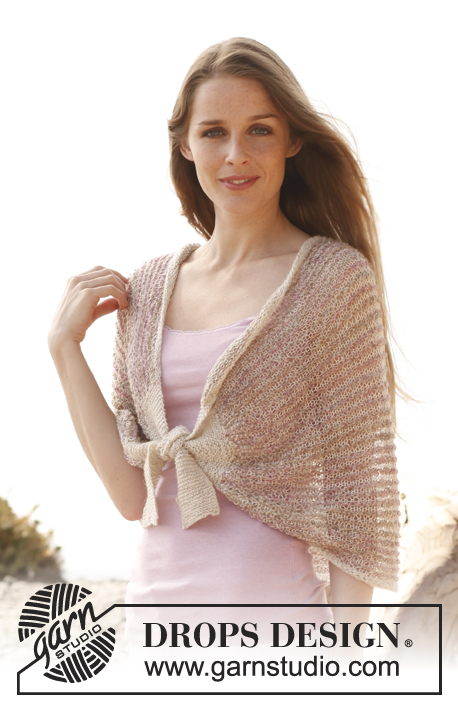
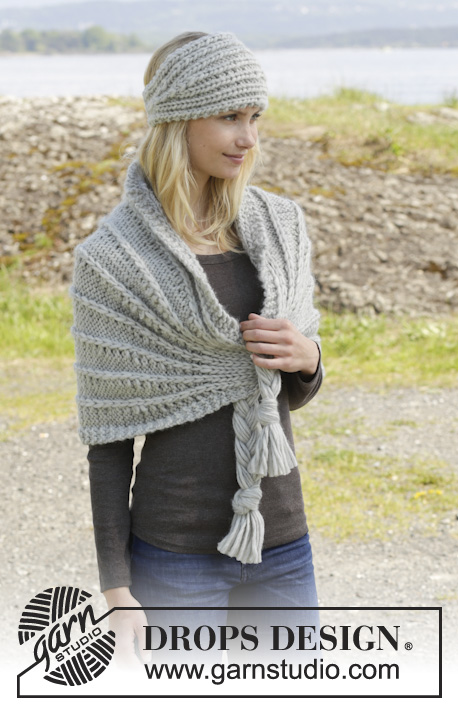
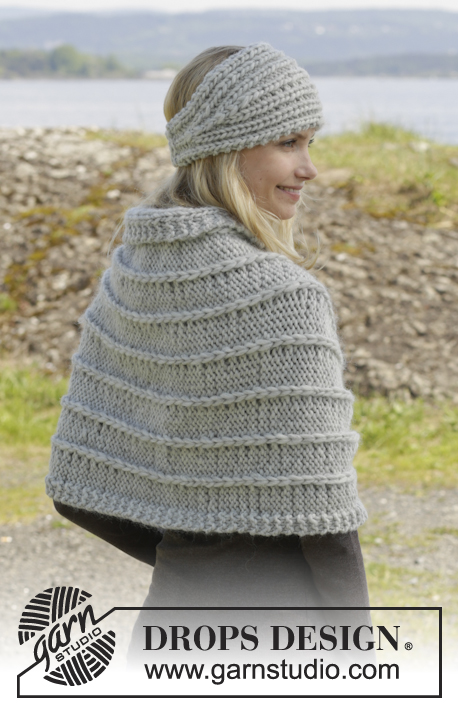
Knitted DROPS head band and shoulder piece in "Snow".
DROPS 156-30 |
|||||||||||||||||||||||||
|
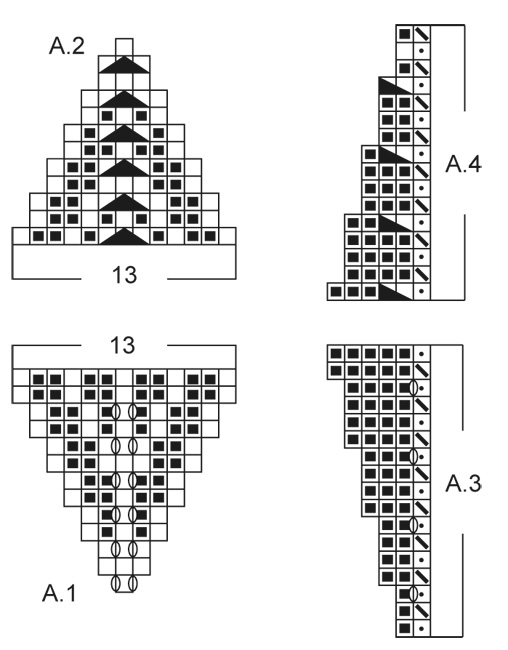
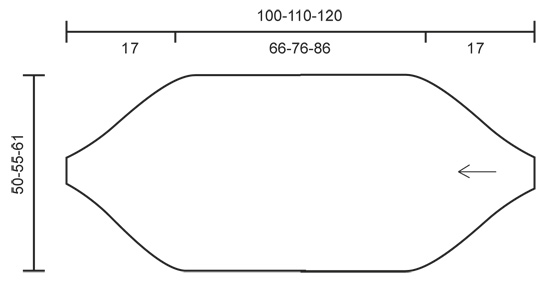
GARTER ST (back and forth on needle): K all rows. 1 ridge = K2 rows. PATTERN: See diagrams A.1 to A.4. Diagrams show pattern seen from RS (1st row = RS). EDGE ST: Row 1 (beg of row): 1 st in GARTER ST - see explanation above, K 1, P 2. Row 1 (end of row): P 2, K 1, 1 st in garter st. Row 2: Garter st over garter st, K over K and P over P. INCREASE TIP: Inc 1 st by making 1 YO, on next round work YO twisted (i.e. work in back loop of st instead front) to avoid holes. ---------------------------------------------------------- HEAD BAND: Worked back and forth on needle. Cast on 9 sts on needle size 8 mm / US 11 with Snow. Work as follows from RS: 4 EDGE STS - see explanation above, 1 st in stockinette st, 4 edge sts. When piece measures 8 cm / 3'', work as follows from RS: 4 edge sts, A.1, 4 edge sts. REMEMBER THE GAUGE! When A.1 has been worked 1 time vertically, there are 21 sts on needle. Then repeat the last 2 rows in A.1 with 4 edge sts in each side of piece. When piece measures 33-35-37 cm / 13"-13 3/4"-14½", work as follows from RS: 4 edge sts, A.2, 4 edge sts. When A.2 has been worked 1 time vertically, there are 9 sts on needle. Then work as follows from RS: 4 edge sts, 1 st in stockinette st, 4 edge sts. When piece measures 49-51-53 cm / 19 1/4"-20"-21", bind off with K over K and P over P. Cut the yarn, leave approx. 20 cm / 8'' - this is used for assembly. ASSEMBLY: Sew tog bind-off and cast-on edge, edge to edge in outer loops of edge sts to avoid a chunky seam. ---------------------------------------------------------- SHOULDER PIECE: Worked back and forth on circular needle to make room for all the sts. Cast on 6 sts on circular needle size 8 mm / US 11 with Snow. Work 1st row (= RS) as follows: * K 1, 1 YO *, repeat from *-* until 1 st remains, K 1 = 11 sts. P 1 row where 1st, 3rd and 5th YO is worked P (to make holes to fasten fringes), while 2nd and 4th YO is worked P twisted (to avoid holes). K 1 row while inc 6-7-8 sts evenly - READ INCREASE TIP. = 17-18-19 sts. P 1 row. K 1 row while inc 6-7-8 sts evenly = 23-25-27 sts. Work 5 rows rib (= K 1, P 1), finish with K 1, with 3 sts in GARTER ST – see explanation above, in each side of piece. Now work as follows from RS: 3 sts in garter st, A.3 (8-9-10 times in total), finish with first st in A.3 (without YO between 2 sts) and 3 sts in garter st. REMEMBER THE GAUGE! When A.3 has been worked 1 time vertically, there are 55-61-67 sts on needle. Repeat the last 2 rows until piece measures 83-93-103 cm / 32 3/4"-36½"-40½". Now work as follows from RS: 3 sts in garter st, A.4 (8-9-10 times in total), finish with first st in A.4 and 3 sts in garter st. When A.4 has been worked 1 time vertically, there are 23-25-27 sts on needle. Work 5 rows rib (= K 1, P 1), finish with K 1, with 3 sts in garter st in each side of piece. P 1 row while dec 6-7-8 sts evenly by P 2 tog = 17-18-19 sts. K 1 row. P 1 row while dec 6-7-8 sts evenly = 11 sts. Work next row as follows: * K 3 tog, 1 YO *, repeat from *-* 3 times in total, K 2 tog = 7 sts. P 1 row and work YOs P (to make holes to fasten fringes), bind off. Piece measures approx. 100-110-120 cm / 39½"-43½"-47". FRINGES: 1 fringe: Cut 3 strands of 2 meters/2.2 yds, cut in 2 (= 6 strands), thread strands through one of the holes in the end (do not tie). Make 2 fringes more the same way, and thread through the other 2 holes. Make 1 LOOSE plait of the 3 fringes, then make 1 loose knot at the end (leave approx. 8 cm / 3'' strands at the end). Repeat on the other side of shoulder piece. |
|||||||||||||||||||||||||
Diagram explanations |
|||||||||||||||||||||||||
|
|||||||||||||||||||||||||
 |
|||||||||||||||||||||||||
 |
|||||||||||||||||||||||||
Have you finished this pattern?Tag your pictures with #dropspattern #raquelset or submit them to the #dropsfan gallery. Do you need help with this pattern?You'll find 19 tutorial videos, a Comments/Questions area and more by visiting the pattern on garnstudio.com. © 1982-2026 DROPS Design A/S. We reserve all rights. This document, including all its sub-sections, has copyrights. Read more about what you can do with our patterns at the bottom of each pattern on our site. |
|||||||||||||||||||||||||


With over 40 years in knitting and crochet design, DROPS Design offers one of the most extensive collections of free patterns on the internet - translated to 17 languages. As of today we count 325 catalogs and 12298 patterns - 12288 of which are translated into English (US/in).
We work hard to bring you the best knitting and crochet have to offer, inspiration and advice as well as great quality yarns at incredible prices! Would you like to use our patterns for other than personal use? You can read what you are allowed to do in the Copyright text at the bottom of all our patterns. Happy crafting!
Post a comment to pattern DROPS 156-30
We would love to hear what you have to say about this pattern!
If you want to leave a question, please make sure you select the correct category in the form below, to speed up the answering process. Required fields are marked *.