
Popular categories
Looking for a yarn?


Comments / Questions (11)
![]() Karmen wrote:
Karmen wrote:
Det mærke man sætter i siden for at måle bagstykkets ærmegab: skal det sættes i opslagskandten eller lige efter sidste udtagning til den skrå skulder? Jeg læser det som om man sætter mærket efter udtagningerne, og måler derfra, men så bliver ærmegabet meget stort hvis man til str L skal måle 17 cm fra mærket efter man har strikket skuldrene .
25.02.2026 - 20:34DROPS Design answered:
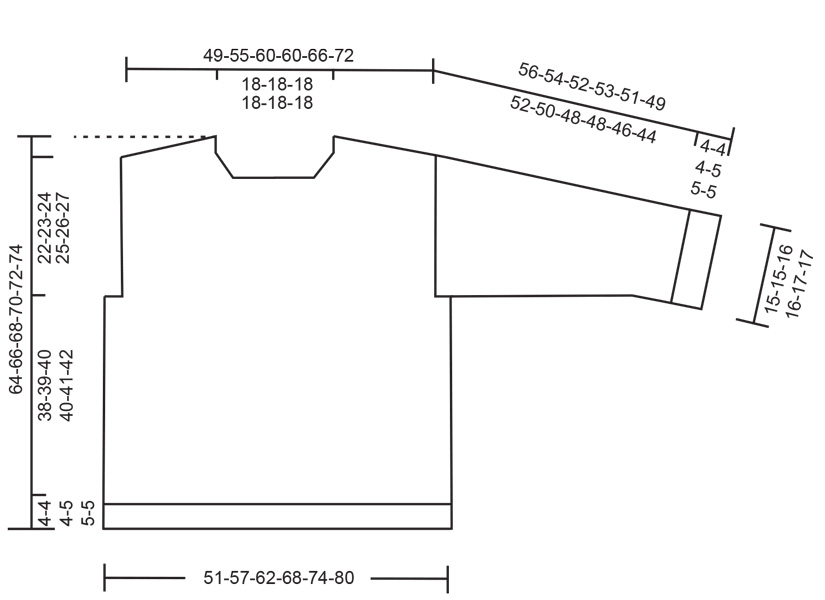
Hei Karmen. Man setter merket ytterst i siden (lige efter sidste udtagning til den skrå skulder). Iflg målskissen skal ermhullet måle 24 cm (Midt oppå skulderen og ned, men husk midt oppå skulderen er ikke samme sted som merket ble satt). mvh DROPS Design
16.03.2026 - 13:52
![]() Christine wrote:
Christine wrote:
Following the back pattern piece\\r\\nIt says increase in each row 2 and 3 \\r\\nFollow charts a1-3 \\r\\nThen it says repeat row 2-3 2/ x \\r\\nSo are you simply repeating row 2/3 of chart a1-3 or are you continuing up the charts on a1-3 ? \\r\\nAlso how are you incorporating the additional stitches being made ?
30.12.2025 - 02:41
![]() Christine wrote:
Christine wrote:
For this pattern it says work rows 2 and 3 a total of 22 times it says work chart a1 -3 So and I just working chart a1-3 on row 2 and. 3 or am I to follow the chart Also dues the chart take into account additional stitches being made or they simply the cream colour and charge being worked on original stitch count?
30.12.2025 - 02:33
![]() Christina Frederiksen wrote:
Christina Frederiksen wrote:
Hej I afsnittet hvor man skal sætte højre og venstre forstykke sammen fra vrangen, kan jeg ikke få det til at stemme med at man skal starte fra højre forstykke. Jeg vil mene at det er venstre?
25.12.2025 - 14:28DROPS Design answered:
Hei Christina. Oppskriften er oversendt design avd. slik at de kan ta en dobbeltsjekk, men tror du har rett (starte med venstre og ikke klipt tråden på venstre forstykke, men på høyre). mvh DROPS Design
14.01.2026 - 08:52
![]() Judith wrote:
Judith wrote:
Nog een laatste opmerking: in maat M moet voor de mouw elke 2,5 cm geminderd worden, anders wordt de mouw veel te lang. Bij elke 7 naalden minderen komt het, ook met patroon herhalingen, precies uit
03.12.2025 - 10:26
![]() Judith wrote:
Judith wrote:
Nog meer te zeuren: bij de overgang van patroon naar boord vind ik het mooier de naald met meerderingen recht in naturel te breien, zodat de laatste patroon naald niet opgaat in boordsteek
29.11.2025 - 12:20
![]() Judith wrote:
Judith wrote:
Het patroon is (nog) niet gecorrigeerd, maar Jeanne heeft volgens mij gelijk. Ik heb na de laatste meerdering de steken voor de hals gemeerderd, daarna de naald aan de verkeerde kant van het rechter voorpand gebreid en vervolgens beide panden vanaf de goede kant. samen gebreid, dan komt het wel uit. In het rechter voorpand staat in maat M ook het aantal herhalingen van A4 verkeerd (3 ipv 2)
22.11.2025 - 20:09
![]() Jeanne wrote:
Jeanne wrote:
Mijn vraag gaat over: HET RECHTER EN LINKER PAND VERBINDEN DOOR EXTRA STEKEN OP TE ZETTEN. Moeten die extra op te zetten steken niet aan de hals ipv aan de achterkant komen? Dus als je de extra steken moet opzetten aan de averechte kant moet je volgens mij eerst de linker schouder averecht in patroon breien en dan de extra steken opzetten en daarna de rechter schouder breien??
29.10.2025 - 19:55DROPS Design answered:
Dag Jeanne,
Het lijkt inderdaad alsof er een foutje in het patroon staat. Je zou volgens mij met het linker voorpand moeten beginnen aan de verkeerde kant als je beide voorpanden samenvoegt. Ik zal het doorgeven aan de ontwerpafdeling zodat het eventueel aangepast kan worden.
12.11.2025 - 16:28
![]() Jeanne wrote:
Jeanne wrote:
Klopt de beschrijving van het patroon bij VOORPAND (rechter en linker deel samen)? Moeten de extra steken die je op moet zetten niet aan de hals zijde zijn? De beschrijving zegt: begin aan de averechte zijde van de rechter schouder te breien, zet dan extra steken op en brei de linker schouder averecht in patroon verder. Het motief past niet en de voorkant blijft open?? Moet dit zo of lees ik het verkeerd?
27.10.2025 - 22:25DROPS Design answered:
Dag Jeanne,
Op het rechter voorpand meerder bij een hoogte van 4-4-5-5-6-6 cm aan de kant van de hals. Dit doe je als je aan de goede kant bent. Je breit dan vanaf het armsgat richting de hals en aan die kant (dus aan het einde van de naald meerder je steken in 'NAALD 1').
29.10.2025 - 18:22
![]() Annelie wrote:
Annelie wrote:
Hej! Jag stickar storlek small och har börjat på bakstycket. Alla ökningar är gjorda, 32 varv mönster och rätt antal maskor. Enligt fortsättning ska mönstret fortsätta på A4 11:e varv. Jag har stickat 32 varv mönster, 12+12+8, och ska således börja på varv 9 och inte 11 som anges i mönstret. Börjar jag på varv 11 stämmer inte mönstret.
15.10.2025 - 19:27DROPS Design answered:
Hej Annelie, vi forstår hvad du mener og skal høre med design om hvad som stemmer. Du strikker selvfølelig så du får mønsteret til at stemme :)
23.10.2025 - 08:02
|
||||||||||
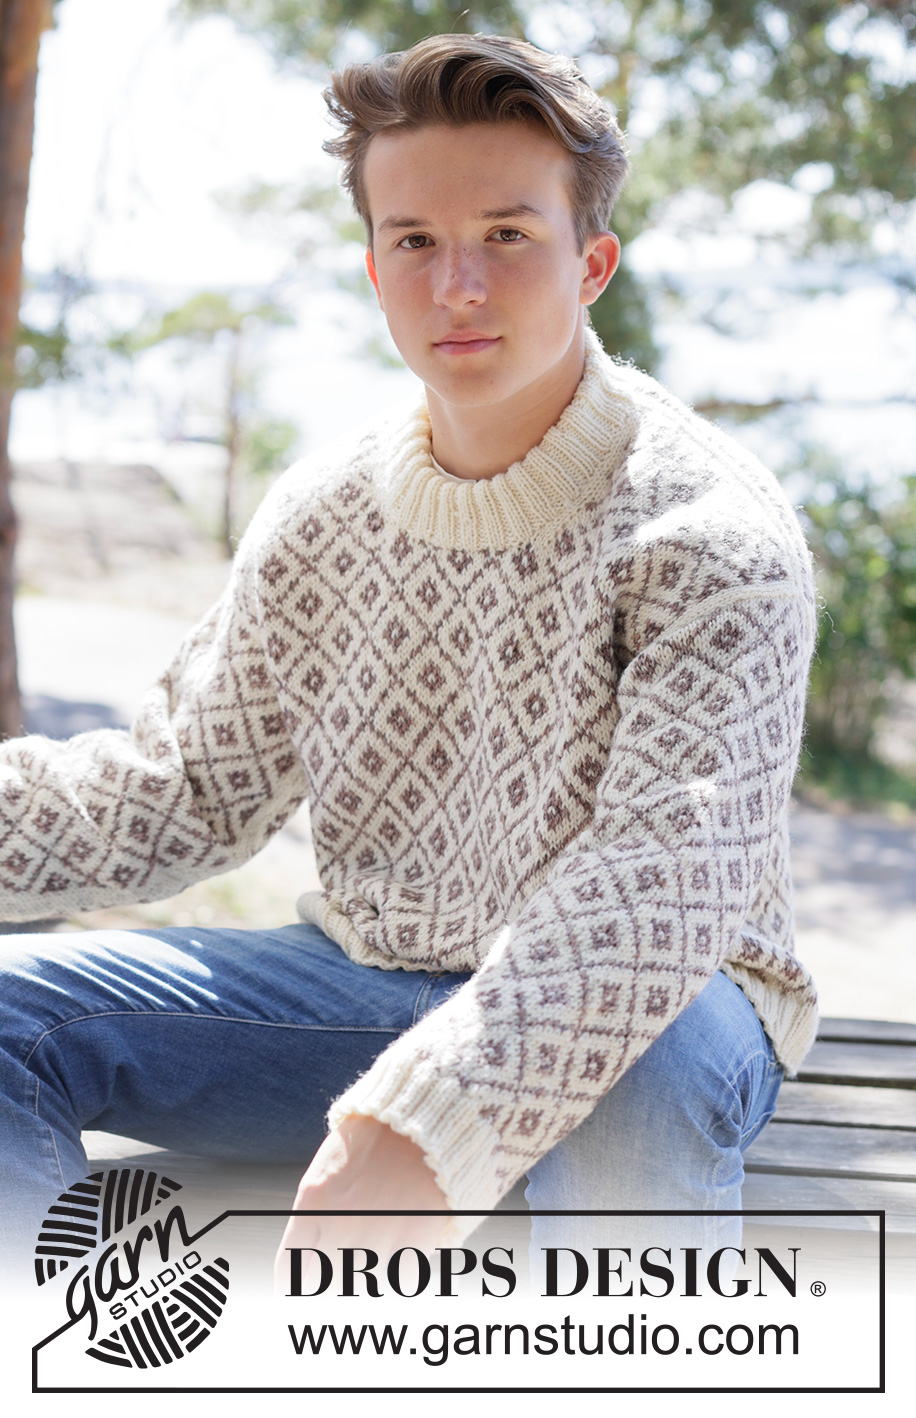
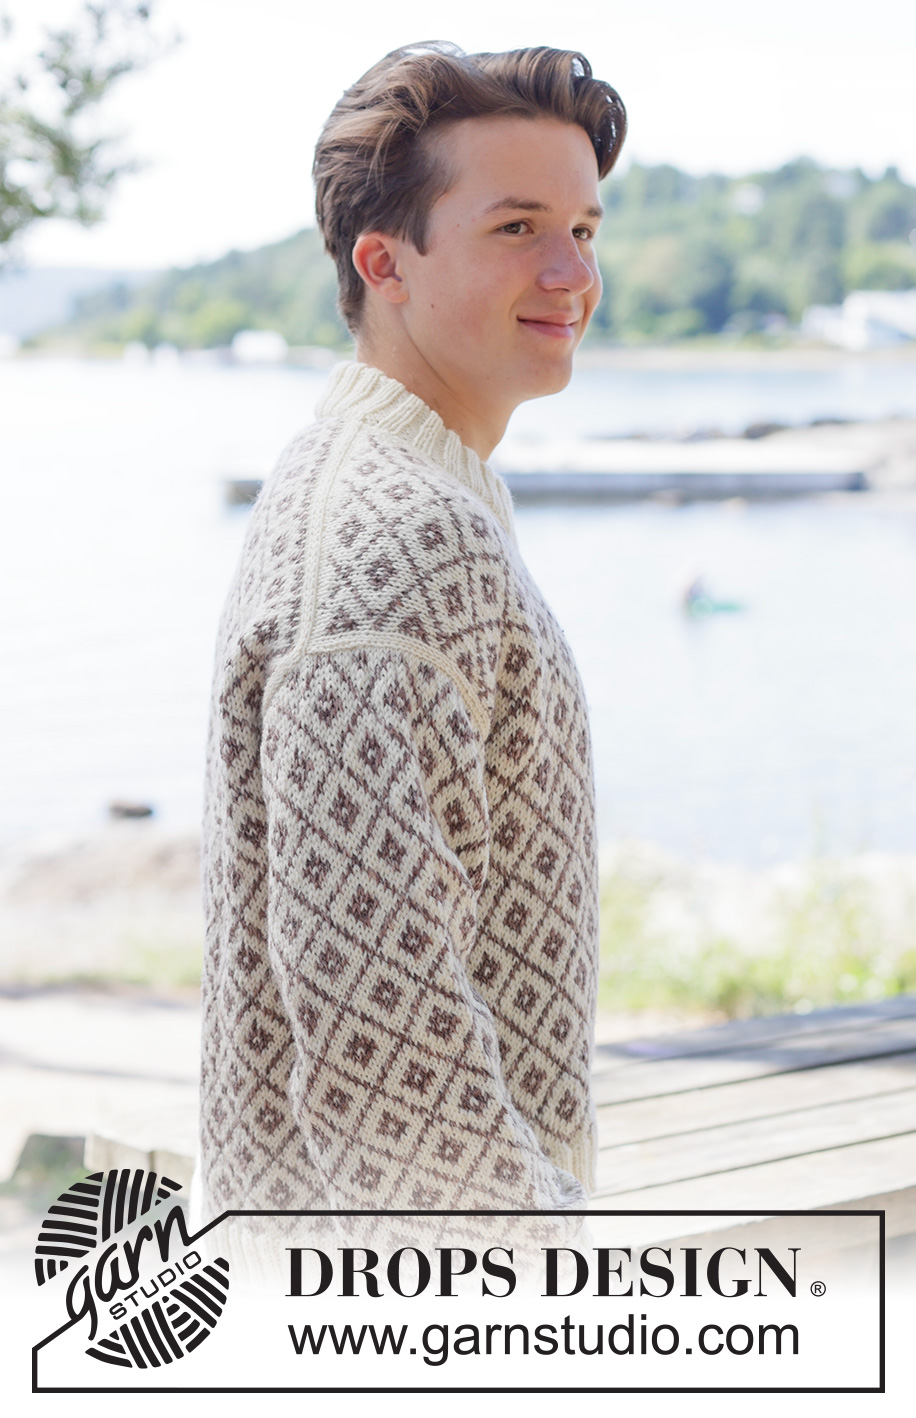
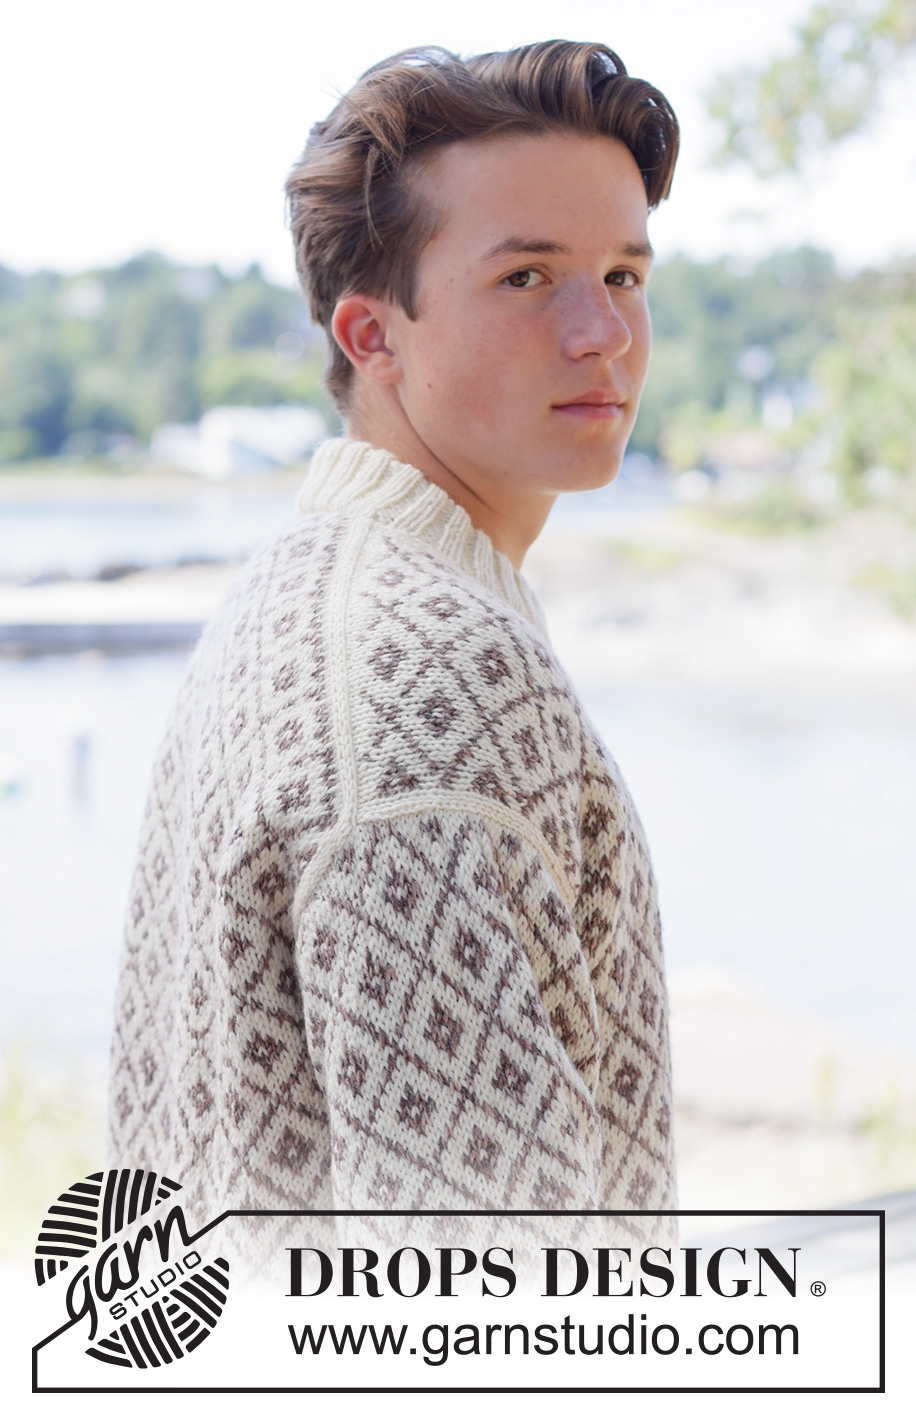
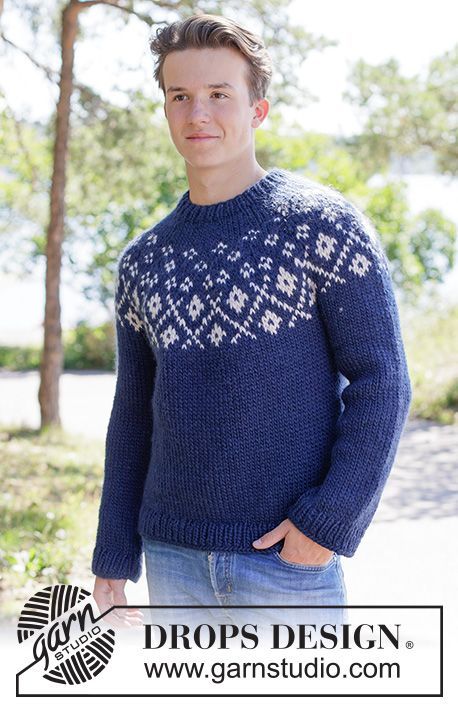
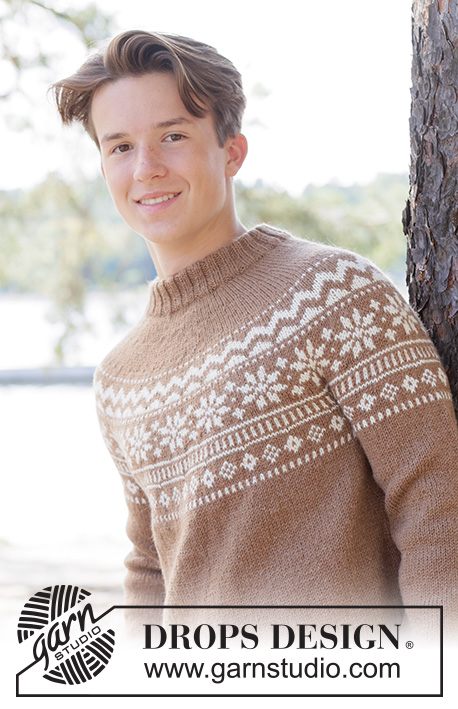
Diamond Love Sweater#diamondlovesweater |
||||||||||
 |
 |
|||||||||
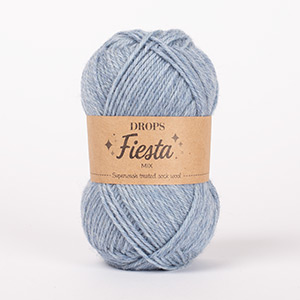
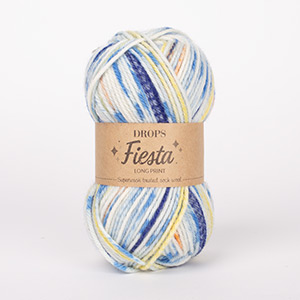
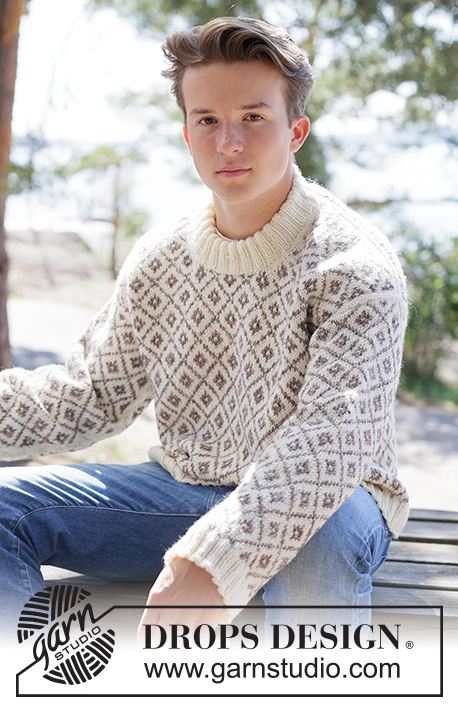
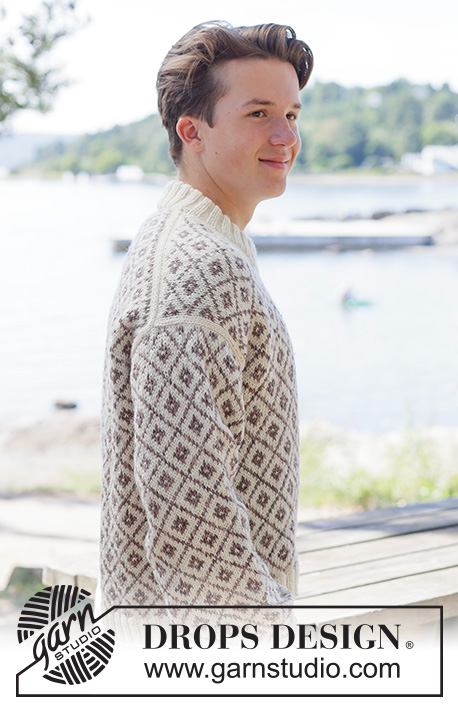
Knitted sweater for men in DROPS Fiesta. Piece is knitted top down with European shoulders / diagonal shoulders, Nordic pattern and double neck edge. Size: S - XXXL
DROPS 260-10 |
||||||||||
|
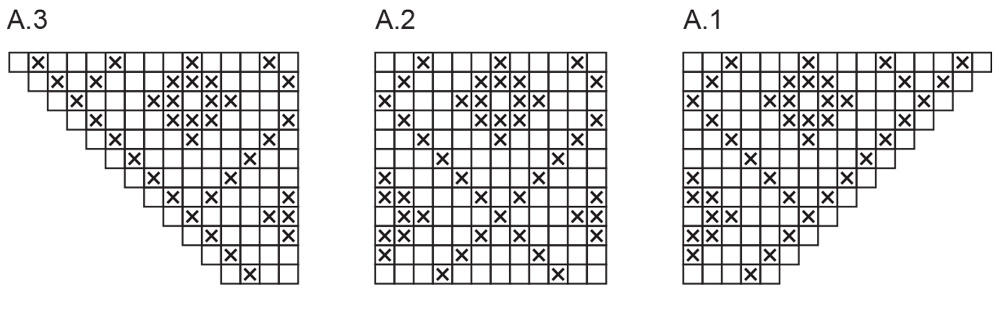
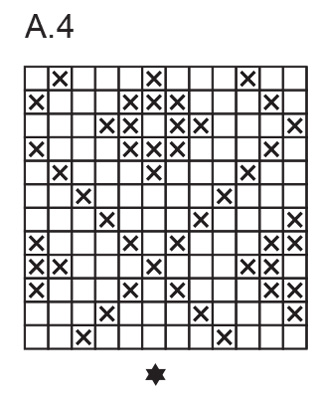
---------------------------------------------------------- EXPLANATION FOR THE PATTERN: ---------------------------------------------------------- GARTER STITCH (when working back and forth): Knit on all rows, i.e. knit from right side and knit from wrong side. 1 ridge vertically = knit 2 rows. PATTERN: See diagrams A.1 to A.4. Diagrams show all rows in pattern seen from the right side. Work the entire pattern in stockinette stitch. INCREASE TIP-1: INCREASE 1 STITCH TOWARDS THE LEFT - from RIGHT SIDE: Use left needle to pick up yarn between 2 stitches from row below, pick up yarn from the front and knit in the stitch loop that is on the back of the needle. INCREASE 1 STITCH TOWARDS THE RIGHT - from RIGHT SIDE: Use left needle to pick up yarn between 2 stitches from row below, pick up yarn from the back and knit in the stitch loop that is on the front side of the needle. INCREASE TIP-2: INCREASE 1 STITCH TOWARDS THE RIGHT - from WRONG SIDE: Use left needle to pick up yarn between 2 stitches from row below, pick up yarn from the back and purl in the stitch loop that is on the front side of the needle. INCREASE 1 STITCH TOWARDS THE LEFT - from WRONG SIDE: Use left needle to pick up yarn between 2 stitches from row below, pick up yarn from the front and purl in the stitch loop that is on the back side of the needle. KNITTING TIP: Mark in diagram on which row back piece was finished - this makes it easier when the front piece is worked and the armhole is adjusted. DECREASE TIP: Decrease 1 stitch on each side of marker as follows: Work until 2 stitches remain before stitch with marker mid under sleeve, knit 2 together with color Off White, knit 1 with color Off White (marker is in this stitch), knit 2 twisted together with color Off White (= 2 stitches decreased). ---------------------------------------------------------- START THE PIECE HERE: ---------------------------------------------------------- SWEATER - SHORT OVERVIEW OF THE PIECE: In this pattern needles of different length have been used, begin with fitting length for number of stitches and switch as needed. First work piece back and forth on circular needle. Begin by casting on stitches in the back of neck. Then work back piece downwards while AT THE SAME TIME increasing in each side of piece until number of stitches for shoulder width is reached. Back piece has a slight diagonal shoulder. Then work down to armholes. Now put back piece a side and work the front piece. Front piece is first worked in 2 parts. Begin by picking up stitches along one shoulder from back piece, work pattern while increasing towards the neck. Repeat on the other shoulder. Put right and left front piece together when increases for neck are done. Then work front piece down to armholes. Now slip front piece and back piece on to same circular needle and work body downwards in the round on circular needle. Pick up stitches for sleeves around the armholes and work sleeves downwards in the round on needle. Finish by picking up stitches around the neck and work a neck edge. BACK PIECE: Work piece back and forth on circular needle. Cast on 39-39-39-39-39-39 stitches on circular needle size 4 MM = US 6 with color Off White in DROPS Fiesta. Work PATTERN - read explanation above while AT THE SAME TIME working as explained below. NOTE! Work the 3 outermost stitches in each side with color Off White until armhole is done. ROW 1 (= wrong side): Purl all stitches. ROW 2 (= right side): Read INCREASE TIP-1 and knit 3, increase 1 stitch towards the left, work A.1, work A.2 2-2-2-2-2-2 times in total, work A.3, increase 1 stitch towards the right, knit 3. ROW 3 (= wrong side): Read INCREASE TIP-2 and purl 3, increase 1 stitch towards the right, work A.3, A.2 2 times in total, A.1, increase 1 stitch towards the left, purl 3. AFTER 3RD ROW: Work 2nd and 3rd ROW 16-19-22-22-25-28 times in total (= 32-38-44-44-50-56 rows worked). After last increase there are 103-115-127-127-139-151 stitches on needle. Insert 1 marker in the side. Now measure piece from here! Work next row as follows from right side: Work 3 stitches in stockinette stitch in color Off White, work A.4 8-9-10-10-11-12 times in total (begin on 11th row in A.4 so that the pattern fits over the stitches from A.1, A.2 and A.3), work until 4 stitches remain on needle, work first stitch in A.4 and finish with 3 stitches in stockinette stitch in color Off White. Continue pattern back and forth like this. Remember to follow the knitting gauge! Work until piece measures 16-17-17-18-19-19 cm = 6¼"-6¾"-6¾"-7"-7½"-7½" measured from marker at the edge along armhole – finish after a row from wrong side and cast at the same time off 1 edge stitch in each side on last row= 101-113-125-125-137-149 stitches – read KNITTING TIP. Cut the yarn, slip stitches on a thread or stitch holder, now work left front piece along the left shoulder as explained below. LEFT FRONT PIECE: Find left shoulder on back piece as follows: Place back piece flat with right side up, place back piece so that stitches on thread/stitch holder is towards you, left side of piece = left shoulder. Now pick up stitches along left diagonal shoulder on back piece - begin from right side at the neck and pick up stitches out towards the armhole as follows: Use color Off White and pick up 1 stitch in every knitted row along the shoulder inside outermost stitch, then pick up 1 stitch in the next 2 rows at the edge towards the armhole (pick up inside outermost stitch) = 34-40-46-46-52-58 stitches. All length measurements on front piece are done from pick-up edge. Purl 1 row from wrong side. Work next row as follows from right side: Work 3 stitches in stockinette stitch in color Off White, work the last 4-10-4-4-10-4 stitches in A.2, work entire A.2 2-2-3-3-3-4 times, finish with 3 stitches in stockinette stitch in color Off White. Continue pattern back and forth like this. When piece measures 4-4-5-5-6-6 cm = 1½"-1½"-2"-2"-2⅜"-2⅜", increase as follows - note which row in the diagram this is: ROW 1 (= right side): Remember INCREASE TIP-1 and knit 3 in color Off White, increase 1 stitch towards the left (in color Off White), continue A.2 as before, knit 3 in color Off White. ROW 2 (= wrong side): Purl 3 in color Off White, work A.2 from wrong side until 3 stitches remain, purl 3 in color Off White. Work the increased stitches in pattern A.2. Work 1st and 2nd ROW 6 times in total (= 12 rows have been worked) = 40-46-52-52-58-64 stitches. Finish with a row from right side without increases. Cut the yarn, slip stitches on a thread or stitch holder, now work right front piece along the shoulder as explained below. RIGHT FRONT PIECE: Now pick up stitches along right diagonal shoulder on back piece - begin from right side at the armhole and pick up stitches in towards the neck as follows: Use color Off White, begin 2 rows before last increase for diagonal shoulders on back piece, pick up 1 stitch in each of these rows inside outermost stitch, then pick up 1 stitch in every knitted row along the shoulder (inside outermost stitch) = 34-40-46-46-52-58 stitches. All length measurements on front piece are done from pick-up edge. Purl 1 row from wrong side. Work next row as follows from right side: Work 3 stitches in stockinette stitch in color Off White, work A.4 2-3-3-3-3-4 times in total, work the first 4-10-4-4-10-4 stitches in A.4, finish with 3 stitches in stockinette stitch in color Off White. Continue pattern back and forth like this. When piece measures 4-4-5-5-6-6 cm = 1½"-1½"-2"-2"-2⅜"-2⅜", make sure that increase begins on the same row as on left front piece, increase as follows: ROW 1 (= right side): Knit 3 in color Off White, work A.4 until 3 stitches remain, increase towards the right (in color Off White), knit 3 in color Off White - remember INCREASE TIP-1. ROW 2 (= wrong side): Purl 3 in color Off White, work A.4 from wrong side, purl 3 in color Off White. Work 1st and 2nd ROW 6 times in total (= 12 rows have been worked) = 40-46-52-52-58-64 stitches. Finish with a row from right side without increases. Cut the yarn. Then place the front pieces together as explained below. FRONT PIECE (right and left part together): Work first row as follows from wrong side: Begin with stitches from left front piece: Purl 3 with color Off White, continue pattern as before over the next 37-43-49-49-55-61 stitches, cast on 23-23-23-23-23 new stitches on needle with color Off White, continue pattern as before over the next 37-43-49-49-55-61 stitches from right shoulder, purl 3 with color Off White = 103-115-127-127-139-151 stitches. Work next row as follows from right side: Work 3 stitches in stockinette stitch in color Off White, work A.4 8-9-10-10-11-12 times in total, work until 4 stitches remain on needle, work first stitch in A.4 and finish with 3 stitches in stockinette stitch in color Off White. Work until piece measures 28-29-31-32-33-35 cm = 11"-11⅜"-12¼"-12½"-13"-13¾" from pick up edge - finish after a row from wrong side, adjust to finish on the same row in diagram as on back piece and cast at the same time off 1 edge stitch in each side on last row (to avoid cutting the yarn at the end of row purl the last 2 stitches on row together) = 101-113-125-125-137-149 stitches. Now put front piece and back piece together for body as explained below. Now measure the piece from here. BODY: Work pattern as before over the 101-113-125-125-137-149 stitches from front piece, cast on 7-7-7-19-19-19 new stitches at the end of this row (= in the side mid under sleeve), work pattern as before over the 101-113-125-125-137-149 stitches from back piece and cast on 7-7-7-19-19-19 new stitches on row (= in the side mid under sleeve) = 216-240-264-288-312-336 stitches on needle. Now work pattern in the round on needle over all stitches, i.e. continue established pattern in the round over all stitches - round begin between the new stitches cast on under sleeve and front piece. Work the until piece measures approx. 38-39-40-40-41-42 cm = 15"-15¼"-15¾"-15¾"-16⅛"-16½" from armhole – after 4th or 10th round in pattern. Switch to circular needles size 3 MM = US 2.5, work rib (= knit 2/purl 2) while AT THE SAME TIME increasing 24-24-28-28-32-36 stitches evenly on 1st round = 240-264-292-316-344-372 stitches. When rib measures 4-4-4-5-5-5 cm = 1½"-1½"-1½"-2"-2"-2", bind off all stitches somewhat loosely with knit over knit and purl over purl. Sweater measures approx. 64-66-68-70-72-74 cm = 25¼"-26"-26¾"-27½"-28⅜"-29⅛", measured furthest in towards neck. SLEEVES: Sleeve is worked from the armhole and down. Place piece flat and insert 1 marker at the top of armhole = mid on top shoulder (NOTE! Mid on top shoulder is not the same place as stitches were picked up for front piece but approx. 7-8 cm = 2¾"-3⅛" down on front piece). Pick up stitches inside 1 edge stitch around the armhole, use circular needle size 3 MM = US 2.5, color Off White and begin in the middle stitch cast on under sleeve, insert 1 marker in this stitch and pick up 99-103-107-125-129-133 stitches - adjust to pick up 1 stitch in the stitch mid under sleeve, and 1 stitch at the marker mid on top of shoulder and to pick up same number of stitches on each side of both stitches with markers. Count out from marker mid on top of shoulder where pattern should begin mid under sleeve - marker mid on top of shoulder should fit marking for middle stitch in A.4. Continue with circular needle size 4 MM = US 6. Now work in the round in stockinette stitch and A.4 over all stitches but work the middle 3 stitches under sleeve in color Off White while AT THE SAME TIME decreasing under sleeve, read DECREASE TIP and decrease like this: When sleeve measures 1-1-1-1-1-1 cm = ⅜"-⅜"-⅜"-⅜"-⅜"-⅜" measured mid under sleeve, decrease 2 stitches 3-3-3-3-3-3 times on every other round, then decrease 2 stitches every 3-3-2½-1½-1½-1½ cm = 1⅛"-1⅛"-1"-½"-½"-½" 15-16-17-25-26-27 times in total = 63-65-67-69-71-73 stitches on row. Continue pattern with 3 stitches in stockinette stitch in color Off White mid under sleeve until sleeve measures 52-50-48-48-46-44 cm = 20½"-19¾"-19"-19"-18"-17¼" from marker mid on top of shoulder. Switch to double pointed needles size 3 MM = US 2.5 and work rib in color Off White (= knit 2/purl 2) while AT THE SAME TIME increasing 9-7-9-7-9-7 stitches evenly on 1st round = 72-72-76-76-80-80 stitches. When rib measures 4-4-4-5-5-5 cm = 1½"-1½"-1½"-2"-2"-2", bind off with knit over knit and purl over purl. Sleeve measures approx. 56-54-52-53-51-49 cm = 22"-21¼"-20½"-21"-20"-19¼" from mid on top of shoulder. NECK EDGE: Use circular needle size 3 MM = US 2.5 and color Off White. Begin from right side at one shoulder line and pick up approx. 100 to 112 stitches inside 1 stitch, number of stitches must be divisible by 4. Work rib in the round (= knit 2/purl 2) for 9-9-9-11-11-11 cm = 3½"-3½"-3½"-4⅜"-4⅜"-4⅜". Switch to circular needle size 4 MM = US 6 and loosely bind off. Fold the rib down on inside of garment. Fasten rib to get a double neck edge. To avoid a tight neck edge that sticks out it is important to keep the seam elastic. |
||||||||||
Diagram explanations |
||||||||||
|
||||||||||
 |
||||||||||
 |
||||||||||
 |
||||||||||
Have you finished this pattern?Tag your pictures with #dropspattern #diamondlovesweater or submit them to the #dropsfan gallery. Do you need help with this pattern?You'll find 33 tutorial videos, a Comments/Questions area and more by visiting the pattern on garnstudio.com. © 1982-2026 DROPS Design A/S. We reserve all rights. This document, including all its sub-sections, has copyrights. Read more about what you can do with our patterns at the bottom of each pattern on our site. |
||||||||||


With over 40 years in knitting and crochet design, DROPS Design offers one of the most extensive collections of free patterns on the internet - translated to 17 languages. As of today we count 325 catalogs and 12298 patterns - 12288 of which are translated into English (US/in).
We work hard to bring you the best knitting and crochet have to offer, inspiration and advice as well as great quality yarns at incredible prices! Would you like to use our patterns for other than personal use? You can read what you are allowed to do in the Copyright text at the bottom of all our patterns. Happy crafting!
Post a comment to pattern DROPS 260-10
We would love to hear what you have to say about this pattern!
If you want to leave a question, please make sure you select the correct category in the form below, to speed up the answering process. Required fields are marked *.