
Popular categories
Looking for a yarn?


Comments / Questions (7)
![]() Wendy wrote:
Wendy wrote:
I have a full video tutorial for this pattern on YouTube @myknittingteacherwendy.
26.07.2025 - 01:04
![]() Wendy wrote:
Wendy wrote:
This is a wonderfully fitting cardigan. You can find a video tutorial for this pattern on YouTube @myknittingteacherwendy
12.07.2025 - 20:49
![]() Marisa wrote:
Marisa wrote:
Vorrei sapere se è possibile avere modelli lavorati con ferri lineari, nn so usare I ferri circolari.....grazie
10.06.2025 - 06:55DROPS Design answered:
Buonasera Marisa, tanti dei nostri modelli sono lavorati in piano, quindi può utilizzare i ferri lineari, come nel caso di questo cardigan. Buon lavoro!
10.06.2025 - 23:42
![]() Guylaine wrote:
Guylaine wrote:
Bonjour, vous pouvez ignorer ma question du 13.04.2025. J’avais mal interprété ce qui était entendu par ‘côté’… Je pensais côté droit et côté gauche, mais je comprend maintenant que c’est côté endroit et côté envers! Cela fait pas mal plus de sens!
20.04.2025 - 21:01
![]() Guylaine wrote:
Guylaine wrote:
Bonjour, pour la manche, si celle-ci doit mesurer au total 20 cm et qu’on commence a rabattre le haut de la manche à 10 cm, pour un echantillon de 22 rangs pour 10 cm , ça implique que les rabats doivent se faire seulement sur les rangs endroits, non? J’ai suivi vos instructions qui indiquent de rabattre 10 fois de chaque côté (donc sur 10 rangs) et ma manche ne fait pas 10 cm… Merci de clarifier les rabats du haut de la manche.
18.04.2025 - 23:34DROPS Design answered:
Bonjour Guylaine, vous devez tricoter 21 rangs au total en taille M pour la tête de manche: 1 rang où on rabat 6 mailles, puis on va rabattre de chaque côté: 2 x 2 m => 4 rangs au total + 5 x 1 m => 10 rangs au total + 2 x 2m => 4 rangs au total et enfin 1 x 3 m => 2 rangs au total soit un total de 1+4+10+4+2=21 rangs soit environ 10 cm au total. Bon tricot!
22.04.2025 - 14:32
![]() Ktil wrote:
Ktil wrote:
Bonjour, J'aimerais tricoter ce gilet, mais avec 2 aiguilles "normales". Comment je compte les mailles pour le devant et pour le dos puisque ces 2 parties sont tricotées séparément ? Dans l'attente, et avec mes remerciements anticipés, Cordialement.
13.04.2025 - 18:22DROPS Design answered:
Bonjour Ktil, vous pouvez simplement tricoter le bas du gilet (dos et devants) en allers et retours sur aiguilles droites, comme dans les explications; ou bien il vous faudra recalculer chaque partie si vous voulez des coutures sur les côtés. Vous trouverez quelques astuces dans cette leçon. Bon tricot!
22.04.2025 - 08:42
![]() Sophie wrote:
Sophie wrote:
Bonjour, Est-il possible pour ce gilet de faire des manches longues et de faire des côtes serrées pour les poignets ? Combien de pelotes dans ce cas faut-il rajouter ? Merci
28.03.2025 - 07:36DROPS Design answered:
Bonjour Sophie, tout à fait, vous pouvez vous inspirer d'un modèle de même tension avec les manches longues, par ex. ici (ajoutez des filtres pour affiner la recherche) - la quantité de laine dépendra de la taille et la longueur des manches souhaitées, votre magasin saura vous aider et vous renseigner si besoin, même par mail ou téléphone. Bon tricot!
28.03.2025 - 08:29
|
|
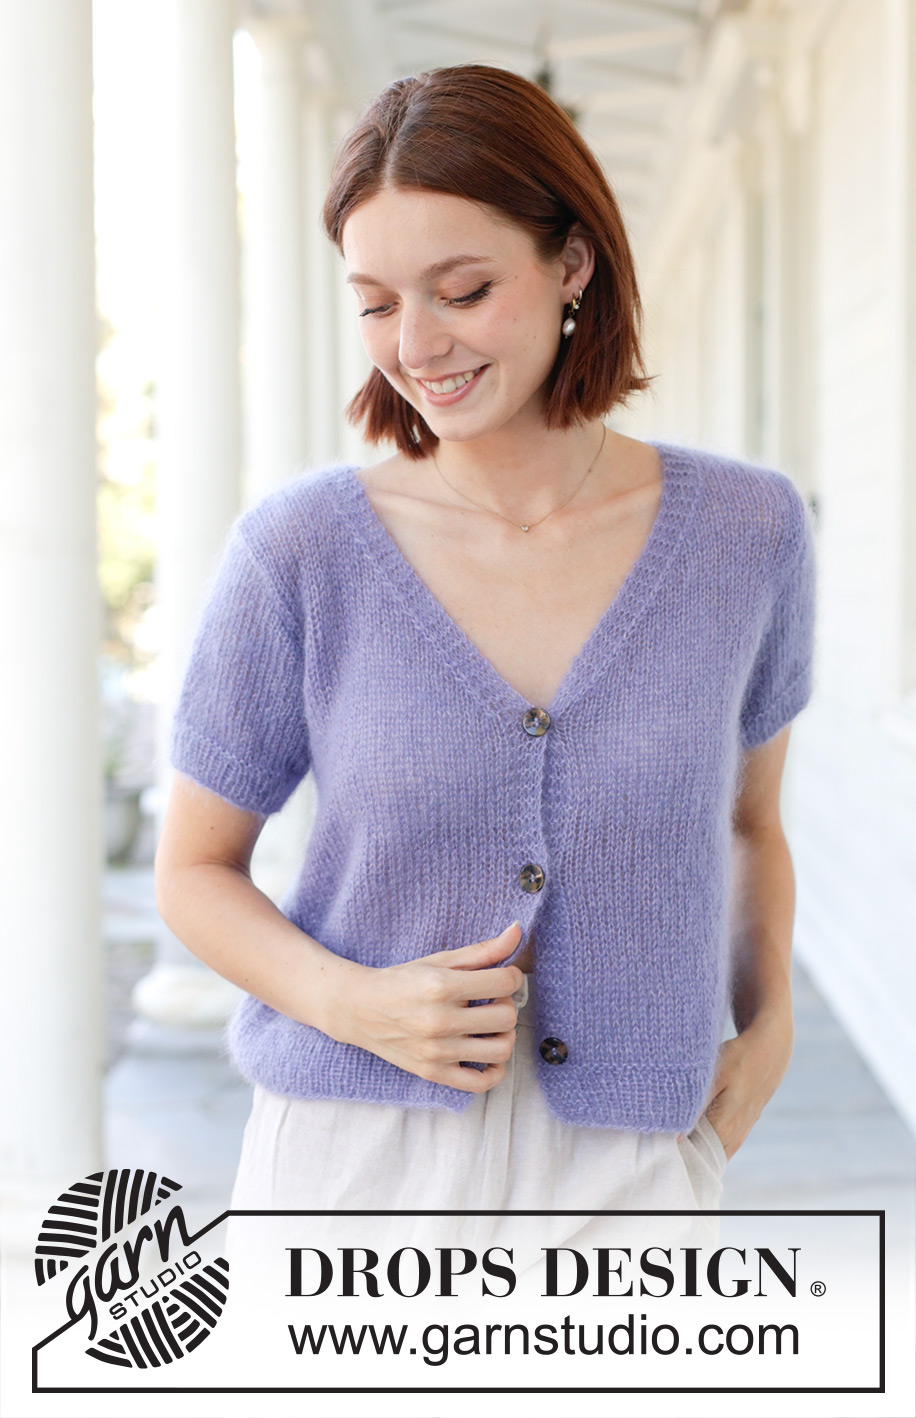
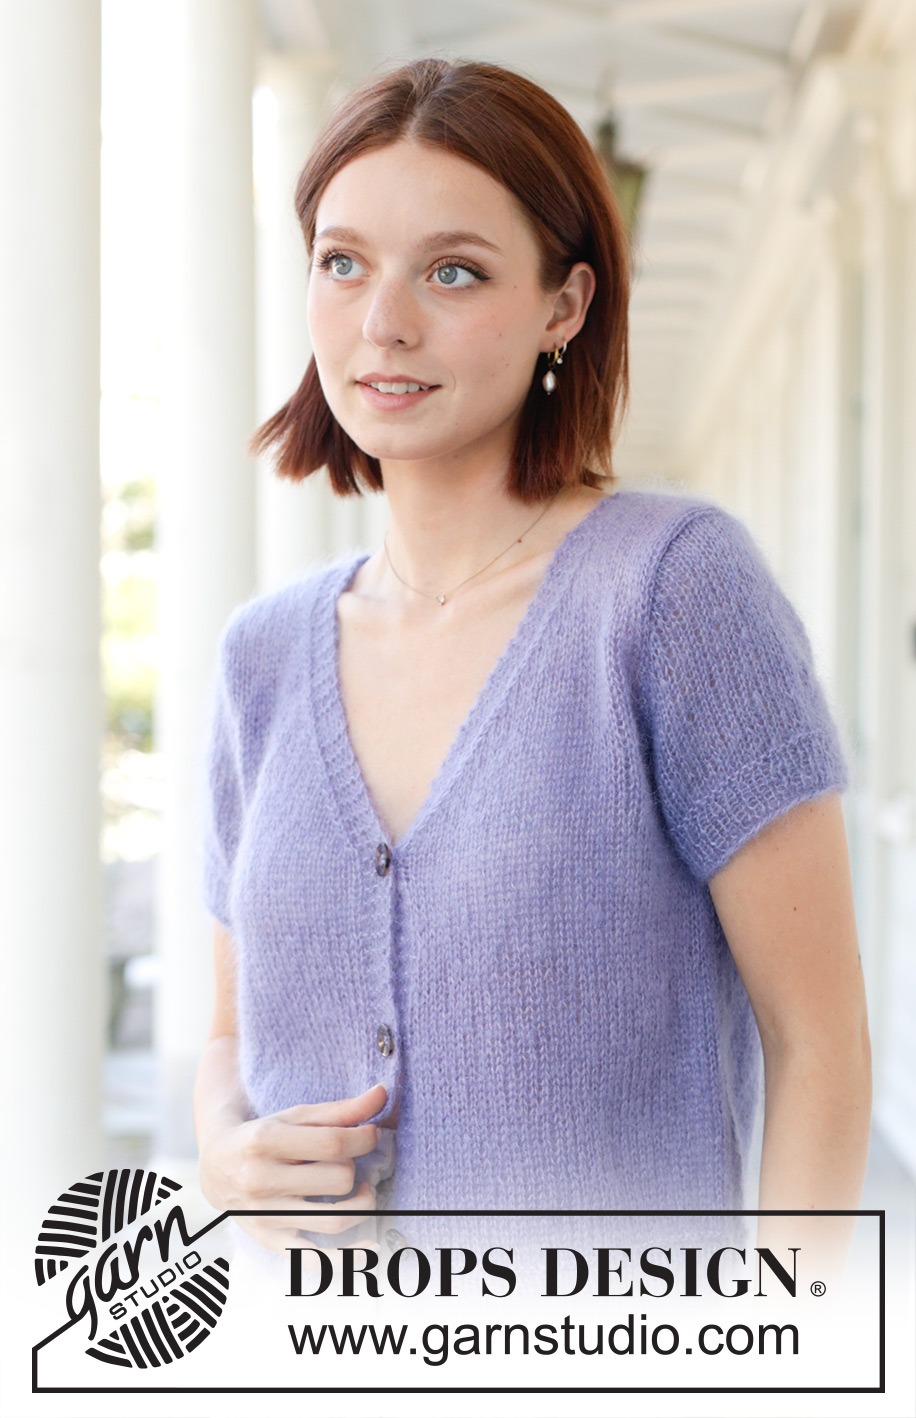
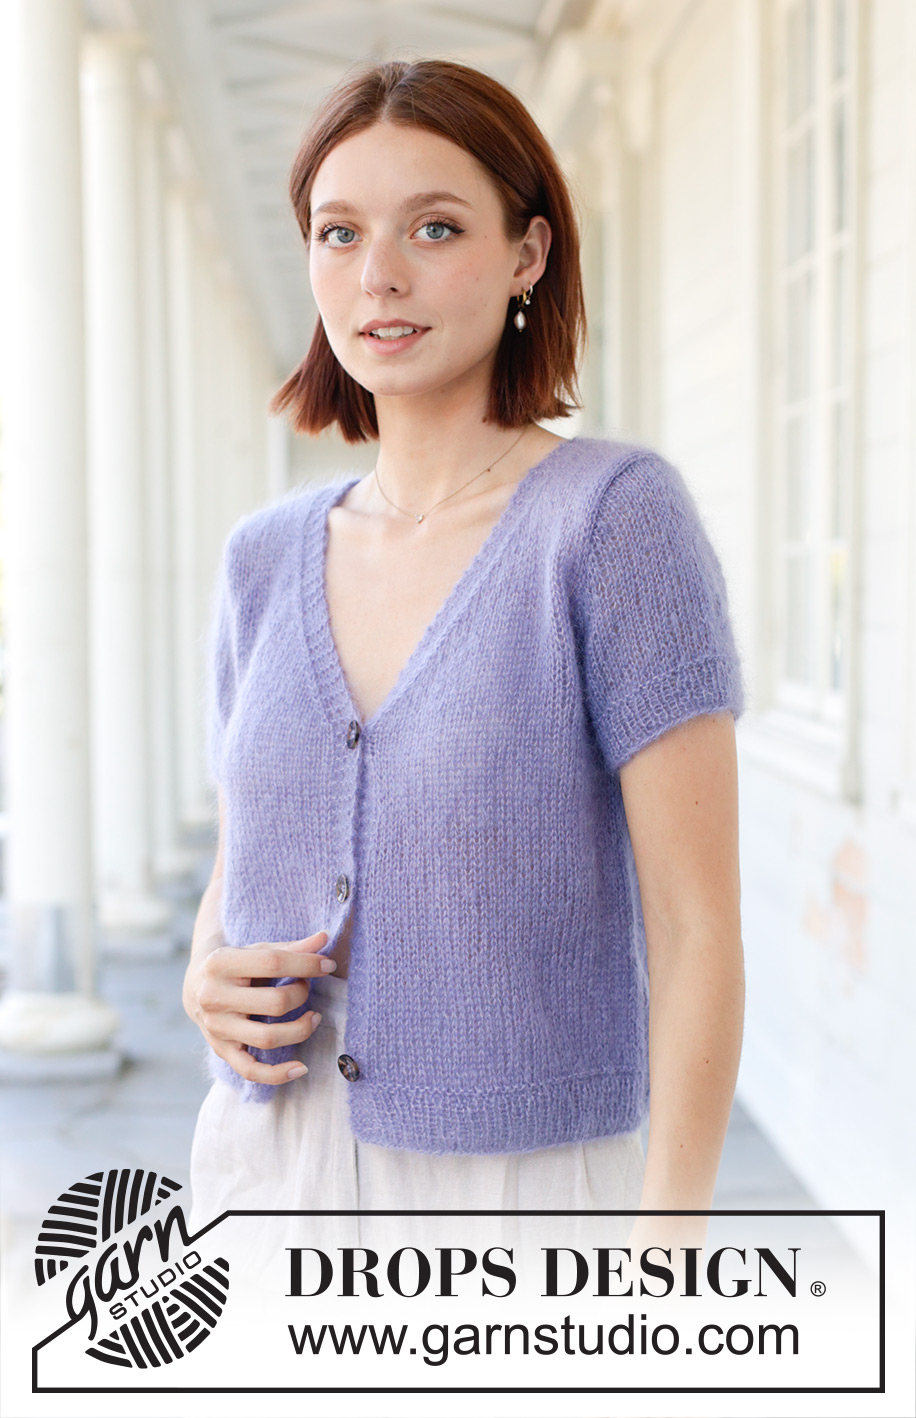
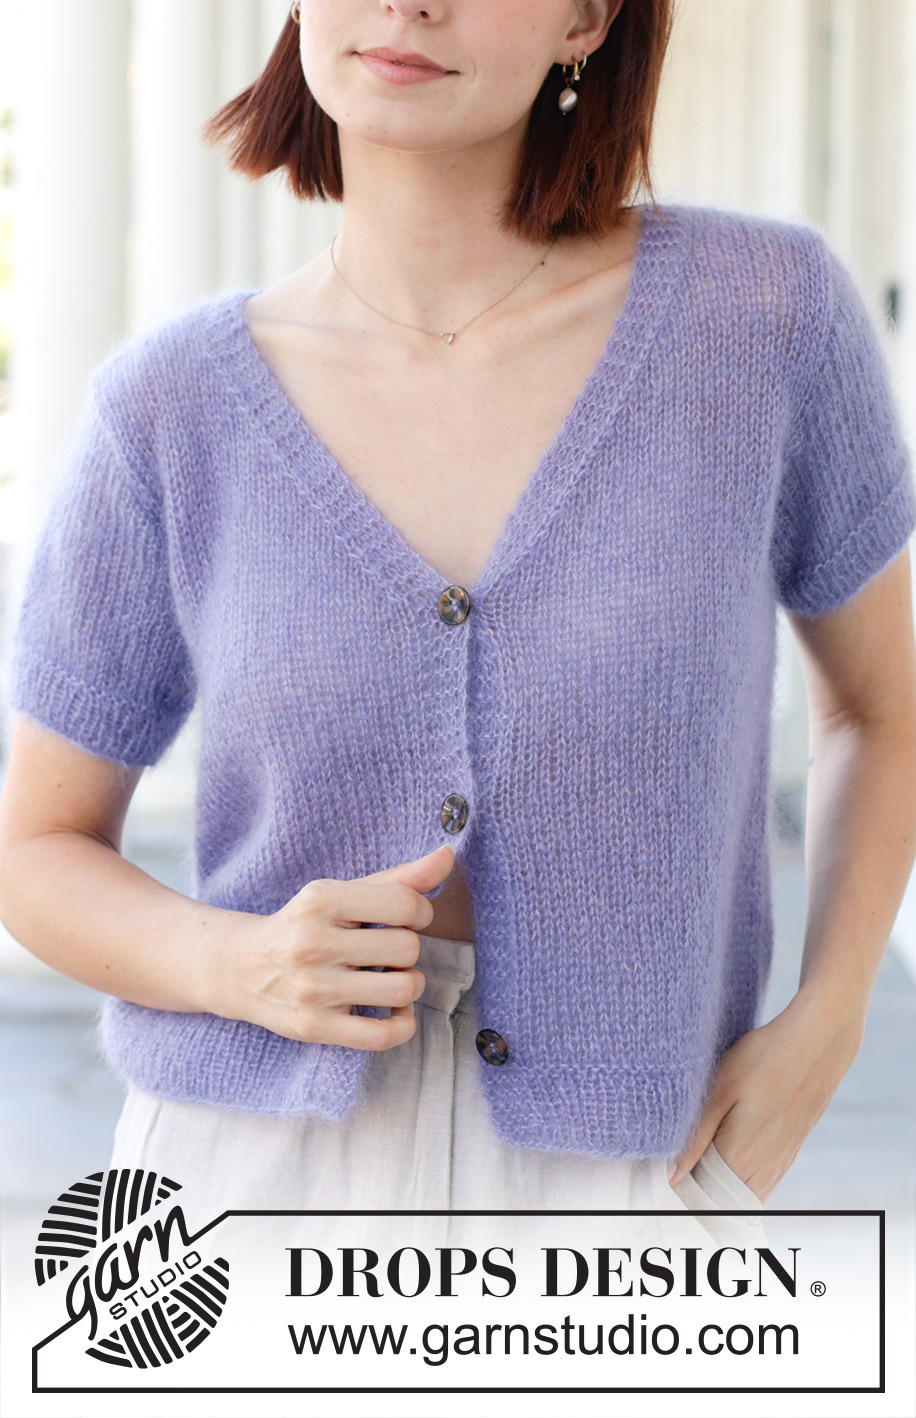
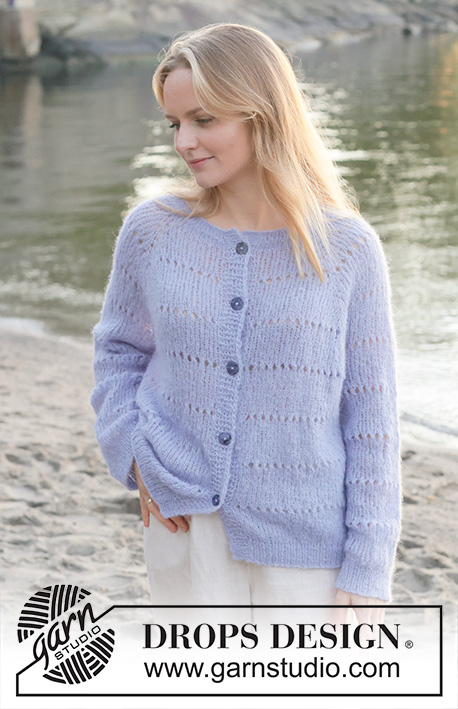
Violet Reverie Cardigan#violetreveriecardigan |
|
 |
 |
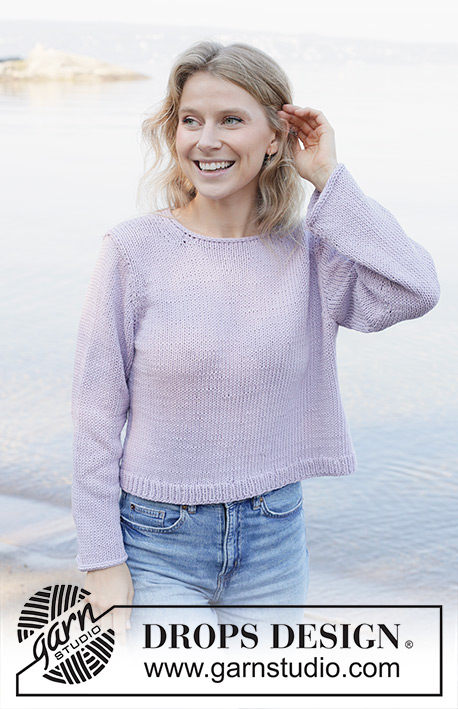
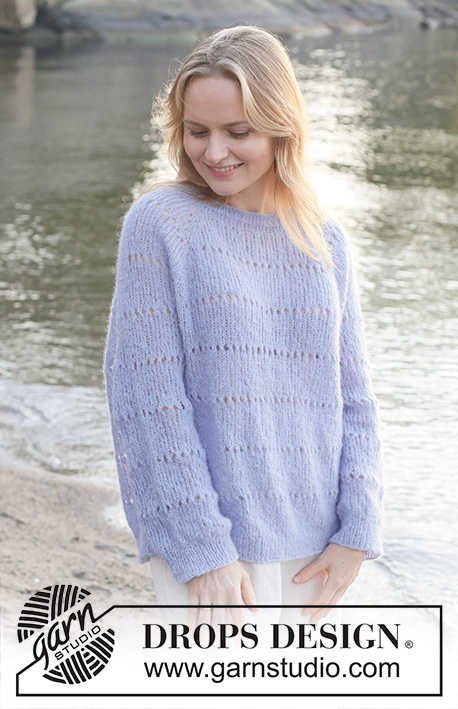
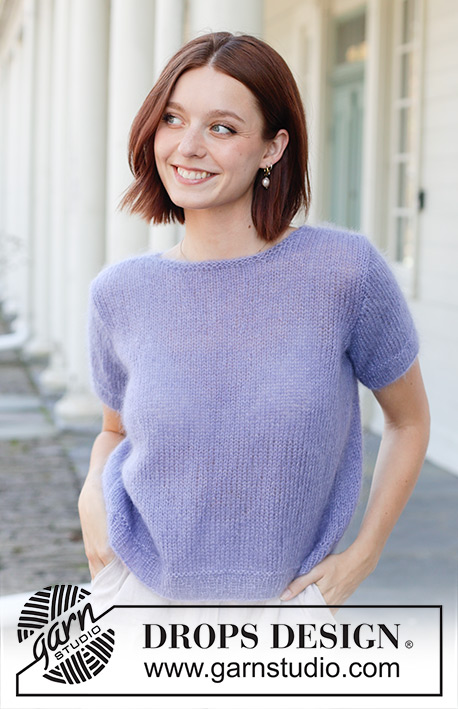
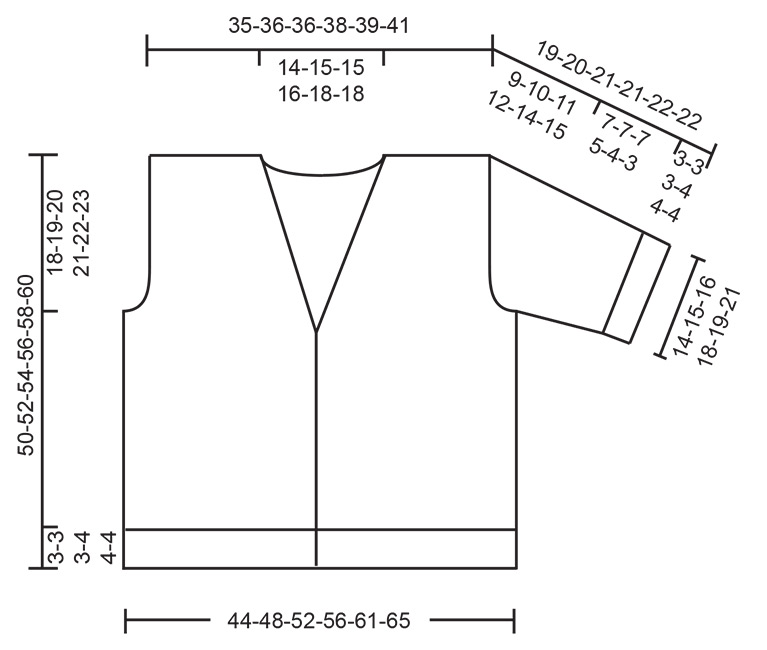
Knitted jacket in 2 strands DROPS Kid-Silk. Piece is knitted bottom up, in stockinette stitch with short sewn-in sleeves and V-neck. Size XS – XXXL.
DROPS 259-4 |
|
|
---------------------------------------------------------- EXPLANATION FOR THE PATTERN: ---------------------------------------------------------- GARTER STITCH (when working back and forth): Knit on all rows, i.e. knit from right side and knit from wrong side. 1 ridge vertically = knit 2 rows. DECREASE TIP-1 (evenly): To calculate how to decrease evenly, use the total number of stitches on row (e.g. 177 stitches), minus bands (e.g. 10 stitches) and divide the remaining stitches by number of decreases to be done (e.g. 19) = 8.8. In this example decrease by knitting every 8th and 9th stitch together (do not decrease of bands). BUTTONHOLES: Bind off for buttonholes on right band from right side (band = 5 stitches): ROW 1 (= right side): Knit 3rd and 4th stitch from the edge mid front together, make 1 yarn over, then continue stitches from front piece as before. ROW 2 (= wrong side): Work band as before and knit yarn over to make a buttonhole. Decrease for first buttonhole when piece measures 3-3-3-4-4-4 cm = 1⅛"-1⅛"-1⅛"-1½"-1½"-1½", then decrease for buttonholes when piece measures: XS: 16 and 29 cm = 6¼" and 11⅜". S: 12, 21 and 30 cm = 4¾", 8¼" and 11¾" M: 12, 21 and 30 cm = 4¾", 8¼" and 11¾" L: 13, 22 and 31 cm = 5⅛", 8¾" and 12¼" XL: 13½, 23 and 32½ cm = 5⅜", 9" and 12¾" XXL: 14, 24 and 34 cm = 5½", 9½" and 13⅜" DECREASE TIP-2 (applies to V-neck): All decreases are done from the right side! DECREASE AS FOLLOWS AFTER BAND: Work band as before, slip 1 stitch knitwise, knit 1, pass slipped stitch over stitch worked (= 1 stitch decreased). DECREASE AS FOLLOWS BEFORE BAND: Work until 7 stitches remain on row, knit 2 together, work band as before (= 1 stitch decreased) GARTER STITCH (when working in the round): Alternately knit 1 round and purl 1 round. 1 ridge vertically = 2 rounds. INCREASE TIP: Increase 1 stitch on each side of marker thread as follows: Work until 1 stitch remains before marker thread, make 1 yarn over, knit 2 (marker thread is between these 2 stitches), make 1 yarn over. On next round knit yarn overs twisted to avoid holes. Then work the new stitches in stockinette stitch. ---------------------------------------------------------- START THE PIECE HERE: ---------------------------------------------------------- JACKET - SHORT OVERVIEW OF THE PIECE: In this pattern needles of different length have been used, begin with fitting length for number of stitches and switch as needed. Work piece back and forth on needle, from the bottom and up to armholes. Divide the piece for front pieces and back piece and finish each part separately. Work sleeves bottom up, and work in the round on needle until armhole, then work sleeve cap back and forth on row. Sew parts together. If 0 is given for the chosen size, it means that you skip the information until next information. BODY: Cast on 177-195-209-225-243-257 stitches on circular needle size 4 MM = US 6 with 2 strands DROPS Kid-Silk. Work first row as follows from right side: Work 5 band stitches in GARTER STITCH - read explanation above, work rib (= knit 1/purl 1) until 6 stitches remain, knit 1 and work 5 band stitches in garter stitch. Work until rib measures 3-3-3-4-4-4 cm = 1⅛"-1⅛"-1⅛"-1½"-1½"-1½", work last row from right side. Work 1 ridge over all stitches (= 2 rows). Switch to circular needle size 5 MM = US 8, AT THE SAME TIME decrease 19-21-23-23-25-27 stitches evenly on row – read DECREASE TIP-1 = 158-174-186-202-218-230 stitches (do not decrease over bands). Work back and forth in stockinette stitch and band as before in each side - read BUTTONHOLES. Remember to follow the knitting gauge! Insert a marker thread 42-46-49-53-57-60 stitches in from each side (= 74-82-88-96-104-110 stitches on back piece between marker threads) – move the marker threads upwards, they are used when decreasing for armholes. When piece measures 29-30-31-32-33-34 cm = 11⅜"-11¾"-12¼"-12½"-13"-13⅜", begin decrease for V-neck, AT THE SAME TIME when piece measures 32-33-34-35-36-37 cm = 12½"-13"-13⅜"-13¾"-14¼"-14½" bind off for armholes, read the sections below before continuing. V-NECK: Read DECREASE TIP-2 and decrease for V-neck inside band on every approx. 1 cm = ⅜", decrease 12-13-13-14-15-15 times in total. DIVIDING FOR ARMHOLES: When piece measures 32-33-34-35-36-37 cm = 12½"-13"-13⅜"-13¾"-14¼"-14½" divide piece for front pieces and back piece, and work next row from right side as follows: Work as before until 3 stitches remain before first marker thread, bind off 6 stitches for armhole, work until 3 stitches remain before the other marker thread, bind off 6 stitches for armhole, work as before the rest of row. Finish front pieces and back piece separately. LEFT FRONT PIECE: Work first row from wrong side. Continue decrease for V-neck as before while at the same time decreasing for armhole at the beginning of every row from right side as follows: Bind off 3 stitches 0-0-0-1-1-1 time, 2 stitches 1-2-2-3-4-5 times and 1 stitch 2-3-6-4-5-4 times. When all decreases for V-neck and armhole are done 23-23-23-23-23-25 stitches remain on shoulder. Work until piece measures 50-52-54-56-58-60 cm = 19¾"-20½"-21¼"-22"-22¾"-23⅝". On next row from right side bind off the first 18-18-18-18-18-20 stitches. Continue over band stitches for 7-7½-7½-8-9-9 cm = 2¾"-2⅞"-2⅞"-3⅛"-3½"-3½". Bind off. RIGHT FRONT PIECE: Work first row from wrong side. Continue decrease for V-neck as before while at the same time decreasing for armhole at the beginning of every row from wrong side as follows: Bind off 3 stitches 0-0-0-1-1-1 time, 2 stitches 1-2-2-3-4-5 times and 1 stitch 2-3-6-4-5-4 times. When all decreases for V-neck and armhole are done 23-23-23-23-23-25 stitches remain on shoulder. Work until piece measures 50-52-54-56-58-60 cm = 19¾"-20½"-21¼"-22"-22¾"-23⅝". On next row from wrong side bind off the first 18-18-18-18-18-20 stitches. Continue over band stitches for 7-7½-7½-8-9-9 cm = 2¾"-2⅞"-2⅞"-3⅛"-3½"-3½". Bind off. BACK PIECE: = 68-76-82-90-98-104 stitches. Continue back and forth in stockinette stitch as before and bind off stitches for armhole every other row as follows: Bind off 3 stitches 0-0-0-1-1-1 time in each side, 2 stitches 1-2-2-3-4-5 times in each side, and 1 stitch 2-3-6-4-5-4 times in each side = 60-62-62-64-66-70 stitches. When piece measures 48-50-52-54-56-58 cm = 19"-19¾"-20½"-21¼"-22"-22¾", bind off the middle 22-24-24-26-28-28 stitches for neck, and finish each shoulder separately. SHOULDER: On next row from neck bind off 1 stitch for neck = 18-18-18-18-18-20 stitches remain on each shoulder. Bind off when piece measures 50-52-54-56-58-60 cm = 19¾"-20½"-21¼"-22"-22¾"-23⅝". SLEEVES: Work sleeve in the round on needle, then finish sleeve cap back and forth on needle. Cast on 52-56-62-68-74-82 stitches on double pointed needles size 4 MM = US 6. Work in the round in rib (= knit 1/purl 1) until rib measures 3-3-3-4-4-4 cm = 1⅛"-1⅛"-1⅛"-1½"-1½"-1½". Work 1 ridge in GARTER STITCH - read explanation above. On next round switch to double pointed needles size 5 MM = US 8 and knit 1 round while AT THE SAME TIME decreasing 6-6-8-8-8-10 stitches evenly on round - remember DECREASE TIP-1 = 46-50-54-60-66-72 stitches. Insert 1 marker thread mid under sleeve, this is used when increasing stitches under sleeve. Move marker thread upwards when working. Work in stockinette stitch in the round. When sleeve measures 4-4-4-5-5-5 cm = 1½"-1½"-1½"-2"-2"-2", increase stitches mid under sleeve – read INCREASE TIP and increase as follows: Increase 2 stitches every 1½-2-2-2-2-1 cm = ½"-¾"-¾"-¾"-¾"-⅜" 4-3-3-2-2-1 times in total = 54-56-60-64-70-74 stitches. Work in stockinette stitch until sleeve measures 10-10-10-9-8-7 cm = 4"-4"-4"-3½"-3⅛"-2¾". Now work sleeve cap as explained below. SLEEVE CAP: On next round bind off 6 stitches mid under sleeve but to avoid cutting the yarn at begin bind off 3 stitches before marker thread mid under sleeve, bind off and then work as before the rest of row. Then work back and forth on needle in stockinette stitch while AT THE SAME TIME binding off for sleeve cap in each side, bind off at the beginning of row as follows: Bind off 2 stitches 2-2-2-3-3-3 times in each side, 1 stitch 4-5-7-5-7-8 times in each side, 2 stitches 2-2-2-3-3-3 times in each side and 3 stitches 1-1-1-1-1-1 times in each side = 18-18-18-18-20-22 stitches remain. Bind off the remaining stitches. Sleeve measures approx. 19-20-21-21-22-22 cm = 7½"-8"-8¼"-8¼"-8¾"-8¾". ASSEMBLY: Sew the shoulder seams. Sew sleeve in armhole. Sew bands together mid back and sew band along the neck edge on back piece. Sew the buttons on to left front piece. |
|
 |
|
Have you finished this pattern?Tag your pictures with #dropspattern #violetreveriecardigan or submit them to the #dropsfan gallery. Do you need help with this pattern?You'll find 29 tutorial videos, a Comments/Questions area and more by visiting the pattern on garnstudio.com. © 1982-2026 DROPS Design A/S. We reserve all rights. This document, including all its sub-sections, has copyrights. Read more about what you can do with our patterns at the bottom of each pattern on our site. |
|


With over 40 years in knitting and crochet design, DROPS Design offers one of the most extensive collections of free patterns on the internet - translated to 17 languages. As of today we count 324 catalogs and 12290 patterns - 12280 of which are translated into English (US/in).
We work hard to bring you the best knitting and crochet have to offer, inspiration and advice as well as great quality yarns at incredible prices! Would you like to use our patterns for other than personal use? You can read what you are allowed to do in the Copyright text at the bottom of all our patterns. Happy crafting!
Post a comment to pattern DROPS 259-4
We would love to hear what you have to say about this pattern!
If you want to leave a question, please make sure you select the correct category in the form below, to speed up the answering process. Required fields are marked *.