
Popular categories
Looking for a yarn?


Comments / Questions (20)
![]() Suzanne wrote:
Suzanne wrote:
Merci de votre patience. Je vais étudier tout ça en espérant ne plus vous déranger. Bonne journée
31.01.2025 - 18:20
![]() Suzanne wrote:
Suzanne wrote:
Merci pour vos conseils. J’e suis maintenant à 6cm du col. on dit de mettre un marqueur après 30 mailles, mais ce serait au milieu de ma torsade? Et les 4 fils marqueurs, je commence à compter à partir du début du tricot? On dit au 1er tour de tricoter 1 maille et. augmenter pour le raglan, mais si je tricote une maille APRÈS le fils marqueur du début, je n’y arriverai pas pour faire les aug avant et après les 4 fils marqueurs. Merci bien
30.01.2025 - 23:14DROPS Design answered:
Bonjour Suzanne, le marqueur après 30 m sert juste de repère au milieu du devant du pull, comptez seulement les mailles. Placez ensuite les 4 fils marqueurs en commençant à compter les mailles à partir du début du tour (1er fil marqueur), les tours commencent par la manche droite. Vous avez ensuite pour les raglans 2 m endroit avec chacune un fil marqueur; vous tricotez ainsi au début du tour: 1 m end, 1 augm., puis aux 3 autres fils marqueurs tricotez jusqu'à 1 m avant le fil marqueur, 1 augm. 1 m end, fil marqueur, 1 m end, 1 augm. et à la fin du tour, augmentez 1 m avant la dernière maille du tour. Ceci vaut quand on doit augmenter 8 m. Bon tricot!
31.01.2025 - 08:32
![]() Suzanne wrote:
Suzanne wrote:
Bonjour, Pourquoi 17 mailles pour torsade du large? On a 6 mailles et 6 mailles pour la torsade et 1 mailles envers de chaque coté de cette torsade? Je ne comprends pas. Merci de m’aider
29.01.2025 - 23:01DROPS Design answered:
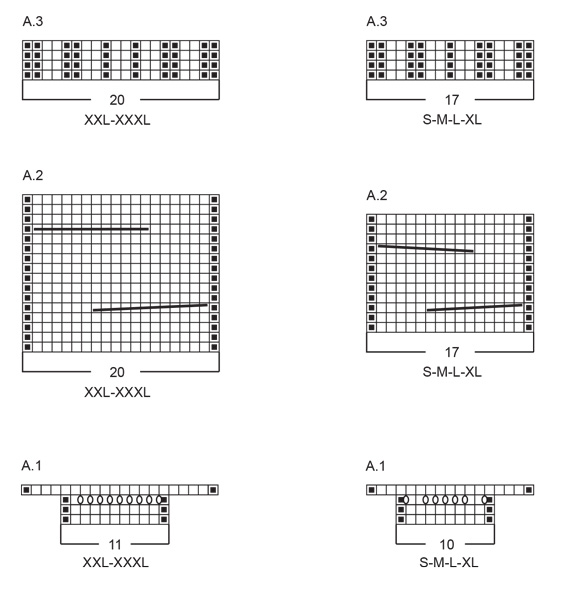
Bonjour Suzanne, A.2 en taille S à XL se tricote sur 17 mailles, les torsades se font sur 10 mailles ainsi (ex au 3ème rang): 1 m env, mettre 5 mailles sur l'aiguille à torsades derrière l'ouvrage, tricoter 5 mailles endroit, reprendre les 5 mailles sur l'aiguille à torsades et les tricoter à l'endroit, 5 mailles endroit, 1 maille envers (= 1+5+5+5+1=17). Bon tricot!
30.01.2025 - 10:15
![]() Sanna wrote:
Sanna wrote:
Hei. Pääntien reunuksessa toistetaan ennen mallineuletta 1o, 2n,1o mutta mallineuleen jälkeen 2o, 1 n. Eikö molemmin puolin pitäisi olla 2o, 2n joustoneuletta?
21.12.2024 - 15:17DROPS Design answered:
Hei, ohje on nyt korjattu. Mallineuleen jälkeen neulotaan 2 o/2 n -joustinneuletta.
02.01.2025 - 18:46
![]() Maibritt wrote:
Maibritt wrote:
Halskant. Der står 2 ret, vrang .. Hvor mange vrang skal der strikkes? Vh Maibritt
12.10.2024 - 18:23DROPS Design answered:
Hej Maibritt. Det ska vara 2 ret, 2 vrang. Mvh DROPS Design
14.10.2024 - 14:03
![]() Monika wrote:
Monika wrote:
Witaj. Bardzo chciałabym skorzystać z tego wzoru ale niestety ta jedna włóczka z alpaki (drops alpaca) bardzo mnie gryzie. Czy możesz zaproponować mi włóczkę, którą mogę użyć razem z brushed alpaka silk ale która nie będzie gryzła aż tak bardzo? Z góry dziękuję za podpowiedzi. Pozdrawiam.
16.09.2024 - 10:24DROPS Design answered:
Witaj Moniko, w zastępstwie proponuję Drops Nord albo Drops Baby Merino. Pozdrawiam!
16.09.2024 - 13:45
![]() Novella wrote:
Novella wrote:
Pervinca
11.08.2024 - 23:17
![]() Virpi wrote:
Virpi wrote:
Yksinkertaisen tyylikäs!
09.08.2024 - 09:20
![]() Patricia wrote:
Patricia wrote:
Cielo
08.08.2024 - 17:38
![]() Paulina wrote:
Paulina wrote:
Blue Braid
08.08.2024 - 16:37
|
||||||||||||||||||||||
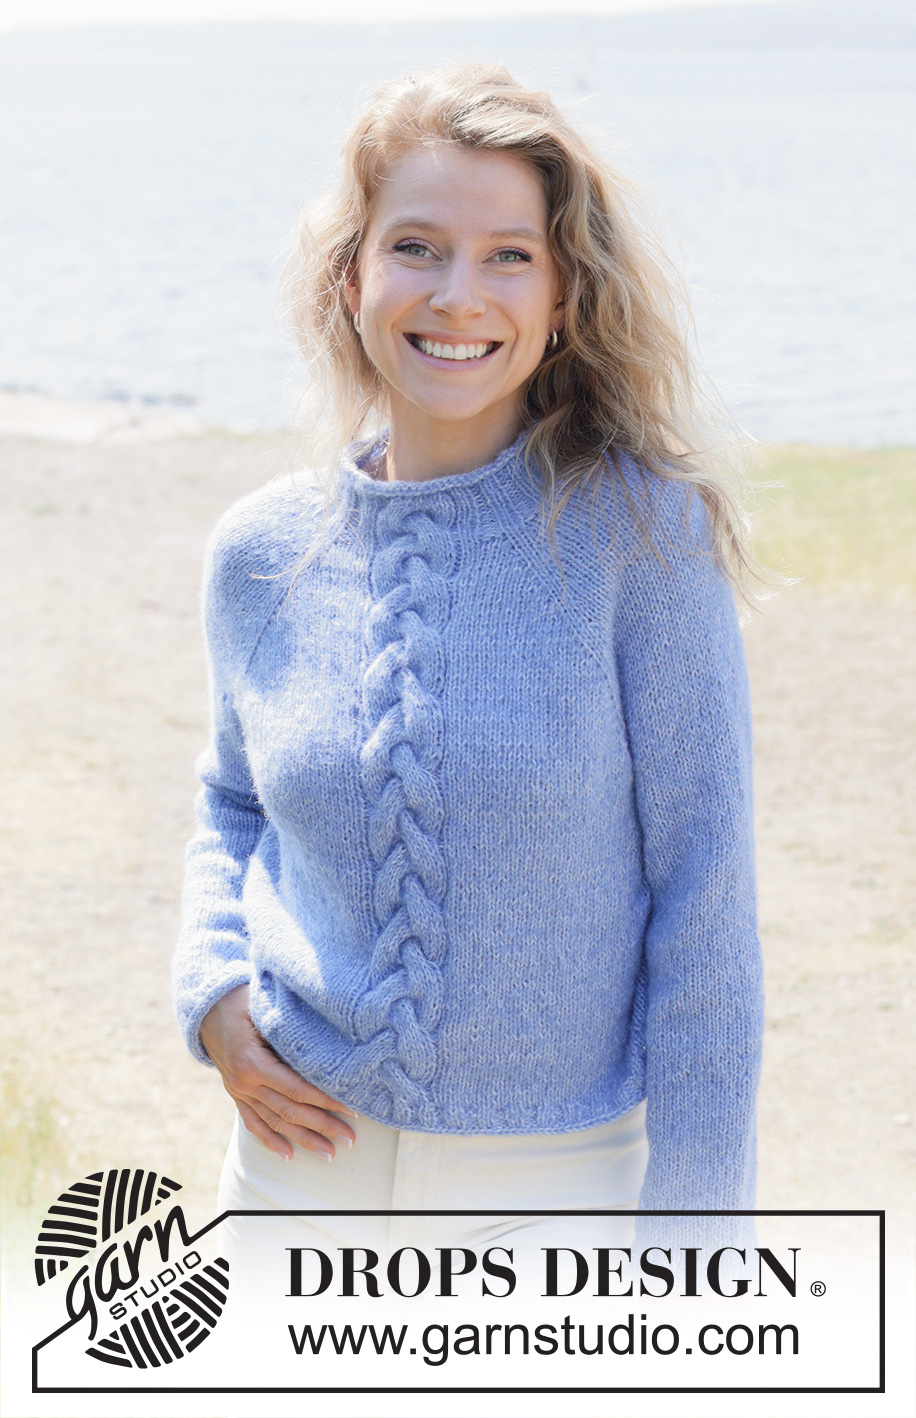
Skyfall Road#skyfallroadsweater |
||||||||||||||||||||||
 |
 |
|||||||||||||||||||||
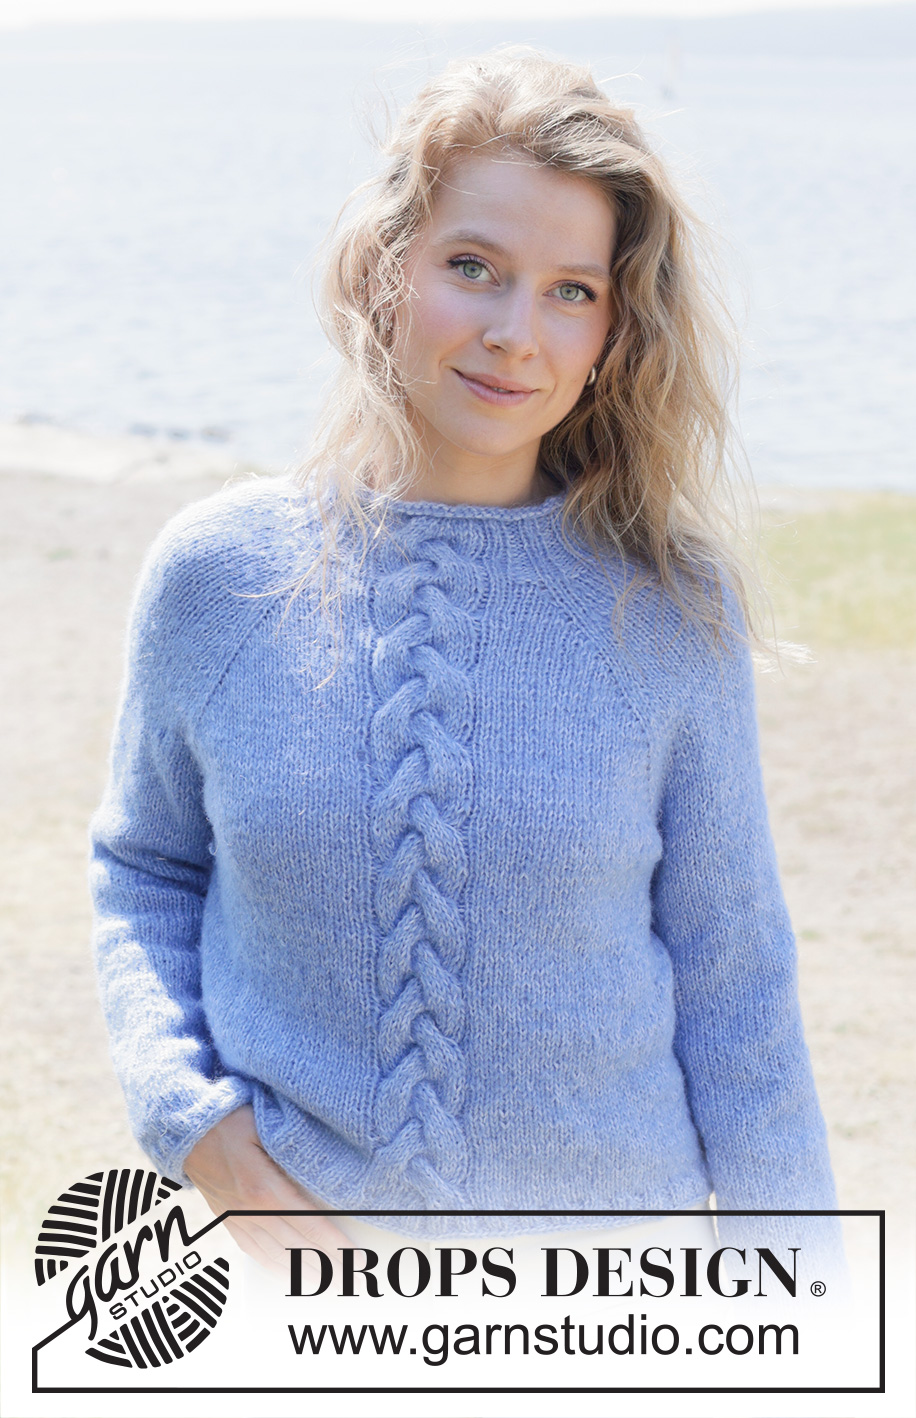
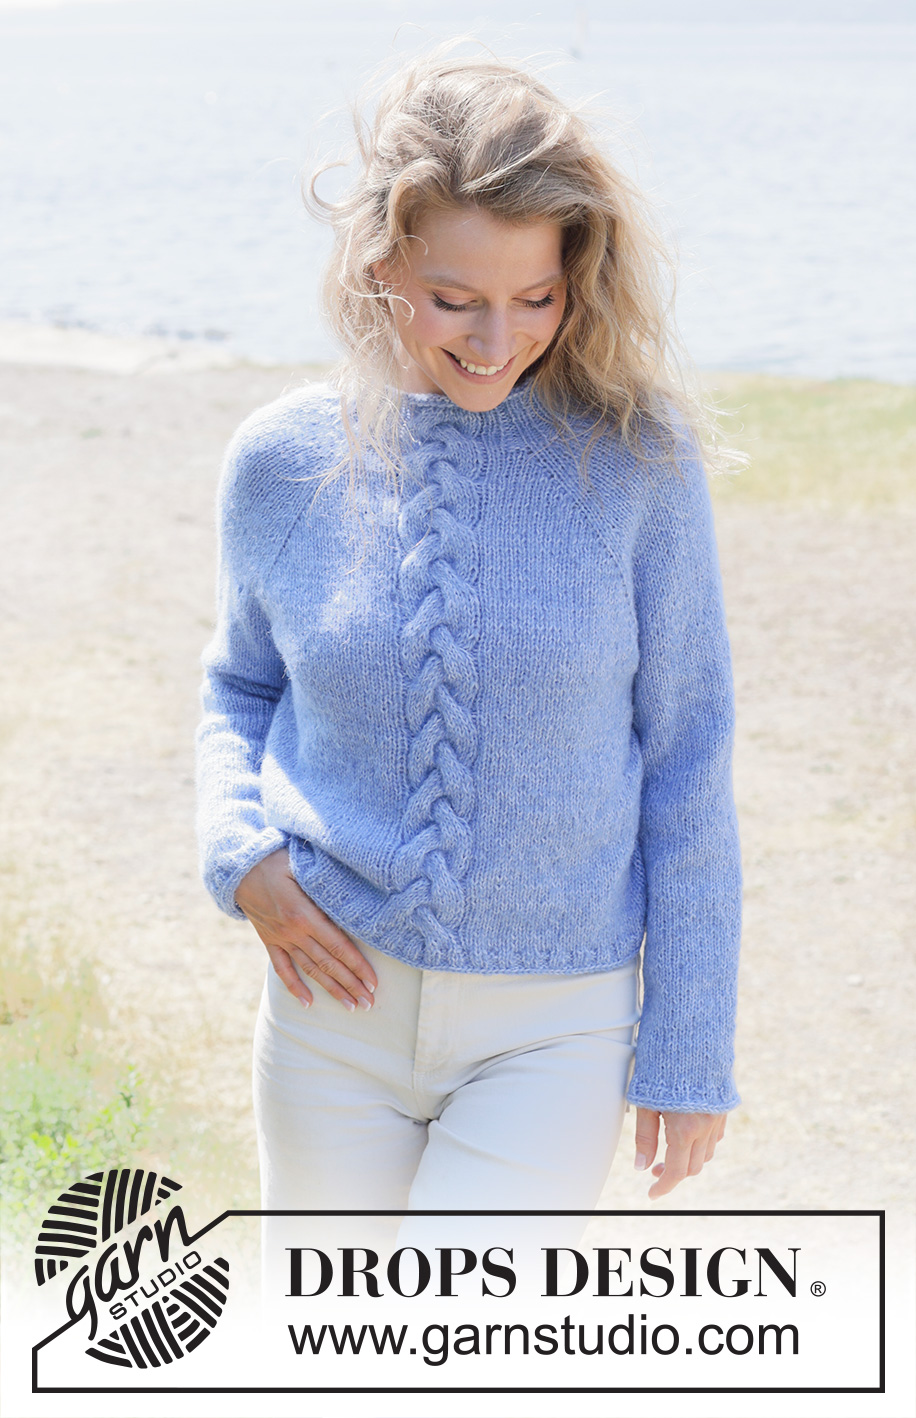
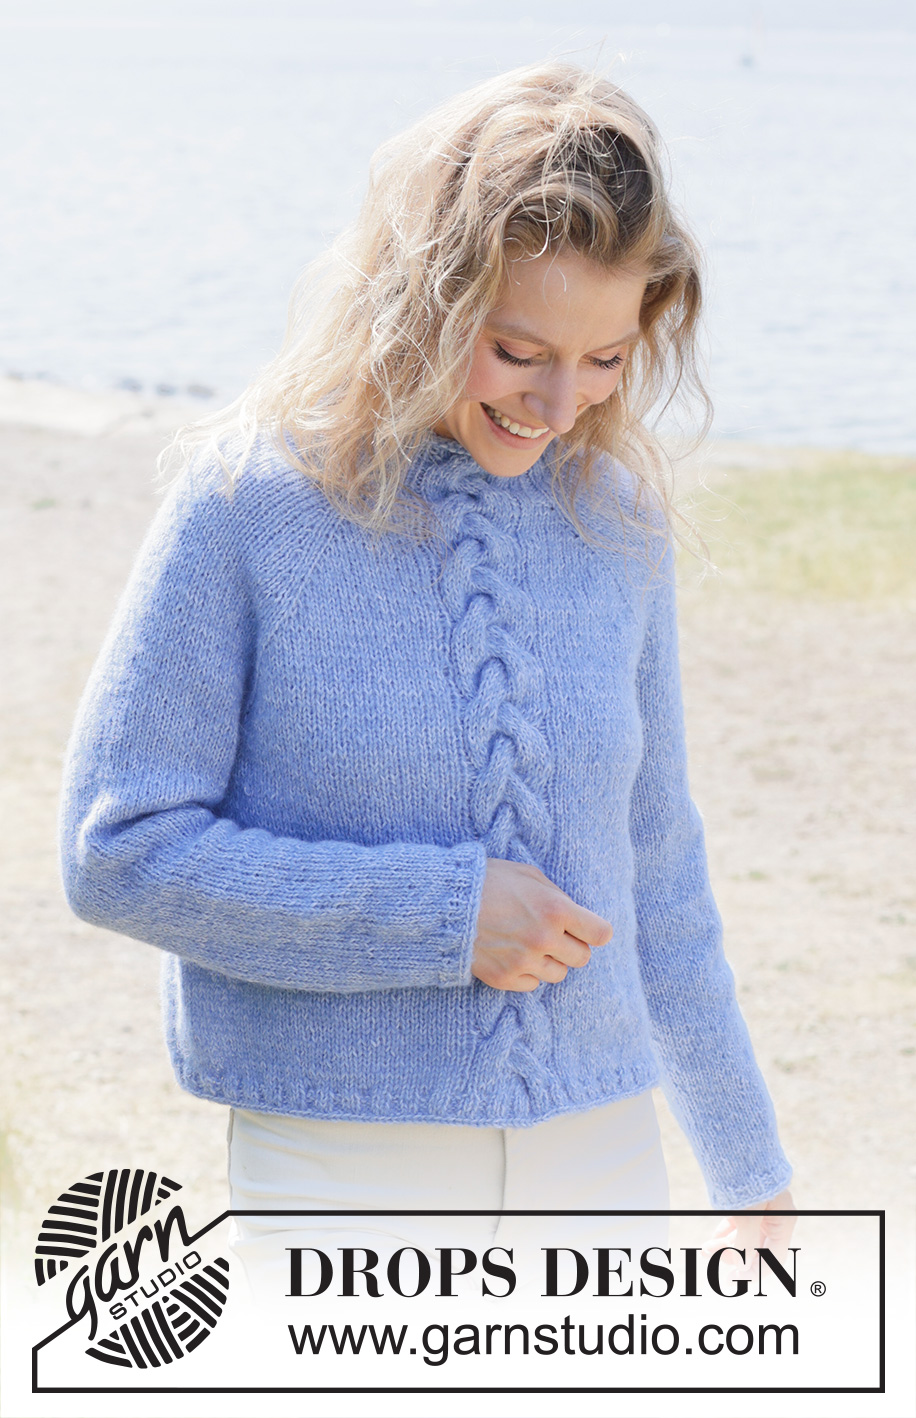
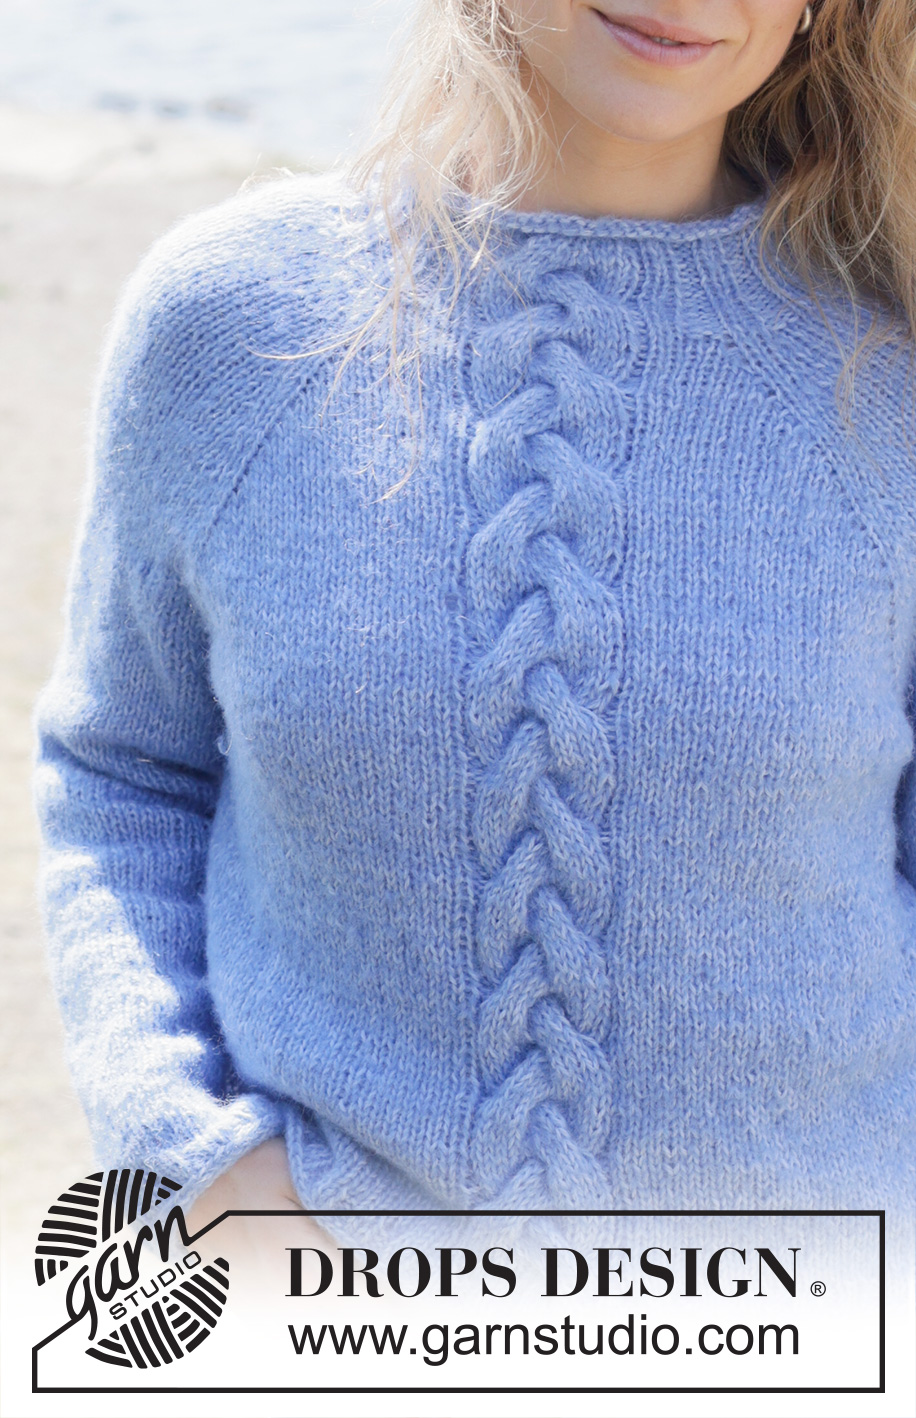
Knitted sweater in DROPS Brushed Alpaca Silk and DROPS Alpaca. The piece is worked top down with raglan, cables and rolled neckline. Sizes S - XXXL.
DROPS 254-10 |
||||||||||||||||||||||
|
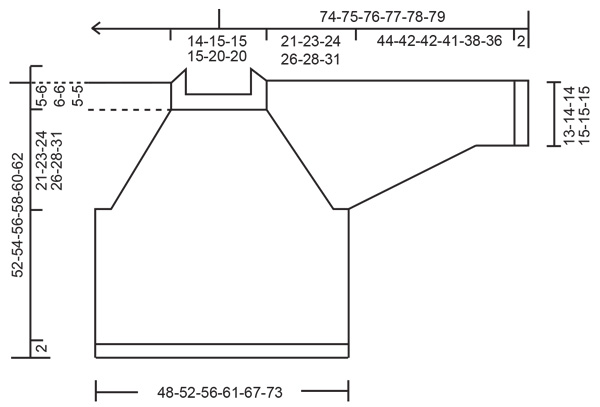
------------------------------------------------------- EXPLANATIONS FOR THE PATTERN: ------------------------------------------------------- PATTERN: See diagrams A.1 to A.3. Choose diagram for your size. RAGLAN: INCREASE ONE STITCH TOWARDS THE RIGHT BEFORE MARKER-THREAD: Make 1 yarn over the right needle by taking the strand from the back and in front of the needle. On the next round knit the front loop of the yarn over. Then work the new stitch in stockinette stitch. INCREASE ONE STITCH TOWARDS THE LEFT AFTER MARKER-THREAD: Make 1 yarn over the right needle by taking the strand in front of the needle and backwards. On the next round knit the back loop of the yarn over. Then work the new stitch in stockinette stitch. DECREASE TIP: Decrease 1 stitch on each side of the marker-thread as follows: Work until there are 3 stitches left before the marker-thread, knit 2 together, knit 2 (marker-thread sits between these 2 stitches), slip 1 stitch knit-wise, knit 1 and pass the slipped stitch over the knitted stitch (2 stitches decreased). I-CORD BIND-OFF: After the last stitch on the round has been worked: Cast on 3 stitches on the right needle from the right side, slip these stitches onto the left needle with the working strand inside the 3 stitches (when worked the strand tightens the piece into a small tube). ROW 1 (right side): Knit 2, knit 2 twisted together. ROW 2 (right side): Slip the 3 stitches from the right needle onto the left needle, knit 2, knit 2 twisted together. Repeat ROW 2 until there are 3 stitches left on the right needle. Slip these 3 stitches from the right needle onto the left needle. Bind off. Sew a small stitch to join the beginning and end of the I-cord. ------------------------------------------------------- START THE PIECE HERE: ------------------------------------------------------- SWEATER – SHORT OVERVIEW OF THE PIECE: The pattern uses both long and short needles; start with the length which fits the number of stitches and change when necessary. The neck and yoke are worked in the round with circular needle, top down and from the right back shoulder. When the yoke is finished, it is divided for the body and sleeves and the body continued in the round, while the sleeves wait. The sleeves are worked top down, in the round. If there is a «0» in your chosen size, skip the information and go straight to the next instruction. NECK: Cast on 72-80-80-80-89-89 stitches with circular needle size 5.5 MM = US 9, 1 strand DROPS Brushed Alpaca Silk and 1 strand DROPS Alpaca (2 strands). Change to circular needle size 4.5 MM = US 7. Work 3 rounds of stockinette stitch (= rolled edge). Work the next round as follows: * Knit 1, purl 2, knit 1 *, work from *-* a total of 5-6-6-6-6-6 times, knit 1, work PATTERN A.1 – read description above, * knit 2, purl 2 *, work from *-* until there is 1 stitch left on the round, knit 1. Continue this rib until A.1 is finished in height – NOTE: After round 3 there are 79-87-87-87-98-98 stitches on the needle. Continue the rib but now with A.2 across the stitches in A.1. Work until the neck measures 6-6-6-6-7-7 cm = 2⅜"-2⅜"-2⅜"-2⅜"-2¾"-2¾". The round begins on the back right shoulder. Insert 1 marker after the first 26-30-30-30-32-32 stitches (approx. mid-front), the piece is measured from here. YOKE: Insert 4 marker-threads without working the stitches, each thread inserted between 2 stitches - these 2 stitches are the raglan-stitches and are worked in stockinette stitch (you increase for raglan on each side of these 2 raglan-stitches). Insert 1 marker-thread at the beginning of the round, count 16-20-20-20-16-16 stitches (= sleeve), insert 1 marker-thread before the next stitch, count 27-27-27-27-38-38 stitches (= front piece), insert 1 marker-thread before the next stitch, count 16-20-20-20-16-16 stitches (= sleeve), insert 1 marker-thread before the next stitch. There are 20-20-20-20-28-28 stitches left after the last marker-thread (= back piece). Now work PATTERN and increase for RAGLAN – read descriptions above, as follows: ROUND 1: Change to circular needle size 5.5 MM = US 9. Knit 1 (raglan-stitch), increase for RAGLAN – read description above, knit 14-18-18-18-14-14 (sleeve), increase for raglan on each side of the raglan-stitches (marker-thread sits between the 2 raglan-stitches), knit 4-4-4-4-8-8 and increase 1-1-2-3-0-1 stitches evenly over these stitches, continue A.2 over the next 17-17-17-17-20-20 stitches, knit 4-4-4-4-8-8 and increase 1-1-2-3-0-1 stitches evenly over these stitches, increase for raglan on each side of the raglan-stitches, knit 14-18-18-18-14-14 (sleeve), increase for raglan on each side of the raglan-stitches, knit 18-18-18-18-26-26 and increase 2-2-4-6-0-2 stitches evenly over these stitches, increase for raglan before the last raglan-stitch, knit this stitch = 91-99-103-107-106-110 stitches. ROUND 2: Continue with stockinette stitch and A.2 (remember to work the yarn overs as described under RAGLAN). ROUND 3: Continue with stockinette stitch and A.2 and increase for raglan on each side of the raglan-stitches (= 8 increased stitches). Work ROUNDS 2 and 3 a total of 6-2-5-7-9-8 times (12-4-10-14-18-16 rounds worked) = 139-115-143-163-178-174 stitches. Remember to maintain the knitting gauge. Now increase as follows: ROUND 1: Continue with stockinette stitch and A.2 (remember to work the yarn overs as described under RAGLAN). ROUND 2: Continue with stockinette stitch and A.2 and increase for raglan on each side of the raglan-stitches (= 8 increased stitches). ROUND 3: Continue with stockinette stitch and A.2 (remember to work the yarn overs as described under RAGLAN). ROUND 4: Continue with stockinette stitch and A.2 and increase for raglan AFTER marker-threads 2 and 4 and BEFORE marker-threads 3 and 1 (= 4 increased stitches). Work ROUNDS 1 to 4 a total of 7-10-9-9-9-11 times (28-40-36-36-36-44 rounds worked). Work ROUND 1 one more time. All increases for raglan are now finished (a total of 21-23-24-26-28-31 times on the front and back pieces and 14-13-15-17-19-20 times on the sleeves) = 223-235-251-271-286-306 stitches. The yoke measures approx. 21-23-24-26-28-31 cm = 8¼"-9"-9½"-10¼"-11"-12¼" from the marker mid-front. Now divide for the body and sleeves. DIVIDE FOR BODY AND SLEEVES: Knit 1 (this stitch belongs to the back piece), place the next 42-44-48-52-52-54 stitches on a thread for the sleeve, cast on 6-8-10-12-14-16 stitches (in side mid-under sleeve), work 73-77-81-87-96-104 stitches as before (= front piece), place the next 42-44-48-52-52-54 stitches on a thread for the sleeve, cast on 6-8-10-12-14-16 stitches (in side mid-under sleeve), work the last 65-69-73-79-85-93 stitches (= back piece). The body and sleeves are finished separately. BODY: = 151-163-175-191-210-230 stitches. Insert 1 marker in the middle of the 6-8-10-12-14-16 cast-on stitches under one sleeve. Work to the marker; the round now begins here. Continue with stockinette stitch and A.2 in the round until the piece measures 45-46-48-50-53-55 cm = 17¾"-18"-19"-19¾"-21"-21⅝" from the marker mid-front – make sure you have worked at least 3 rounds after the last cable. Change to circular needle size 4.5 MM = US 7. Work rib (knit 2, purl 2), AT THE SAME TIME increase 20-20-24-24-28-28 stitches evenly on the first round – adjust the increases so the rib begins and ends with knit 2 on each side of A.2 mid-front and work A.3 across A.2 = 171-183-199-215-238-258 stitches. When the rib measures 2 cm = ¾", work I-CORD BIND-OFF – read description above. The sweater measures approx. 47-48-50-52-55-57 cm = 18½"-19"-19¾"-20½"-21⅝"-22½" from the marker mid-front and 52-54-56-58-60-62 cm = 20½"-21¼"-22"-22¾"-23⅝"-24⅜" from the shoulder. SLEEVES: Place the 42-44-48-52-52-54 sleeve-stitches from the thread on one side of the piece on circular needle size 5.5 MM = US 9 and knit up 1 stitch in each of the 6-8-10-12-14-16 stitches cast on under the sleeve = 48-52-58-64-66-70 stitches. Insert a marker-thread in the middle of the 6-8-10-12-14-16 stitches under the sleeve. Start at the marker-thread and work stockinette stitch in the round. When the sleeve measures 4-4-4-3-3-2 cm = 1½"-1½"-1½"-1⅛"-1⅛"-¾", decrease 2 stitches under the sleeve – read DECREASE TIP. Decrease like this every 10-7-4-3-3-2½ cm = 4"-2¾"-1½"-1⅛"-1⅛"-1" a total of 4-5-8-10-10-12 times = 40-42-42-44-46-46 stitches. Continue working until the sleeve measures 44-42-42-41-38-36 cm = 17¼"-16½"-16½"-16⅛"-15"-14¼" from the division. Change to double pointed needles size 4.5 MM = US 7. Work rib (knit 2, purl 2), AT THE SAME TIME increase 4-6-6-4-6-6 stitches evenly on the first round = 44-48-48-48-52-52 stitches. When the rib measures 2 cm = ¾", work I-CORD BIND-OFF. The sleeve measures approx. 46-44-44-43-40-38 cm = 18"-17¼"-17¼"-17"-15¾"-15". |
||||||||||||||||||||||
Diagram explanations |
||||||||||||||||||||||
|
||||||||||||||||||||||
 |
||||||||||||||||||||||
 |
||||||||||||||||||||||
Have you finished this pattern?Tag your pictures with #dropspattern #skyfallroadsweater or submit them to the #dropsfan gallery. Do you need help with this pattern?You'll find 25 tutorial videos, a Comments/Questions area and more by visiting the pattern on garnstudio.com. © 1982-2026 DROPS Design A/S. We reserve all rights. This document, including all its sub-sections, has copyrights. Read more about what you can do with our patterns at the bottom of each pattern on our site. |
||||||||||||||||||||||


With over 40 years in knitting and crochet design, DROPS Design offers one of the most extensive collections of free patterns on the internet - translated to 17 languages. As of today we count 324 catalogs and 12290 patterns - 12280 of which are translated into English (US/in).
We work hard to bring you the best knitting and crochet have to offer, inspiration and advice as well as great quality yarns at incredible prices! Would you like to use our patterns for other than personal use? You can read what you are allowed to do in the Copyright text at the bottom of all our patterns. Happy crafting!
Post a comment to pattern DROPS 254-10
We would love to hear what you have to say about this pattern!
If you want to leave a question, please make sure you select the correct category in the form below, to speed up the answering process. Required fields are marked *.