
Popular categories
Looking for a yarn?


Comments / Questions (19)
![]() Svatava wrote:
Svatava wrote:
Dobrý den, zřejmě je chyba v popisu u průkrčníku. Možná se logika ztratila v překladu. Na závěr je sice uvedeno "Zkrácené řady jsou dokončené, pro raglán jsme přidali celkem 2x na obou stranách každé straně. Ale podle popisu je přidáváno pouze na prvních dvou značkách. Při nepletení celé řady vznikají velká oka, kde navazuji na nepletená oka. Možná by to chtělo znázornit graficky. Jinak je to nádherný svetr. Nějak se s tím popasuji Svatava
25.08.2025 - 15:36DROPS Design answered:
Dobrý den, Svatavo, popis je správně - přidáváme střídavě u všech značek. Nejprve u 2 (tj. levý rukáv) - končíme na předním dílu, otočíme a pleteme až za 4., POSLEDNÍ značku (2. řada) - tj. končíme na druhé straně předního dílu, pak přidáme u všech 4 značek (3. řada), tj. končíme zase za levým rukávem = na levé straně předního dílu, v 5. řadě přidáme u značek na pravé straně (tj. pravý rukáv) a končíme uprostřed zad. U každé značky jsme tedy opravdu přidali 2x. Zkrácené řady jsou tu poměrně dlouhé, vynechává se jen střed předního dílu. Hodně zdaru! Hana
31.08.2025 - 21:42
![]() Céline Mex wrote:
Céline Mex wrote:
Comment choisir la bonne taille ? Pour un tour de poitrine de 140 ? Merci :)
20.12.2024 - 00:01DROPS Design answered:
Bonjour Mme Mex, mesurez un vêtement similaire que vous avez et dont vous aimez la forme et comparez ces mesures à celles du schéma en bas de page, vous trouverez ainsi la taille correspondante. Retrouvez plus d'infos ici. Bon tricot!
20.12.2024 - 07:12
![]() Mia M wrote:
Mia M wrote:
Skal strikkeprøven laves med pind 4.4 eller pind 5.5, og hvad hvis antallet af masker passer, men jeg har for mange pinde på 10 cm? Mvh. Mia.
04.12.2024 - 20:34DROPS Design answered:
Hej Mia, vi får 15 masker på pind 5,5, hvis strikkefastheden ikke stemmer i højden, så kan du følge målene ifølge opskriften :)
06.12.2024 - 15:00
![]() FRANCOISE DUQUENOY wrote:
FRANCOISE DUQUENOY wrote:
Bonjour, Je commence raglan et rangs raccourcis. Je ne suispassûredebiencomprendre : au 1er rang sur l’endroit, je tourne quand j'ai 4 mailles après le marqueur 2, c'est à dire , 2 mailles + le jeté + 1 maille ? Merci pour votre aide. Françoise
01.12.2024 - 18:29DROPS Design answered:
Bonjour Françoise, vos marqueurs sont placés dans une maille (pas entre les mailles), vous aurez donc ainsi au 2ème marqueur: 1 jeté, 2 m end, 1 m end avec le marqueur, 2 m end, 1 jeté (=5 m raglan), 2 m end, tournez là = vous avez tricoté 4 m après le 2ème marqueur. Bon tricot!
03.12.2024 - 09:33
![]() Rosy wrote:
Rosy wrote:
Bonjour, je souhaite tricoter ce modèle, mais uniquement avec la laine Drops Fabel. Est-ce qu'il suffit pour cela que je change le numéro d'aiguilles pour obtenir l'échantillon correspondant à ce modèle, ou bien cela n'est pas possible ? Merci d'avance ! :-)
25.11.2024 - 09:39DROPS Design answered:
Bonjour Rosy, vous pourrez tricoter avec 3 fils Fabel pour avoir la même tension (jouez éventuellement avec les unis), ou bien si vous voulez ne tricoter qu'avec 1 seul fil Fabel, il vous faudra tout recalculer en fonction de la nouvelle tension - il peut être plus simple de vous orienter vers un autre modèle du groupe de fils A - cf par exemple tous les pulls de tension 26-23 mailles ici. Bon tricot!
25.11.2024 - 14:36
![]() Kirsti wrote:
Kirsti wrote:
Hei! Jeg holder på med denne nå, men kan ikke forstå at de oppgitte garnmengdene kan stemme. Når hele genseren skal strikkes med dobbel tråd, må man vel ha like lang tråd av hvert garn? Nå er jeg på det tredje nøstet med Brushed Alpaca Silk, men har ikke brukt mer enn litt over ett nøste av Fabel. Har dere endret størrelse på nøstene og glemt å oppdatere oppskriften?
22.10.2024 - 16:19DROPS Design answered:
Hej Kirsti, i Fabel har du 50g pr nøgle, så 5x205=1025 meter og i DROPS Brushed Alpaca Silk har du 25 g pr nøgle, så 7x140= 980 meter til den mindste størrelse :)
24.10.2024 - 09:38
![]() Makulamene-Merveille Tandu wrote:
Makulamene-Merveille Tandu wrote:
Gibt es die Möglichkeit, dass man die Anleitung für eine Größe XS umändert? Wenn ja, wie? Liebe Grüße!
11.10.2024 - 23:15DROPS Design answered:
Liebe Frau Tandu, hier finden Sie alle unsere Pullover in XL, Kategorie "Basics" mit der Maschenprobe derselben Gruppe. Ein von den kann Ihnen sicher inspirieren. Viel Spaß beim Stricken!
14.10.2024 - 07:50
![]() Maria Letizia Pianese wrote:
Maria Letizia Pianese wrote:
Buongiorno, nella sezione SPRONE si parla di aumentare 14 volte sul corpo e 7 volte sulle maniche. Significa che si intende che per il "corpo" si faranno aumenti sul marcapunto 1 e 4, mentre per "maniche" si faranno aumenti sui 4 marcapunti? Grazie di una risposta, buon lavoro a tutte
29.09.2024 - 11:37DROPS Design answered:
Buonasera Letizia, per gli aumenti su tutto il lavoro (corpo + maniche) si aumenta a ogni lato di tutti i segnapunti quindi 8 aumenti, per quelli solo sul corpo, non si aumenta sul lato del segnapunti che da sulla manica. Buon lavoro!
06.10.2024 - 23:30
![]() Christiane wrote:
Christiane wrote:
Wie muss ich bei den verkürzten Reihen die Umschläge am Hals nach dem Wenden und zurückstricken abstricken? Ich bin dann ja bei linken Maschen, aber stricke ich die Umschläge dann trotzdem rechts verschränkt? Danke für die Hilfe. Christiane
22.09.2024 - 13:09DROPS Design answered:
Liebe Christiane, die Umschlägen stricken Sie bei den Rückreihen links verschränkt, und bei den HinReihen und in Runde rechts verschränkt. Viel Spaß beim Stricken!
23.09.2024 - 08:27
![]() Susanne Olsen wrote:
Susanne Olsen wrote:
"BÆRESTYKKE: Start omgangen ved mærketråden midt bagpå, og strik rundt over alle masker i glatstrik. SAMTIDIG fortsætter udtagningen til raglan på hver 2.omgang til der er taget ud totalt 7-8-9-!12-11-9! gange (inklusive udtagningerne i de forkortede pinde) = 132-144-152-!180-176-164! masker. Fortsæt i glatstrik og".. Er der nogle talrækker der er smuttet eller kan det passe at, der skal færre masker til en større størrelse?
17.03.2024 - 08:09DROPS Design answered:
Hej Susanne, ja det stemmer, fortsæt ifølge opskrifterne, så får du flere masker jo større størrelser :)
19.03.2024 - 15:16
|
|
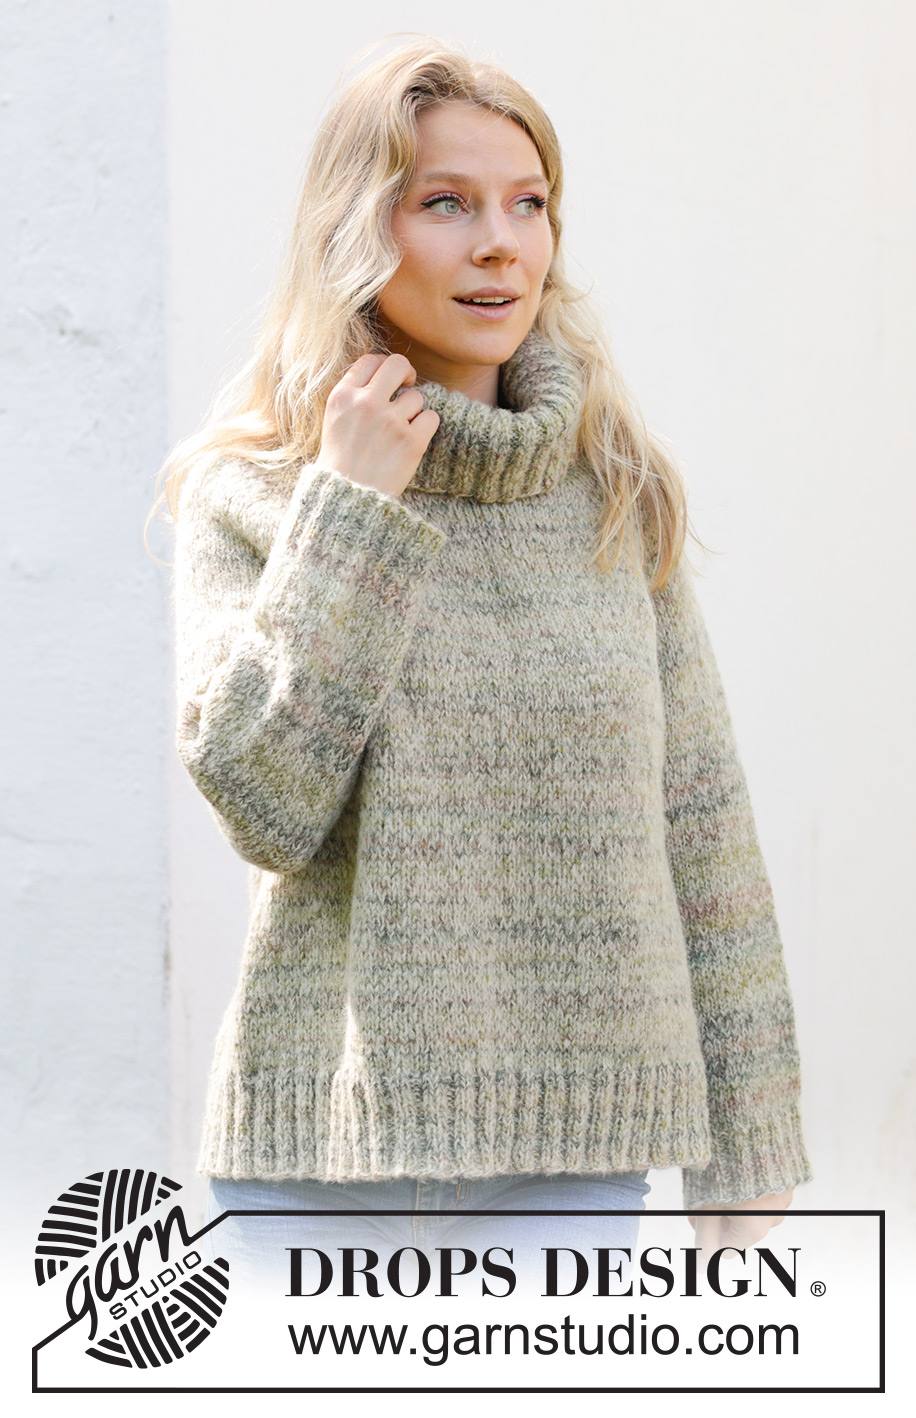
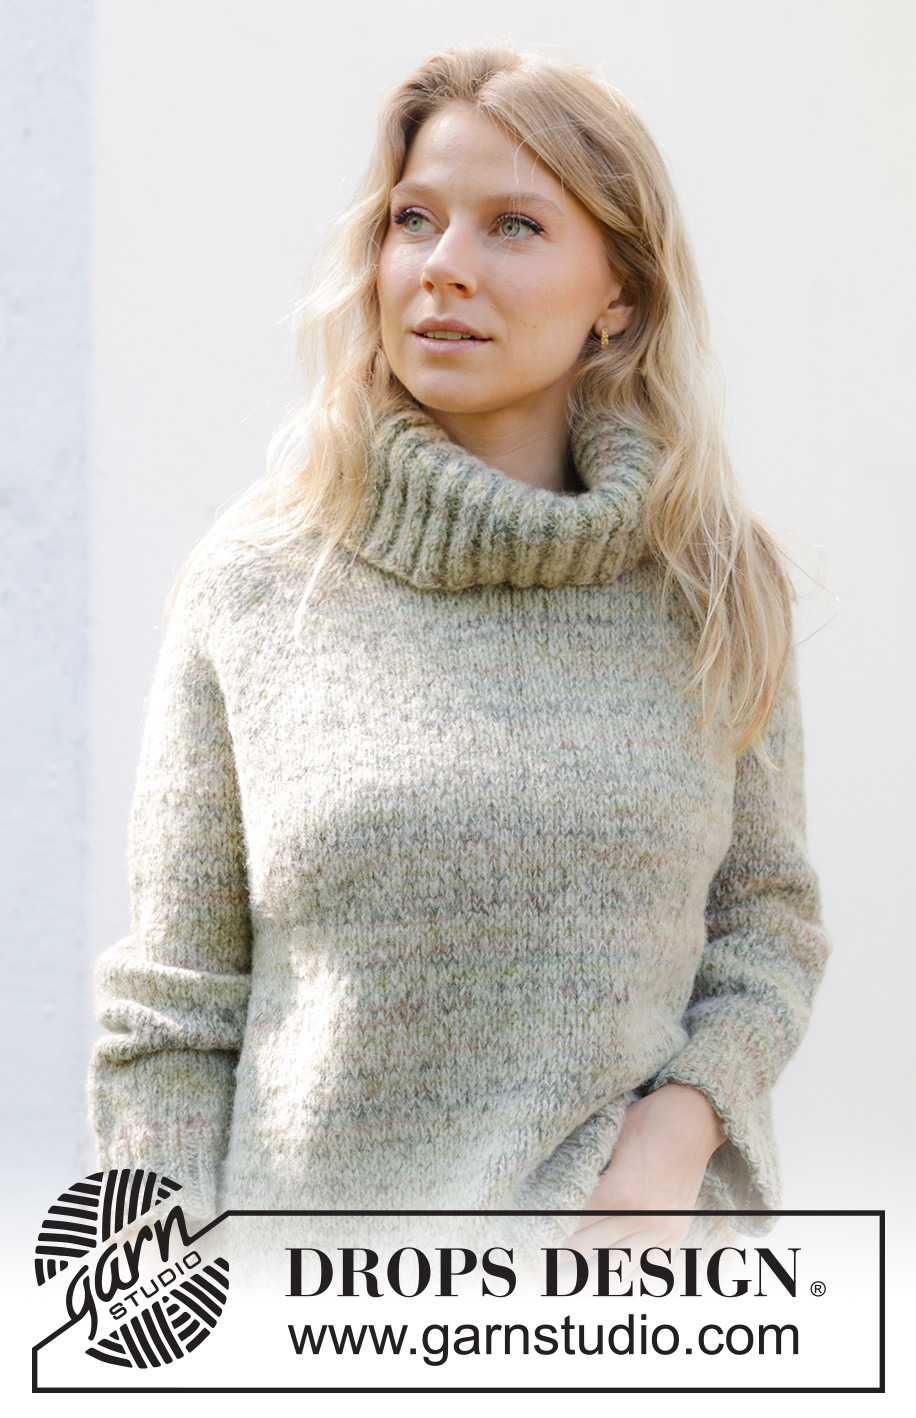
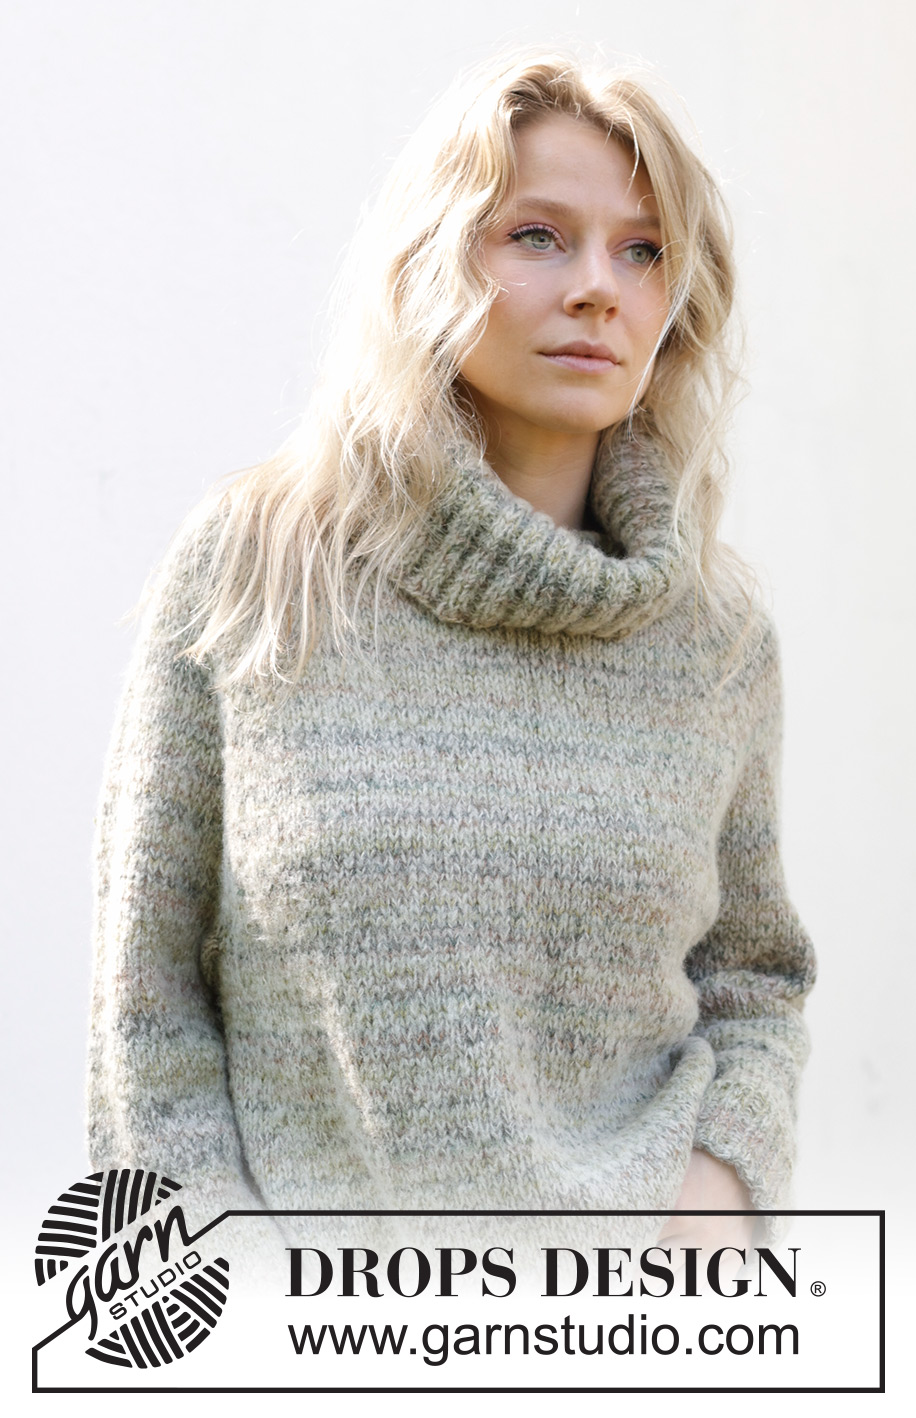
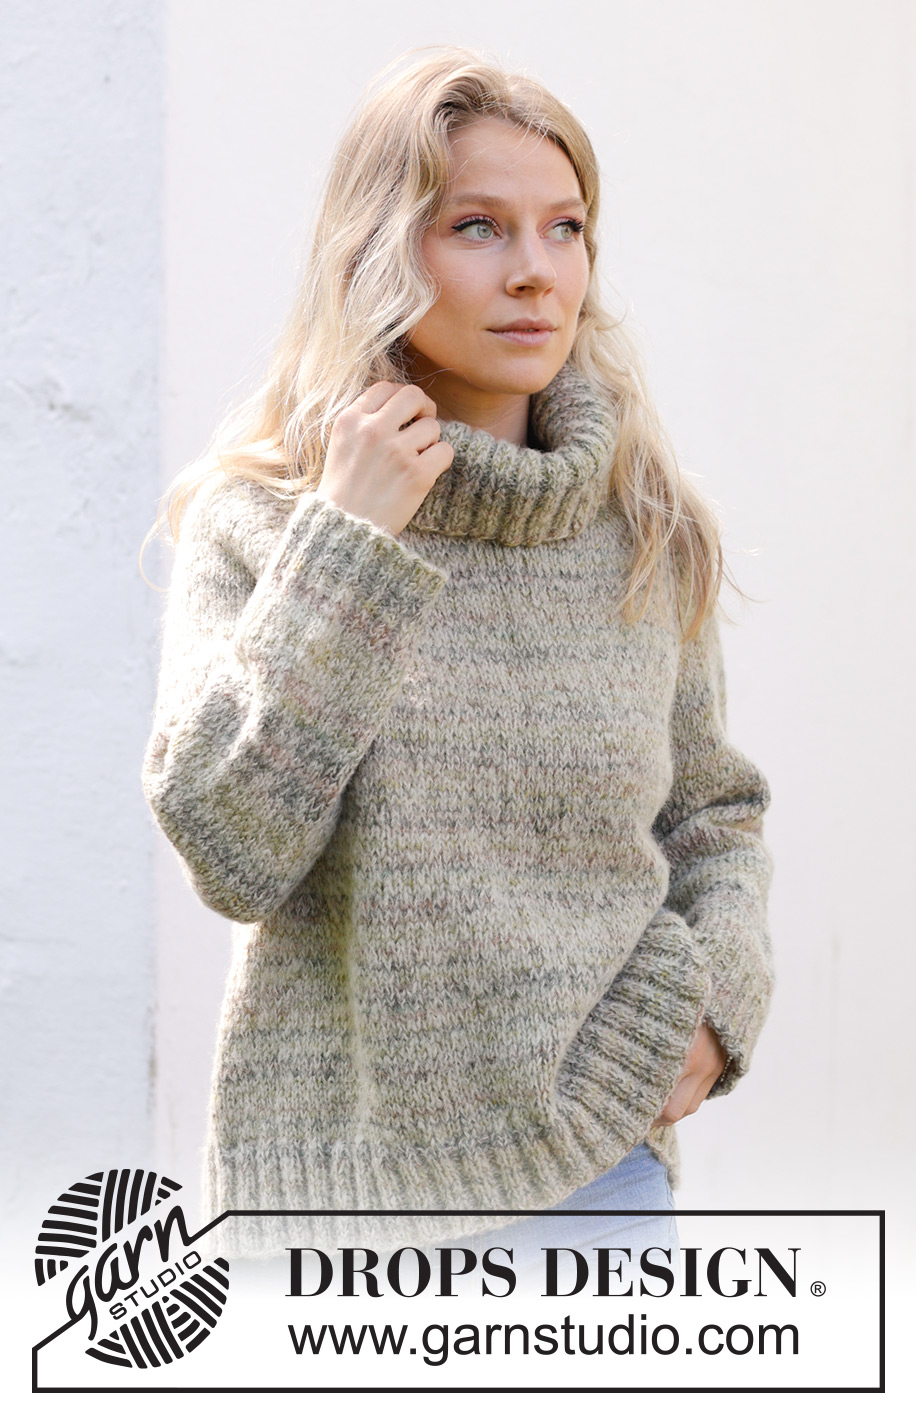
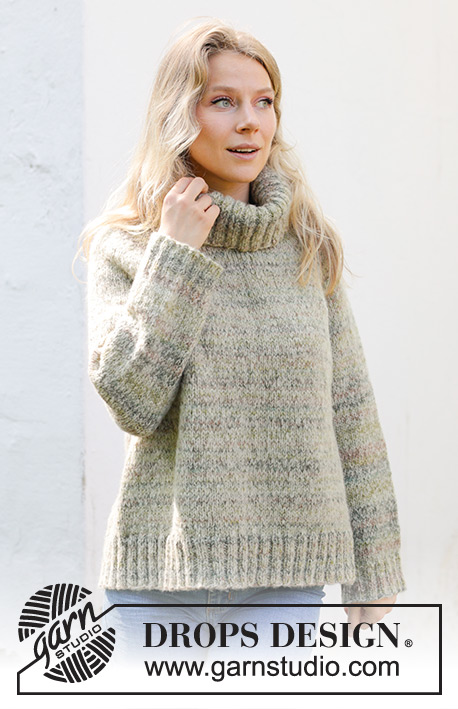
Hidden Forest Sweater#hiddenforestsweater |
|
 |
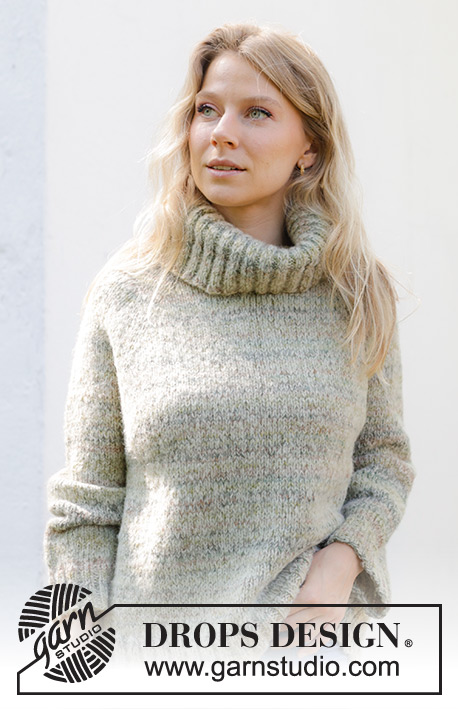 |
Knitted sweater in DROPS Fabel and DROPS Brushed Alpaca Silk. The piece is worked top down with raglan and high neck. Sizes S - XXXL.
DROPS 243-21 |
|
|
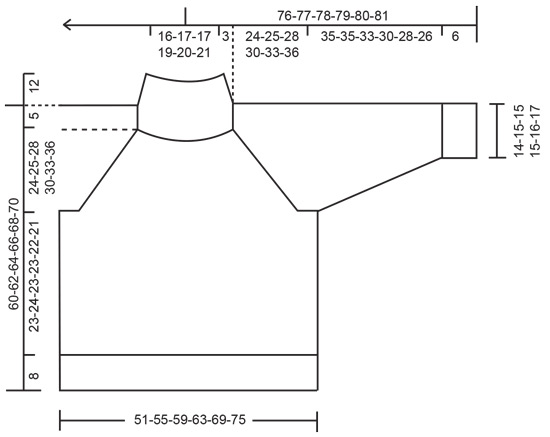
------------------------------------------------------- EXPLANATIONS FOR THE PATTERN: ------------------------------------------------------- RAGLAN: Increase 1 stitch on each side of 5 knitted stitches, in each transition between the body and sleeves; the middle stitch is the marker-stitch (8 increased stitches on the round). Increase by making 1 yarn over, which is worked twisted on the next round to avoid a hole. Work the new stitches in stockinette stitch. DECREASE TIP (for sleeves): Start 3 stitches before the marker-thread, knit 2 together, knit 2 (marker-thread sits between these 2 stitches), slip 1 stitch knit-wise, knit 1 and pass the slipped stitch over the knitted stitch (2 stitches decreased). ------------------------------------------------------- START THE PIECE HERE: ------------------------------------------------------- SWEATER – SHORT OVERVIEW OF THE PIECE: The neck and yoke are worked in the round with circular needle, from mid back and top down. The yoke is divided for body and sleeves and the body is continued in the round with circular needle. The sleeves are worked in the round with short circular needle/double pointed needles. HIGH NECK: Cast on 124-132-132-136-144-148 stitches with 1 strand DROPS Fabel and 1 strand DROPS Brushed Alpaca Silk, over short circular needles sizes 4.5 and 5.5 MM = US 9 held together. Remove the needle size 5.5 MM = US 9 keeping stitches on needle 4.5 MM = US 7 (this gives you an elastic cast-on edge). Work rib in the round (knit 2, purl 2) for 24 cm = 9½". Knit 1 round and decrease 48-52-52-52-56-56 stitches evenly spaced = 76-80-80-84-88-92 stitches. Insert 4 markers as described below, without working the stitches. Each marker is inserted in a knitted stitch (not between 2 stitches) and is used when increasing for raglan. Insert a marker-thread at the beginning of the round = approx. mid-back. Count 11-12-12-13-14-15 stitches (half back piece), insert marker-1 in the next stitch, count 14 stitches (sleeve), insert marker-2 in the next stitch, count 22-24-24-26-28-30 stitches (front piece), insert marker-3 in the next stitch, count 14 stitches (sleeve), insert marker-4 in the next stitch, there are 11-12-12-13-14-15 stitches left on the round (half back piece) NECKLINE: Work short rows for the neckline. Change to needle size 5.5 MM = US 9. Start mid-back: ROW 1 (right side): Knit and increase for RAGLAN – read description above, on each side of the first 2 markers (4 increased stitches), turn when you have worked 4 stitches past marker-2. ROW 2 (wrong side): Purl. Turn when you have worked 4 stitches past last marker. ROW 3 (right side): Knit and increase for raglan on each side of all markers, (8 increased stitches), turn when you have worked 2 stitches past the previous turn. ROW 4 (wrong side): Purl and turn when you have worked 2 stitches past the previous turn. ROW 5 (right side): Knit and increase for raglan on each side of the first 2 markers (4 increased stitches), knit to mid-back. The short rows are finished and you have increased 2 times for raglan by each marker = 92-96-96-100-104-108 stitches. Knit 1 round. YOKE: Start at the marker-thread mid-back and work stockinette stitch in the round. AT THE SAME TIME continue to increase for raglan every 2nd round until you have increased a total of 7-8-9-12-11-9 times (including the increases on the short rows) = 132-144-152-180-176-164 stitches. Continue increasing for raglan, but every 2nd increase is now only on the body (4 stitches increased). I.e., increase on the body every 2nd round and on the sleeves every 4th round. Increase like this 14-14-16-14-18-22 times on the body (7-7-8-7-9-11 times on the sleeves). You have increased a total of 21-22-25-26-29-31 times on the body and 14-15-17-19-20-20 times on the sleeves. After the last increase there are 216-228-248-264-284-296 stitches. Continue with stockinette stitch and without further increases until the yoke measures 24-25-28-30-33-36 cm = 9½"-9¾"-11"-11¾"-13"-14¼" from the neck, measured mid-back (after neck). Now divide for the body and sleeves: Knit 33-35-38-40-44-47 (half back piece), place the next 42-44-48-52-54-54 stitches on 1 thread for the sleeve, cast on 10-12-12-14-16-18 stitches (in side under sleeve), knit 66-70-76-80-88-94 (front piece), place the next 42-44-48-52-54-54 stitches on 1 thread for the sleeve, cast on 10-12-12-14-16-18 stitches (in side under sleeve), knit the last 33-35-38-40-44-47 stitches (half back piece). The body and sleeves are finished separately. The piece is now measured from here! BODY: = 152-164-176-188-208-224 stitches. Continue stockinette stitch in the round for a further 23-24-23-23-22-21 cm = 9"-9½"-9"-9"-8¾"-8¼". Knit 1 round and increase 36-40-44-48-52-56 stitches evenly spaced = 188-204-220-236-260-280 stitches. Change to circular needle size 4.5 MM = US 7. Work rib (knit 2, purl 2) for 8 cm = 3⅛". Bind off. The sweater measures approx. 60-62-64-66-68-70 cm = 23⅝"-24⅜"-25¼"-26"-26¾"-27½" from the shoulder. SLEEVES: Place the 42-44-48-52-54-54 stitches from the thread on the one side of the piece on short circular needle/double pointed needles size 5.5 MM = US 9 and knit up 1 stitch in each of the new stitches cast on under the sleeve = 52-56-60-66-70-72 stitches. Insert a marker-thread in the middle of the new stitches under the sleeve and allow it to follow your work onwards; it is used when decreasing under the sleeve. Start at the marker-thread and work stockinette stitch in the round. When the sleeve measures 4 cm = 1½", decrease 2 stitches under the sleeve – read DECREASE TIP. Decrease like this every 6½-5-4-2½-2-1½ cm = 2½"-2"-1½"-1"-¾"-½" a total of 5-6-7-10-11-11 times = 42-44-46-46-48-50 stitches. Continue working until the sleeve measures 35-35-33-30-28-26 cm = 13¾"-13¾"-13"-11¾"-11"-10¼" from the division. Knit 1 round and increase 6-4-6-6-8-6 stitches evenly spaced = 48-48-52-52-56-56 stitches. Change to double pointed needles size 4.5 MM = US 7 and work rib (knit 2, purl 2) for 6 cm = 2⅜". Bind off. The sleeve measures approx. 41-41-39-36-34-32 cm = 16⅛"-16⅛"-15¼"-14¼"-13⅜"-12½" from the division. Work the other sleeve in the same way. |
|
 |
|
Have you finished this pattern?Tag your pictures with #dropspattern #hiddenforestsweater or submit them to the #dropsfan gallery. Do you need help with this pattern?You'll find 26 tutorial videos, a Comments/Questions area and more by visiting the pattern on garnstudio.com. © 1982-2026 DROPS Design A/S. We reserve all rights. This document, including all its sub-sections, has copyrights. Read more about what you can do with our patterns at the bottom of each pattern on our site. |
|


With over 40 years in knitting and crochet design, DROPS Design offers one of the most extensive collections of free patterns on the internet - translated to 17 languages. As of today we count 325 catalogs and 12298 patterns - 12288 of which are translated into English (US/in).
We work hard to bring you the best knitting and crochet have to offer, inspiration and advice as well as great quality yarns at incredible prices! Would you like to use our patterns for other than personal use? You can read what you are allowed to do in the Copyright text at the bottom of all our patterns. Happy crafting!
Post a comment to pattern DROPS 243-21
We would love to hear what you have to say about this pattern!
If you want to leave a question, please make sure you select the correct category in the form below, to speed up the answering process. Required fields are marked *.