
Popular categories
Looking for a yarn?








































Comments / Questions (92)
 Noreen Fisher wrote:
I am having difficulty adding the yoke could you guide me with the increases after knitting the neck band
17.10.2026 - 14:31DROPS Design answered:
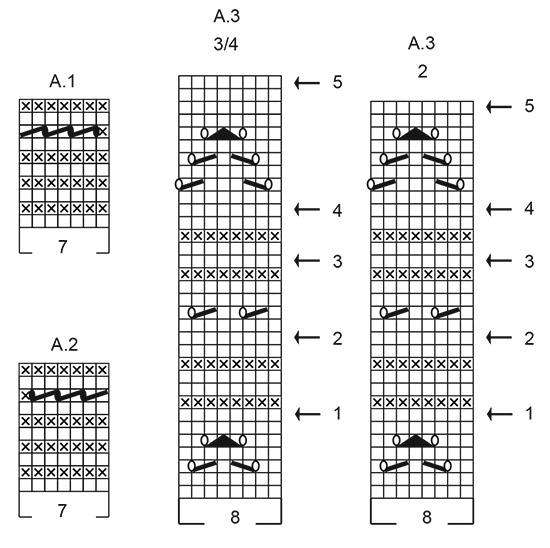
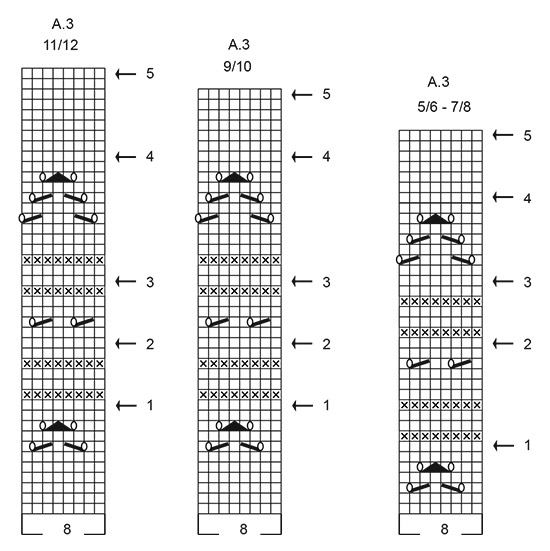
Dear Noreen, first you increase stitches evenly for your size over all stitches except the band stitches on each side. Then work pattern A.3 over all stitches except for the band stitches. Then, as you work the chart, whenever you reach the row with the arrow you increase stitches evenly (in rows with no lace pattern). Increase stitches as explained in arrows 1-5 in the text. The chart has already been accomodated for the increases spread evenly. If you need help understanding how to increase evenly you can follow this lesson. Happy knitting!
18.10.2026 - 19:39
 Donna wrote:
Mistake in pattern - in size 9/10 in body when moving to ribbing should increase by 34 stitches to end with 217 stitches to make the ribbing work correctly.
12.09.2026 - 20:16
 Doris wrote:
Die 8. Reihe im Muster A1 und A2 verwirrt mich. Habe keine Symbolbeschreibung entdeckt. Bin Anfänger. Danke im Voraus für Ihre Antwort
10.09.2026 - 12:30DROPS Design answered:
Liebe Doris, die 8. Reihe A.2 stricken Sie so: 1 Masche rechts, (1 Umschlag, 2 M rechts zusammen) x 3 ; die 8. Reihe A.1 stricken Sie so: (2 M rechts zuammen, 1 Umschlag) x 3, 1 Masche rechts. Bei der nächsten Hinreihe stricken Sie die Umschläge rechts (siehe auch 4. Symbolerklärung). Viel Spaß beim Stricken!
11.09.2026 - 09:00
 Ingrid wrote:
Hoe wordt de vette zigzag rand bij A1 en A2 gebreid. ? Ik zie het niet bij de uitleg van de symbolen .
30.08.2026 - 11:55DROPS Design answered:
Dag Ingrid,
Het schuine streepje betekent 2 recht samen. Deze is in de teltkekening vetter dan in de symboolverklaring.
30.08.2026 - 13:34
 Bodil Tenggren wrote:
Hej Jag stickar Drops children model 447-7 i storlek 3/4. När jag stickar framkanterna A1 och A2 är dom lika. När jag kommer till A3 rad 3 (första mönsterraden) på vilken rad i A1 och A2 skall jag vara då?
10.08.2026 - 12:10DROPS Design answered:
Hej Bodil, A.3 varv 3 (nerifrån) stickas från rätsidan och du är också på varv 3 (nerifrån) i A.1 och A.2 :)
13.08.2026 - 14:06
Bodil Tenggren wrote:
På mönsterdiagrammet A3 varv 3 när mönsterstickningen börjar stickar jag Två räta maskor, ett omslag, 1 rät, 1 lyft maska, 1 rät maska, lyfter 1 maska, stickar en rät, drar över den lyfta maskan, 1 rät, 1 omslag, 1 rät Har jag förstått rätt?
19.07.2026 - 18:00DROPS Design answered:
Hei Bodil. Det kommer an på hvilket diagram / hvilken str. du strikker etter, men f.eks diagram A.3 og str. 2 år - 3/4 år - 5/7 år - 7/8 år strikker man varv 3 slik: 2 räta maskor, 1 omslag, lyft 1 maska av stickan som om den skulle stickas rät, sticka 1 rätmaska och drag den lyfta maskan över maskan som stickades, 1 rät, 2 maskor räta tillsammans, 1 omslag och 1 rät. mvh DROPS Design
04.08.2026 - 08:31
Angie Steer wrote:
Is it possible to get the instructions for this pattern yoke written out in knitting text in English? I CAN NOT MAKE THE CHART WORK OUT.
16.07.2026 - 00:03DROPS Design answered:
Dear Mrs Steer, we only have diagrams for this pattern, but you can find how to read them here; feel free to tell us more if you have worries with your size/number of stitches so that we can help you further; Happy knitting!
10.08.2026 - 09:50
Bodil Tenggren wrote:
Vad betyder diagrammet på varv 8 A1 och A2 Ska det stickas 2 maskor tillsammans. Då återstår 4 mask. Ska det inte vara 7 maskor i framkantmaskor hela vägen?
13.07.2026 - 22:32DROPS Design answered:
Hei Bodil. Jo, det skal være 7 framkantmaskor hela vägen. Om du ser på varv 8 på A.1 og A.2 ser du at det samtidig som det strikkes 2 og 2 masker sammen (skråstilt strek over 2 masker), lages det også 1 omslag (sort sirkel = mellan 2 maskor görs det 1 omslag om stickan, på nästa varv stickas omslaget rätt - det ska bli hål), slik at maskeantallet blir det samme hele tiden. mvh DROPS Design
04.08.2026 - 07:08
Donna wrote:
Good afternoon - frustrating to find no instruction in the actual pattern indicating that the charts are worked bottom up. Also very frustrating to have no mention in the patter that the A3 charts do *not* work evenly into the number of stitches on your needles, leading to reknityung the patterns 3 times only to find in the comments that you may have a stitch left at the end of the repeat. This is just sloppy.
05.07.2026 - 22:39
Fabienne wrote:
Wenn A.3 gestrickt wird, die letzte Masche vor der Blende wie die erste Masche von A.3 stricken, damit das Muster bei den Blenden symmetrisch beginnt und endet. Welche Masche ist damit gemeint ?
03.06.2026 - 21:37DROPS Design answered:
Liebe Fabienne, die 1. Masche vom Diagram an der rechten Seite, dh wenn man das Diagram rechts nach links liest (bei den Hin-Reihen), bei den Rückreihen ist es die letzte Masche (wenn man dann links nach rechts liest). Viel Spaß beim Stricken!
04.06.2026 - 10:23
|
|||||||||||||||||||||||||
Running Circles Cardigan#runningcirclescardigan |
|||||||||||||||||||||||||
 |
 |
||||||||||||||||||||||||
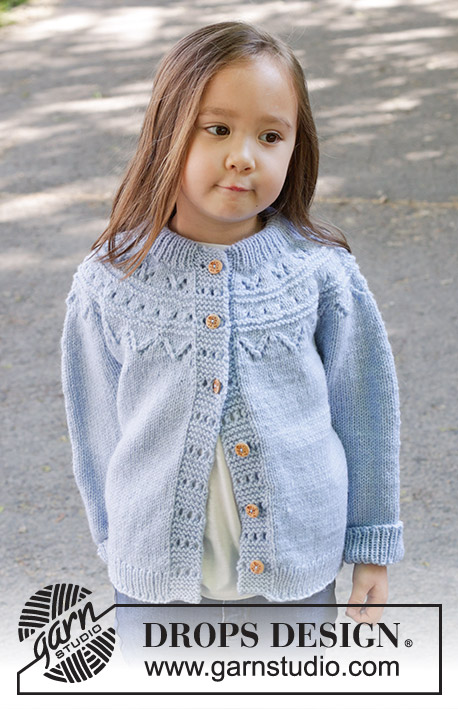
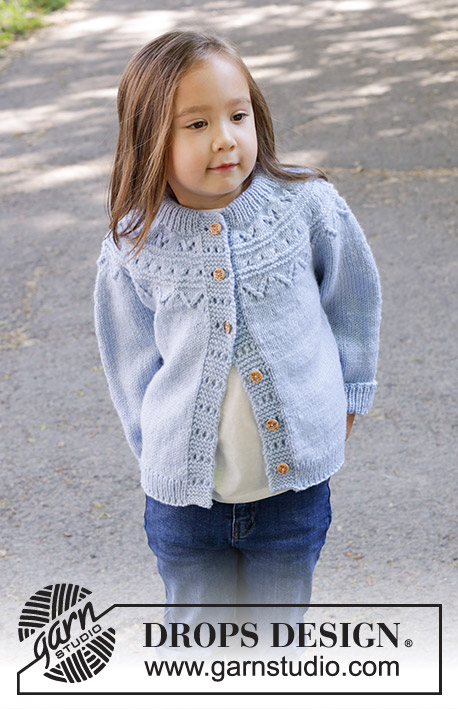
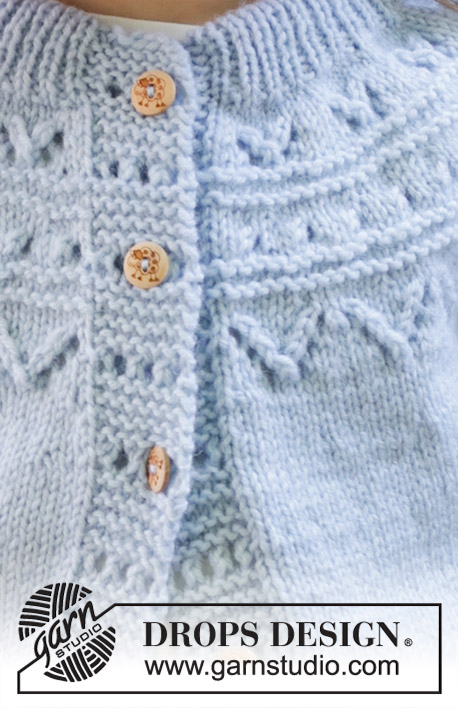
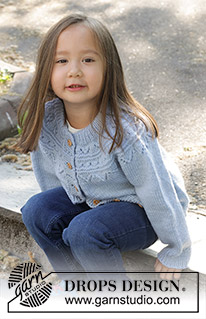
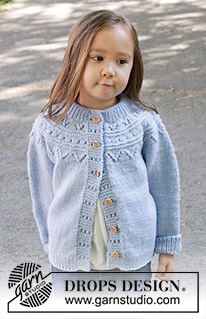
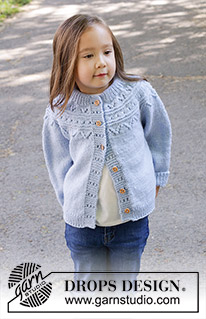
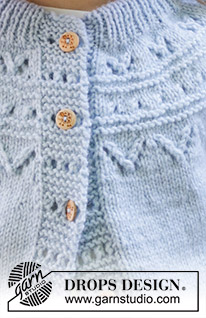
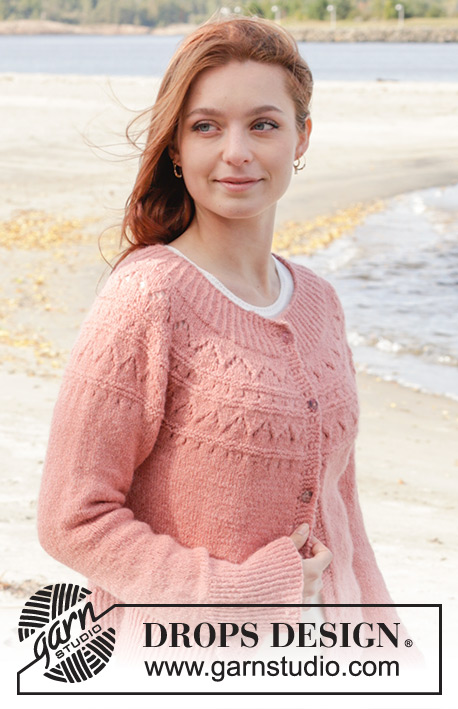
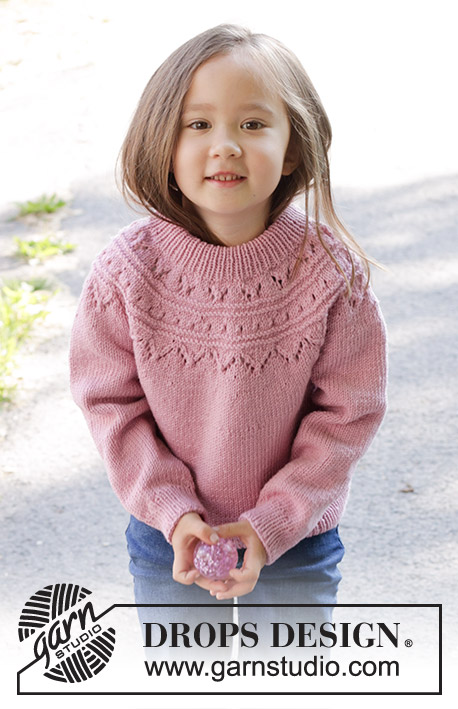
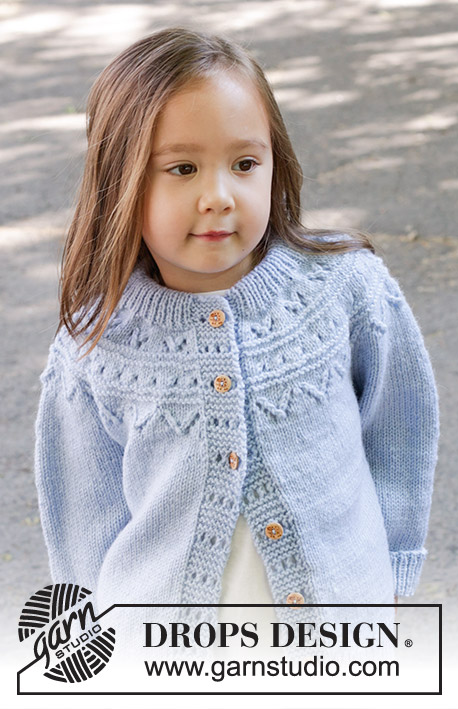
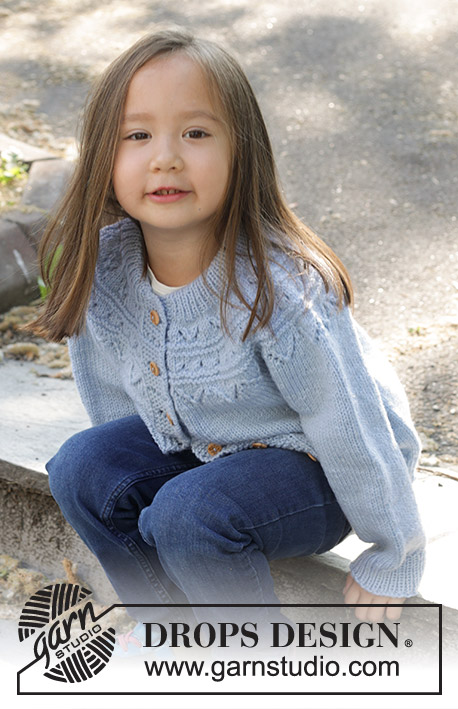
Knitted jacket for children in DROPS Karisma. The piece is worked top down with round yoke, lace pattern and double neck. Sizes 2 - 12 years.
DROPS Children 47-7 |
|||||||||||||||||||||||||
|
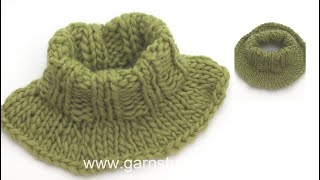
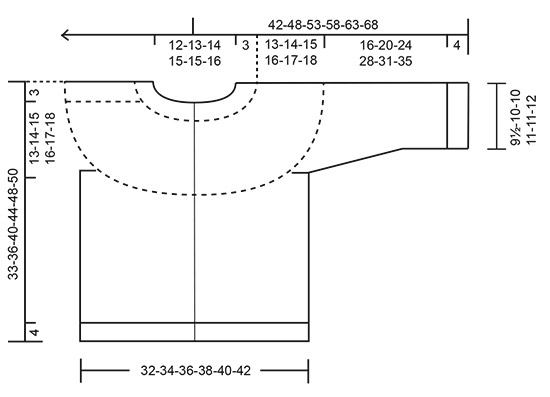
------------------------------------------------------- EXPLANATIONS FOR THE PATTERN: ------------------------------------------------------- GARTER STITCH (worked back and forth): Knit all rows. 1 ridge = knit 2 rows. PATTERN: See diagrams A.1 to A.3. Choose diagram for your size (applies to A.3). The diagrams show all rows in the pattern from the right side. When working A.3, the last stitch before the band is worked as the first stitch in A.3 so the pattern is symmetrical. INCREASE TIP: Increase 1 stitch by making 1 yarn over which is then worked twisted on the next row to avoid a hole. DECREASE TIP (for sleeves): Decrease 1 stitch on each side of the marker-thread as follows: Work until there are 3 stitches left before the marker-thread, knit 2 together, knit 2 (marker-thread sits between these 2 stitches), slip 1 stitch knit-wise, knit 1 and pass the slipped stitch over the knitted stitch. ------------------------------------------------------- START THE PIECE HERE: ------------------------------------------------------- JACKET – SHORT OVERVIEW OF THE PIECE. The neck and yoke are worked back and forth with circular needle, from mid front and top down as far as the armholes, then the body and sleeves are finished separately. The body is finished back and forth with circular needle. The sleeves are worked in the round with double pointed needles. Buttonholes are not worked, as the buttons are buttoned in the lace pattern on the band. DOUBLE NECK: Cast on 75-79-85-87-89-93 stitches with circular needle size 4 MM = US 6 and DROPS Karisma. Change to circular needle size 3 MM = US 2.5. Purl 1 row from the wrong side. Work rib (knit 1, purl 1) until there is 1 stitch left, knit 1. Work this rib back and forth for 3 cm = 1⅛". At the end of the next 2 rows cast on 7 stitches in garter stitch for the bands = 89-93-99-101-103-107 stitches. On the next row from the right side work as follows: A.1 over the 7 band stitches, continue the rib as before until there are 7 stitches left, A.2 over the 7 band stitches. Continue this pattern until the rib measures 6½ cm = 2½" from the cast-on edge and the next row is from the right side. YOKE: Work the 7 band stitches as before, knit until there are 7 stitches left, increasing 14-18-20-18-24-20 stitches evenly over these stitches - read INCREASE TIP, work the 7 band stitches as before = 103-111-119-119-127-127 stitches. Insert a marker; the yoke is measured from here. Change to circular needle size 4 MM = US 6. Purl 1 row from the wrong side (bands worked as before). Now work A.3 - read PATTERN in explanations above, and at the same time increase on each row marked with an arrow in A.3 as follows (bands worked as before): ARROW 1: Increase 24 stitches evenly spaced = 127-135-143-143-151-151 stitches. REMEMBER THE KNITTING GAUGE! ARROW 2: Increase 24-24-28-28-32-32 stitches evenly spaced = 151-159-171-171-183-183 stitches. ARROW 3: Increase 24-24-28-28-32-32 stitches evenly spaced =175-183-199-199-215-215 stitches. ARROW 4: Increase 24-24-26-32-28-36 stitches evenly spaced = 199-207-225-231-243-251 stitches. ARROW 5: Increase 26-30-26-32-32-36 stitches evenly spaced = 225-237-251-263-275-287 stitches Continue with stockinette stitch (bands worked as before) until the yoke measures 13-14-15-16-17-18 cm = 5⅛"-5½"-6"-6¼"-6¾"-7" from the marker. Now divide for the body and sleeves as follows from the right side: Work the first 37-39-42-44-46-48 stitches as before (left front piece), place the next 44-46-48-50-52-54 stitches on a thread, without working them (sleeve), cast on 6 stitches under the sleeve, knit 63-67-71-75-79-83 (back piece), place the next 44-46-48-50-52-54 stitches on a thread, without working them(sleeve), cast on 6 stitches under the sleeve, work the last 37-39-42-44-46-48 stitches as before (right front piece). The piece is now measured from here! BODY: = 149-157-167-175-183-191 stitches. Continue back and forth as before for a further 13-15-18-21-24-25 cm = 5⅛"-6"-7"-8¼"-9½"-9¾", with the next row from the right side (approx. 4 cm = 1½" left; try the jacket on and work to desired length). Work the bands in GARTER STITCH – see explanation above, and stockinette stitch over the other stitches, increasing 28-30-30-32-33-36 stitches evenly over the stockinette stitches = 177-187-197-207-216-227 stitches. Purl back from the wrong side (bands in garter stitch). Change to circular needle size 3 MM = US 2.5 and work rib as follows from the right side: 7 band stitches in garter stitch, rib (knit 1, purl 1) until there are 8 stitches left, knit 1, worked 7 band stitches in garter stitch. Continue this rib for 4 cm = 1½". Bind off a little loosely with knit over knit and purl over purl. The jacket measures approx. 33-36-40-44-48-50 cm = 13"-14¼"-15¾"-17¼"-19"-19¾" from the shoulder. SLEEVES: Place the 44-46-48-50-52-54 stitches from the thread on the one side of the piece on double pointed needles size 4 MM = US 6 and knit up 1 stitch in each of the 6 stitches cast on under the sleeve = 50-52-54-56-58-60 stitches. Insert a marker-thread in the middle of the new stitches under the sleeve and allow it to follow your work onwards. Work stockinette stitch in the round. When the sleeve measures 4 cm = 1½", decrease 1 stitch on each side of the marker-thread – read DECREASE TIP. Decrease like this every 2½-3½-4½-5-6-7 cm = 1"-1¼"-1⅝"-2"-2⅜"-2¾" a total of 5 times = 40-42-44-46-48-50 stitches. Work until the sleeve measures 16-20-24-28-31-35 cm = 6¼"-8"-9½"-11"-12¼"-13¾" from the division (or to desired length. There is approx. 4 cm = 1½" left). Knit 1 round and increase 4 stitches evenly spaced = 44-46-48-50-52-54 stitches. Change to double pointed needles size 3 MM = US 2.5 and work rib (knit 1, purl 1) for 4 cm = 1½". Bind off with knit over knit and purl over purl. Work the other sleeve in the same way. ASSEMBLY: Fold the neck double to the inside and sew down. To avoid the neck being tight and rolling outwards, it is important that the seam is elastic. Sew the openings together mid-front with small stitches. Sew the buttons onto the left band; the top button is positioned so it can be buttoned through the first row of the lace pattern on the band and the other buttons positioned evenly down the band. |
|||||||||||||||||||||||||
Diagram explanations |
|||||||||||||||||||||||||
|
|||||||||||||||||||||||||
 |
|||||||||||||||||||||||||
 |
|||||||||||||||||||||||||
 |
|||||||||||||||||||||||||
Have you finished this pattern?Tag your pictures with #dropspattern #runningcirclescardigan or submit them to the #dropsfan gallery. Do you need help with this pattern?You'll find 21 tutorial videos, a Comments/Questions area and more by visiting the pattern on garnstudio.com. © 1982-2026 DROPS Design A/S. We reserve all rights. This document, including all its sub-sections, has copyrights. Read more about what you can do with our patterns at the bottom of each pattern on our site. |
|||||||||||||||||||||||||






With over 40 years in knitting and crochet design, DROPS Design offers one of the most extensive collections of free patterns on the internet - translated to 17 languages. As of today we count 333 catalogs and 12525 patterns - 12515 of which are translated into English (US/in).
We work hard to bring you the best knitting and crochet have to offer, inspiration and advice as well as great quality yarns at incredible prices! Would you like to use our patterns for other than personal use? You can read what you are allowed to do in the Copyright text at the bottom of all our patterns. Happy crafting!
Post a comment to pattern DROPS Children 47-7
We would love to hear what you have to say about this pattern!
If you want to leave a question, please make sure you select the correct category in the form below, to speed up the answering process. Required fields are marked *.