Comments / Questions (28)
![]() Hennie Cramer wrote:
Hennie Cramer wrote:
Bij elke schouder (28 steken) blijven er 5 steken over, hoe is daar de mindering van horen die bij de hals in het voorpand! Graag advies!
07.02.2025 - 16:29
![]() Flores Hélène wrote:
Flores Hélène wrote:
Bonjour, je ne comprends pas les explications pour l'encolure et biais des épaules. Merci pour votre réponse.
24.02.2024 - 17:58DROPS Design answered:
Bonjour Mme Florès, vous allez mettre en attente les mailles des épaules en début de rang à partir de l'emmanchure (par ex pour le dos: en début de rang sur l'endroit pour l'épaule droite, en début de rang sur l'envers pour l'épaule gauche), et en même temps, vous devrez rabattre les mailles de l'encolure = en début de rang sur l'envers pour l'épaule droite/en début de rang sur l'endroit pour l'épaule gauche. Quand ces rangs raccourcis sont faits, vous tricotez 1 rang sur toutes les mailles de l'épaule et rabattez au rang suivant. Bon tricot!
26.02.2024 - 08:33
![]() CURIEUX Suzanne wrote:
CURIEUX Suzanne wrote:
Bonjour, très intéressée par le modèle pull écru diagramme de points mousse , Jersey présenté sur la page d accueil pinterest , je voudrais les explications pour le réaliser. Merci de votre aide ..a bientôt j espère
13.01.2024 - 09:07DROPS Design answered:
Bonjour Mme Curieux, retrouvez les explications en français ici. Bon tricot!
15.01.2024 - 08:13
![]() Hennie Cramer wrote:
Hennie Cramer wrote:
Patr 239-1 Er staat in de beschrijving van het achterpand niet dat na A3 A4 gebreid moet worden Hoe kan dat?
24.09.2023 - 14:48DROPS Design answered:
Dag Hennie,
Klopt, A.4 wordt op de mouwen gebreid.
27.09.2023 - 20:35
![]() Hennie wrote:
Hennie wrote:
Wordt in het telpatroon uitsluitend de heengaan naaldgegeven ? Het betreft model 239-1 A-1
08.09.2023 - 21:58DROPS Design answered:
Dag Hennie,
In de telpatronen zijn altijd alle naalden weergegeven, dus zowel de heengaande als de teruggaande naalden.
13.09.2023 - 20:45
![]() Christine wrote:
Christine wrote:
Bonjour, quelle option est la plus douce pour la peau pour une personne avec une sensibilité à la laine? Drops Ctoton-Merino ou Drops Sky avec Kid-Silk? Merci!
26.08.2023 - 12:28DROPS Design answered:
Bonjour Christine, je vous recommande de contacter votre magasin pour toute assistance personnalisée au choix de la meilleure laine adéquate, ce sera bien plus facile pour eux de vous conseiller la laine idéale, même par mail ou téléphone. Bon tricot!
28.08.2023 - 13:22
![]() ZUMAGLIA wrote:
ZUMAGLIA wrote:
Je ne comprends absolument rien aux explications de Drops. J'ai l'habitude de tricoter Phildar, Pingoon, Annie Blatt, je n'ai JAMAIS eu autant de difficultés pour comprendre et pourtant je tricote depuis plus de 40 ans ! Bien à vous.
22.08.2023 - 20:03DROPS Design answered:
Bonjour Mme Zumaglia, nos modèles sont écrits par des scandinaves et donc peuvent paraître déroutants car écrits d'une autre façon que celle dont vous avez l'habitude; vous pouvez volontiers utiliser cet espace pour poser votre question si les vidéos/leçons du bas de page n'ont pu vous aider, nous vous aiderons volontiers. Bon tricot!
23.08.2023 - 09:18
![]() NELLY PREVOT wrote:
NELLY PREVOT wrote:
Merci pour votre réponse reçue le 26 mai alors que la demande était du 5 mai ! Heureusement j'étais absente pendant ce temps. Vous n'avez toujours pas répondu à ma question : que signifie les 2 petits ovals de chaque côté du point ? vous répondez à côté et impossible de voir explicitement les changements sur le schéma ! Par ailleurs je ne commanderai plus à l'avenir de modèles chez vous car les explications ne sont pas claires. Désolée.
26.05.2023 - 15:20DROPS Design answered:
Bonjour Mme Prevot, je suis désolée si j'ai mal compris votre question, le triangle noir correspond à la diminution tricotée dans la vidéo dont j'ai indiqué le lien, et les ovales sont les jetés (3ème symbole de la légende); le rang 3 de A.2 va donc se tricoter ainsi: 2 m end, 1 jeté, le triangle noir = glissez 1 m à l'end, 2 m ens à l'end, passez la m glissée par-dessus la m tricotée, 1 jeté. Il peut être sage d'actualiser la page et d'imprimer à nouveau les diagrammes pour être certaine qu'ils soient justes désormais. Bon tricot!
26.05.2023 - 15:25
![]() NELLY PREVOT wrote:
NELLY PREVOT wrote:
Toujours une incompréhension : j'ai terminé le diagramme A.1 ; je suis le A.2 et 1° je me retrouve sur l'envers et sur les deux premiers rangs de A2 ce sont des symboles carré blanc ensuite je ne comprends pas du tout du tout votre symbole triangle noir (le 5ème) avec les petits 0 de chaque côté. Merci de détailler clairement : merci.
05.05.2023 - 15:52DROPS Design answered:
Bonjour Mme Prevot, effectivement, les diagrammes avaient un défaut, ils ont été maintenant corrigés, merci pour votre retour. Nous montrons dans cette vidéo comment tricoter le symbole triangle noir = 5ème symbole dans la légende; dans ce diagramme, vous devrez faire 1 jeté (cf 3ème symbole) avant et 1 jeté après (le nombre de mailles doit rester le même). Bon tricot!
26.05.2023 - 13:05
![]() Nelly wrote:
Nelly wrote:
Drops Design 239-1 Je ne comprends pas le diagramme : que signifie le petit 0 devant le trait oblique noir et les deux 0 de part et d'autre du triangle noir ? Les explications du diagramme le troisième à partir du haut (faire 1 jeté entre 2 mailles) ou est-il dans le modèle ? Que signifie "tension" pour vous ? Si l'on tricote avec l'aiguille circulaire en AR à quoi cela sert-il ? Merci pour votre prompte réponse. Cordialement.
25.04.2023 - 09:34DROPS Design answered:
Bonjour Nelly, la "tension" correspond à l'échantillon, lorsque vous tricotez l'ouvrage, vous devez conserver la même façon de tricoter que pour votre échantillon pour conserver les mêmes mesures (adaptez la taille des aiguilles si besoin). Le 1er rang de A.1 va se tricoter ainsi: 2 m ens à l'end, 1 jeté - pour le triangle, cf 5ème symbole de lé légende. On tricote avec des aiguilles circulaires pour avoir suffisamment de place pour y loger toutes les mailles (cf cette leçon. Bon tricot!
25.04.2023 - 14:40
Tip of the Iceberg#tipoftheicebergsweater |
|||||||||||||||||||
 |
 |
||||||||||||||||||
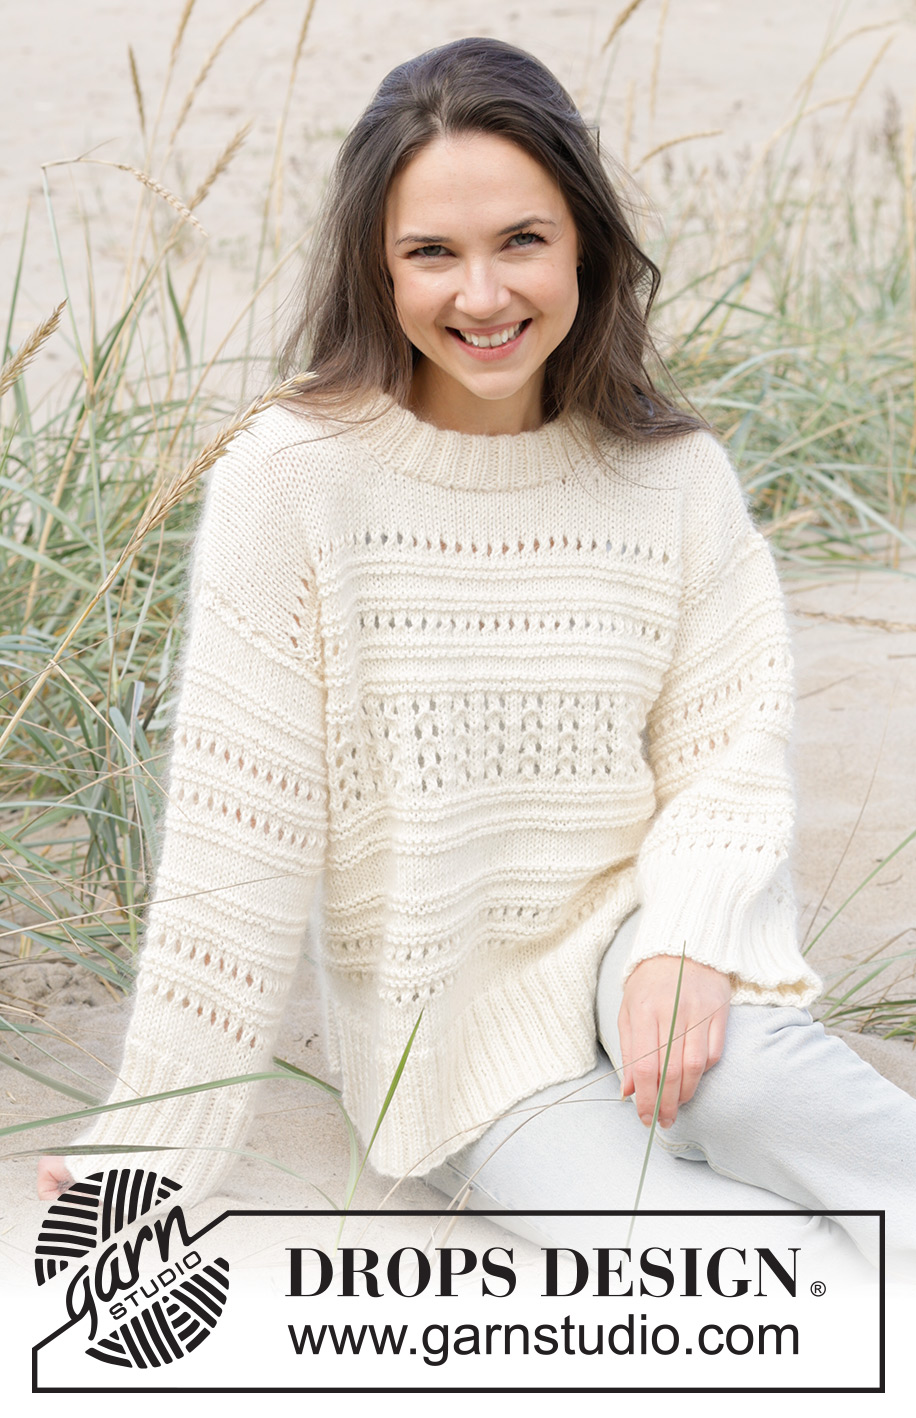
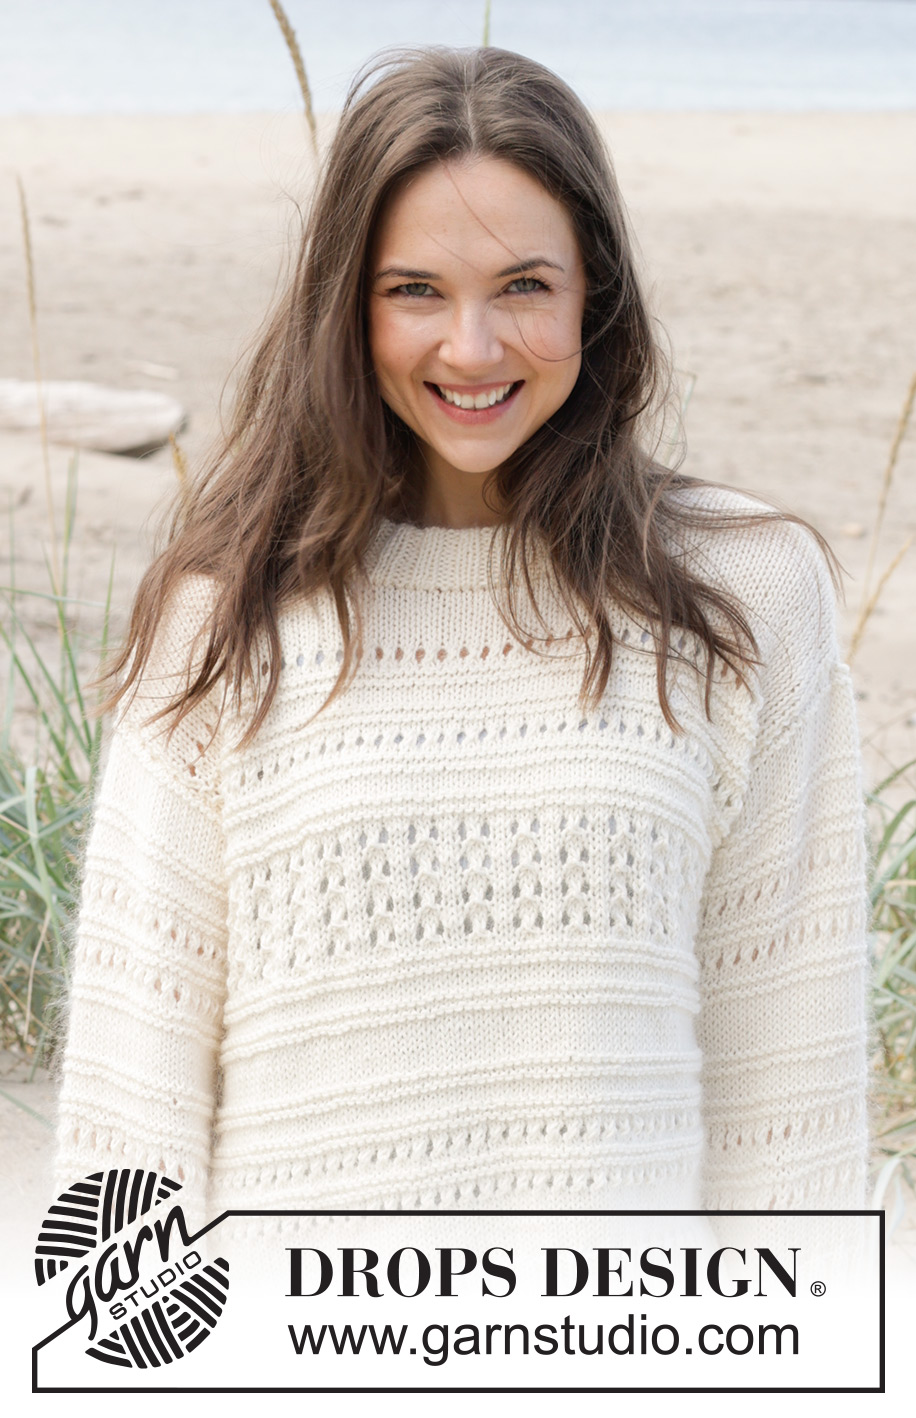
Knitted sweater in DROPS Cotton Merino or DROPS Sky and DROPS Kid-Silk. The piece is worked bottom up, with relief-pattern, lace pattern and splits in the sides. Sizes S - XXXL.
DROPS 239-1 |
|||||||||||||||||||
|
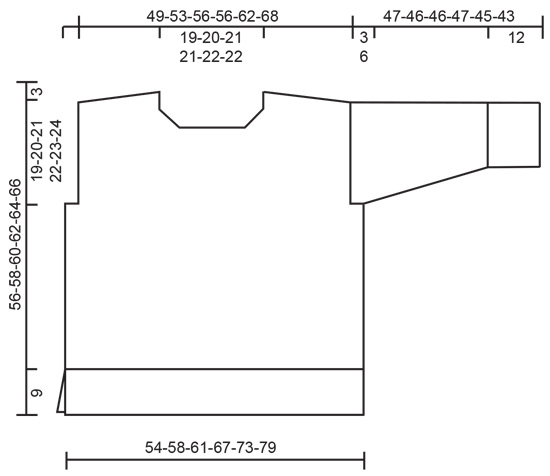
------------------------------------------------------- EXPLANATIONS FOR THE PATTERN: ------------------------------------------------------- RIDGE/GARTER STITCH (worked back and forth): Knit all rows. 1 ridge = knit 2 rows. PATTERN: See diagrams A.1 to A.4. The diagrams show all rows in the pattern from the right side. DECREASE TIP (for neck): All decreases are worked from the right side: BEGINNING OF ROW (working from the neck): 1 edge stitch in garter stitch, knit 2, slip 1 stitch as if to knit, knit 1 and pass the slipped stitch over the knitted stitch. END OF ROW (working towards the neck): Work until there are 5 stitches left, knit 2 together, knit 2 and 1 edge stitch in garter stitch. INCREASE TIP (for sleeves): Increase 1 stitch on each side of the marker-stitch by making 1 yarn over. On the next round work the yarn overs twisted to avoid holes, then work the new stitches into the pattern. ------------------------------------------------------- START THE PIECE HERE: ------------------------------------------------------- SWEATER – SHORT OVERVIEW OF THE PIECE: The back and front pieces are worked separately, back and forth on circular needle, bottom up. The sleeves are worked in the round with double pointed needles/short circular needle, bottom up as far as the sleeve cap, which is then finished back and forth. The neck is worked after the piece has been sewn together. BACK PIECE: Cast on 122-134-138-150-166-178 stitches with circular needle size 4 MM = US 6 and 1 strand of each quality (2 strands). Purl 1 row from the wrong side. Work the next row as follows from the right side: 2 stitches in GARTER STITCH – read description above, * knit 2, purl 2 *, work from *-* until there are 4 stitches left, knit 2 and 2 stitches in garter stitch. Continue this rib for 9 cm = 3½". Knit 1 row from the right side and decrease 35-42-41-43-49-51 stitches evenly spaced, in addition cast on 1 stitch at the beginning and end of this row (edge stitches) = 89-94-99-109-119-129 stitches. Change to circular needle size 5.5 MM = US 9. Work stockinette stitch with 1 edge stitch in garter stitch on each side. REMEMBER THE KNITTING GAUGE! When the piece measures 12-12-13-13-14-14 cm = 4¾"-4¾"-5⅛"-5⅛"-5½"-5½", start the pattern as well as decreasing for the armholes, neck and diagonal shoulders. Read sections PATTERN, ARMHOLES, NECK and DIAGONAL SHOULDERS before continuing. PATTERN: Work the first row as follows from the right side: 1 edge stitch in garter stitch, work A.1 until there is 1 stitch left, 1 edge stitch in garter stitch - NOTE: On each row with lace pattern where the pattern does not fit (applies to all sizes apart from M), knit the last stitch before the edge stitch). Continue this pattern. When A.1 is finished, work as follows: 1 edge stitch in garter stitch, work A.2 until there are 3 stitches left, 2 stitches in stockinette stitch, 1 edge stitch in garter stitch. Continue this pattern until A.2 has been worked 4-4-4-5-5-6 times in height. After A.2, work as follows from the right side: 1 edge stitch in garter stitch, work A.3 until there is 1 stitch left, 1 edge stitch in garter stitch. When A.3 is finished the piece measures approx. 47-47-48-50-51-53 cm = 18½"-18½"-19"-19¾"-20"-21" from the cast-on edge. Continue with stockinette stitch and 1 edge stitch in garter stitch on each side to finished length. ARMHOLES: When the piece measures 34-35-36-37-38-39 cm = 13⅜"-13¾"-14¼"-14½"-15"-15¼" from the cast-on edge, bind off 5-5-5-10-10-10 stitches at the beginning of the next 2 rows = 79-84-89-89-99-109 stitches. NECK: When the piece measures 53-55-57-59-61-63 cm = 21"-21⅝"-22½"-23¼"-24"-24¾", bind off the middle 29-30-31-31-33-33 stitches for the neck and finish each shoulder separately. Decrease 1 stitch for the neck on the next row from the right side – read DECREASE TIP = 24-26-28-28-32-37 stitches on the shoulder. DIAGONAL SHOULDERS: AT THE SAME TIME, when the piece measures 53-55-57-59-61-63 cm = 21"-21⅝"-22½"-23¼"-24"-24¾", place stitches on a thread for the diagonal shoulders (work the stitches first to avoid having to cut the strand). Place stitches on a thread from the side as follows: 8-9-9-9-11-12 stitches 2 times, then the remaining 8-8-10-10-10-13 stitches. When all the stitches are on the thread, place them back on circular needle size 5.5 MM = US 9. Work 1 row of stockinette stitch; to avoid a hole in the transition between stitches being placed on the thread, pick up the strand between 2 stitches and work it twisted together with the first stitch on the left needle. Bind off. Work the other shoulder in the same way. FRONT PIECE: Cast on and work in the same way as the back piece, until A.3 is finished in height – remember to bind off for the armholes. There are 79-84-89-89-99-109 stitches and the piece measures approx. 47-47-48-50-51-53 cm = 18½"-18½"-19"-19¾"-20"-21" from the cast-on edge. Continue with stockinette stitch and 1 edge stitch in garter stitch on each side. When the piece measures 49-50-51-53-54-56 cm = 19¼"-19¾"-20"-21"-21¼"-22", place the middle 23-24-23-23-23-23 stitches on a thread for the neck and finish each shoulder separately. Read sections NECK and DIAGONAL SHOULDERS before continuing. NECK: Decrease 1 stitch for the neck on each row from the right side – remember DECREASE TIP, 4-4-5-5-6-6 times. DIAGONAL SHOULDERS: AT THE SAME TIME, when the piece measures 53-55-57-59-61-63 cm = 21"-21⅝"-22½"-23¼"-24"-24¾", place stitches on a thread for the diagonal shoulders (work the stitches first to avoid having to cut the strand). Place stitches on a thread from the side as follows: 8-9-9-9-11-12 stitches 2 times, then the remaining 8-8-10-10-10-13 stitches. When all the stitches are on the thread, place them back on circular needle size 5.5 MM = US 9. Work 1 row of stockinette stitch; to avoid a hole in the transition between stitches being placed on the thread, pick up the strand between 2 stitches and work it twisted together with the first stitch on the left needle. Bind off. Work the other shoulder in the same way. SLEEVES: Cast on 72-76-76-80-84-84 stitches with double pointed needles size 4 MM = US 6 and 1 strand of each quality (2 strands). Knit 1 round, then work rib (knit 2, purl 2) in the round for 12 cm = 4¾". Knit 1 round and decrease 21-23-21-23-27-25 stitches evenly spaced = 51-53-55-57-57-59 stitches. Insert 1 marker in the last stitch on the round. Allow the marker to follow your work onwards – it is used when increasing under the sleeve. Change to double pointed needles size 5.5 MM = US 9 and work stockinette stitch. When the piece measures 14 cm = 5½", increase 2 stitches under the sleeve – read INCREASE TIP. Increase like this every 6½-5-5-4-3-2½ cm = 2½"-2"-2"-1½"-1⅛"-1" a total of 5-6-6-7-8-9 times = 61-65-67-71-73-77 stitches. AT THE SAME TIME when the sleeve measures 20-19-19-20-18-16 cm = 8"-7½"-7½"-8"-7"-6¼", work A.4 on the whole round – NOTE: The last stitch on the round follows the pattern with knit/purl but not with a hole. Work A.4 two times in height. If the finished length is not reached after working A.4, continue with stockinette stitch. AT THE SAME TIME when the sleeve measures 44-43-43-41-39-37 cm = 17¼"-17"-17"-16⅛"-15¼"-14½", work the sleeve cap back and forth, from mid-under the sleeve, continuing the pattern. Bind off when the sleeve measures 47-46-46-47-45-43 cm = 18½"-18"-18"-18½"-17¾"-17". ASSEMBLY: Sew the shoulder seams inside the bind-off edge. Sew the side seams inside the 1 edge stitch – start at the bottom of the armhole and work down to the rib (leaving 9 cm = 3½" split). Sew the sleeve cap to the armhole inside the 1 edge stitch, then sew together the bottom of the armhole – see sketch. DOUBLE NECK: Start at one shoulder seam and knit up from the right side (inside the 1 edge stitch, using short circular needle size 4 MM = US 6 and 1 strand of each quality) 88-92-100-100-104-104 stitches including the stitches from the thread in front. The stitch-count should be divisible by 4. Work rib in the round (purl 2, knit 2) for 9 cm = 3½". Bind off with knit over knit and purl over purl, making 1 yarn over after each 4th stitch which is then bind off as a normal stitch. Fold the neck double to the inside and sew down. To avoid the neck being tight and rolling outwards, it is important that the seam is elastic. |
|||||||||||||||||||
Diagram explanations |
|||||||||||||||||||
|
|||||||||||||||||||
 |
|||||||||||||||||||
 |
|||||||||||||||||||
 |
|||||||||||||||||||
Have you finished this pattern?Tag your pictures with #dropspattern #tipoftheicebergsweater or submit them to the #dropsfan gallery. Do you need help with this pattern?You'll find 35 tutorial videos, a Comments/Questions area and more by visiting the pattern on garnstudio.com. © 1982-2026 DROPS Design A/S. We reserve all rights. This document, including all its sub-sections, has copyrights. Read more about what you can do with our patterns at the bottom of each pattern on our site. |
|||||||||||||||||||


Post a comment to pattern DROPS 239-1
We would love to hear what you have to say about this pattern!
If you want to leave a question, please make sure you select the correct category in the form below, to speed up the answering process. Required fields are marked *.