
Popular categories
Looking for a yarn?


Comments / Questions (146)
![]() Lise wrote:
Lise wrote:
Hej. Jeg er færdig med at tage ud på for- og bagstykkerne og skal nu kun strikke raglanudtagningerne på ærmerne. Men på p 7 på A3 og A4 er der 2 mørke masker. Er det kun raglanudtagningen - altså den sidste og første maske, jeg ikke skal strikke eller er det begge de mørke omslag på både A3 og A4, jeg ikke skal strikke? Håber mit spørgsmål giver mening? Mvh Lise
07.12.2025 - 08:06DROPS Design answered:
Hei Lise. Om du mener de sorte firkantene på 5. pinne i diagram A.2, A.3 og A.5 der det mangler masker, så ser du de igjen på 5. pinne i diagram A.1, A.2 og A.4. (diagrammene går sammen). mvh DROPS Design
15.12.2025 - 12:04
![]() Bernadette wrote:
Bernadette wrote:
I have 20 stitches too many.
09.11.2025 - 19:54
![]() Bernadette wrote:
Bernadette wrote:
When A.3 and A.4 have been worked 2-2-3-3-3 times in height, the increases are finished on the front and back pieces; continue increasing only on the sleeves as explained above. Continue the pattern on the front and back pieces, but without further increases. Please tell me how I prevent making further increases in the body?
09.11.2025 - 10:57DROPS Design answered:
Hi bernadette, The first/final yarn overs on alternate rows in the diagrams are the yarn overs which give you increases. Do not work these yarn overs (but continue with the other yarn overs for the lace pattern) and you will not increase on the body. Regards, Drops Team.
12.11.2025 - 06:59
![]() Paulinska wrote:
Paulinska wrote:
Hallo, ich stricke das Jäckchen in der Größe 92. Ich bin jetzt bei dem Schritt nach den Zunahmen. Man soll A1 über 7 Maschen stricken. Was bedeutet das genau für die 5. Reihe? 2 zusammen, rechts, Umschlag, rechts, Umschlag, rechts, 2 zusammen? Schöne Grüße!
26.10.2025 - 21:34DROPS Design answered:
Liebe Paulinska, beim letzten Symbol der 5. Reihe stricken Sie 3 Maschen überzogen zusammen, d.h. hier nehmen Sie die 1. Masche von A.2 hinzu (A.2 folgt ja in der Reihe auf A.1) - wie Sie in A.2 sehen, ist dort als 1. Masche ein schwarzes Kästchen in der 5. Reihe, was "keine Masche" bedeutet, denn diese Masche haben Sie bereits bei A.1 durch das Zusammenstricken der 3 Maschen mitgestrickt. Viel Spaß beim Weiterstricken!
26.10.2025 - 22:28
![]() Ann-Marie wrote:
Ann-Marie wrote:
När jag stickar A1 och A2 och ska gör omtaget (hål) stickar jag en rät maska före och efter
06.10.2025 - 11:07DROPS Design answered:
Hej Ann-Marie. Det beror på vilket varv du är på. Är det en vit ruta innan och efter så gör du det. Mvh DROPS Design
06.10.2025 - 14:31
![]() Lise wrote:
Lise wrote:
Hej. Jeg strikker str 6/9 mdr. Jeg har nu strikket de ialt 3 repetitioner af mønsteret og har 215 m på pinden. Der står, at udtagningerne på for- og bagstykkerne færdige. Jeg mangler stadig 2 raglan udtagninger (ialt 14). Men hvad er det, jeg ikke skal tage ud? Raglan - det er vel på begge sider af raglanmasken? Men jeg forstår ikke, hvad jeg ikke skal tage ud og hvilke diagrammer, jeg skal strikke efter, til jeg har de 229 m på pinden? Mvh Lise
30.09.2025 - 17:24DROPS Design answered:
Hei Lise. Ta en titt på vårt forrige svar til deg. mvh DROPS Design
06.10.2025 - 11:54
![]() Lise wrote:
Lise wrote:
Hej. Har I set mit spørgsmål den 18.9.? Mvh Lise
24.09.2025 - 20:20DROPS Design answered:
Hei Lise. Ja, se vårt svar under ditt forrige spørsmål mvh DROPS Design
06.10.2025 - 11:43
![]() Bernadette Henshaw wrote:
Bernadette Henshaw wrote:
I am struggling at this point, I hope you can guide me "6 band stitches in garter stitch, work A.1, A.2 1-1-1-2-2 times, A.3, work stocking stitch and increase as before over the sleeve as far as marker 2, work A.4, A.2 5-5-5-6-6 times, A.3, work stocking stitch and increase as before over the sleeve as far as marker 4, work A.4, A.2 1-1-1-2-2 times, A.5 and 6 band stitches in garter stitch." I have knit 6 in garter stitch, then A1 +A2 X2, how do I incorporate the sleeve?
21.09.2025 - 22:42DROPS Design answered:
Dear Bernadette, work 6 band stitches in garter stitch, A.1 once, A.2 twice and A.3 once. Now you will work over the sleeve stitches. In the sleeves you work in stocking stitch (between markers 1 and 2) and increase 4 stitches evenly. Work A.4 once, work A.2 6 times, work A.3 once. Work in stocking stitch for the second sleeve, between markers 3 and 4, increasing 4 stitches evenly. Work A.4 once, work A.2 2 times, work A.5 once and 6 band stitches in garter stitch. Happy knitting!
22.09.2025 - 01:00
![]() Lise wrote:
Lise wrote:
Hej. Jeg strikker str 6/9 mdr. Jeg har nu strikket de ialt 3 repetitioner af mønsteret og har 215 m på pinden. Der står, at udtagningerne på for- og bagstykkerne færdige. Jeg mangler stadig 2 raglan udtagninger (ialt 14). Men hvad er det, jeg ikke skal tage ud? Raglan - det er vel på begge sider af raglanmasken? Men jeg forstår ikke, hvad jeg ikke skal tage ud og hvilke diagrammer, jeg skal strikke efter, til jeg har de 229 m på pinden? Mvh Lise
18.09.2025 - 06:09DROPS Design answered:
Hei Lise. Det tas nå kun ut til raglan på ermene. Fortsett mønstret på for- og bakstykket uten økninger (uten raglan økninger på for- og bakstykket). mvh DROPS Design
06.10.2025 - 09:43
![]() Lise wrote:
Lise wrote:
Hej. TUSIND TAK for hjælpen. Det var pind 5, der drillede. Jeg tænkte nok, at jeg ikke læste diagrammet rigtigt. Det fungerer nu ☺️.
16.09.2025 - 07:56
|
||||||||||||||||||||||
Cotswolds Cardigan#cotswoldscardigan |
||||||||||||||||||||||
 |
 |
|||||||||||||||||||||
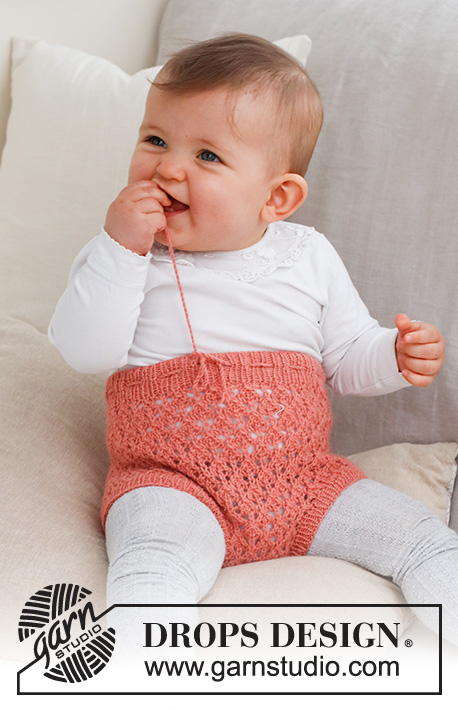
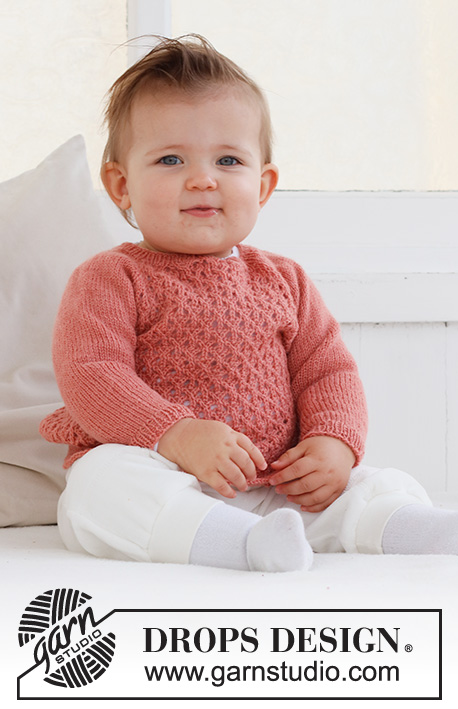
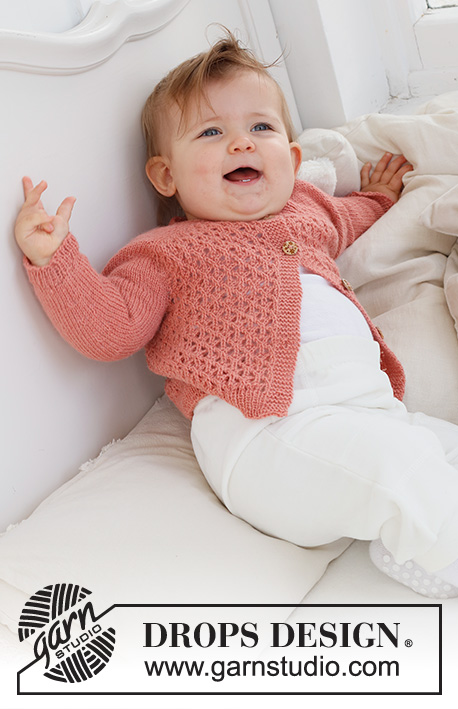
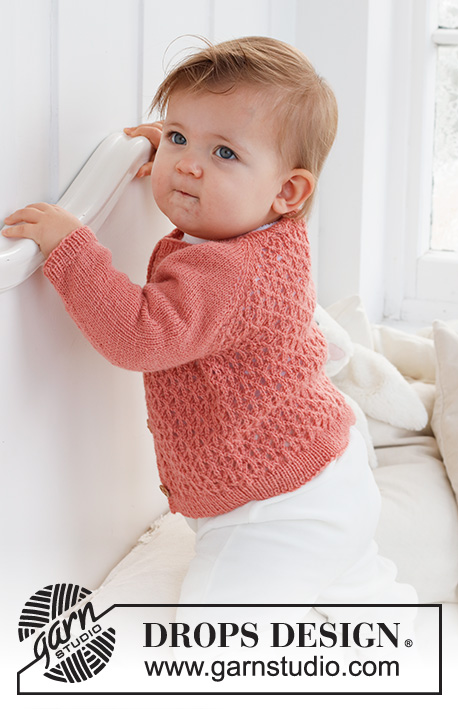
Knitted jacket for baby in DROPS Flora. The piece is worked top down, with raglan and lace pattern. Sizes 0 – 2 years.
DROPS Baby 43-2 |
||||||||||||||||||||||
|
------------------------------------------------------- EXPLANATIONS FOR THE PATTERN: ------------------------------------------------------- RIDGE/GARTER STITCH (worked back and forth): Knit all rows. 1 ridge = knit 2 rows. PATTERN: See diagrams A.1 to A.5. The diagrams show all rows in the pattern from the right side. BUTTONHOLES: Work buttonholes on the right band (when the garment is worn). Work from the right side when there are 4 stitches left on the row as follows: Make 1 yarn over, knit 2 together and knit 2. On the next row (wrong side), knit the yarn over to leave a hole. The first buttonhole is worked right after the neck. Then work the other 4 buttonholes with approx. 4½-4½-5-5½-6 cm = 1⅝"-1⅝"-2"-2⅛"-2⅜" between each one. RAGLAN: All increases are worked from the right side! On the front and back pieces the increases are included in the diagram. Increase as follows on the sleeves: Increase 1 stitch after markers 1 and 3. Knit the marker-stitch, make 1 yarn over. Increase 1 stitch before markers 2 and 4. Work as far as the marker-stitch and make 1 yarn over, knit the marker-stitch. On the next row purl the yarn overs twisted to avoid holes! Repeat this increase every row from the right side a total of 10-12-14-16-17 times. DECREASE TIP (for sleeves): Decrease 1 stitch on either side of the marker as follows: Work until there are 3 stitches left before the marker, knit 2 together, knit 2 (marker sits between these 2 stitches), slip 1 stitch as if to knit, knit 1 and pass the slipped stitch over the knitted stitch. ------------------------------------------------------- START THE PIECE HERE: ------------------------------------------------------- JACKET – SHORT OVERVIEW OF THE PIECE. The neck and yoke are worked back and forth with circular needle, top down. The yoke is divided for body and sleeves and the body continued back and forth with circular needle. The sleeves are worked in the round with double pointed needles. NECK: Cast on 93-93-93-111-111 stitches with circular needle size 2.5 MM = US 1.5 and DROPS Flora. Purl 1 row from the wrong side with 6 band stitches in GARTER STITCH – read description above, on each side. Then work rib as follows: 6 band stitches in garter stitch, * knit 1, purl 1 *, work from *-* until there are 7 stitches left, knit 1 and 6 band stitches in garter stitch. Work this rib for 2 cm = ¾". Change to circular needle size 3 MM = US 2.5. YOKE: Work the BUTTONHOLE on the right band – read description above! On the first row from the right side insert 4 markers and work as follows: Front piece: 6 band stitches in garter stitch, work A.1, then A.2 0-0-0-1-1 time, A.3. Sleeve: Insert marker 1 in the next stitch, work 12 stitches in stockinette stitch and increase 4 stitches evenly over these stitches, insert marker 2 in the next stitch. Back piece: Work A.4, A.2 3-3-3-4-4 times, then A.3. Sleeve: Insert marker 3 in the next stitch, work 12 stitches in stockinette stitch and increase 4 stitches evenly over these stitches, insert marker 4 in the next stitch. Front piece: Work A.4, A.2 0-0-0-1-1 time, A.5 and 6 band stitches in garter stitch. Continue this pattern on the next row from right side start to increase for sleeve – read description above. REMEMBER THE KNITTING GAUGE! When A.1 to A.5 are completed, work the next row from the right side as follows: 6 band stitches in garter stitch, work A.1, A.2 1-1-1-2-2 times, A.3, work stockinette stitch and increase as before over the sleeve as far as marker 2, work A.4, A.2 5-5-5-6-6 times, A.3, work stockinette stitch and increase as before over the sleeve as far as marker 4, work A.4, A.2 1-1-1-2-2 times, A.5 and 6 band stitches in garter stitch. Repeat this pattern in height. Each time A.3 and A.4 are repeated in height, there is room for 1 more repeat of A.2 on the front pieces and 2 more repeats on the back piece. When A.3 and A.4 have been worked 2-2-3-3-3 times in height, the increases are finished on the front and back pieces; continue increasing only on the sleeves as explained above. Continue the pattern on the front and back pieces, but without further increases. When all the increases are finished there are 189-197-229-255-259 stitches. Now work pattern as follows: 6 band stitches in garter stitch, A.1 over 7 stitches, A.2 3-3-4-5-5 times, work 37-41-45-49-51 stitches in stockinette stitch, A.2 9-9-11-12-12 times, work 37-41-45-49-51 stitches in stockinette stitch, A.2 3-3-4-5-5 times, A.5 and 6 band stitches in garter stitch. Continue this pattern. When you work round 5 in A.2 on the back piece, knit the first stitch in the first repeat, the last stitch in the last repeat is worked over the first stitch on the sleeve. When the piece measures 12-13-14-15-16 cm = 4¾"-5⅛"-5½"-6"-6¼" from the cast-on edge, divide for the body and sleeves as follows: 6 band stitches in garter stitch, work 25-25-31-37-37 stitches as before, place the next 37-41-45-49-51 stitches on a thread for the sleeve, cast on 6 stitches under the sleeve, work 54-54-66-72-72 stitches, place the next 37-41-45-49-51 stitches on a thread for the sleeve, cast on 6 stitches under the sleeve, work 24-24-30-36-36 stitches as before and 6 band stitches in garter stitch. BODY: = 127-127-151-169-169 stitches. Continue back and forth as follows: 6 band stitches in garter stitch, work A.1, A.2 until there are 12 stitches left, work A.5 and 6 band stitches in garter stitch. When the piece measures 9-12-13-15-17 cm = 3½"-4¾"-5⅛"-6"-6¾" from the division, increase 20-20-22-26-26 stitches evenly spaced on the next row from the right side (do not increase over the bands) = 147-147-173-195-195 stitches. Change to circular needle size 2.5 MM = US 1.5 and work rib from the wrong side as follows: 6 band stitches in garter stitch, * purl 1, knit 1 *, work from *-* until there are 7 stitches left, purl 1 and 6 band stitches in garter stitch. Continue this rib for 3 cm = 1⅛". Bind off. The jacket measures approx. 24-28-30-33-36 cm = 9½"-11"-11¾"-13"-14¼" from the shoulder down. SLEEVES: Place the 37-41-45-49-51 stitches from the thread on the one side of the piece on double pointed needles size 3 MM = US 2.5 and knit up 1 stitch in each of the 6 stitches cast on under the sleeve = 43-47-51-55-57 stitches. Insert a marker thread in the middle of the new stitches under the sleeve. Start at the marker and work stockinette stitch in the round for 1 cm = ⅜". Now decrease 2 stitches under the sleeve – read DECREASE TIP. Decrease like this every 2½-2-2-2-2½ cm = 1"-¾"-¾"-¾"-1" a total of 3-5-6-7-8 times = 37-37-39-41-41 stitches. When the sleeve measures 10-12-15-16-22 cm = 4"-4¾"-6"-6¼"-8¾" from the division increase 5 stitches evenly spaced = 42-42-44-46-46 stitches. Change to double pointed needles size 2.5 MM = US 1.5 and work rib (knit 1, purl 1) for 3 cm = 1⅛". Bind off with knit over knit and purl over purl. The sleeve measures approx. 13-15-18-19-25 cm = 5⅛"-6"-7"-7½"-9¾" from the division. Work the other sleeve in the same way. ASSEMBLY: Sew the buttons onto the left band. |
||||||||||||||||||||||
Diagram explanations |
||||||||||||||||||||||
|
||||||||||||||||||||||
 |
||||||||||||||||||||||
Have you finished this pattern?Tag your pictures with #dropspattern #cotswoldscardigan or submit them to the #dropsfan gallery. Do you need help with this pattern?You'll find 30 tutorial videos, a Comments/Questions area and more by visiting the pattern on garnstudio.com. © 1982-2026 DROPS Design A/S. We reserve all rights. This document, including all its sub-sections, has copyrights. Read more about what you can do with our patterns at the bottom of each pattern on our site. |
||||||||||||||||||||||


With over 40 years in knitting and crochet design, DROPS Design offers one of the most extensive collections of free patterns on the internet - translated to 17 languages. As of today we count 324 catalogs and 12290 patterns - 12280 of which are translated into English (US/in).
We work hard to bring you the best knitting and crochet have to offer, inspiration and advice as well as great quality yarns at incredible prices! Would you like to use our patterns for other than personal use? You can read what you are allowed to do in the Copyright text at the bottom of all our patterns. Happy crafting!
Post a comment to pattern DROPS Baby 43-2
We would love to hear what you have to say about this pattern!
If you want to leave a question, please make sure you select the correct category in the form below, to speed up the answering process. Required fields are marked *.