
Popular categories
Looking for a yarn?


Comments / Questions (12)
![]() Tove Juhl wrote:
Tove Juhl wrote:
Kan jeg sætte en tynd følgetråd ind og følge opskriften
08.04.2026 - 19:29
![]() Christiane Heuermann wrote:
Christiane Heuermann wrote:
Leider steht in den Angaben zur Maschenprobe nicht die Nadelstärke. Können Sie mir bitte diese mitteilen?
11.12.2025 - 20:43DROPS Design answered:
Liebe Frau Heuermann, die Maschenprobe stricken Sie mit den grösseren Nadeln, dh hier mit Nr 3. Viel Spaß beim Stricken!
12.12.2025 - 08:01
![]() INGE wrote:
INGE wrote:
Havde printet denne opskrift med 2 forskellige garner , det ene var mohair agtig m den mistede jeg , og den nye opskrift passer ikke ned det jeg har strikket, hvordan kan jeg få den første opskrift igen
14.11.2025 - 22:28DROPS Design answered:
Hei Inge. Denne oppskriften har kun vært i Alpaca. Har du valg et annet garn, er det kun garnet som er forandret, ikke selve oppskriften. mvh DROPS Design
17.11.2025 - 20:05
![]() Neeta wrote:
Neeta wrote:
I started this pattern but I am not able to understand A.1
12.11.2025 - 01:37
![]() Andreani wrote:
Andreani wrote:
Bravo a drops design pour les modeles et leurs explications via les tuto
27.02.2023 - 21:29
![]() Andreani wrote:
Andreani wrote:
J ai realise ce modele avec deux types de laine il est tres reussi surtout avec lalpaga tres doux au toucher et tres souple les explications sont bien faites . bonne idee des tuto pour les debutantes bravo a drops
27.02.2023 - 21:27
![]() Ester wrote:
Ester wrote:
Increase 4 stitches by working 5 stitches in the Fisherman’s rib stitch as follows (from the right side): Knit 1 in the stitch below this stitch, but do not slip the stitch from the left needle, * make 1 yarn over, knit 1 in the same stitch but do not slip the stitch from the left needle *, work from *-* 1 more time, then slip the stitch from the left needle = 4 stitches increased. Can you please explain this one more time?
05.12.2022 - 07:06DROPS Design answered:
Hi Ester, You are working 4 extra stitches in one and the same stitch (the Fisherman's rib stitch). You first knit the stitch as normal but do not slip it from the left needle, make 1 yarn over and knit the same stitch again, make 1 yarn over and knit the stitch 1 more time . So you now have 3 knitted stitches and 2 yarn overs on the right needle and can slip the Fisherman's rib stitch from the left needle. As you would have had 1 knitted stitch (if you had not done all the increases) this means you have increased 4 stitches. Happy knitting!
06.12.2022 - 06:54
![]() Chantal Lessard wrote:
Chantal Lessard wrote:
Bonjour, je n'ai pas d'aiguilles 2.5mm circulaire, est-ce que je peux commencer le col avec des aiguilles double pointe ? car il se travaille en aller-retour. Merci beaucoup de votre aide. Chantal
04.11.2022 - 13:54DROPS Design answered:
Bonjour Mme Lessard, si vous avez des aiguilles droites en 2,5 elles seront plus pratiques, mais si vous n'avez que des doubles pointes en 2,5 ça le fera aussi, répartissez bien vos mailles pour ne pas en perdre et rappelez-vous de bien tourner pour tricoter alternativement sur l'endroit et sur l'envers. Bon tricot!
04.11.2022 - 13:57
![]() María José wrote:
María José wrote:
No entiendo la explicación del canesú del patrón z-048-bn Si hago la labor como la entiendo, no se parece a la fotografía. No sé dónde estoy fallando
28.09.2022 - 18:52DROPS Design answered:
Hola María José, ¿puedes concretar en qué apartado del canesú tienes problemas?
03.10.2022 - 00:00
![]() Maryse wrote:
Maryse wrote:
(suite) par ailleurs je crois qu'il y a confusion ensuite entre A2 A et A2B merci d'éclaircir ce point aussi
18.12.2021 - 08:38DROPS Design answered:
Bonjour Maryse, lorsque vous avez répété les 2 derniers rangs de A.1 jusqu'à ce que votre ouvrage mesure 6-7-7-8-8-9 cm depuis le marqueur, tricotez A.2A (= 4 m) au-dessus du 1er A.1 du rang (sur l'endroit), et tricotez A.2B au-dessus de chaque A.1 jusqu'à la fin du rang, et terminez par la 1ère m de A.2A (au-dessus de la 1ère m de A.1 = la même maille = 1 m en côte anglaises), ainsi vous augmentez dans chaque A.1 sauf dans le 1er et vous avez ensuite 8 m dans chaque A.2B et tout le rang (1 m en côtes anglaises, 3 m env), vu sur l'endroit. Bon tricot!
20.12.2021 - 07:18
|
|||||||||||||||||||
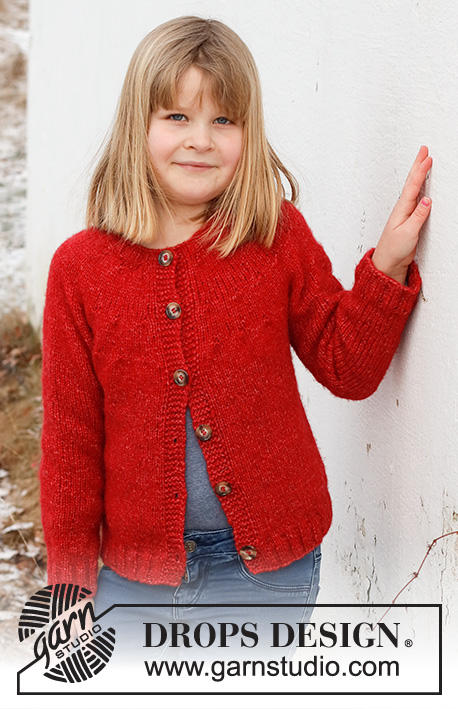
Hermine Jacket#herminejacket |
|||||||||||||||||||
 |
 |
||||||||||||||||||
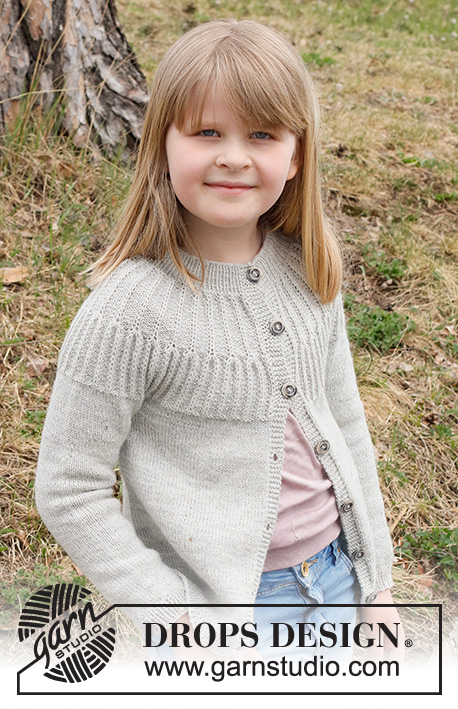
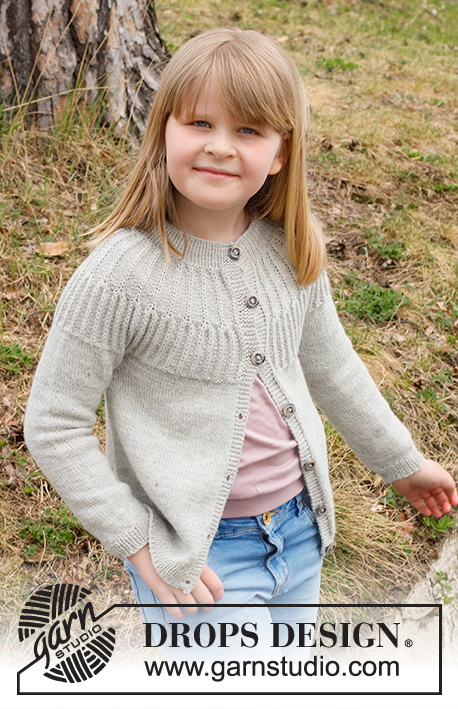
Knitted jacket for children in DROPS Alpaca. The piece is worked top down, with round yoke, textured pattern and Fisherman’s rib on the yoke. Sizes 2 to 12 years.
DROPS Children 41-13 |
|||||||||||||||||||
|
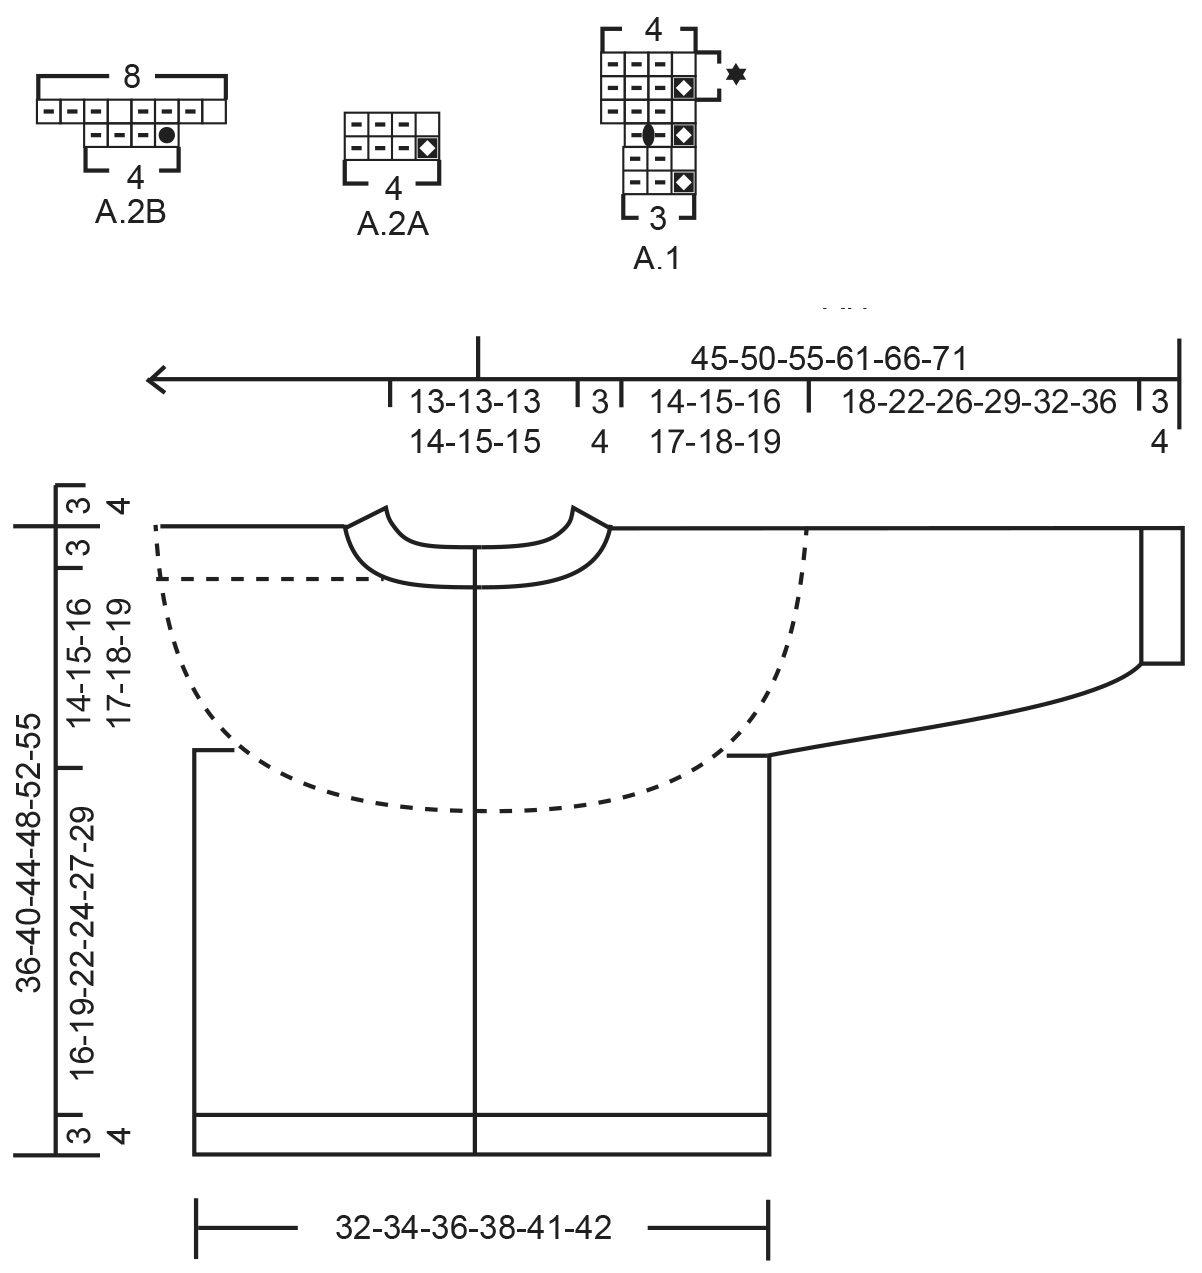
------------------------------------------------------- EXPLANATIONS FOR THE PATTERN: ------------------------------------------------------- RIDGE/GARTER STITCH (worked back and forth): Knit all rows. 1 ridge = knit 2 rows. PATTERN: See diagrams A.1 and A.2. The diagrams show all rows in the pattern from the right side. INCREASE/DECREASE TIP (evenly spaced): To work out how to increase/decrease evenly, count the total number of stitches on needle (e.g. 103 stitches), minus the bands (e.g. 10 stitches) and divide the remaining stitches by the number of increases/decreases to be made (e.g. 10) = 9.3. In this example, increase by making 1 yarn over after approx. each 9th stitch. Do not increase on the bands. On the next row work the yarn overs twisted to avoid holes. When decreasing, knit together approx. each 8th and 9th stitch. DECREASE TIP (for sleeves): Start 3 stitches before the marker thread, knit 2 together, knit 2 (marker thread sits between these 2 stitches), slip 1 stitch as if to knit, knit 1 and pass the slipped stitch over the knitted stitch (2 stitches decreased). BUTTONHOLES: Work buttonholes on the right band (when the garment is worn). Work from the right side when there are 3 stitches left on the row as follows: Make 1 yarn over, knit 2 together and knit 1. On the next row (wrong side), knit the yarn over to leave a hole. The first buttonhole is worked when the rib on the neck measures approx. 1½-2 cm = ½"-¾". Then work the other 5-5-5-6-6-6 buttonholes with approx. 6-7-8-7-8-8½ cm = 2⅜"-2¾"-3⅛"-2¾"-3⅛"-3¼" between each one. BINDING-OFF TIP: To avoid the bind-off edge being tight you can bind off with a larger size needle. If the edge is still tight, make 1 yarn over after approx. each 6th stitch at the same time as binding off; the yarn overs are bind off as normal stitches. ------------------------------------------------------- START THE PIECE HERE: ------------------------------------------------------- JACKET – SHORT OVERVIEW OF THE PIECE. The neck and yoke are worked back and forth with circular needle, from mid front and top down. The yoke is divided for body and sleeves and the body continued back and forth with circular needle. The sleeves are worked in the round with double pointed needles, top down. NECK: Cast on 99-101-103-107-109-111 stitches (including 5 band stitches on each side towards mid-front) with circular needle size 2.5 MM = US 1.5 and DROPS Alpaca. Purl 1 row (= wrong side). The next row is worked as follows from the right side: 5 band stitches in GARTER STITCH – read description above, * knit 1, purl 1 *, work from *-* until there are 6 stitches left, knit 1 and 5 band stitches in garter stitch. Continue this rib for 3-3-3-4-4-4 cm = 1⅛"-1⅛"-1⅛"-1½"-1½"-1½", remember the BUTTONHOLES on the right band – read description above. Insert 1 marker after the band at the beginning of the row; the yoke is measured from this marker! Purl 1 row from the right side (bands are knitted) and increase 2-6-10-12-16-20 stitches evenly on this row – read INCREASE/DECREASE TIP = 101-107-113-119-125-131 stitches. Knit 1 row from the wrong side (the yarn overs are knitted twisted). YOKE: Change to circular needle size 3 MM = US 2.5. The first row is worked as follows from the right side: 5 band stitches in garter stitch, work A.1 until there are 6 stitches left (= 30-32-34-36-38-40 repeats of 3 stitches), work the first stitch in A.1 so the pattern is symmetrical and 5 band stitches in garter stitch. After row 3 in A.1 there are 131-139-147-155-163-171 stitches. Complete A.1, then repeat the 2 rows in A.1 with stars until the piece measures 6-7-7-8-8-9 cm = 2⅜"-2¾"-2¾"-3⅛"-3⅛"-3½" from the marker – finish after a complete repeat in height. REMEMBER THE KNITTING GAUGE! The next row is worked as follows from the right side: 5 band stitches in garter stitch, work A.2A (= 4 stitches), A.2B until there are 6 stitches left (= 29-31-33-35-37-39 repeats of 4 stitches), work the first stitch in A.2A so the pattern is symmetrical and 5 band stitches in garter stitch. When A.2 has been completed there are 247-263-279-295-311-327 stitches. The next row is worked as follows from the right side: 5 band stitches in garter stitch, work A.2A until there are 6 stitches left (= 59-63-67-71-75-79 repeats of 4 stitches), work the first stitch in A.2A so the pattern is symmetrical and 5 band stitches in garter stitch. Continue this pattern until the piece measures 12-13-14-15-16-17 cm = 4¾"-5⅛"-5½"-6"-6¼"-6¾" from the marker. Knit 1 row from the right side where you increase 10-6-6-2-6-2 stitches evenly spaced = 257-269-285-297-317-329 stitches. Continue with stockinette stitch and 5 band stitches in garter stitch on each side until the piece measures 14-15-16-17-18-19 cm = 5½"-6"-6¼"-6¾"-7"-7½" from the marker. On the next row divide for the body and sleeves as follows: Work the first 41-43-46-48-51-53 stitches as before (= front piece), place the next 52-54-56-58-62-64 stitches on a thread for the sleeve, cast on 6 stitches (= in side under sleeve), work 71-75-81-85-91-95 stitches (= back piece), place the next 52-54-56-58-62-64 stitches on a thread for the sleeve, cast on 6 stitches (= in side under sleeve), work the last 41-43-46-48-51-53 stitches (= front piece). The body and sleeves are finished separately. THE PIECE IS NOW MEASURED FROM HERE! BODY: = 165-173-185-193-205-213 stitches. Continue with stockinette stitch back and forth and 5 band stitches in garter stitch on each side for 16-19-22-24-27-29 cm = 6¼"-7½"-8¾"-9½"-10⅝"-11⅜". There is approx. 3-3-3-4-4-4 cm = 1⅛"-1⅛"-1⅛"-1½"-1½"-1½" left to finished length; try the jacket on and work to desired length. To avoid the following rib being tight, knit 1 row from the right side where you increase 24-24-26-26-30-30 stitches evenly spaced = 189-197-211-219-235-243 stitches. Change to circular needle size 2.5 MM = US 1.5 and work from the wrong side as follows: 5 band stitches in garter stitch, * purl 1, knit 1 *, work from *-* until there are 6 stitches left, purl 1 and 5 band stitches in garter stitch. Continue this rib for 3-3-3-4-4-4 cm = 1⅛"-1⅛"-1⅛"-1½"-1½"-1½". Bind off, with garter stitch over garter stitch, knit over knit and purl over purl - read BINDING-OFF TIP! The jacket measures approx. 36-40-44-48-52-55 cm = 14¼"-15¾"-17¼"-19"-20½"-21⅝" from the shoulder down. SLEEVES: Place the 52-54-56-58-62-64 stitches from the thread on the one side of the piece on double pointed needles/short circular needle size 3 MM = US 2.5 and knit up 1 stitch in each of the 6 stitches cast on under the sleeve = 58-60-62-64-68-70 stitches. Insert a marker thread in the middle of the 6 stitches under the sleeve. Start at the marker thread and work stockinette stitch in the round for 2-2-2-3-3-3 cm = ¾"-¾"-¾"-1⅛"-1⅛"-1⅛". Now decrease 2 stitches under the sleeve – read DECREASE TIP. Decrease like this every 2½-3-3½-4½-4½-5 cm = 1"-1⅛"-1¼"-1⅝"-1⅝"-2" a total of 5-5-5-5-6-6 times = 48-50-52-54-56-58 stitches. Work until the piece measures 18-22-26-29-32-36 cm = 7"-8¾"-10¼"-11⅜"-12½"-14¼" from the division. There is approx. 3-3-3-4-4-4 cm = 1⅛"-1⅛"-1⅛"-1½"-1½"-1½" left to finished length; try the jacket on and work to desired length. Knit 1 round where you decrease 6 stitches evenly spaced = 42-44-46-48-50-52 stitches. Change to double pointed needles size 2.5 MM = US 1.5 and work rib (knit 1, purl 1) for 3-3-3-4-4-4 cm = 1⅛"-1⅛"-1⅛"-1½"-1½"-1½". Bind off with knit over knit and purl over purl – remember BINDING-OFF TIP! The sleeve measures approx.21-25-29-33-36-40 cm = 8¼"-9¾"-11⅜"-13"-14¼"-15¾" from the division. Work the other sleeve in the same way. ASSEMBLY: Sew the buttons onto the left band. |
|||||||||||||||||||
Diagram explanations |
|||||||||||||||||||
|
|||||||||||||||||||
 |
|||||||||||||||||||
Have you finished this pattern?Tag your pictures with #dropspattern #herminejacket or submit them to the #dropsfan gallery. Do you need help with this pattern?You'll find 32 tutorial videos, a Comments/Questions area and more by visiting the pattern on garnstudio.com. © 1982-2026 DROPS Design A/S. We reserve all rights. This document, including all its sub-sections, has copyrights. Read more about what you can do with our patterns at the bottom of each pattern on our site. |
|||||||||||||||||||


With over 40 years in knitting and crochet design, DROPS Design offers one of the most extensive collections of free patterns on the internet - translated to 17 languages. As of today we count 324 catalogs and 12290 patterns - 12280 of which are translated into English (US/in).
We work hard to bring you the best knitting and crochet have to offer, inspiration and advice as well as great quality yarns at incredible prices! Would you like to use our patterns for other than personal use? You can read what you are allowed to do in the Copyright text at the bottom of all our patterns. Happy crafting!
Post a comment to pattern DROPS Children 41-13
We would love to hear what you have to say about this pattern!
If you want to leave a question, please make sure you select the correct category in the form below, to speed up the answering process. Required fields are marked *.