
Popular categories
Looking for a yarn?


Comments / Questions (107)
![]() Marie Reynolds wrote:
Marie Reynolds wrote:
When the pattern says to bind of stitches every other row one time, do I bind off from the RS and WS, then work another RS and WS row before starting the next bind off? I’m making size small. Also, could you explain how to decrease 1 stitch every 4 rows? Is that RS +WS 4 times (8 rows total)? The pattern makes it seem like you bind off RS, knit across, then bind off WS, purl across, then do 3 more repetitions of RS/WS before binding off again
08.12.2025 - 15:54DROPS Design answered:
Dear Mrs Reynolds, if you have to cast off 2 sts on each side on every other row, cast off 2 sts at the beg of next 2 rows; then 1 st 1 time on every other row = 1 st at the beg of next 2 rows. cast off 1 st 4 times on every 4th row: cast off 1 st at the beg of next 2 rows, work 2 rows without casting off and repeat these 4 rows until you have cast off 4 times 1 stitch on each side. Happy knitting!
08.12.2025 - 16:21
![]() Isobel Neil wrote:
Isobel Neil wrote:
Double Neck Edge - what does this instruction mean? ...10cm. Now increase 1 purl stitch in approx every other section with purl stitches - how many?? Then work knit over knit and purl over purl until neck edge measures 14cm - how many stitches are you increasing by?? Thank you
30.11.2025 - 09:48DROPS Design answered:
Dear Mrs Neil, you will now increase that way: (K1, P1, K1, P1, increase 1), repeat from (to) all the round and then work rib (K1, P1, K1, P2) all the round =you have increased every other P1 into P2. Happy knitting!
01.12.2025 - 09:13
![]() Corinne wrote:
Corinne wrote:
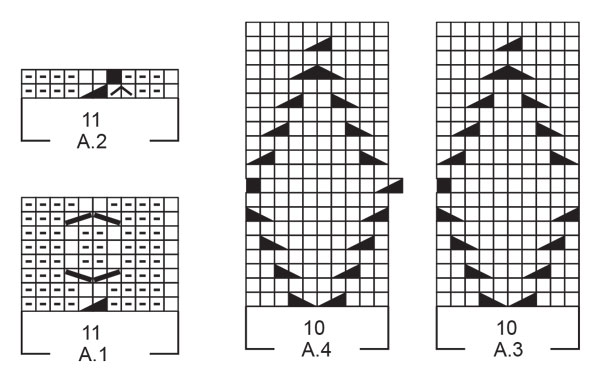
Bonsoir, J'ai un décalage au 11eme rang de A3-A4, mon dernier motif se termine se termine sur les 2 dernières mailles du maille et je perds la maille lisière... Il faut bien commencer le 11eme rang par 1 maille lisière puis 1 maille endroit ?
27.11.2025 - 22:28DROPS Design answered:
Bonjour Corinne, la dernière maille de A.3 va se tricoter avec la 1ère maille de A.4, puis la dernière maille de A.4 va se tricoter avec la 1ère m du A.4 suivant et ainsi de suite. Bon tricot!
28.11.2025 - 08:10
![]() Christina wrote:
Christina wrote:
Hallo, ich stricke gerade Diamond Sky in Größe S mit dem Garn Merino extra Fine und würde jetzt für den Hauptteil gerne einen Faden Drops kidsilk im selben Ton mitlaufen lassen um es etwas flauschiger in der Optik zu haben - kann ich das einfach machen, oder habe ich dann Probleme zb. beim waschen ? Liebe Grüße, Christina
13.11.2025 - 08:06DROPS Design answered:
Liebe Christina, Sie können das machen, allerdings ist Kid-Silk empfindlicher beim Waschen, Sie sollten den Pullunder nur mit Handwäsche waschen, Kid-Silk verträgt keine Maschinenwäsche. Außerdem sollten Sie beachten, dass sich die Maschenprobe ändern kann, wenn Sie noch Kid-Silk mitlaufen lassen, oder das Gestrick insgesamt etwas zu fest wird bzw. der Flauscheffekt weniger wird. Sie sollten das unbedingt vorher an einem Probestück ausprobieren und auch ausmessen. Viel Spaß beim Weiterstricken!
18.11.2025 - 10:05
![]() DANIELA wrote:
DANIELA wrote:
SALVE VANNO BENE I FERRI NORMALI?
22.10.2025 - 18:58DROPS Design answered:
Buonasera Daniela, la prima parte del gilet è lavorata in piano, quindi può usare i ferri dritti. Buon lavoro!
23.10.2025 - 00:24
![]() Maria Teresa wrote:
Maria Teresa wrote:
O índice continua errado? Passar uma malha para trás, tricotar uma meia e retomar a anterior em liga. Penso que assim está correto.????
05.10.2025 - 17:10DROPS Design answered:
De facto, as legendas do gráfico estavam erradas. Foi já efectuada a devida correcção! Obrigado. Bons tricôs!
06.10.2025 - 13:17
![]() Monica wrote:
Monica wrote:
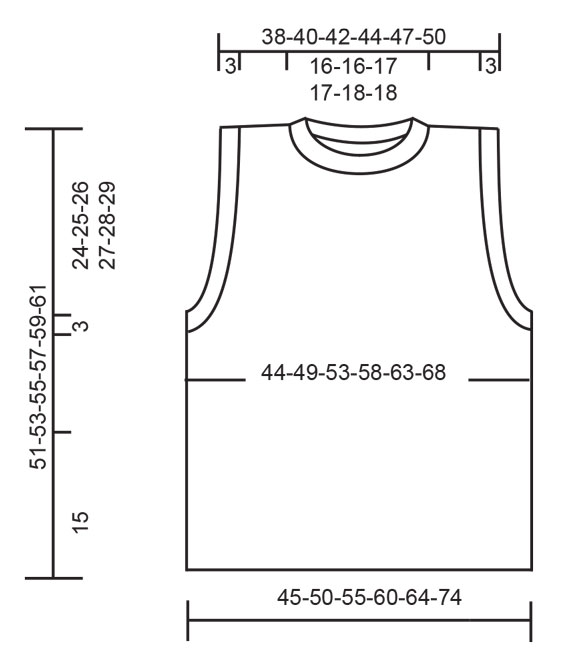
Hello. I like very much the vest and I intend to knitt this pattern. I read carefully but I can not find the dimensions for every sizes. Could you please insert this information? Thank you and a very great autumn.
05.10.2025 - 08:26DROPS Design answered:
Dear Monica, the measurements of the finished garment are indicated in the size chart at the bottom of the pattern, with all measurements in cm. You can check this lesson if you want more information regarding the size charts. Happy knitting!
05.10.2025 - 17:49
![]() Kate wrote:
Kate wrote:
When following the pattern diagrams A1,A2,A3,A4 do you work from top or bottom of diagrams.
21.08.2025 - 10:37DROPS Design answered:
Dear Kate, diagrams we read from bottom up, fro right to left. Happy knitting!
21.08.2025 - 16:28
![]() Rikke wrote:
Rikke wrote:
Hvad menes der med at der skal tages ud i den dobbelte halskant i vrang masker I hvert 2 parti
22.06.2025 - 18:17
![]() Dubois wrote:
Dubois wrote:
Dans explication col doublė : 'augmenter 1 m env dans ENVIRON 1 section en mailles env sur 2...... Ça signifie quoi? Augmenter 1 maille env ts les 4 mailles ?
07.06.2025 - 18:47DROPS Design answered:
Bonjour Mme Dubois, augmentez ainsi: *1 m end, 1 m env, 1 m end, 1 m env, augmentez 1 m*, répétez de *à* tout le tour pour obtenir ainsi des côtes (1 m end, 1 m env, 1 m end, 2 m env). Bon tricot!
09.06.2025 - 09:49
|
|||||||||||||||||||||||||
Diamond Sky#diamondskyslipover |
|||||||||||||||||||||||||
 |
 |
||||||||||||||||||||||||
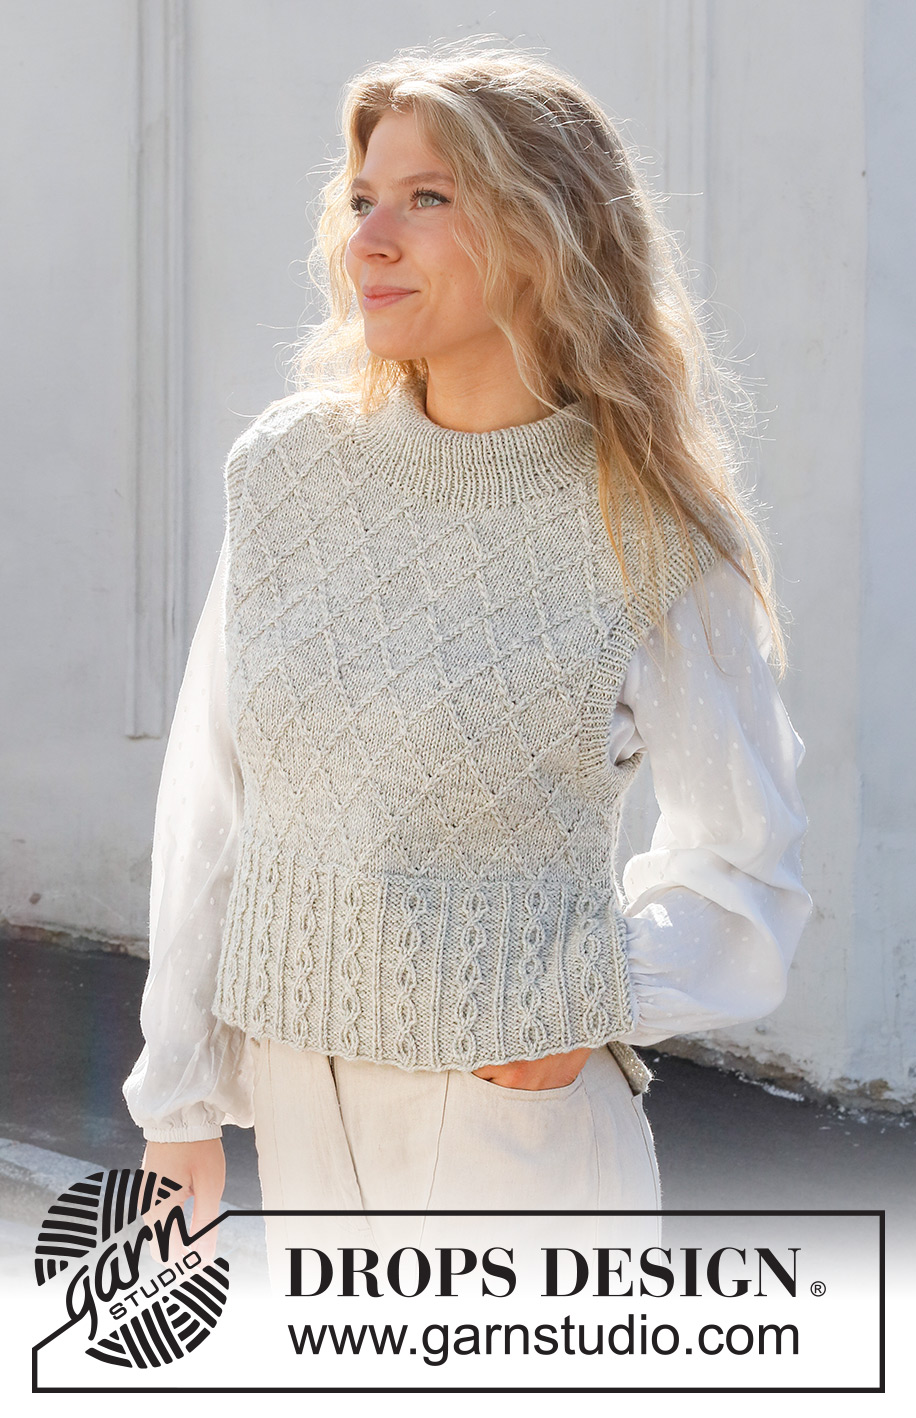
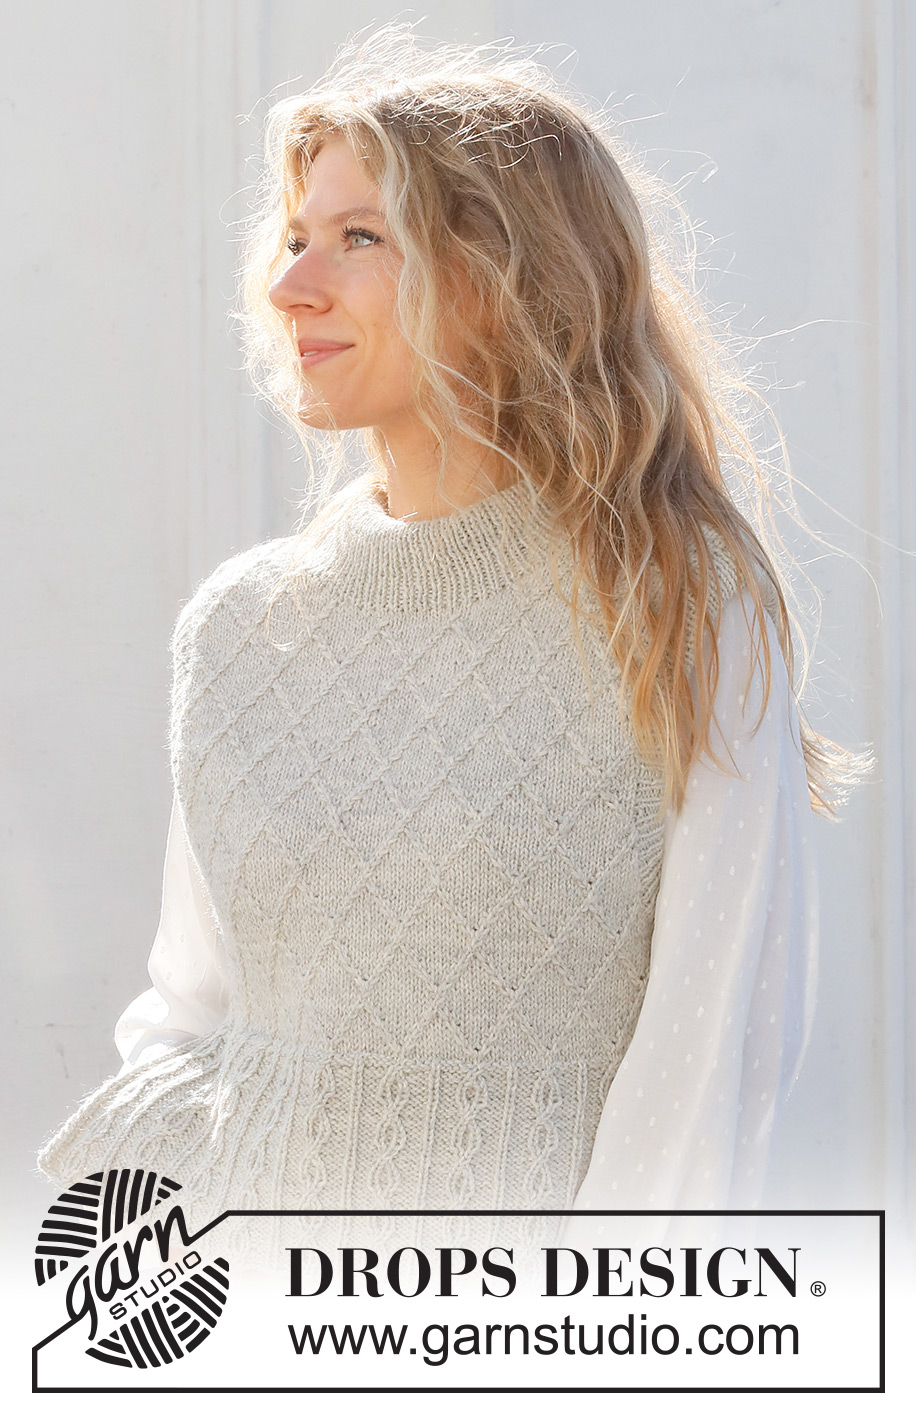
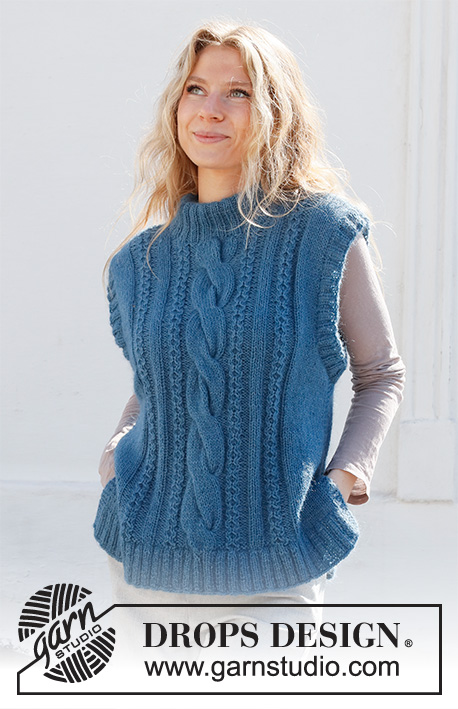
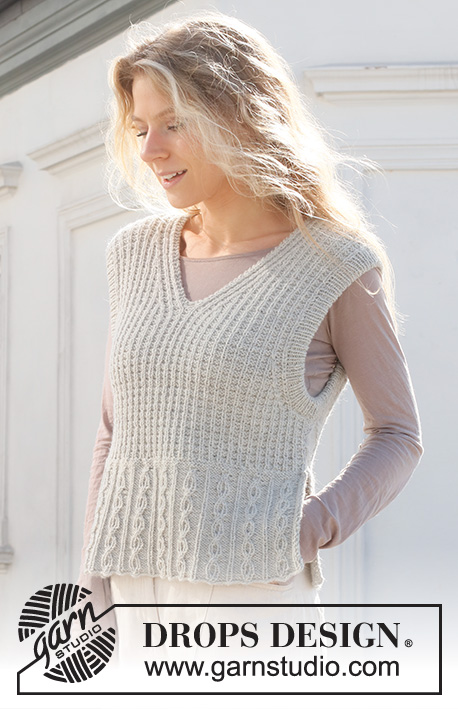
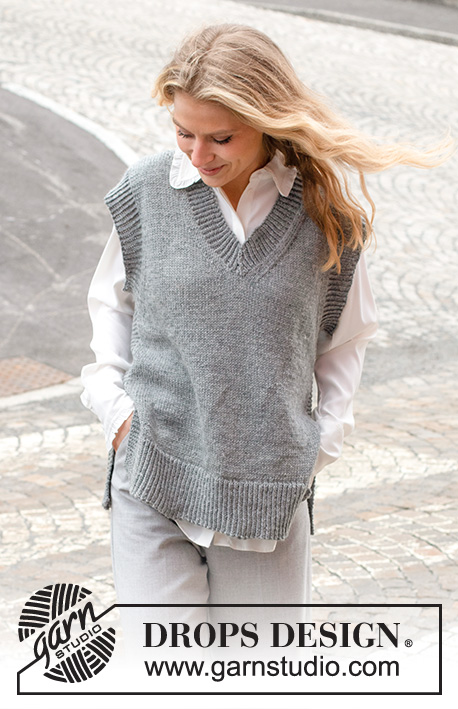
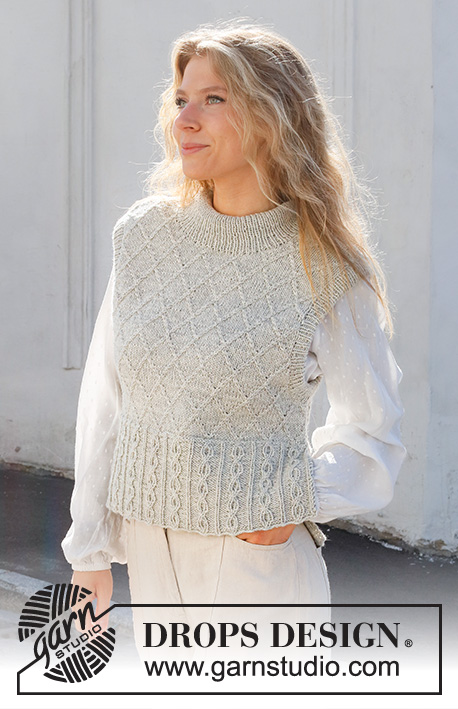
Knitted vest in DROPS Lima or DROPS Merino Extra Fine. Piece is knitted with cables, textured pattern, double neck edge and sleeve edges. Size: S - XXXL
DROPS 228-8 |
|||||||||||||||||||||||||
|
---------------------------------------------------------- EXPLANATION FOR THE PATTERN: ---------------------------------------------------------- GARTER STITCH (back and forth): Knit all rows. 1 ridge vertically = knit 2 rows. PATTERN: See diagrams A.1 to A.4. Diagrams show all rows in pattern seen from the right side. BIND-OFF TIP: To avoid a tight bind-off edge when binding off, you may use a larger needle. If this still is too tight make 1 yarn over after approx. every 4th stitch while binding off (bind off yarn overs as stitches). ---------------------------------------------------------- START THE PIECE HERE: ---------------------------------------------------------- VEST – SHORT SUMMARY OF PIECE: Work front and back piece back and forth in 2 parts. Then assemble the piece at the shoulder seems and sew the side seams. Finish with a double neck edge and sleeve edges in the round on a circular needle. BACK PIECE: Cast on 104-115-126-137-148-159 stitches (including 2 edge stitches in each side) on circular needle size 4 MM = US 6 with DROPS Lima or DROPS Merino Extra Fine. Purl 1 row from wrong side. Then work pattern as follows: 2 edge stitches in GARTER STITCH – read explanation above, A.1 over the next 99-110-121-132-143-154 stitches (= 9-10-11-12-13-14 repetitions of 11 stitches), work first stitch in A.1, 2 edge stitches in garter stitch. Continue back and forth until A.1 has been worked 5 times vertically. REMEMBER THE KNITTING GAUGE. Work next row as follows: Knit 2 together (= 1 stitch decreased), work A.2 over every repetition of A.1 (1 stitch is decreased in each repetition A.2 = 9-10-11-12-13-14 stitches decreased), knit the next 3 together (= 2 stitches decreased), cast on 1 stitch at the end of row (= edge stitch). Turn and work 1 edge stitch in garter stitch, purl 1, work A.2 until 1 stitch remains, purl 1, cast on 1 stitch at the end of row (= 1 edge stitch in garter stitch) = 94-104-114-124-134-144 stitches on needle and piece measures approx. 15 cm = 6". Now work pattern as follows: 1 edge stitch in garter stitch, 1 stitch in stockinette stitch, A.3 over the next 10 stitches, A.4 over the next 80-90-100-110-120-130 stitches (= 8-9-10-11-12-13 repetitions of 10 stitches), work 1 stitch in stockinette stitch, and finish with 1 edge stitch in garter stitch. Continue back and forth like this. On 9th row in A.4 knit 1 when last repetition is finished. When piece measures 24-25-26-27-28-29 cm = 9½"-9¾"-10¼"-10⅝"-11"-11⅜", bind off 6-6-9-9-12-12 stitches for armholes at the beginning of the next 2 rows. Then bind off stitches in each side (bind off stitches at the beginning of the row) as follows: Bind off 2 stitches on every other row 1-2-2-2-2-2 times, then bind off 1 stitch on every other row 1-1-1-3-3-5 times and finally 1 stitch every 4th row 4-5-5-6-5-5 times = 68-72-76-80-86-92 stitches. Continue to work until piece measures 49-51-53-55-57-59 cm = 19¼"-20"-21"-21⅝"-22½"-23¼". Now bind off the middle 32-32-34-34-36-36 stitches for neck and finish each shoulder separately. Then bind off 1 stitch on next row from the neck = 17-19-20-22-24-27 stitches remain on each shoulder. Now finish each shoulder separately. Continue to work until piece measures 51-53-55-57-59-61 cm = 20"-21"-21⅝"-22½"-23¼"-24". Bind off knitting from right side. Work the other shoulder the same way. FRONT PIECE: Cast on and work as on back piece until piece measures 43-45-46-48-49-51 cm = 17"-17¾"-18"-19"-19¼"-20". Now slip the middle 16-16-18-18-20-20 stitches on a stitch holder and finish each shoulder separately. Then bind off stitches on every row from neck as follows: Bind off 3 stitches 1 time, 2 stitches 2 times and 1 stitch 2 times = 17-19-20-22-24-27 stitches remain for shoulder. Bind off when piece measures 51-53-55-57-59-61 cm = 20"-21"-21⅝"-22½"-23¼"-24". Work the other shoulder the same way. ASSEMBLY: Sew the shoulder seams. Sew side seam from armholes and down to where 1 edge stitch was cast on in each side (= approx. 15 cm = 6" vent). DOUBLE SLEEVE EDGES: Begin mid under sleeve in side seam and pick up approx. 136 to 162 stitch around armhole with circular needle size 3 MM = US 2.5 and DROPS Lima or DROPS Merino Extra Fine. Number of stitches must be divisible by 2. Work rib in the round (= knit 1/purl 1) for 6 cm = 2⅜". Bind off – read BIND-OFF TIP. Fold the rib around sleeves on inside of garment. Fasten rib to get a double sleeve edge. To avoid a tight sleeve edge that sticks out it is important to keep the seam elastic. DOUBLE NECK EDGE: Pick up from right side approx. 100 to 116 stitches (including stitch on stitch holder) inside 1 edge stitch around the neck on circular needle size 3 MM = US 2.5 with DROPS Lima or DROPS Merino Extra Fine. Number of stitches must be divisible by 2. Work rib in the round (= knit 1/purl 1) for 10 cm = 4". Now increase 1 purl stitch in approx. every other section with purl stitches. Then work knit over knit and purl over purl until neck edge measures 14 cm = 5½". Bind off stitches with knit over knit and purl over purl - make sure to avoid a tight neck edge - remember BIND-OFF TIP. Fold rib at the top of neck down on inside of garment. Fasten rib to get a double neck edge. To avoid a tight neck edge that sticks out it is important to keep the seam elastic. |
|||||||||||||||||||||||||
Diagram explanations |
|||||||||||||||||||||||||
|
|||||||||||||||||||||||||
 |
|||||||||||||||||||||||||
 |
|||||||||||||||||||||||||
Have you finished this pattern?Tag your pictures with #dropspattern #diamondskyslipover or submit them to the #dropsfan gallery. Do you need help with this pattern?You'll find 31 tutorial videos, a Comments/Questions area and more by visiting the pattern on garnstudio.com. © 1982-2026 DROPS Design A/S. We reserve all rights. This document, including all its sub-sections, has copyrights. Read more about what you can do with our patterns at the bottom of each pattern on our site. |
|||||||||||||||||||||||||


With over 40 years in knitting and crochet design, DROPS Design offers one of the most extensive collections of free patterns on the internet - translated to 17 languages. As of today we count 325 catalogs and 12298 patterns - 12288 of which are translated into English (US/in).
We work hard to bring you the best knitting and crochet have to offer, inspiration and advice as well as great quality yarns at incredible prices! Would you like to use our patterns for other than personal use? You can read what you are allowed to do in the Copyright text at the bottom of all our patterns. Happy crafting!
Post a comment to pattern DROPS 228-8
We would love to hear what you have to say about this pattern!
If you want to leave a question, please make sure you select the correct category in the form below, to speed up the answering process. Required fields are marked *.