
Popular categories
Looking for a yarn?


Comments / Questions (128)
![]() Maddy wrote:
Maddy wrote:
De eerste gaatjestoer. begin met A1 = 1 recht en dan 2 samen omslag etc. aan het eind zijn na de laatste omslag direct de 5 kantsteken. Dus rechts zie je 5 kantsteken 2 recht en dan eerste gaatje en links sluit het gaatje gelijk aan op de kantsteek. Klopt dat wel? het is nu a-symetrisch
22.05.2023 - 12:38DROPS Design answered:
Dag Maddy,
Hmm ja, de naald met gaatjes wordt hierdoor asymmetrisch, maar voor de rest van het patroon met je wel eerst A.1 breien en dan de herhalingen van A.2. Als je het storend vindt, zou je bij de naald met gaatjes de 1 recht van A.1 aan het eind kunnen maken in plaats van aan het begin en daarna het patroon weer oppakken volgens de beschrijving.
23.05.2023 - 09:46
![]() Debbie Hallam wrote:
Debbie Hallam wrote:
Hi I’ve just knitted this pattern for my granddaughter and loved it . Is it ( or something similar ) available in adult sizes .? Thanks
28.04.2023 - 15:40
![]() Annis wrote:
Annis wrote:
Where do I place the marker stitches in the row?
26.04.2023 - 06:11DROPS Design answered:
Hi Annis, The marker is used to measure the yoke from, so it does not matter where you place it on the row. Happy knitting!
26.04.2023 - 06:39
![]() Ms Marie Littlejohn wrote:
Ms Marie Littlejohn wrote:
I loved knitting this design and learning some new skills. I hadn't knitted a top down cardigan before . The yoke pattern was a bit of a challenge until I took time to concentrate on it! I liked that there was no sewing up at the end. Thank you
29.03.2023 - 11:59
![]() Mo wrote:
Mo wrote:
I am doing 7/8..how do I knit " A.1 over 1 stitch ". I understand A.1=1st, this means on the RS, I would knit 1st...so how do I do Over 1 stitch... Thanks.
19.01.2023 - 11:19DROPS Design answered:
Dear Mo, A.1 is just worked over 1 stitch (only 1 stitch in diagram) and this makes the pattern being symmetrical. Just work the stitch as shown in diagram. Happy knitting!
19.01.2023 - 18:33
![]() Cremon Jacqueline wrote:
Cremon Jacqueline wrote:
Bonjour j'ai un souci avec le diagramme du modèle cardigan Agnès en taille 11 ans Le début est correct ensuite ce n'est plus aligné
20.12.2022 - 02:52DROPS Design answered:
Bonjour Mme Cremon, tricotez le point fantaisie ainsi en taille 11/12 ans: 5 m point mousse, puis tricotez A.1 (1 maille), répétez ensuite 15 fois les 7 mailles de A.2, 5 mailles point mousse - soit 5+1+(15x7)+5=116 m. Pour vous aider, vous pouvez placer un marqueur après chaque A.2, ainsi, vous pourrez toujours bien vérifier votre nombre de mailles pour chaque motif. Bon tricot!
20.12.2022 - 08:42
![]() Inga Skou Johannsen wrote:
Inga Skou Johannsen wrote:
Angående mit tidligere spørgsmål, om der mangler noget i mønsteret. Jeg kan se, at det passer, hvis jeg læser diagrammet nedefra. Ikke oppefra, som det faldt naturligt for mig. Undskyld ulejligheden.
11.09.2022 - 15:14
![]() Inga Skou Johannsen wrote:
Inga Skou Johannsen wrote:
Jeg tror, der mangler noget af opskriften på bærestykket. Jeg har strikket det allerøverste stykke, taget ud til 89 masker (mindste størrelse.) Herefter skal jeg, iflg. beskrivelsen strikke efter diagram A1 og A2. A2 skal gentages 13 gange. 2x 5 kant masker+ 1 maske fra A1 + 13x16 masker mønster giver 219 masker i alt. Dvs. jeg mangler 130 masker! Kan se på billedet at der lige under halskantens ret-pinde, er en hulrække hele vejen rundt samt små V-formede hulborter. Ikke beskrevet?
11.09.2022 - 15:07DROPS Design answered:
Hei Inga. Så bra du fant ut av det selv :) Og ja, man leser et strikkediagram motsatt av slik man normalt leser: Fra høyre mot venstre, nedenfra og opp. mvh DROPS Design
12.09.2022 - 13:25
![]() Emma-Jane De Villiers wrote:
Emma-Jane De Villiers wrote:
I am knitting the third size and to divide for the body it states you have 5 sts for band, 35 for front, 71 for back, 35 for other front and 5 for other band then tells me this adds up to 163? It adds up to 151 which is the amount of stitches listed for the second size????
05.09.2022 - 09:34DROPS Design answered:
Hi Emma, you forgot to cast on 6 new stitches under each sleeve: 151+12=163. Happy knitting!
05.09.2022 - 09:57
![]() Julie wrote:
Julie wrote:
Is there anyway I could get this pattern written? It is so confusing.
23.06.2022 - 03:40DROPS Design answered:
Dear Julie, there is only diagrams to this pattern, but you will find how to read diagrams here, this should help you to work them. Happy knitting!
23.06.2022 - 08:41
|
||||||||||||||||||||||
Agnes#agnescardigan |
||||||||||||||||||||||
 |
 |
|||||||||||||||||||||
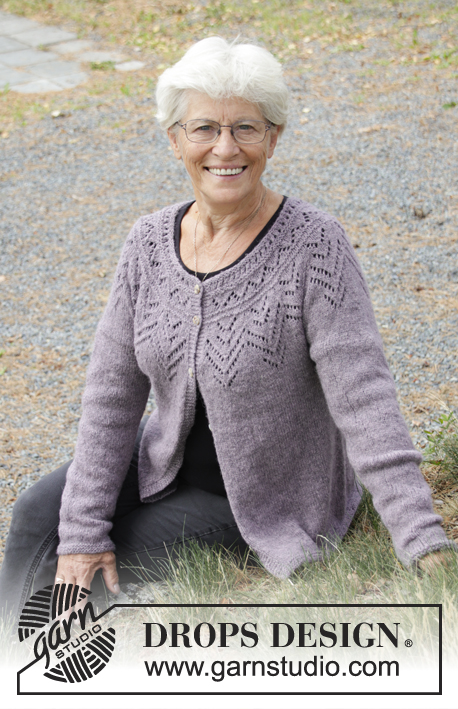
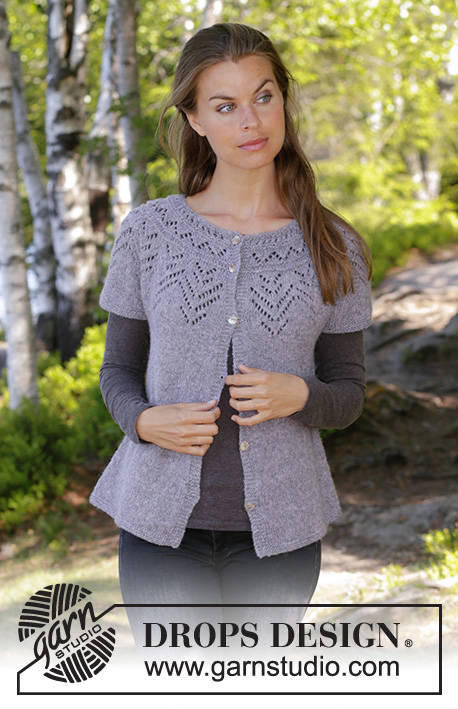
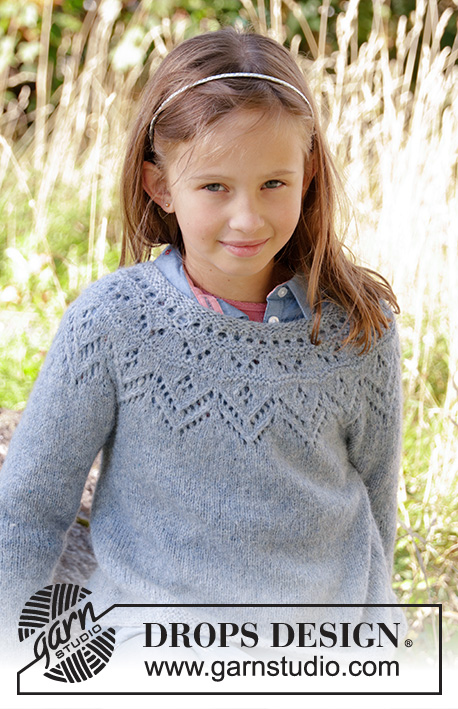
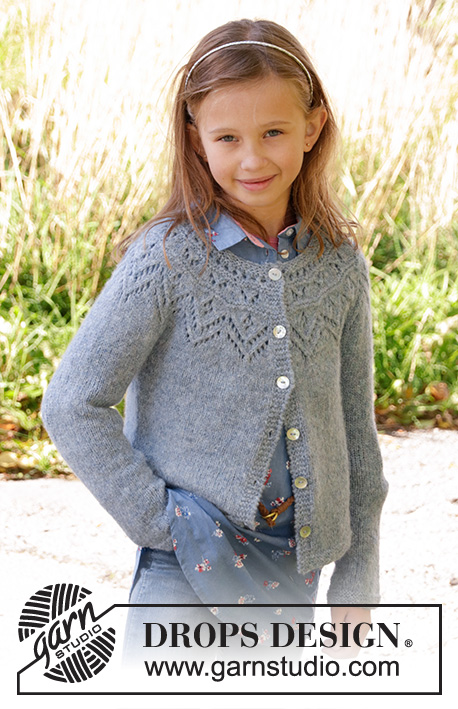
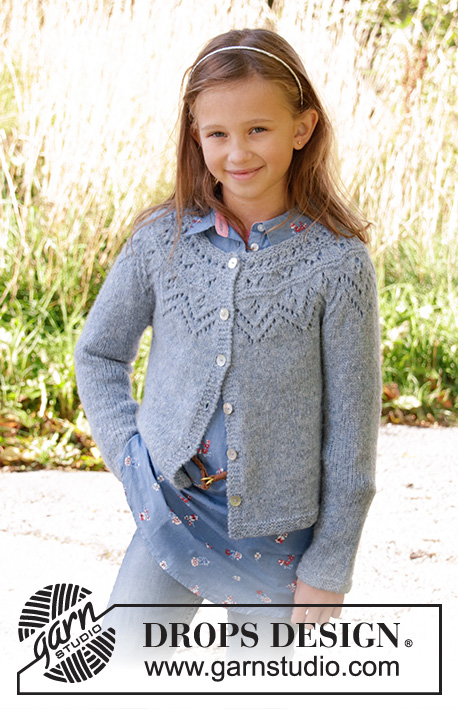
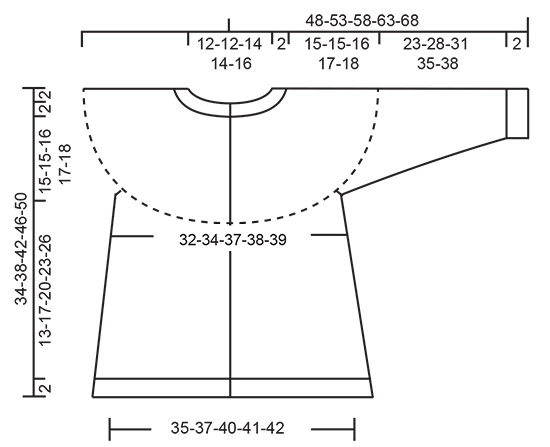
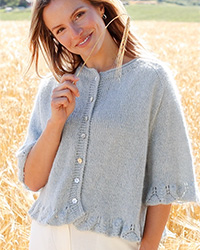
Knitted jacket for children in DROPS Sky. The piece is worked top down with round yoke, lace pattern, stockinette stitch and garter stitch. Sizes 3-12 years.
DROPS Children 34-9 |
||||||||||||||||||||||
|
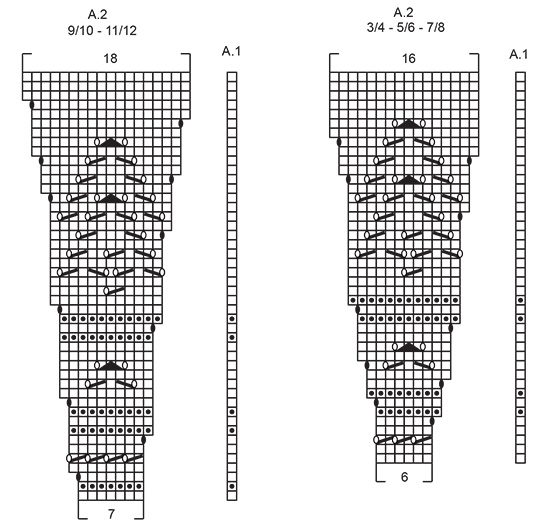
------------------------------------------------------- EXPLANATIONS FOR THE PATTERN: ------------------------------------------------------- RIDGE/GARTER STITCH (worked back and forth): 1 ridge = Knit 2 rows. RIDGE/GARTER STITCH (worked in the round): 1 ridge = 2 rounds. Knit 1 round and purl 1 round PATTERN: See diagrams A.1 and A.2. Choose diagram for your size. The diagrams show all the rows in the pattern seen from the right side. INCREASE TIP-1 (evenly spaced): To work out how to increase evenly, count the total number of stitches on the needle (e.g. 72 stitches) and divide by the number of increases to be made (e.g. 17) = 4.2. In this example, increase by making 1 yarn over after approx. each 4th stitch. On the next row work the yarn overs twisted to avoid holes. INCREASE TIP-2 (for sides of body): Work until there is 1 stitch left before the marker thread, 1 yarn over, knit 2 (the marker thread sits between these 2 stitches), 1 yarn over = 2 stitches increased. On the next row work the yarn overs twisted to avoid holes. Then work the new stitches in stockinette stitch. DECREASE TIP (for sleeves): Decrease 1 stitch on each side of the marker thread as follows: Work until there are 3 stitches left before the marker thread, knit 2 together, knit 2 (the marker thread sits between these 2 stitches), slip 1 stitch as if to knit, knit 1 and pass the slipped stitch over the knitted stitch = 2 stitches decreased. BUTTONHOLE: Work the buttonholes on right band (when the garment is worn). 1 buttonhole = start from the wrong side and knit together the 2nd and 3rd stitch from the edge, make 1 yarn over. On the next row knit the yarn over to leave a hole. The first buttonhole is worked after approx. 1 cm from the neck edge, then the next 5-5-5-6-6 buttonholes every 5-6-6-6-7 cm = 2"-2⅜"-2⅜"-2⅜"-2¾". ------------------------------------------------------- START THE PIECE HERE: ------------------------------------------------------- JACKET - SHORT OVERVIEW OF THE PIECE: The piece is worked back and forth with circular needle, top down. It is divided for body and sleeves. The body is continued back and forth with circular needle. The sleeves are worked in the round with double pointed needles/short circular needle. YOKE: Cast on 72-76-80-86-92 stitches with circular needle size 4 mm = US 6 and Sky. Work 2 RIDGES – see description above – remember BUTTONHOLES on right band – see description above. Knit 1 row where you increase 17-19-21-23-24 stitches evenly on row - READ INCREASE TIP-1! = 89-95-101-109-116 stitches on needle. Knit 1 row from the wrong side. Insert a marker thread on this round and measure from here. Work according to diagrams A.1 and A.2 as follows from the right side: Work 5 band stitches in GARTER STITCH, work A.1 over 1 stitch, A.2 a total of 13-14-15-14-15 times on the row and then 5 band stitches in garter stitch. REMEMBER THE KNITTING GAUGE! When diagrams A.1 and A.2 have been completed in height there are 219-235-251-263-281 stitches on the row. On the next row from the right side adjust stitch count to 219-235-253-261-283 stitches. Continue working stockinette stitch until the piece measures 15-15-16-17-18 cm = 6"-6"-6¼"-6¾"-7" from marker thread. The next row from the right side is worked as follows: Work 5 band stitches in garter stitch, 30-32-35-36-37 stitches in stockinette stitch (= front piece), place the next 44-48-51-53-62 stitches on a thread (= sleeve), cast on 6 new stitches under the sleeve, work 61-65-71-73-75 stitches in stockinette stitch (= back piece), place the next 44-48-51-53-62 stitches on a new thread (= sleeve), cast on 6 new stitches, work 30-32-35-36-37 stitches (= front piece) and 5 band stitches in garter stitch. BODY: There are 143-151-163-167-171 stitches on the needle. THE PIECE IS NOW MEASURED FROM HERE! Insert 1 marker thread in the middle of the 6 new stitches which were cast on in each side. Work stockinette stitch back and forth with 5 band stitches in garter stitch on each side. When the piece measures 3 cm = 1⅛" increase 1 stitch on each side of each marker (= 4 stitches increased) READ INCREASE TIP-2! Repeat this increase every 3-4½-5½-6½-7½ cm = 1⅛"-1¾"-2¼"-2⅝"-3" a total of 3 times = 155-163-175-179-183 stitches on needle. Continue working until the piece measures approx. 15-17-20-23-26 cm = 6"-6¾"-8"-9"-10¼" (or to desired length, there is approx. 2 cm = ¾" until finished measurements). Work garter stitch for 2 cm = ¾". Loosely bind off with knit. Cut and fasten the thread. SLEEVE: Place the stitches from the one thread on short circular needle/double pointed needles size 4 mm = US 6 (= 44-48-51-53-62 stitches) and knit up 1 new stitch in each of the 6 new stitches on the body (= 50-54-57-59-68 stitches). Insert 1 marker thread in the middle of these 6 stitches. Work stockinette stitch in the round until the sleeve measures 3 cm = 1⅛". Now decrease 1 stitch on each side of the marker thread - READ DECREASE TIP. Continue with stockinette stitch and repeat the decrease every 4-4-4-4-3½ cm = 1½"-1½"-1½"-1½"-1¼" until you have decreased a total of 5-6-7-8-10 times = 40-42-43-43-48 stitches on needle. Work stockinette stitch until the sleeve measures 23-28-31-35-38 cm = 9"-11"-12¼"-13¾"-15". Work garter stitch for 2 cm = ¾". Bind off with knit. Cut and fasten the strand. Work the other sleeve in the same way. ASSEMBLY: Sew buttons onto left band. |
||||||||||||||||||||||
Diagram explanations |
||||||||||||||||||||||
|
||||||||||||||||||||||
 |
||||||||||||||||||||||
 |
||||||||||||||||||||||
Have you finished this pattern?Tag your pictures with #dropspattern #agnescardigan or submit them to the #dropsfan gallery. Do you need help with this pattern?You'll find 25 tutorial videos, a Comments/Questions area and more by visiting the pattern on garnstudio.com. © 1982-2026 DROPS Design A/S. We reserve all rights. This document, including all its sub-sections, has copyrights. Read more about what you can do with our patterns at the bottom of each pattern on our site. |
||||||||||||||||||||||

With over 40 years in knitting and crochet design, DROPS Design offers one of the most extensive collections of free patterns on the internet - translated to 17 languages. As of today we count 324 catalogs and 12177 patterns - 12167 of which are translated into English (US/in).
We work hard to bring you the best knitting and crochet have to offer, inspiration and advice as well as great quality yarns at incredible prices! Would you like to use our patterns for other than personal use? You can read what you are allowed to do in the Copyright text at the bottom of all our patterns. Happy crafting!
Post a comment to pattern DROPS Children 34-9
We would love to hear what you have to say about this pattern!
If you want to leave a question, please make sure you select the correct category in the form below, to speed up the answering process. Required fields are marked *.