
Popular categories
Looking for a yarn?


Comments / Questions (135)
![]() Leena wrote:
Leena wrote:
Miksi kaikki on ylhäältä alas
13.04.2019 - 13:49
![]() SADORGE Mireille wrote:
SADORGE Mireille wrote:
Bonjour sur le diagramme A1 au 5 ème rgs si on doit avoir 5 mailles au début et à la fin pour la bordure de boutonnage il reste donc en taille S 79 mailles pour le motif hors c'est sur 2 mailles à chaque fois donc avant les 5 dernières il n'en reste qu'une au lieu de 2 !, j'ai un problème on dirait !! merci de m'aider !
04.04.2019 - 16:11DROPS Design answered:
Bonjour Mme Sadorge, tricotez simplement la dernière maille (avant les 5 m de bordure de boutonnage) à l'endroit et terminez par les 5 m au point mousse. Bon tricot!
05.04.2019 - 08:41
![]() Martine Viallet wrote:
Martine Viallet wrote:
Bonjour, je suis en train de tricoter ce joli modèle. Je suis à l'empiècement , diagramme A2, 35e rangée. Et je m'aperçois que le dessin ne se poursuit pas comme je l'attendais. N'y aurait-il pas une erreur dans la 34e rangée, où il devrait y avoir 7 mailles - au lieu de 5 au centre du diagramme A2 ?
08.03.2019 - 13:31DROPS Design answered:
Bonjour Mme Viallet, tout à fait, le diagramme A.2 va être corrigé, merci. Bon tricot!
21.03.2019 - 11:39
![]() Anna Blomquist wrote:
Anna Blomquist wrote:
Hej! Vill gärna sticka Summer Leaves men utan knappslå bak på oket. Hur gör jag då?? Med vänlig hälsning, Anna
22.01.2019 - 16:10DROPS Design answered:
Hej Anna, du kan välja att sticka runt utan knappslå, men se till att du har rätt antal maskor så du kan sticka A.2 (6 maskor) runt. Lycka till :)
24.01.2019 - 14:34
![]() Yvette wrote:
Yvette wrote:
Bonjour encore moi dans le message précédant je lis 1 er rang 6 ma. endr et dans les explications c'est 5 mailles point mousse .ensuite 2 ième rang(sur l'envers) ; 2 m end,1 m env, .3 mend est ce cela tout le rang jusqu'au 5 dernière mailles. je trouve que A1 est pas facile à comprendre . une rangée c'est des carreau vide et l'autre des tirets.
02.12.2018 - 04:51DROPS Design answered:
Bonjour Yvette, pour le pull, vous commencez le rang par 5 m point mousse (la bordure de boutonnage), puis vous tricotez A.1 (=1er rang = 8 m end) terminez par 5 m point mousse. Au 2ème rang (= sur l'envers), tricotez: 5 m point mousse, répétez A.1 (= 8 m end) et terminez par 5 m point mousse. Les explications précédentes concernaient A.2. Bon tricot!
03.12.2018 - 09:26
![]() Yvette wrote:
Yvette wrote:
J'ai fais le 1 ier rang endroit en tenant compte des 5 mailles point mousse a ch. rang. 2 ième envers. 3 ième endroit. 4 ième envers. ensuite 5 ième points pour mes trous celui ci très réussi . mais encore défait mon traval. ça roule , alors aider moi svp si il faudrait que je fasse des cotes 1/1 pour empêcher de rouler merci de m'aider
27.11.2018 - 14:11DROPS Design answered:
Bonjour Yvette, Tricotez les 4 premiers rangs de A.1 comme indiqué ci-dessous. Au 5ème rang: 3 m end, 1 jeté, 1 m end, 1 jeté, 2 m end. Au 6ème rang: 2 m end, 3 m env, 3 m end. Tricotez ensuite les mailles ainsi, comme indiqué dans le diagramme. Les mailles ne se tricotent pas de la même façon tous les rangs, ni sur l'endroit, ni sur l'envers - celles avec un - sur l'envers se tricotent au point mousse (= à l'endroit tous les rangs), les cases blanches sur l'envers sont des mailles jersey (= à tricoter à l'endroit sur l'endroit et à l'envers sur l'envers). Bon tricot!
27.11.2018 - 14:39
![]() Yvette Therrien wrote:
Yvette Therrien wrote:
Bonjour je suis a faire ce modèle et je sais qu'il faut commencer de A.1 de bas en haut le premier tour, est ce à l'endroit qu'on commence après le rang de montage . je l'ai commencer et défait 2 x on dirait que je ne comprend pas vraiment comment débuté . ex premier rang endroit. deuxième rang envers . merci de m'aider à débuter et après je crois que ça va aller .
26.11.2018 - 01:07DROPS Design answered:
Bonjour Mme Therrien, vous tricotez effectivement le diagramme de bas en haut ainsi: 1er rang (sur l'endroit): 6 m end, 2ème rang (sur l'envers): 2 m end, 1 m env, 3 m end. 3ème rang: 6 m end. 4ème rang: 1 m end, 3 m env, 2 m end. Et ainsi de suite. Lisez de droite à gauche sur l'endroit et de gauche à droite sur l'envers en suivant bien la légende des symboles. Bon tricot!
26.11.2018 - 10:38
![]() Frankie Johnson wrote:
Frankie Johnson wrote:
I did not want the button band, I cast on 117 stitches and did row one and two twice and than did chart A1 as a knitter helper told me . I knit 5 +8 =13 9 times. I am ready to start A2 but I do not understand the translation how to increase to get the 263 stitches. What is the method of Increase. Please advise. Thanks Frankie
05.11.2018 - 05:04DROPS Design answered:
Dear Mrs Johnson, if you don't want the buttonband, you may then still need the 5 sts on mid back to get the width matching, you will work these 5 sts only once: 5 sts in garter st ("button" band mid back), then repeat A.2 in the round. You will increase a total of 12 sts in each A.2 so that you should ge the correct number of sts (less 5 sts if you only cast on 5) at the end of A.2. Please contact the store where you bought the yarn for any further individual assistance, it will be much easier for them to help you - even per mail or telephone. Happy knitting!
05.11.2018 - 10:09
![]() Lisa wrote:
Lisa wrote:
Guten Abend! Ich habe nun A2 bei der Passe beendet. In der Anleitung steht: „Wenn A.2 1x in der Höhe gestrickt wurde, sind 281 M auf der Nadel“. Ich habe allerdings 280, habe es mehrfach kontrolliert und die letzte Reihe von A.2 passt, es müsste da ja bereits eine Masche felhen, es fehlt aber keine, das Muster geht genau auf. (281 M gehen allerdings nicht mit dem Muster von A.2 auf, woher kommt also diese eine Masche?). Daher bin ich sehr verwirrt und hoffe, Sie können mir helfen.
26.10.2018 - 19:37DROPS Design answered:
Liebe Lisa, haben Sie zufällig die 1. Masche von A.2 zu stricken? dh : 5 M kraus re, A.2 (= 6 M) insgesamt 15 x, enden mit der ersten M von A.2 (damit das Muster an beiden Seiten symmetrisch wird) und 5 M kraus re - wenn A.2 fertig ist haben Sie: 5 M + A.2 (= 18 M.) 15 x (= 270 M.) + die erste M von A.2 + 5 M = 281 M. Viel Spaß beim stricken!
29.10.2018 - 09:43
![]() Stephanie Bragg wrote:
Stephanie Bragg wrote:
Hello. Can you please explain what is meant by cast on 6 stitches “under the sleeve?”
28.08.2018 - 17:20DROPS Design answered:
Dear Stephanie, after working the yoke and slipping the stitches for the sleeve to a stitch holder, the stitches in the back and front pieces are joined by casting 6 stitches under the sleeve ( in the empty space which remains after slipping the stitches for the sleeve, which would technically be under the sleeve if we had worked the sleeve beforehand).
28.08.2018 - 19:47
|
||||||||||||||||||||||
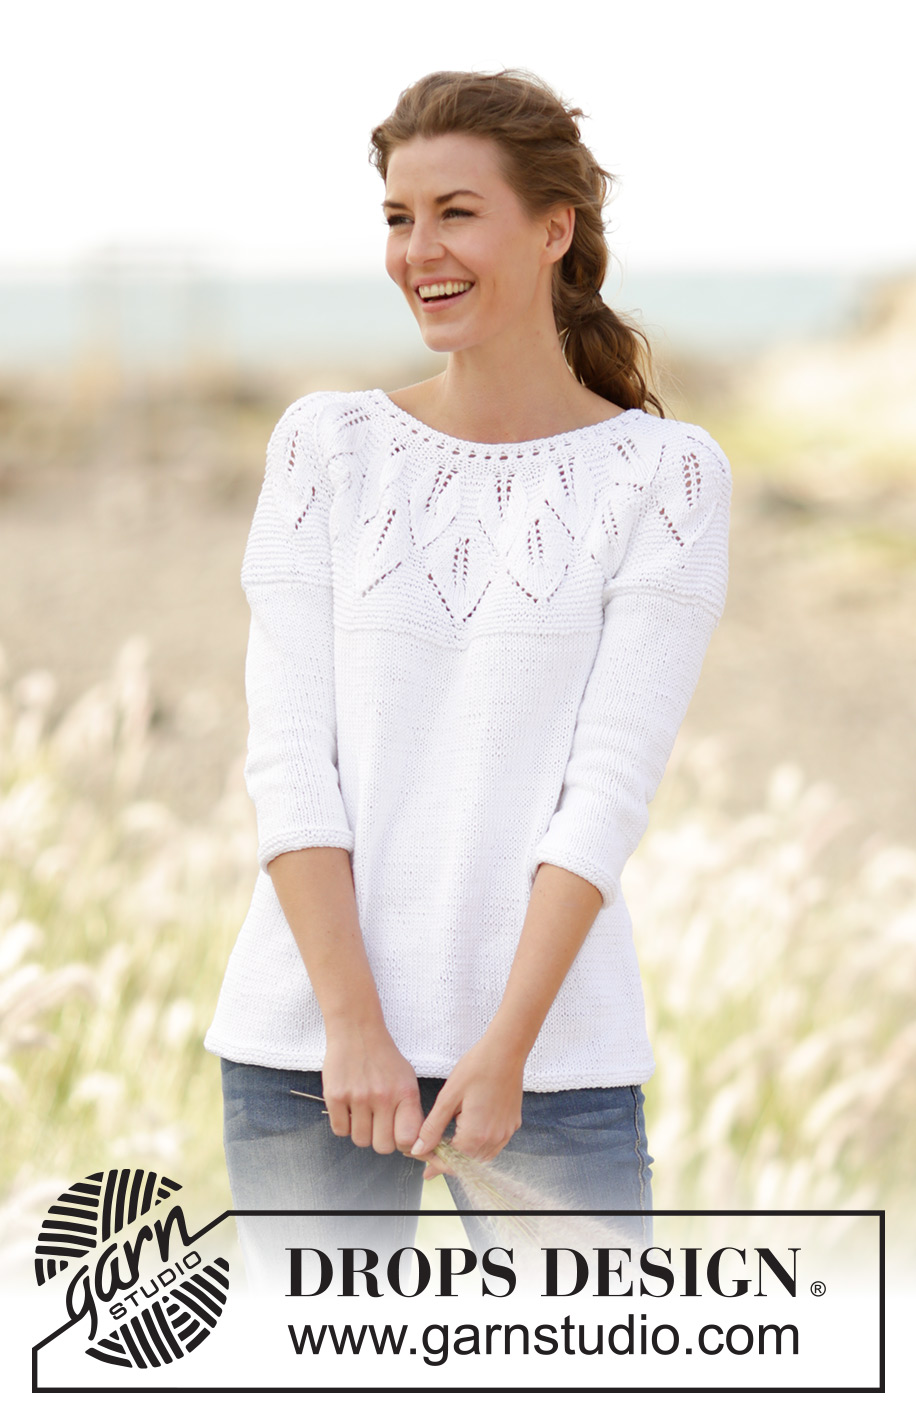
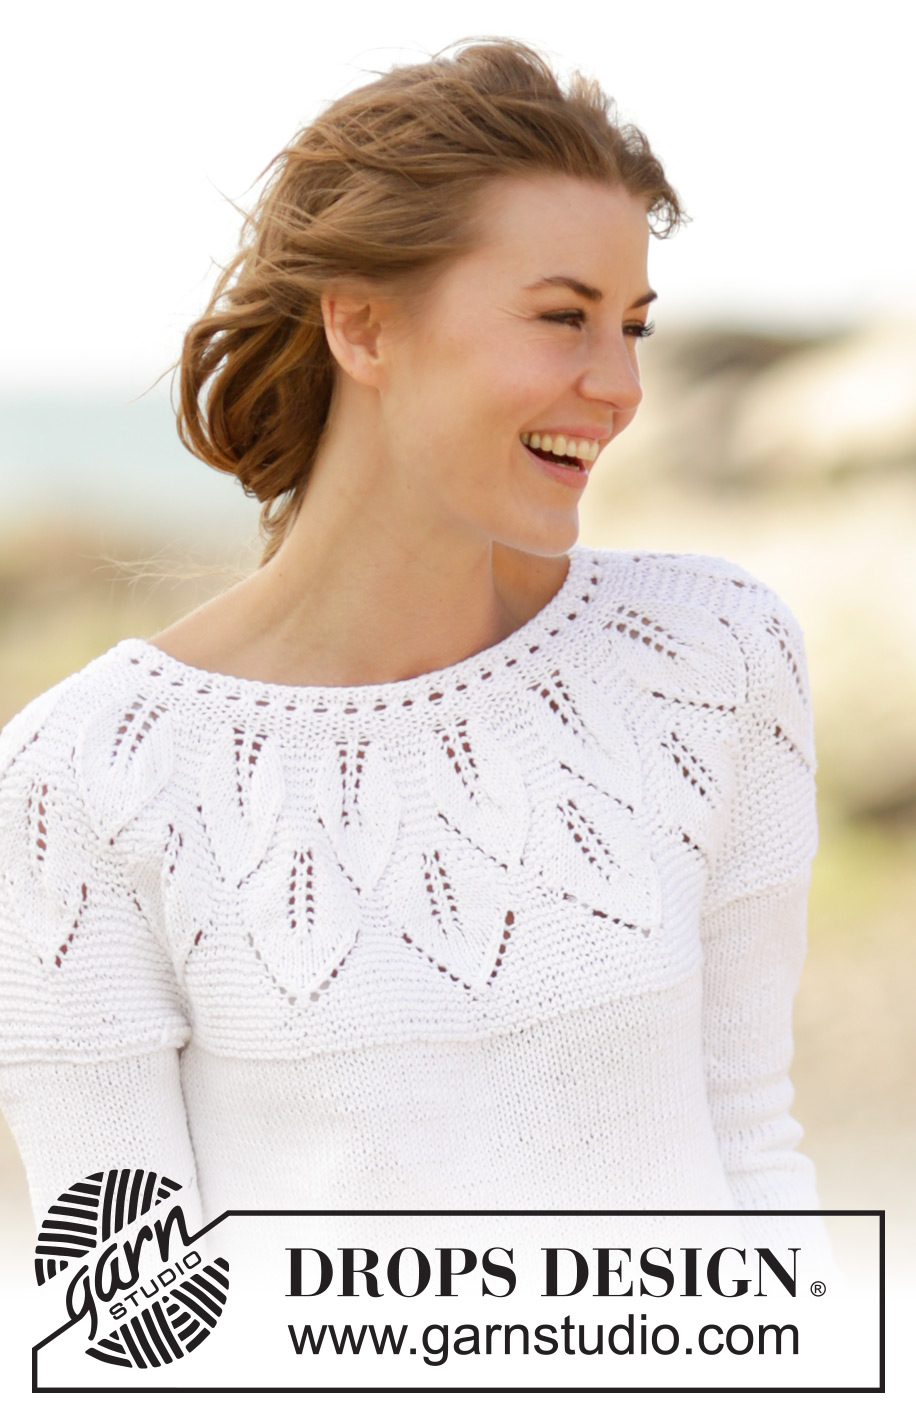
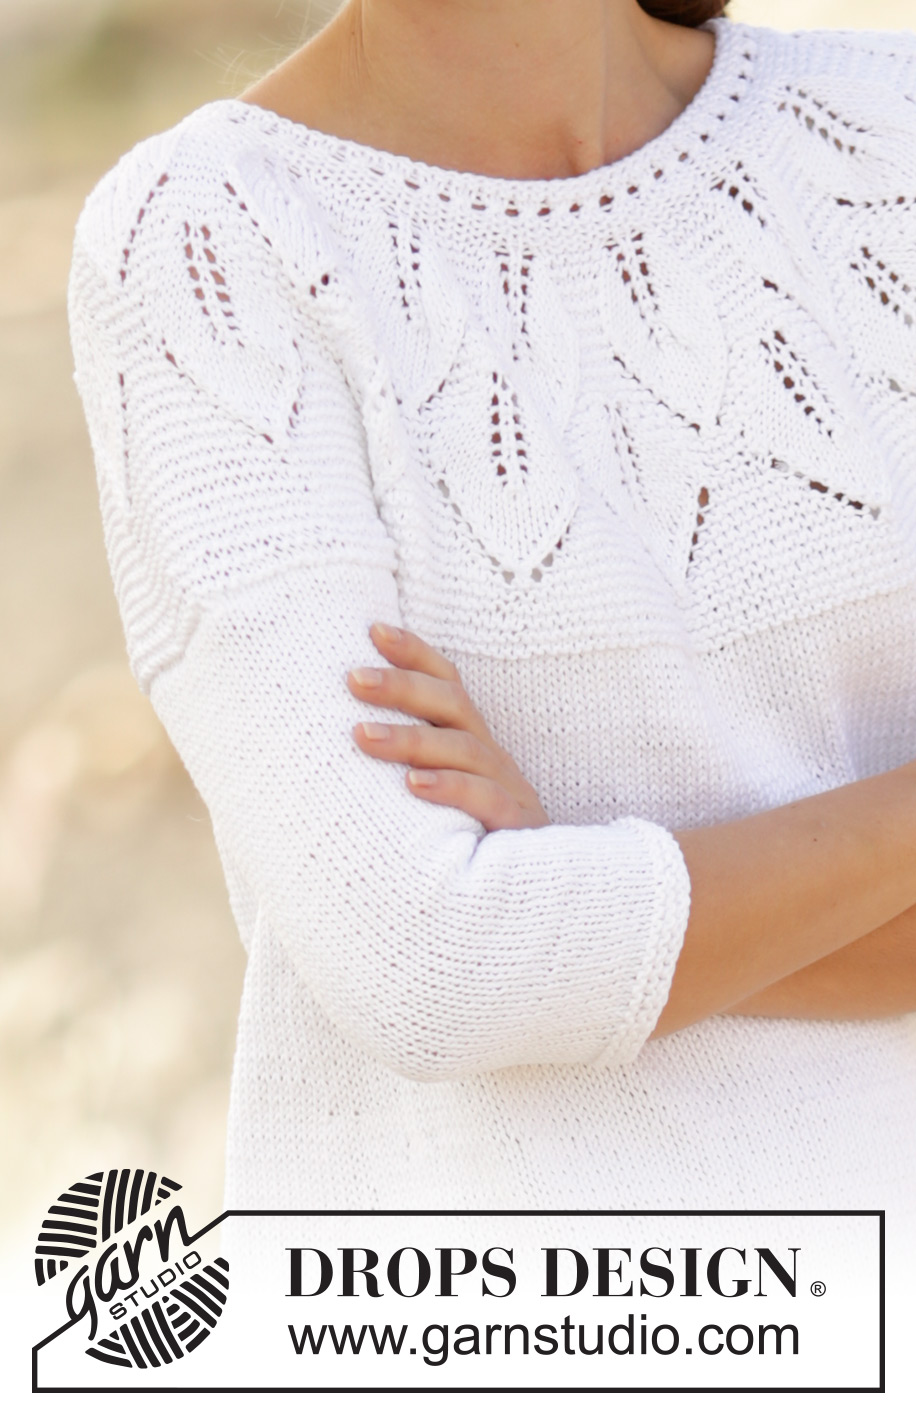
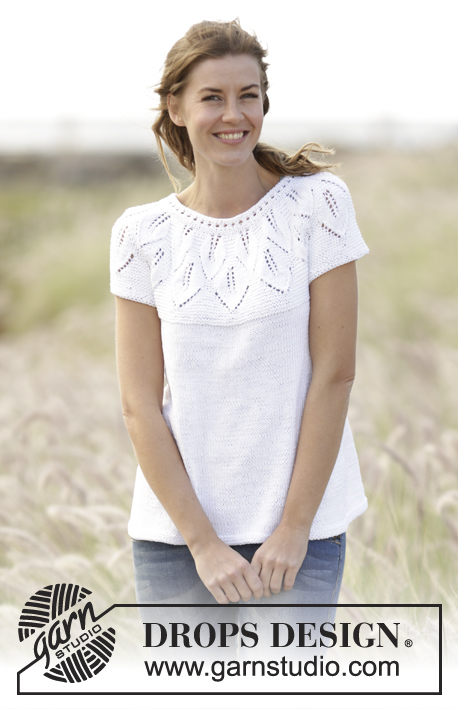
Summer Leaves#summerleavessweater |
||||||||||||||||||||||
 |
 |
|||||||||||||||||||||
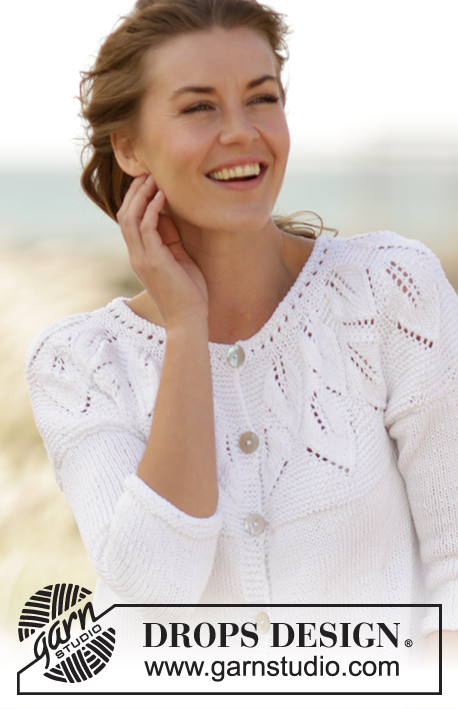
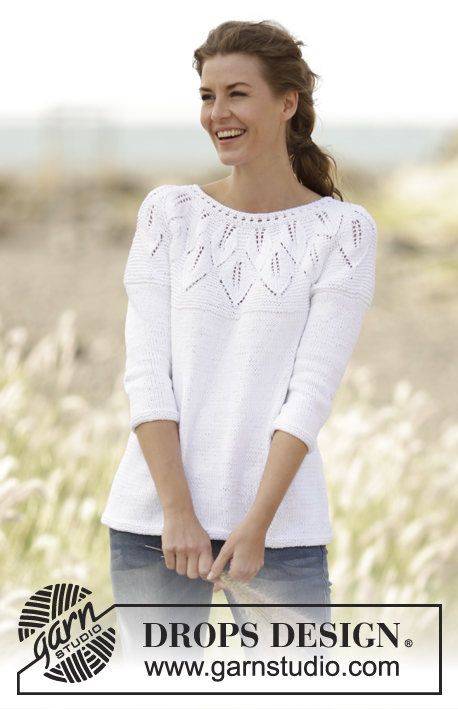
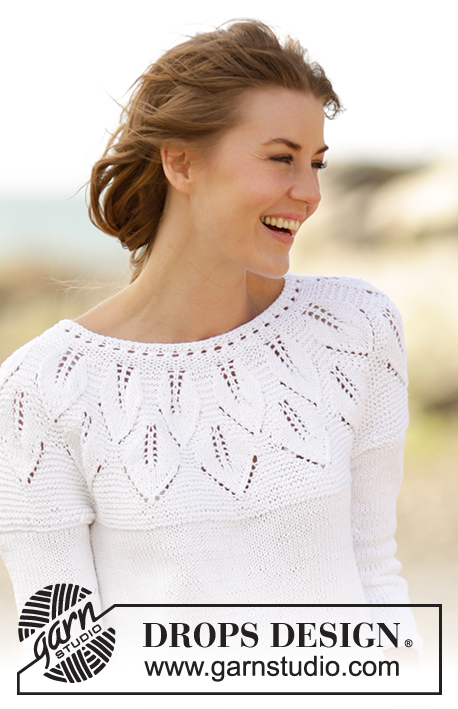
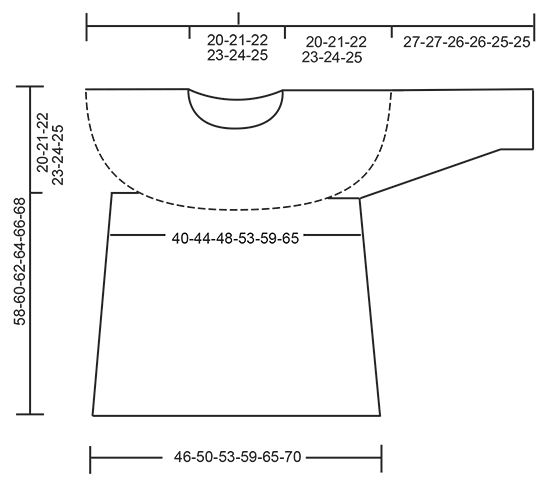
Knitted DROPS jumper with leaf pattern, ridges and round yoke, worked top down in ”Muskat”. Size S-XXXL.
DROPS 169-3 |
||||||||||||||||||||||
|
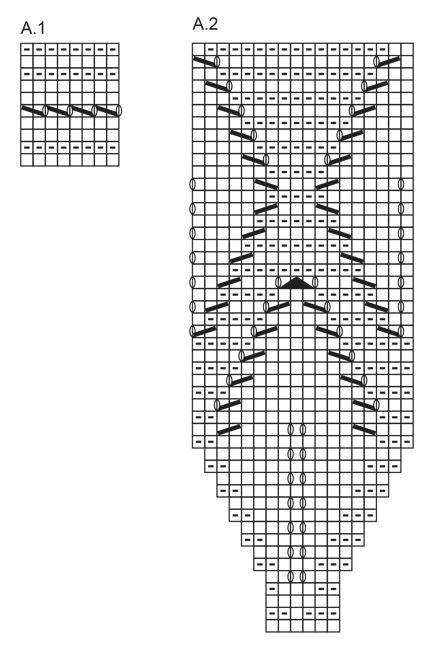
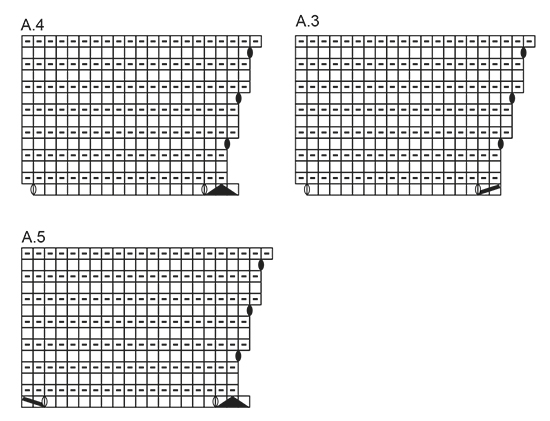
GARTER ST (back and forth): K all rows. 1 ridge = K2 rows. GARTER ST (worked in the round): 1 ridge = 2 rounds. * K 1 round and P 1 round *, repeat from *-*. PATTERN: See diagrams A.1 to A.5. The diagrams show all rows in pattern seen from RS. BUTTONHOLES: Dec for buttonhole on band at the end of row seen from RS. Work until 4 sts remain. Make 1 YO, K the next 2 sts tog, work the last 2 sts on row. Dec for buttonholes when piece measures (from cast-on edge and along the band): SIZE S: 2, 8, 14 and 19 cm SIZE M: 2, 8, 14 and 20 cm SIZE L: 2, 8, 14 and 21 cm SIZE XL: 2, 8, 15 and 22 cm SIZE XXL: 2, 9, 16 and 23 cm SIZE XXXL: 2, 9, 16 and 24 cm ---------------------------------------------------------- JUMPER: The piece is worked top down. Yoke is worked back and forth on circular needle with button band on the back, then work the body in the round. YOKE: Cast on 89-95-101-113-125-131 sts on circular needle size 3.5 mm / US 4 with Muskat. Bind off for BUTTON HOLES mid back - see explanation above. Work 5 sts in GARTER ST - see explanation above (= band), A.1 until 5 sts remain, 5 sts in garter st (= band). When A.1 has been worked 1 time vertically, continue as follows: 5 sts in garter st, A.2 (= 6 sts), repeat A.2 13-14-15-17-19-20 times in total, finish with first st in A.2 (so that pattern is the same in each side), finish with 5 sts in garter st. REMEMBER THE KNITTING GAUGE When A.2 has been worked 1 time vertically, there are 245-263-281-317-353-371 sts on needle. Then work as follows: 5 sts in garter st, A.3 (= 17 sts), repeat A.4 11-12-13-15-17-18 times, A.5 (= 20 sts) and 5 sts in garter st. When A.3-A.5 have been worked 1 time vertically, there are 284-305-326-368-410-431 sts on needle. Continue in garter st until piece measures 20-21-22-23-24-25 cm / 8"-8¼"-8¾"-9"-9½"-9¾", on last row from WS adjust no of sts to 283-307-331-365-397-429. Continue to work as follows (from RS): bind off the first 5 sts, work the first 39-43-47-53-59-65 sts (= half back piece), slip the next 61-65-69-74-78-82 sts on a stitch holder (= sleeve), cast on 6 new sts under sleeve, work the next 78-86-94-106-118-130 sts (= front piece), slip the next 61-65-69-74-78-82 sts on a stitch holder (= sleeve), cast on 6 new sts under sleeve, work the remaining 39-43-47-53-59-65 sts (= half back piece). BODY: There are now 168-184-200-224-248-272 sts for body. Insert a marker in each side of body where new sts were cast on under sleeve (= 3 new sts on each side of marker). NOW MEASURE THE PIECE FROM HERE. Switch to circular needle size 4 mm / US 6. Continue with stockinette st, now work in the round. When piece measures 4 cm / 1½", inc 1 st on each side of each marker (= 4 sts inc). Repeat inc every 5-5-5-6-6-6 cm / 2"-2"-2"-2 ⅜"-2⅜"-2⅜" 5 more times = 192-208-224-248-272-296 sts. Continue in stockinette st until piece measures 34-35-36-37-38-39 cm / 13⅜"-13¾"-14¼"-14½"-15"-15¼", switch to circular needle size 3.5 mm / US 4 and work 3 ridges in GARTER ST - see explanation above. Bind off. The whole piece measures approx. 58-60-62-64-66-68 cm / 22¾"-23⅝"-24⅜"-25¼"-26"-26¾". SLEEVE: Slip sts from stitch holder back on double pointed needles size 3.5 mm / US 4 (= 61-65-69-74-78-82 sts). Pick up 1 st in each of the 6 sts cast on under sleeve, insert a marker in the middle of these sts = 67-71-75-80-84-88 sts. Work 2 ridges in GARTER ST – see explanation above, switch to double pointed needles size 4 mm / US 6, then work in stockinette st. When piece measures 3 cm / 1", dec 1 st on each side marker, repeat dec every 2-2-1½-1½-1-1 cm / ¾"-¾"-½"-½"-⅜"-⅜" 9-10-11-13-14-15 more times = 47-49-51-52-54-56 sts. Continue in stockinette st until sleeve measures 27-27-26-26-25-25 cm / 10½"-10½"-10¼"-10¼"-9¾"-9¾" (shorter measurements in the larger sizes because of longer yoke), switch to double pointed needle size 3.5 mm / US 4 and work 3 ridges. Bind off. Work the other sleeve the same way. ASSEMBLY: Place band without buttonholes under band with buttonholes and fasten the bottom band. Sew on buttons. |
||||||||||||||||||||||
Diagram explanations |
||||||||||||||||||||||
|
||||||||||||||||||||||
 |
||||||||||||||||||||||
 |
||||||||||||||||||||||
 |
||||||||||||||||||||||
Have you finished this pattern?Tag your pictures with #dropspattern #summerleavessweater or submit them to the #dropsfan gallery. Do you need help with this pattern?You'll find 26 tutorial videos, a Comments/Questions area and more by visiting the pattern on garnstudio.com. © 1982-2026 DROPS Design A/S. We reserve all rights. This document, including all its sub-sections, has copyrights. Read more about what you can do with our patterns at the bottom of each pattern on our site. |
||||||||||||||||||||||


With over 40 years in knitting and crochet design, DROPS Design offers one of the most extensive collections of free patterns on the internet - translated to 17 languages. As of today we count 325 catalogs and 12298 patterns - 12288 of which are translated into English (US/in).
We work hard to bring you the best knitting and crochet have to offer, inspiration and advice as well as great quality yarns at incredible prices! Would you like to use our patterns for other than personal use? You can read what you are allowed to do in the Copyright text at the bottom of all our patterns. Happy crafting!
Post a comment to pattern DROPS 169-3
We would love to hear what you have to say about this pattern!
If you want to leave a question, please make sure you select the correct category in the form below, to speed up the answering process. Required fields are marked *.