
Popular categories
Looking for a yarn?


Comments / Questions (50)
![]() Martina wrote:
Martina wrote:
Hallo. Der Mustersatz geht bei mir nicht auf. Das heisst, ab dem ich die Reihe mit den Umschlägen stricke wirkt für mich das Muster nicht so wie auf dem Bild. Ich fange mit den ersten 5 rechten Maschen an ( die ersten 2 rechten stricke ich zusammen dann stricke ich 2 Umschläge und dann bleibt noch eine rechte und eine linke Masche übrig. Hier hebe ich die rechte Masche ab und ziehe sie dann über die darauf folgende linke Masche, die ich zuvor rechts strickte? Ist das so richtig? LG Martina
23.03.2022 - 21:07DROPS Design answered:
Liebe Martina, da Sie gleichzeitig für den Raglanabnehmen haben Sie nach und nach immer weniger Maschen, die in A.1 passen am Anfang und am Ende von jedem Teil (Vorder-, Rückenteil und Ärmel), wenn Sie nicht genügend Maschen um die Abnahmen + Umschlag bei der 3. Reihe zu stricken, dann stricken Sie diese Maschen rechts, aber das Muster muss immer in der Höhe wiederholt werden (also das Muster nicht verschieben, ben den ganzen Muster stricken Sie wie im Diagram gezeigt). Viel Spaß beim stricken!
24.03.2022 - 09:54
![]() Patricia Schwartz wrote:
Patricia Schwartz wrote:
I have placed markers at the beginning of the round and 102stitches apart.( Size med). When beginning the garter section 4 stitches each side of marker on each side . The. Problem is my first marker is at the beginning of my round . To do 4 stitches before an after marker means I would be knitting the entire round finishing up with last 4 stitches garter before starting the next round. When binding these stitches off creates a gap . What did I do wrong?
02.06.2020 - 22:21DROPS Design answered:
Dear Mrs Schwartz, work the cast off row for armhole as follows: cast off the first 4 sts on round (the first 4 sts in garter st of the round), work until 4 sts remain before next marker, cast off the next 8 sts (= 4 sts before + 4 sts after marker), work until 4 sts remain before end of round, cast off the last 4 sts, cut the yarn and pull it through the last st. Join then yarn again on front piece to work yoke. Happy knitting!
03.06.2020 - 07:06
![]() Sabine wrote:
Sabine wrote:
Hallo, ich möchte diese Tunika mit einem anderen Garn stricken. Mein Garn ist von Lana Grossa und heißt Summer Lace. Es besteht zu 97 % aus Baumwolle und zu 3 % aus Polyester bei einer Lauflänge von 195 m auf 50 g. 25 M und 32 R sollen 10 x 10 cm ergeben. Kann ich dieses Garn verwenden? Wie rechne ich die Maschenzahl um? Vielen Dank für Ihre Unterstützung. Mit freundlichen Grüßen Sabine
02.06.2020 - 18:41DROPS Design answered:
Liebe Sabine, wir bitten um Verständnis, dass wir nicht Produkte unserer Konkurrenz empfehlen können und dass der Kauf des Materials uns hilft, weiterhin kostenlose Anleitungen zur Verfügung stellen zu können.
03.06.2020 - 06:39
![]() Tracey wrote:
Tracey wrote:
Where do I put markers after complete 6 garter rows. I’m doing 5th size do I put marker in the beg Continue in stockinette st. REMEMBER THE GAUGE! Insert 2 markers in the piece, 88-102-116-130-144 sts apart. When piece measures 7 cm / 2¾'', dec 1 st on each side of markers, repeat dec every 3 cm / 1 1/8'' 5 more times (6 dec in total) = 152-180-208-236-264 sts.
29.01.2020 - 15:03DROPS Design answered:
Dear Tracey, in 5th size insert 1 marker at the beg of the round and the other marker after 144 sts. Happy knitting!
29.01.2020 - 15:54
![]() Pamela Thomas wrote:
Pamela Thomas wrote:
Good day, I am making this sweater in size M (the second in the stitch count), and I have now had to rip it back multiple times trying to get it to work. If I'm suppose to have 276 stitches when starting the lace pattern, why does the instruction only cover 266 of those stitches. (84+4+42+4+84+42+2=266) I can only assume that this discrepancy is the cause of the pattern not lining up properly with the sleeves. Help?
17.08.2015 - 03:18DROPS Design answered:
Dear Mrs Thomas, work the 276 sts as follows: K 2, P 2, A.1 over the next 84 sts, K 4 (marker is in the middle of these 4 sts), P 2, A.1 over the next 42 sts, K 4 (marker is in the middle of these 4 sts), P 2, A.1 over the next 84 sts, K 4 (marker is in the middle of these 4 sts), P 2, A.1 over the next 42 sts, K 2 (marker is after these sts). Happy knitting!
17.08.2015 - 09:48
![]() Kirsten wrote:
Kirsten wrote:
Blusen får en meget stor halsåbning, hvis man følger opskriften. Der bør tages væsentlig flere masker ind på de sidste 4 omgange!
13.07.2014 - 12:34Olga Ivanova wrote:
Might be useful to mention that the required gauge is for stockinette in the round.
30.07.2013 - 10:31Nathalie Vergobbi wrote:
Bonjour, Le top ci me plait bcp,voilà,il y a 232 mailles en aiguilles circulaires,je divise en 2 ca fait 116 mailles +2(mailles lisieres),c bien ca?.
18.07.2013 - 20:11DROPS Design answered:
C'est tout à fait ça, attention pour l'empiècement à bien recalculer pour tomber juste avec les manches/les diminutions. Bon tricot !
19.07.2013 - 09:40Nathalie Vergobbi wrote:
Bonjour, le top se peut se faire avec des aiguilles droites aussi?
18.07.2013 - 20:04DROPS Design answered:
Bonjour Mme Vergobbi, vous pouvez tout à fait le tricoter en allers et retours si vous le souhaitez, il suffit de répartir les mailles. Attention toutefois à bien recompter pour l'empiècement avec les manches. Bon tricot !
19.07.2013 - 09:38
![]() Marie-france wrote:
Marie-france wrote:
Merci pour la réponse. mais si le marqueur côté est à l'endroit du changement de tour, les augmentation ou diminutions de chaque côté ne seront pas sur le même tour. Cela risque d'être compliqué. De plus, je ne comprend à quel endroit du tricot on doit se trouver pour commencer l'empiècement expliqué au 2ème paragraphe "tricoter ensuite 2 m end, 2 m env, A1....
04.04.2013 - 13:58DROPS Design answered:
Si vous diminuez comme indiqué dans l'astuce au début des explications, les diminutions seront joliment situées. Vous pouvez aussi tout à fait considérer votre début du tour au milieu dos si vous préférez. Pour l'empiècement, le tour commence avec les mailles du devant (cf 1er tour de l'empiècement). Bon tricot!
04.04.2013 - 15:11
|
||||||||||||||||
Sunny#sunnytunic |
||||||||||||||||
 |
 |
|||||||||||||||
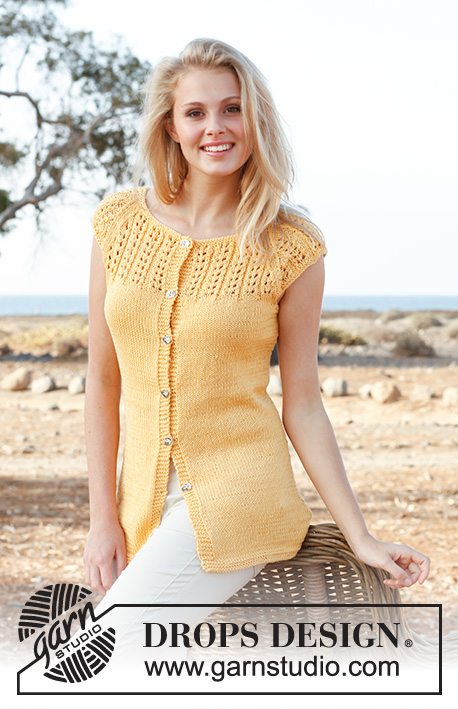
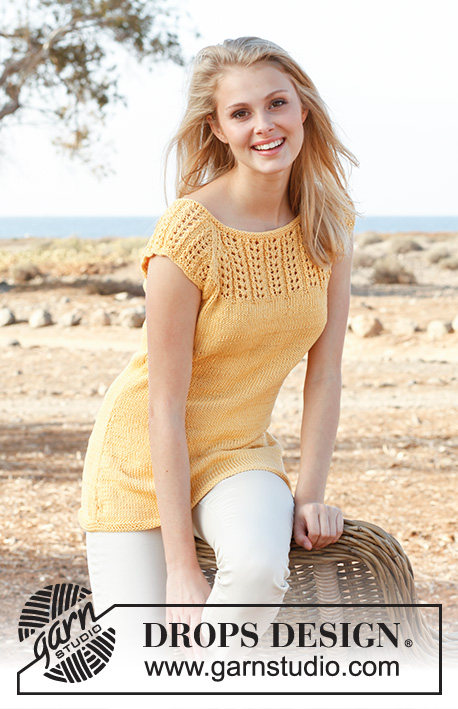
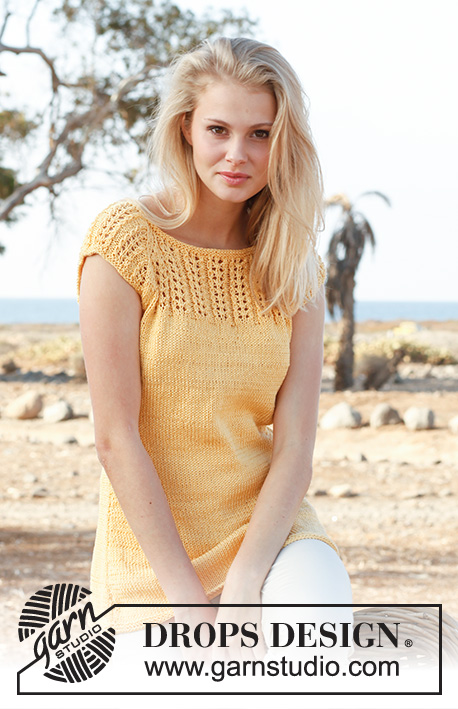
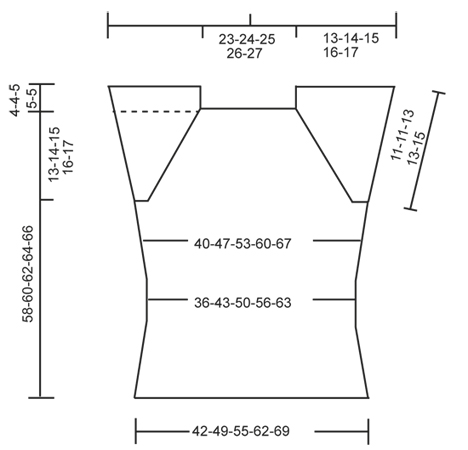
Knitted DROPS top with raglan, short sleeves and lace pattern in ”Muskat”.
DROPS 147-6 |
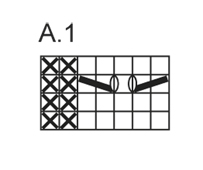
||||||||||||||||
|
GARTER ST (in the round on circular needle): * K 1 round and P 1 round *, repeat from *-*. 1 ridge = 2 rounds. PATTERN: See diagram A.1. DECREASE TIP: Dec as follows from RS: Beg 3 sts before marker: K 2 tog, K 2 (marker is in the middle of these sts), slip 1 st as if to K, K 1, psso. KNITTING TIP: If gauge is incorrect in height and the knitting is too tight, the raglan dec will be too short and the armholes too small. This can be adjusted by working 1 extra round without dec evenly spaced between rounds with dec. -------------------------------------------------------- -------------------------------------------------------- TOP: Worked in the round on circular needle. Cast on 176-204-232-260-288 sts on circular needle size 4 mm / US 6. Work 3 ridges in GARTER ST - see explanation above. Continue in stockinette st. REMEMBER THE GAUGE! Insert 2 markers in the piece, 88-102-116-130-144 sts apart. When piece measures 7 cm / 2¾", dec 1 st on each side of markers, repeat dec every 3 cm / 1⅛" 5 more times (6 dec in total) = 152-180-208-236-264 sts. When piece measures 28 cm / 11", inc 1 st on each side of markers, repeat inc every 5-5-5½-5½-6 cm / 2"-2"-2¼"-2¼"-2½" 3 more times (4 inc in total) = 168-196-224-252-280 sts. When piece measures 44-45-46-47-48 cm / 17¼"-17¾"-18"-18½"-19", work in garter st over 8 sts in each side (= 4 sts on each side of marker in each side), work the remaining sts as before. When 4 rounds in garter st have been worked over the 8 sts in each side, bind off these 8 sts for armholes = 152-180-208-236-264 sts. Piece now measures approx. 45-46-47-48-49 cm / 17¾"-18"-18½"-19"-19¼". YOKE: Work next round as follows: Work in stockinette st over front piece, cast on 48-48-55-55-62 new sts over armhole, work in stockinette st over back piece, cast on 48-48-55-55-62 new sts over the other armhole = 248-276-318-346-388 sts. Work 3 rounds over all sts as follows: Work in garter st over the middle 44-44-51-51-58 new sts for sleeve, work the other sts in stockinette st. Insert 1 marker in each side of the new sts for sleeve in each side (= 4 markers). READ ALL OF THE FOLLOWING SECTION BEFORE CONTINUING! Now work as follows: K 2, P 2, A.1 over the next 70-84-98-112-126 sts, K 4 (marker is in the middle of these 4 sts), P 2, A.1 over the next 42-42-49-49-56 sts, K 4 (marker is in the middle of these 4 sts), P 2, A.1 over the next 70-84-98-112-126 sts, K 4 (marker is in the middle of these 4 sts), P 2, A.1 over the next 42-42-49-49-56 sts, K 2 (marker is after these sts). On next round beg dec for raglan in each of the 4 transitions between body and sleeves (i.e. 8 dec per dec round) - READ DECREASE TIP AND KNITTING TIP! Repeat dec every 4th round 2-3-2-3-2 more times, and every other round 12-11-15-14-18 times (15-15-18-18-21 dec in total). Switch to a shorter circular needle when needed. After all dec, 128-156-174-202-220 sts remain on round. Work 2 ridges while AT THE SAME TIME on 1st round dec 0-10-16-28-34 sts evenly = 128-146-158-174-186 sts. Bind off. |
||||||||||||||||
Diagram explanations |
||||||||||||||||
|
||||||||||||||||
 |
||||||||||||||||
 |
||||||||||||||||
Have you finished this pattern?Tag your pictures with #dropspattern #sunnytunic or submit them to the #dropsfan gallery. Do you need help with this pattern?You'll find 14 tutorial videos, a Comments/Questions area and more by visiting the pattern on garnstudio.com. © 1982-2026 DROPS Design A/S. We reserve all rights. This document, including all its sub-sections, has copyrights. Read more about what you can do with our patterns at the bottom of each pattern on our site. |
||||||||||||||||


With over 40 years in knitting and crochet design, DROPS Design offers one of the most extensive collections of free patterns on the internet - translated to 17 languages. As of today we count 324 catalogs and 12290 patterns - 12280 of which are translated into English (US/in).
We work hard to bring you the best knitting and crochet have to offer, inspiration and advice as well as great quality yarns at incredible prices! Would you like to use our patterns for other than personal use? You can read what you are allowed to do in the Copyright text at the bottom of all our patterns. Happy crafting!
Post a comment to pattern DROPS 147-6
We would love to hear what you have to say about this pattern!
If you want to leave a question, please make sure you select the correct category in the form below, to speed up the answering process. Required fields are marked *.