
Popular categories
Looking for a yarn?


Comments / Questions (208)
![]() Aat wrote:
Aat wrote:
De 2 steken ( dubbele draad ) beneden aan rollen naar buiten om ,hoe kan ik dat verhelpen ?? Hoor het graag. Met vr.gr. Aat
31.10.2014 - 20:49DROPS Design answered:
Hoi Aat. Dat zal verdwijnen als je het werk hebt gewassen en plat laten drogen. Krult ie dan nog steeds een beetje om, kan je de rand lichtjes persen met een strijkijzer (leg wel een theedoek ertussen).
05.11.2014 - 17:13
![]() Tanja wrote:
Tanja wrote:
I am confused on how the M2 pattern is worked with the short rows. Do I have to count the 8 rows per M2 separately for the neck cable and the bottom cable? Is there a chart for this pattern that would make it a bit easier to visualize? Thanks!
21.09.2014 - 18:04DROPS Design answered:
Dear Tanja, in neckwarmer, M2 is worked at the beg of row from RS (bottom edge) and at the end of row (towards neck). Both M2 will not be worked at the same time, follow each diagram separately, short rows are worked in the garter st sections. Happy knitting!
22.09.2014 - 10:13
![]() Lnouchou wrote:
Lnouchou wrote:
Pour les rangs raccourcis, ok pour R1 et R2.Pr R3 sur 20 mailles, donc je tricote les 20 premières mailles du rang ou les 20 dernières en lisant de gauche à droite ?
17.03.2014 - 18:01DROPS Design answered:
Bonjour Mme Lnouchou, le 1er rang se tricote sur toutes les mailles, puis vous tricotez 2 rangs sur les 20 premières m (en haut du chauffe-épaules), 1 rang sur toutes les mailles puis vous continuez en rangs raccourcis comme indiqué, mais cette fois sur les mailles du bas du chauffe-épaules. Bon tricot!
17.03.2014 - 18:46
![]() Lnouchou wrote:
Lnouchou wrote:
- les rgs rac : 1er rg sur ttes les m, ok, mais pour le 2ème sur 20 m, dois-je faire les 20 1ères m du rg complet (soit 2 pts m,4 m env,14 mailles M2) ou dois-je faire les m qui "correspondent" en sens inverse ( c à d les 20 dernières ) ? Pareil pr les autres rgs rac ? Parce que là, chaque fois qu'il était dit 1 rg sur 20 m, je faisais les 20 1ères du rg, 1 rg sur 37, je faisais les 37 1ères ( soit 2 pts m, 4m env, M2, 2 menv, 13 pts m ) mais mon tricot n'est pas comme sur l'image...
15.03.2014 - 13:03DROPS Design answered:
Pour les rangs raccourcis, tricotez les mailles indiquées : R1 (sur l'endroit): toutes les m, R2 (sur l'envers) : 20 m = les 20 premières m sur l'envers (= 4 m point mousse, M2) et ainsi de suite. On va tricoter des rangs raccourcis alternativement en bas et en haut du tour de cou pour former l'arrondi du bas mais aussi le col en même temps, mais on tricotera davantage de mailles sur les mailles du bas pour avoir la bonne largeur. Bon tricot!
17.03.2014 - 08:50
![]() Lnouchou wrote:
Lnouchou wrote:
Bjr, Questions en plus coms car aprmt suis trop longue ! J'essaie de faire ce magnifique modèle mais ai fait plusieurs erreurs, car je ne comprends pas certaines choses dans les explications : - pt fantaisie : est écrit que sur l'endroit faut faire 2ptsm, 4menv,M2,2menv,15ptsm,M2,4 ptsm : mon pb se pose sur l'envers : avt et ap le 1er M2, dois-je faire 4 puis 2 m env ou dois-je les faire à l'end ?
15.03.2014 - 12:57DROPS Design answered:
Bonjour Mme Lnouchou, Sur l'envers, vous tricotez les mailles ainsi : 4 m point mousse, M2 (en lisant de gauche à droite), 15 m point mousse, 2 m end (celles tricotées à l'env sur l'end), M2 (comme le 1er M2), 4 m end (celles tricotées à l'env sur l'end), 2 m point mousse. Bon tricot!
17.03.2014 - 08:48Evangelia wrote:
Thanks for your immediate answer,it's been really helpful.
08.01.2014 - 18:39Evangelia wrote:
Hi, I come from Greece, and I love your patterns. In this pattern I'm confused especially on the short neck cable. I' shortening rows following instructions after watching the relevant video, but I think I have made a mistake. I almost complete the third repeat of M2 that means almost 48rows and I cannot coordinate the neck cable because as I'm shortening rows I don't reach on the 3rd or 7th row of M2 till the end to form the cable.
07.01.2014 - 21:53DROPS Design answered:
Dear Evangelia, to give the correct shape, you will have to work more rows on the bottom side of neck warmer than on neck side - cables in both M2 will not be made at the same time because of the short rows : *1 row on all sts, 2 rows on first 20 sts (neck side), 1 row on all sts, 2 rows on 37-41-45 sts (bottom side), 2 rows on 33-37-41 sts, 2 rows on 29-33-37 sts, 2 rows on all sts, 2 rows on 37-41-457 sts, 2 rows on 29-33-37 sts*, ie 14 rows on bottom side and 6 on neck side. Happy knitting!
08.01.2014 - 09:45
![]() Nonotte wrote:
Nonotte wrote:
JE ne comprends pas comment faire la torsade comme sur le modèle pouvez expliquer pour le chauffe épaule merci adore votre cite
06.12.2013 - 20:45DROPS Design answered:
Bonjour Nonotte, M2 se tricote ainsi: R1 et 5(sur l'end):2m env, 12m end, 2m env. R2 et tous les rangs sur l'env:2 m end, 12 m env, 2m end. R3: 2m env, glis. 4m sur l'aig. aux. devant l'ouvrage, 4m end, reprendre les 4m et les tric à l'end, 4m end, 2m env. R7: 2m env, 4m end, glis. 4 m sur l'aig aux derrière l'ouvrage, 4m end, reprendre les 4m en attente et les tric à l'endroit et 2m env. Bon tricot!
06.12.2013 - 21:43
![]() Bollen Brigitte wrote:
Bollen Brigitte wrote:
Wanneer krijgen wij antwoord op onze vraag ? Wij kunnen niet verder.
04.12.2013 - 21:28DROPS Design answered:
Hoi Brigitte. Mijn antwoord staat onder jouw vraag.
05.12.2013 - 09:53
![]() Bollen Brigitte wrote:
Bollen Brigitte wrote:
De schouderverwarmer : - 2 naalden over 37 steken. Bedoel je 1 maal heen en weer of 2 maal heen en weer. Met vriendelijke groeten. Bollen Brigitte.
01.12.2013 - 21:00DROPS Design answered:
Hoi Brigitte. 2 naalden over 37 st: 1 nld heen en 1 nld terug.
02.12.2013 - 12:29
|
|||||||||||||
Chocolate Fudge#chocolatefudgeset |
|||||||||||||
|
|
|||||||||||||
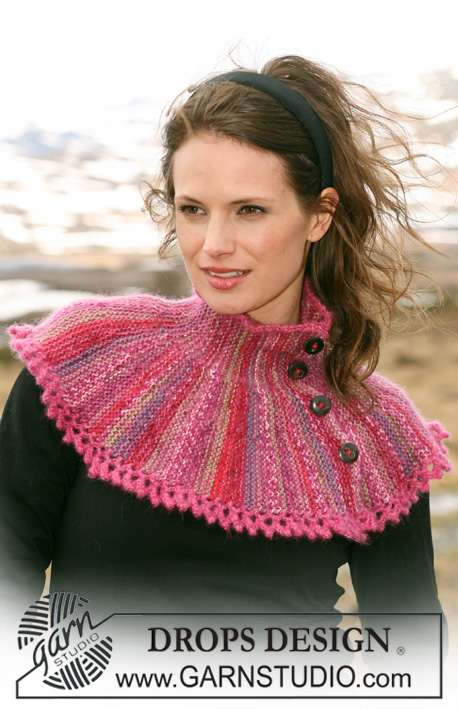
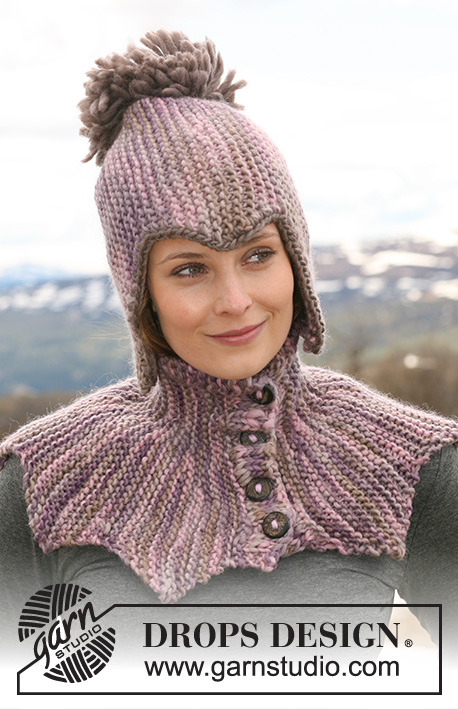
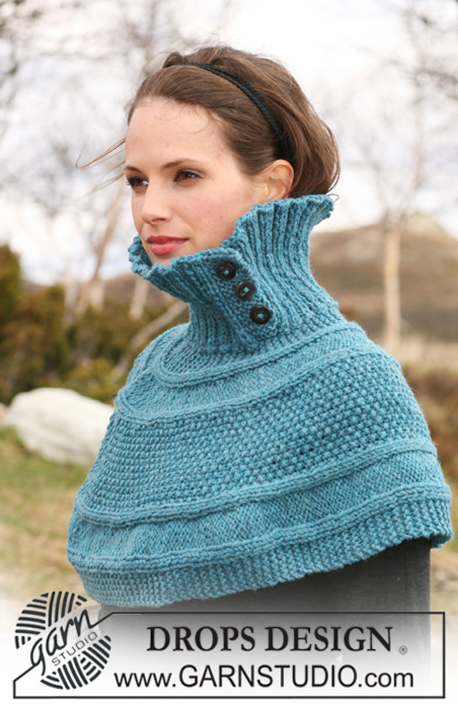
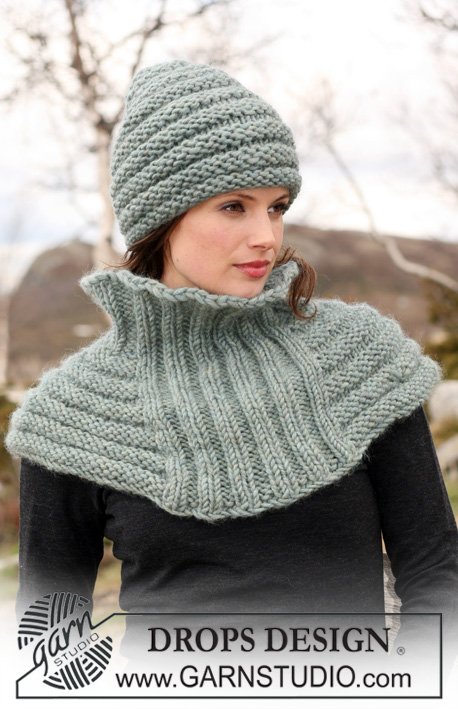
Set comprises: DROPS hat and shoulder wrap knitted from side to side with cables and garter st in ”Snow”.
DROPS 114-31 |
|||||||||||||
|
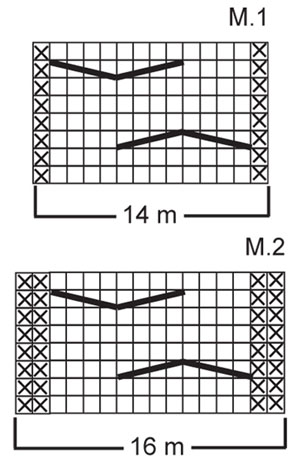
HAT: -------------------------------------------------------- GARTER ST (back and forth on needle): K all rows. PATTERN: See diagram M.1. Diagram shows the pattern from RS. -------------------------------------------------------- -------------------------------------------------------- HAT: Worked from side to side, back and forth on needle. Work the first 2 sts from RS with double thread (to make edge firmer) in GARTER ST throughout - see above. Cast on 38-42 sts on needle size 7 mm / US 10½ with Snow and work PATTERN as follows from RS: 2 garter sts – see above - M.1 (= 14 sts), 22-26 garter sts. Continue in pattern like this, AT THE SAME TIME work shortened rows, back and forth on needle, with start from RS as follows: * 2 rows on all sts, 2 rows on 36-40 sts, 2 rows on 34-38 sts, 2 rows on 31-35 sts *, repeat from *-*. REMEMBER THE GAUGE! Continue like this until there are 10-11 vertical repeats of M.1, piece measures approx 50-55 cm / 19¾"-21⅝" where longest. Bind off loosely on the last row in the last pattern repeat. ASSEMBLY: Sew cast on row to bind off row, edge to edge. Run a thread through sts at the top of hat, tighten and fasten. -------------------------------------------------------- SHOULDER WRAP: -------------------------------------------------------- GARTER ST (back and forth on needle): K all rows. PATTERN: See diagram M.2. Diagram shows the pattern from RS. BUTTONHOLES: Make buttonholes when piece measures 2 cm / ¾" as follows from RS: Work 7-7-7 sts, bind off 1 st, * work 8-9-10 sts, bind off 1 st *, repeat from *-* a total of 4 times, finish with 3 sts = 5 buttonholes. Cast on new sts over bind off sts on return row. -------------------------------------------------------- -------------------------------------------------------- SHOULDER WRAP: Worked from side to side, back and forth on circular needle. Cast on 47-51-55 sts on circular needle size 8 mm / US 11 with Snow. Work GARTER ST – see above - AT THE SAME TIME work the first 2 sts on every row from RS with double thread throughout. AT THE SAME TIME when piece measures 2 cm / ¾" make BUTTONHOLES on next row from RS – see above! When piece measures 4 cm / 1½" inc as follows on row from WS: Work garter st on the first 4 sts, inc 6 sts evenly on the next 10 sts, garter st on the next 17-21-25 sts, inc 6 sts evenly on the next 10 sts, complete row in garter st = 59-63-67 sts. READ ALL OF THE FOLLOWING SECTION BEFORE CONTINUING! Continue in pattern and shortened rows as follows from RS: 2 garter sts, P 4 (K from WS), M.2 (= 16 sts), P2 (K from WS), garter st on the next 15-19-23 sts, M.2 (=16 sts), 4 garter sts - AT THE SAME TIME work shortened rows starting on RS as follows: * 1 row on all sts, 1 row on 20 sts, turn, work return row on 20 sts, 1 row on all sts, 2 rows on 37-41-45 sts, 2 rows on 33-37-41 sts, 2 rows on 29-33-37 sts, 2 rows on all sts, 2 rows on 37-41-45 sts, 2 rows on 33-37-41 sts, 2 rows on 29-33-37 sts *, repeat from *-*. REMEMBER THE GAUGE! Continue in pattern like this. When piece measures 128-148-168 cm / 50⅜"-58⅛"-66" measured along bottom edge (adjust to after a full repeat of M.2) work next row from RS as follows: Work garter st, AT THE SAME TIME dec 6 sts evenly on all cables = 47-51-55 sts. Continue in garter st on all sts. Bind off when edge in garter st measures 4 cm / 1½". Sew on buttons. |
|||||||||||||
Diagram explanations |
|||||||||||||
|
|||||||||||||
 |
|||||||||||||
Have you finished this pattern?Tag your pictures with #dropspattern #chocolatefudgeset or submit them to the #dropsfan gallery. Do you need help with this pattern?You'll find 11 tutorial videos, a Comments/Questions area and more by visiting the pattern on garnstudio.com. © 1982-2026 DROPS Design A/S. We reserve all rights. This document, including all its sub-sections, has copyrights. Read more about what you can do with our patterns at the bottom of each pattern on our site. |
|||||||||||||


With over 40 years in knitting and crochet design, DROPS Design offers one of the most extensive collections of free patterns on the internet - translated to 17 languages. As of today we count 325 catalogs and 12298 patterns - 12288 of which are translated into English (US/in).
We work hard to bring you the best knitting and crochet have to offer, inspiration and advice as well as great quality yarns at incredible prices! Would you like to use our patterns for other than personal use? You can read what you are allowed to do in the Copyright text at the bottom of all our patterns. Happy crafting!
Post a comment to pattern DROPS 114-31
We would love to hear what you have to say about this pattern!
If you want to leave a question, please make sure you select the correct category in the form below, to speed up the answering process. Required fields are marked *.