
Popular categories
Looking for a yarn?


Comments / Questions (8)
![]() Line wrote:
Line wrote:
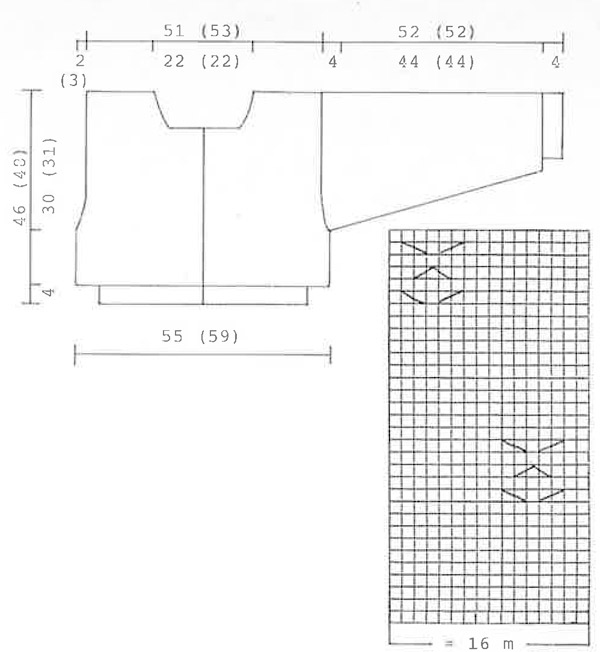
Der står, at ærmet skal strikkes rundt til det måler 44 cm, hvorefter man lukker af til armhulen - og så strikker man videre til ærmet måler 48 cm. Men kan det virkelig passe at ærmegabet kun er 4 cm stort?
23.03.2026 - 23:37DROPS Design answered:
Hej Line, ja det stemmer helt fint, det kan du også se i måleskitsen :)
08.04.2026 - 14:47
![]() Lilly wrote:
Lilly wrote:
Hallo, wird die Arbeit von unten nach oben gestrickt? Das ist aus der Anleitung leider nicht genau erkennbar.
15.04.2025 - 11:34DROPS Design answered:
Liebe Lilly, ja genau, die Jacke wird von unten nach oben gestrickt. Bei unseren alten Anleitungen wurde das noch nicht so ausdrücklich formuliert wie jetzt. Viel Spaß beim Stricken!
17.04.2025 - 22:14
![]() Hannah Solberg wrote:
Hannah Solberg wrote:
Hei! Kva størresle bruker modellen på biletet, til referanse?
05.01.2025 - 15:43DROPS Design answered:
Hei Hannah, Du finner en målskisse på bunnen av oppskriften, med alle mål for de forskjellige størrelsene. Hvis du velger riktig størrelse for dine mål, får du den fasongen som er vist på bildet. God fornøyelse!
06.01.2025 - 08:27
![]() Amy wrote:
Amy wrote:
Hi! A question: after binding off the center 44 stitches for the neck (when working the back), are the decreases for shaping the neck done immediately to the left and right of the binded-off 44 stitches? Or do you decrease at the very start and very end of the row across the entire piece, like [ dec @ start ::: 37 stitches- 44 binded off - 37 stitches ::: dec @ end ] ? (note 37+44+37 is the 118 sts across the entire row)
10.12.2023 - 21:53DROPS Design answered:
Dear Amy, after casting off the 44 stitches for the neck, end the row, work back up to the neck and then cast off the next 2 sts on the next row from the right side from the neck . In the next row from the right side from the neck cast off 1 stitch. On the other side of the neck, the 2 stitches are cast off on the first row from the wrong side from the neck. On the next row from the wrong side from the neck cast off 1 stitch. Each shoulder is worked separately. Happy knitting!
10.12.2023 - 23:27
![]() Wen wrote:
Wen wrote:
Do I knit front and back piece separately with each cast on 256 stitches How do I get 122 stitches when working on back piece alone and 61 stitches when working on front piece alone I’m confused if I should cast on 256 stitches for each back and front or together
20.07.2023 - 11:32DROPS Design answered:
Hi Wen, at the beginning you work front pieces and back piece togerher (back and forth on circular needle from mid front) until the armholes. Then when piece measures 12-13 cm cast off 6-8 sts each side for armhole (choose the correct number according to your size) and now complete each front piece and back piece separately. Happy knitting!
20.07.2023 - 12:00
![]() Wendy wrote:
Wendy wrote:
Hi I can’t seem to get the pattern right especially the psso from 2nd to 3rd and then to last Any video to show how is it done?
18.07.2023 - 05:44DROPS Design answered:
Dear Wendy, we have no videos for this specific technique. This symbol is worked as follows: make 1 yarn over, slip the next 3 stitches onto the right needle. Now you will work with these 3 slipped stitches with the left needle: pass over the 2nd slipped stitch (the middle slipped stitch) over the last slipped stitch (the leftmost slipped stitch). Now you should have 2 stitches left. Pass the 1st slipped stitch (rightmost stitch) over the last slipped stitch (leftmost stitch). You now have 1 stitch left. Leave this stitch be in the right needle. Work 1 yarn over and continue with the rest of the chart. Happy knitting!
20.07.2023 - 13:58
![]() Laura wrote:
Laura wrote:
Jeg har svært ved at afkode, hvad symbolet med trekanten over de tre m betyder. Skal jeg strikke en ret efter at have taget de tre af og derefter tage 2. og 1. løse m over? Ender jeg så ikke med 4 m frem for 3?
17.10.2019 - 19:32DROPS Design answered:
Hej Laura, du laver først et omslag, flyter de 3 masker over på højre pind, løfter den midterste over den yderste og så den sidste over den yderste, og så laver du et omslag igen. Nu har du 1 maske tilbage med 1 omslag på hver side af denne maske = ialt 3 masker igen. God fornøjelse!
18.10.2019 - 11:28
![]() Mai Mogensen wrote:
Mai Mogensen wrote:
Hejsa. Jeg har problemer med blondekanten til denne opskrift. Dels kan jeg ikke læse hvor 2. rækker stopper og 3. række begynder. Derudover kan jeg ikke få dettil at passe med deling med 14 masker, jeg ser det umiddelbart som 16 ud fra 1. række - de 14 fm. og 1 picot som dækker over 2 masker. Kan I hjælpe - på forhånd tak.
19.01.2019 - 14:24DROPS Design answered:
Hej Mai, nu er opskriften blevet opdateret, så nu skal den være lettere at læse. God fornøjelse!
21.01.2019 - 10:37
|
|||||||||||||
DROPS 25-11 |
|||||||||||||
|
|
|||||||||||||
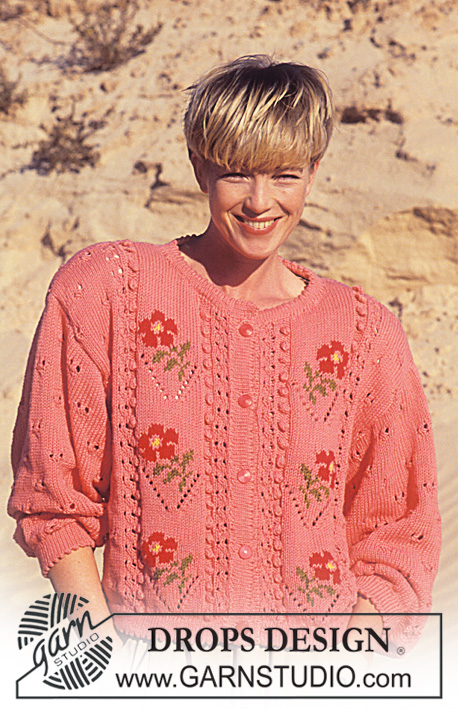
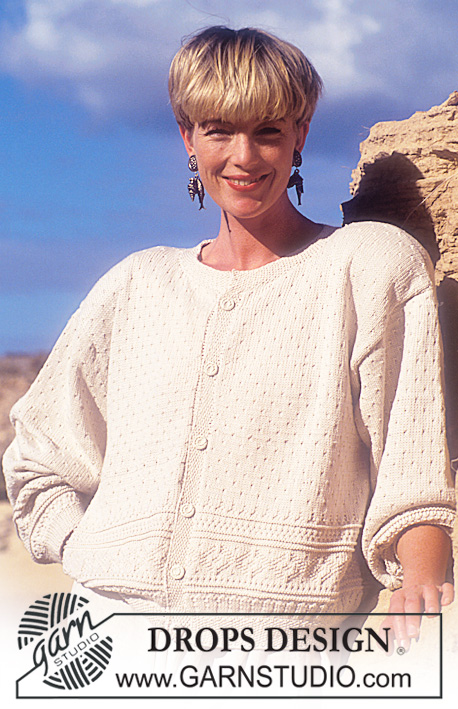
DROPS jacket with lace pattern and crochet border in “Safran”.
DROPS 25-11 |
|||||||||||||
|
Pattern: See diagram. The diagram shows the pattern from the RS side. Crochet border: 1 picot = 3 ch, 1 sc in first ch. No of sts divisible by 14 +5. Row 1: 10 sc, 1 picot, *14 sc, 1 picot*, repeat from *-* and finish with 9 sc. Row 2: 2 ch, skip 1 st, 1 dc, 1 ch, skip 1 st, 1 sc, *4 ch, skip 3 sts, 1 sc (in sc before picot), 5 ch, 1 sc (in sc after picot), 4 ch, skip 3 sts, 1 sc, 1 ch, skip 1 st, 1 dc, 1 ch, skip 1 st, 1 sc*, repeat from *-*. Row 3: *3 ch, 1 sc in dc from previous row, 3 ch, 1 sc in the 4-ch-loop, 10 dc in the 5-ch-loop, 1 sc in the 4-ch-loop*, repeat from *-* and finish with 3 ch, 1 sc in dc from previous row, 2 ch, 1 sc in the last sc from previous row. Row 4: 3 ch, *1 dc in sc from previous row, 1 dc + 1 ch in each of the following 10 dc*, repeat from *-* and finish with 1 dc in sc from previous row, 1 dc in the first of the 3 ch from beg of row. Row 5: 1 ch, *1 sc in dc, in the next 10 dc crochet as follows: 3 sc, 1 picot, 2 sc, 1 picot, 2 sc, 1 picot, 3 sc. 1 sc in next dc*, repeat from *-* and finish with 1 sc in the third ch from beg of previous row. Front and back piece: Worked back and forth on circular needle from mid front. Cast on 256-272 sts on needle size 3.5 mm = US 4 and work pattern. When piece measures 12-13 cm = 4¾"-5⅛" bind off 6-8 sts each side for armhole and now complete front and back pieces separately. Back piece: = 122-128 sts. Dec for armhole each side on every other row: 1 st 2-3 times = 118-122 sts. When piece measures 34-36 cm = 13⅜"-14¼" bind off the middle 44-44 sts for neck and dec to shape the neckline on every other row: 2 sts 1 time, 1 st 1 time. Bind off remaining sts when piece measures 42-44 cm = 16½"-17¼". Front piece: = 61-64. Dec to shape the armhole at side as described for back piece = 59-61 sts. When piece measures 34-36 cm = 13⅜"-14¼" bind off to shape the neckline on every other row: 12-12 sts 1 time, 3 sts 2 times, 2 sts 2 times, 1 st 3 times. Bind off when piece measures 42-44 cm = 16½"-17¼". Sleeve: Worked in the round on double pointed needles. Cast on 64-64 sts on double pointed needle size 3.5 mm = US 4 and work pattern. At the same time inc 2 sts mid under arm on every 3rd round a total of 38-40 times = 140-144 sts (incorporate inc sts in pattern as you go along). When piece measures 44-44 cm = 17¼"-17 174" bind off 12 sts mid under arm and complete piece back and forth on needle. Dec to shape the sleeve cap on every other row 10 sts 5 times and bind off. Piece measures approx 48-48 cm = 19"-19". Assembly: Sew shoulder seams. Front bands: Pick up approx 104 sts along left front piece on needle size 2.5 mm = US C/2 and work 3 cm = 1⅛" dc st, P 1 round (= folding edge), 3 sc stockinette st, bind off. Repeat along right front piece, but after 1 cm = ⅜" make 5 buttonholes evenly distributed. 1 buttonhole = bind off 3 sts and cast on 3 new sts on return row – remember buttonholes on piece in stockinette st to be folded towards WS. Fold the edges double towards WS and fasten. Neckline: Pick up approx 126 sts round neckline on needle size 2.5 mm = US 1,5 and work 4 rounds stockinette st, at the same time dec 6 sts evenly distributed along neckline on back piece on first row. Bind off. Crochet 1 round of sc, skip approx every 5 st = approx 100 sc. Cut the thread and beg from RS again: *3 ch, 1 sc in the first ch, 2 sc*, repeat from *-*. Crochet border: Crochet a row of sc along bottom edge, skip approx every 9 st = 229-243 sc. Cut the thread and beg from RS again. Crochet Border – see above. Sleeves: Crochet a round of sc, skip approx every 8 st = 61-61 sc. Crochet Border as described above. Set in sleeves. Sew on buttons. |
|||||||||||||
Diagram explanations |
|||||||||||||
|
|||||||||||||
 |
|||||||||||||
Have you finished this pattern?Tag your pictures with #dropspattern or submit them to the #dropsfan gallery. Do you need help with this pattern?You'll find 22 tutorial videos, a Comments/Questions area and more by visiting the pattern on garnstudio.com. © 1982-2026 DROPS Design A/S. We reserve all rights. This document, including all its sub-sections, has copyrights. Read more about what you can do with our patterns at the bottom of each pattern on our site. |
|||||||||||||


With over 40 years in knitting and crochet design, DROPS Design offers one of the most extensive collections of free patterns on the internet - translated to 17 languages. As of today we count 324 catalogs and 12290 patterns - 12280 of which are translated into English (US/in).
We work hard to bring you the best knitting and crochet have to offer, inspiration and advice as well as great quality yarns at incredible prices! Would you like to use our patterns for other than personal use? You can read what you are allowed to do in the Copyright text at the bottom of all our patterns. Happy crafting!
Post a comment to pattern DROPS 25-11
We would love to hear what you have to say about this pattern!
If you want to leave a question, please make sure you select the correct category in the form below, to speed up the answering process. Required fields are marked *.