Comments / Questions (16)
![]() Heidi wrote:
Heidi wrote:
Ved udtagning af ærmegab skal kanten med de 3 masker glatstrikning så øges? eller skal der fortsat kun være 3 masker i kanten med glatstrikning?
12.11.2025 - 14:48DROPS Design answered:
Hej Heidi, nej de skal ikke øges, de nye masker strikkes ind i mønsteret - Se udtagningstips-1 :)
19.11.2025 - 14:31
![]() Heidi wrote:
Heidi wrote:
Hej, hvorfor skal der bruges anden fremgangsmåde til udtagning ved ærmegab end da der skulle tages ud til skulder? Og hvordan skal man strikke den drejede maske på den efterfølgende vrang side?
12.11.2025 - 14:29DROPS Design answered:
Hej Heidi, hvis du er kommet til en vrangmaske, så skal den strikkes drejet vrang (i bagerste maskeled, og hvis du er kommet til en retmaske skal den strikkes drejet ret (i bagerste maskeled)
19.11.2025 - 14:33
![]() Berta wrote:
Berta wrote:
Har svårt att förstår hur man gör ökning på Moss-stickning. Jag gör slipover med europeisk axel, vilket innebär en ökning både i början efter 9 maskar och innan de 9 sista maskar.
12.09.2024 - 20:55DROPS Design answered:
Hei Berta. Ta en titt på hjelpevideoene og hvordan økningene strikkes. De viser økninger i glattstrikk, men teknikken er den sammen (hvordan det økes før/etter merket og fra retten + vrangen). Du finner hjelpevideoer ved å klikke på VIDEOER til høyre eller under bildet. mvh DROPS Design
16.09.2024 - 13:14
![]() Enormous wrote:
Enormous wrote:
Enjoying this pattern - thank you! Can I just confirm that the part 1 video on European shoulders covers many patterns and so the line in. *this* pattern “Increase like this every 2nd row (each row from the right side) a total of 6-6-7-8-11-13 times = 81-85-91-97-105-113 stitches.” where there is NO increase on wrong side should be followed rather than the video? An increase on wrong side is demonstrated in the video. Thanks!
26.04.2024 - 11:32DROPS Design answered:
Dear Enormous, in this pattern you increase for shoulders on back piece on every row (= from RS as well as from WS) and in the video we also show how to increaes from WS - see time code 02:04 for example. Increase from RS and from WS in this pattern as explained under INCREASE TIP FROM THE RIGHT SIDE and under INCREASE TIP FROM THE WRONG SIDE. Happy knitting!
26.04.2024 - 13:41
![]() Corina Avram wrote:
Corina Avram wrote:
Hello, Is it possible to work the neck like the sleeve edges? and not to fold it in double? Thanks
27.03.2024 - 15:40DROPS Design answered:
Dear Corina, of course, if you prefer it that way, you are welcome to do so. Happy Knitting!
27.03.2024 - 22:17
![]() Monika Pfeffer wrote:
Monika Pfeffer wrote:
Hallo liebes Drops-Team, Beim Vorderteil steht …..bei einer Länge von …cm für die armausschnitte abketten. Es mus aber zugenommen werden., das ist etwas verwirrend. Liebe Grüße
10.12.2023 - 16:03
![]() Sacha wrote:
Sacha wrote:
Bonjour ! Comme Susanne, je ne comprends pas bien les augmentations du dos, en taille M, si j'augmente 19 fois 2 mailles sur l'envers et sur l'endroit, je crée 76 nouvelles mailles, en additionnant 76 à 35 j'obtiens 111. Pouvez me dire à quoi correspond le chiffre 73 et comment y arriver, svp ? En vous remerciant par avance de votre aide et du temps passé à répondre. Bonne journée
02.12.2023 - 16:20DROPS Design answered:
Bonjour Sacha, vous devez augmenter 19 fois 2 mailles soit 38 mailles au total sur un total de 19 rangs (- on augmente tous les rangs, sur l'endroit aussi bien que sur l'envers et non 19 fois sur l'endroit et 19 fois sur l'envers). Vous aurez ainsi bien 35 + 38 = 73. Bon tricot!
04.12.2023 - 07:58
![]() Murielle Pham wrote:
Murielle Pham wrote:
Bonsoir, tout d'abord merci pour votre réponse à ma question précédente. J'en suis maintenant aux emmanchures du devant mais il est dit de mesurer 30 cm depuis qu'on a relevé les mailles (il s'agit bien des mailles relevées sur les épaules ?). D'où mesure r on exactement ? Au niveau de l'encolure ou de l'épaule ?
19.11.2023 - 20:54DROPS Design answered:
Bonjour Mme Pham, vous mesurez le devant à partir des mailles relevées, comme vous avez le même nombre de rangs côté encolure et côté épaules, la mesure sera la même des 2 côtés. Bon tricot!
20.11.2023 - 11:16
![]() PHAM Murielle wrote:
PHAM Murielle wrote:
Bonjour, pour remonter les mailles de l'épaule du devant, je démarre donc a 22 m avant les bordures en jersey ( je n'ai pas de m à remonter sur les bordures?)
14.11.2023 - 17:38DROPS Design answered:
Bonjour Mme Pham, pour l'épaule gauche, vous commencez à relever les mailles à partir du 1er rang du dos jusqu'au marqueur - dans cette vidéo nous montrons comment relever les mailles des deux devants. Bon tricot!
15.11.2023 - 07:58
![]() Mirjam Weiß wrote:
Mirjam Weiß wrote:
Liebes Drops-Team, ich stricke den Pollunder in Größe M und bin gerade beim Vorderteil. Momentan sind es 73 Maschen und ich frage mich, wann ich mit den Zunahmen beginnen muss, damit ich auf insgesamt 85 Maschen komme und wann ich das Vorderteil abketten muss. An dieser Stelle kommt mir die Anleitung etwas durcheinander vor oder bin nur ich das? 😅 Vielen Dank für eure Hilfe!
02.11.2023 - 21:33DROPS Design answered:
Liebe Frau Weiß, nach den letzten Zunahmen stricken Sie noch 2 Reihen und setzen Sie die Markierungen beidseitig, jetzt messen Sie von hier; dann stricken Sie die 73 Maschen bis die Arbeit 22 cm von den Markierungen, und dann wird es neue Maschen für die Armlöcher beideitig zugenommen, so haben Sie die 85 Maschen und die Arbeit misst 27 cm. Maschen still legen und Vorderteil stricken. Siehe wie man so einen Rückenteil strickt in diesem Video. Viel Spaß beim stricken!
03.11.2023 - 06:37
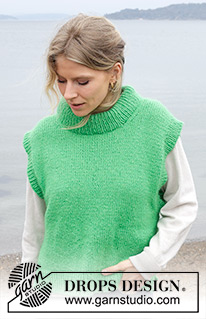
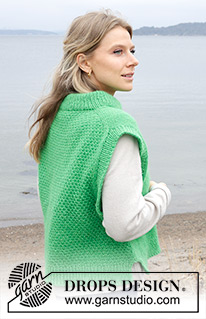
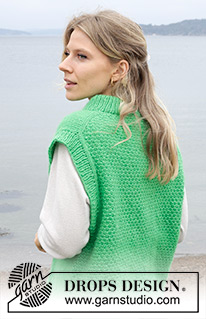
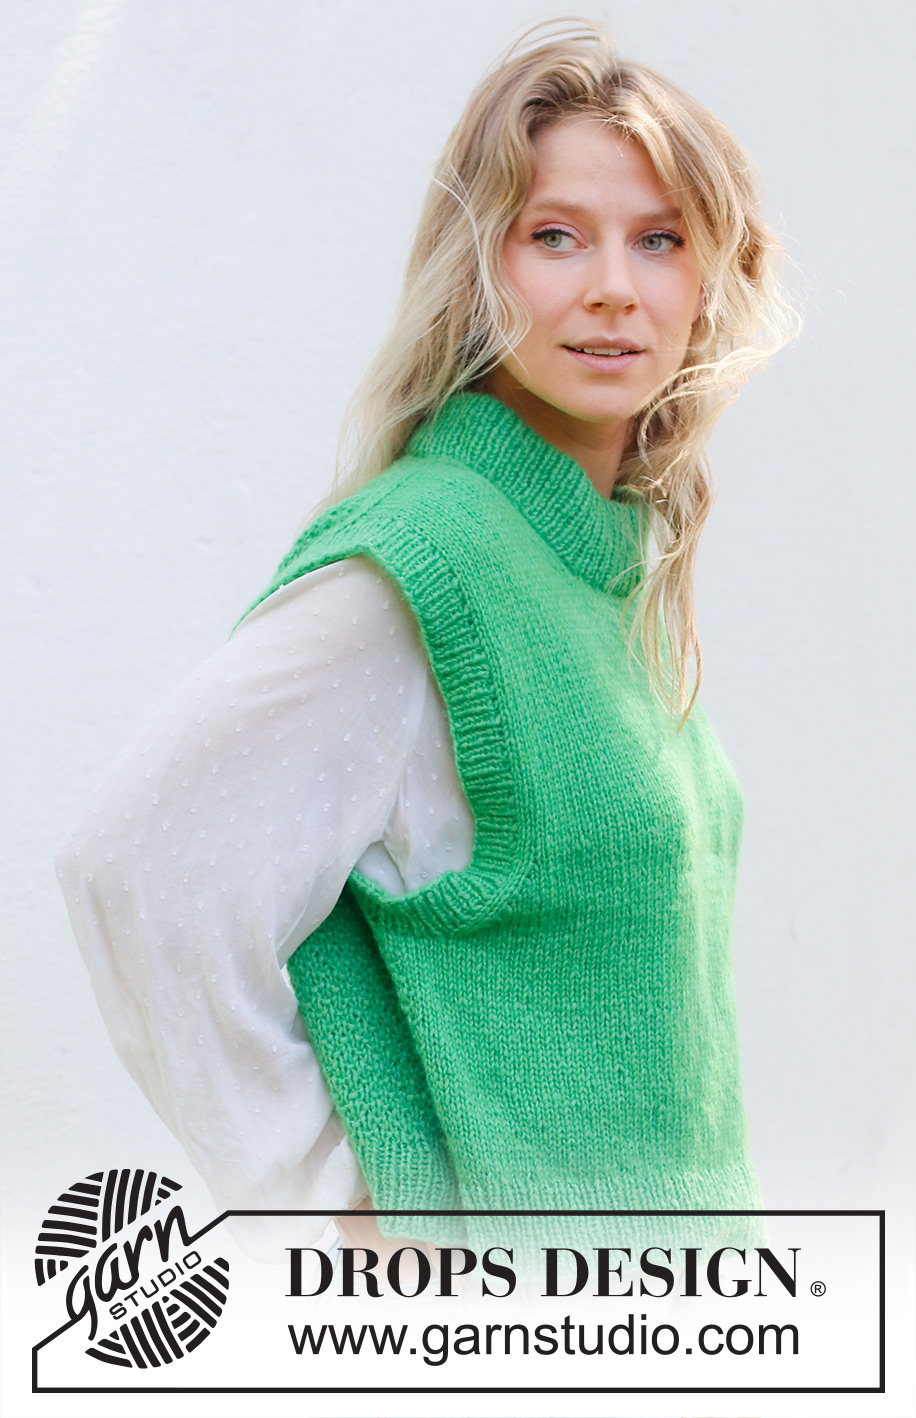
Feel the Beat#feelthebeatvest |
|||||||||||||
 |
 |
||||||||||||
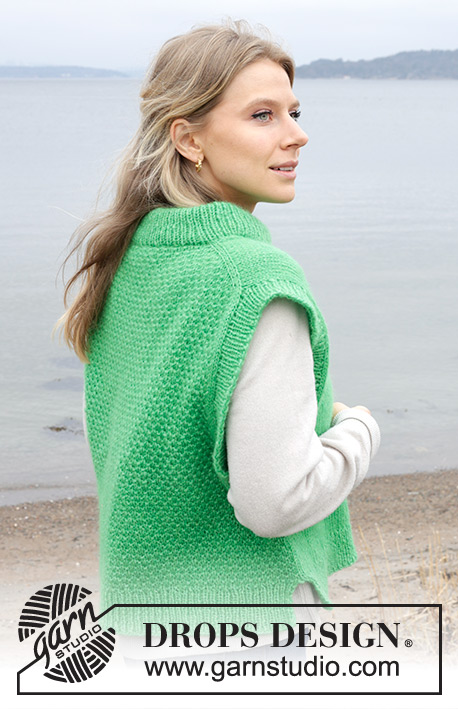
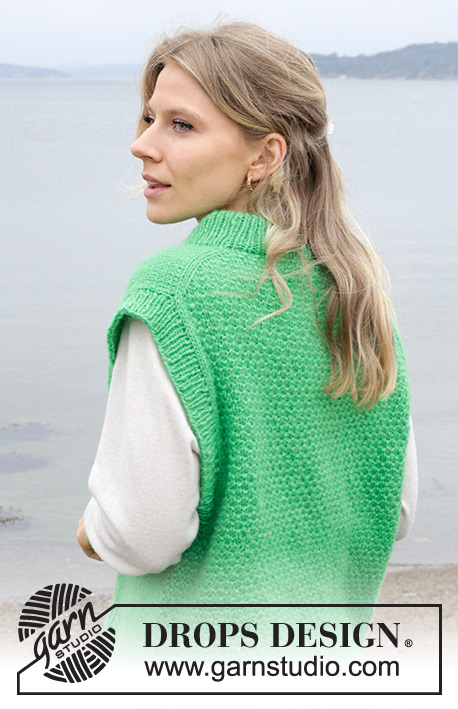
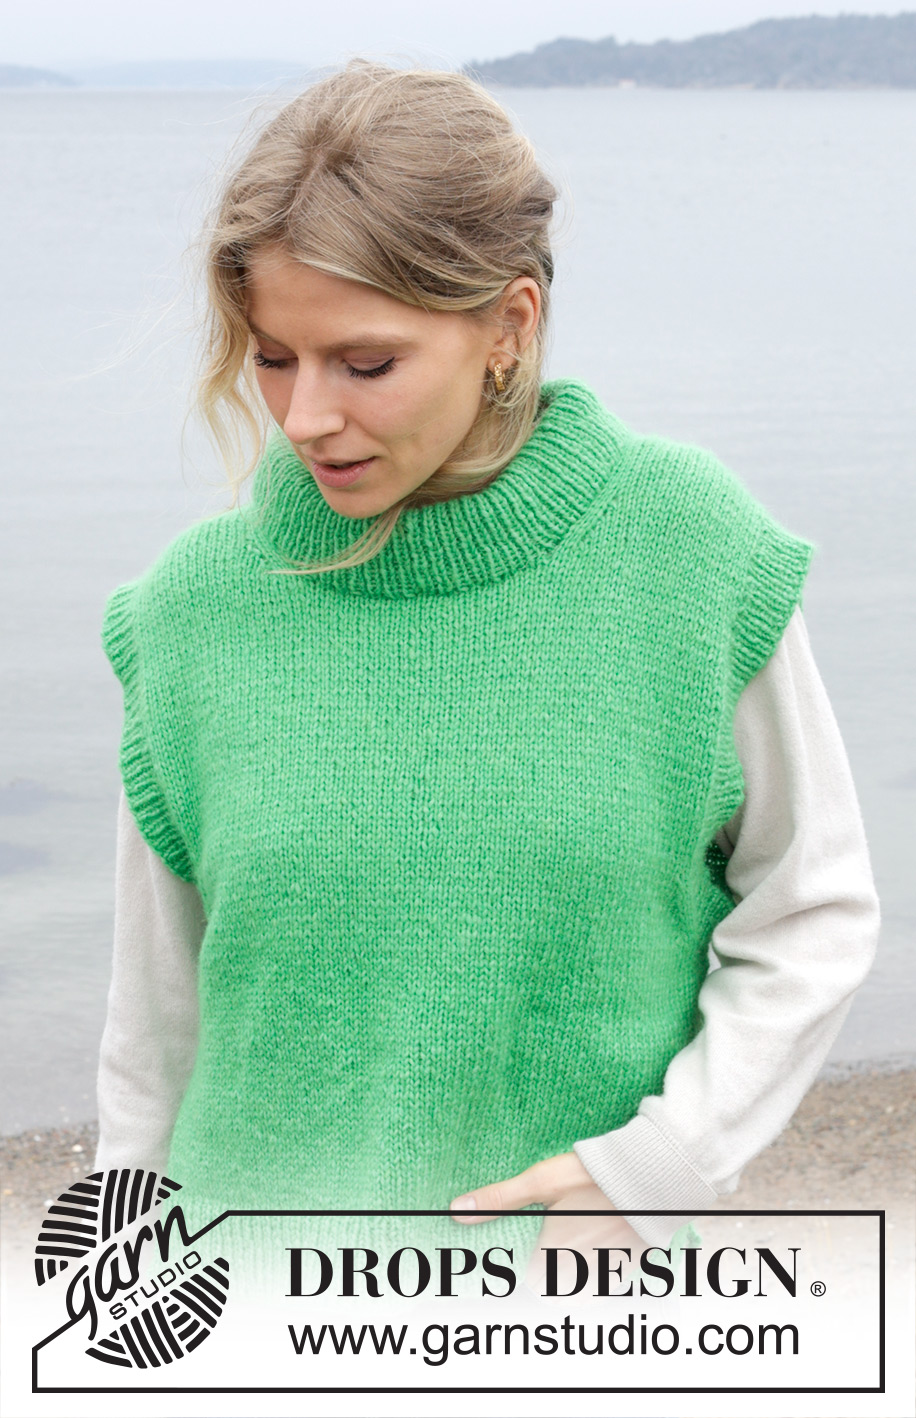
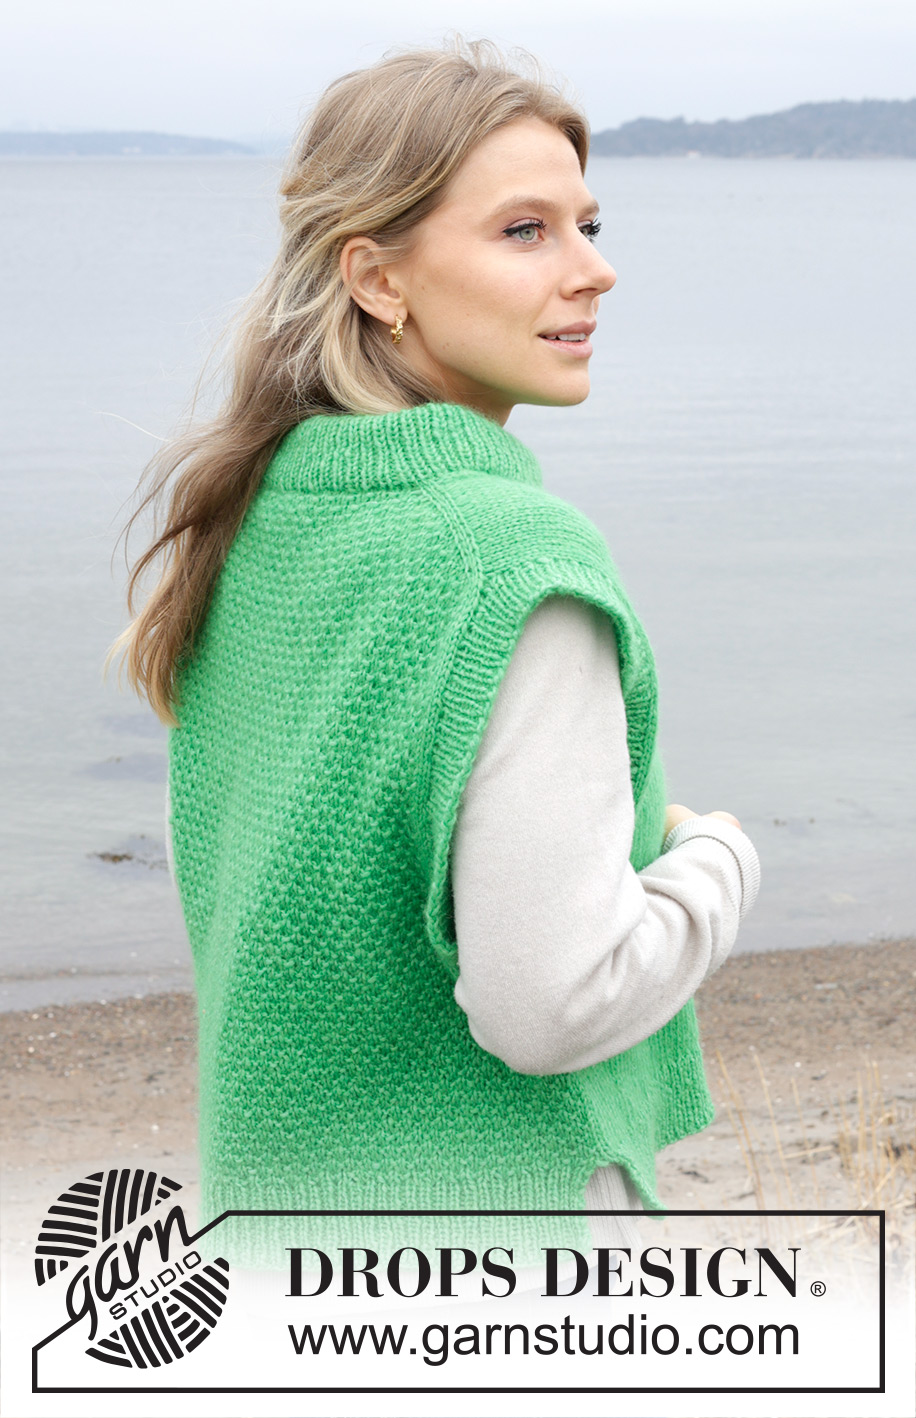
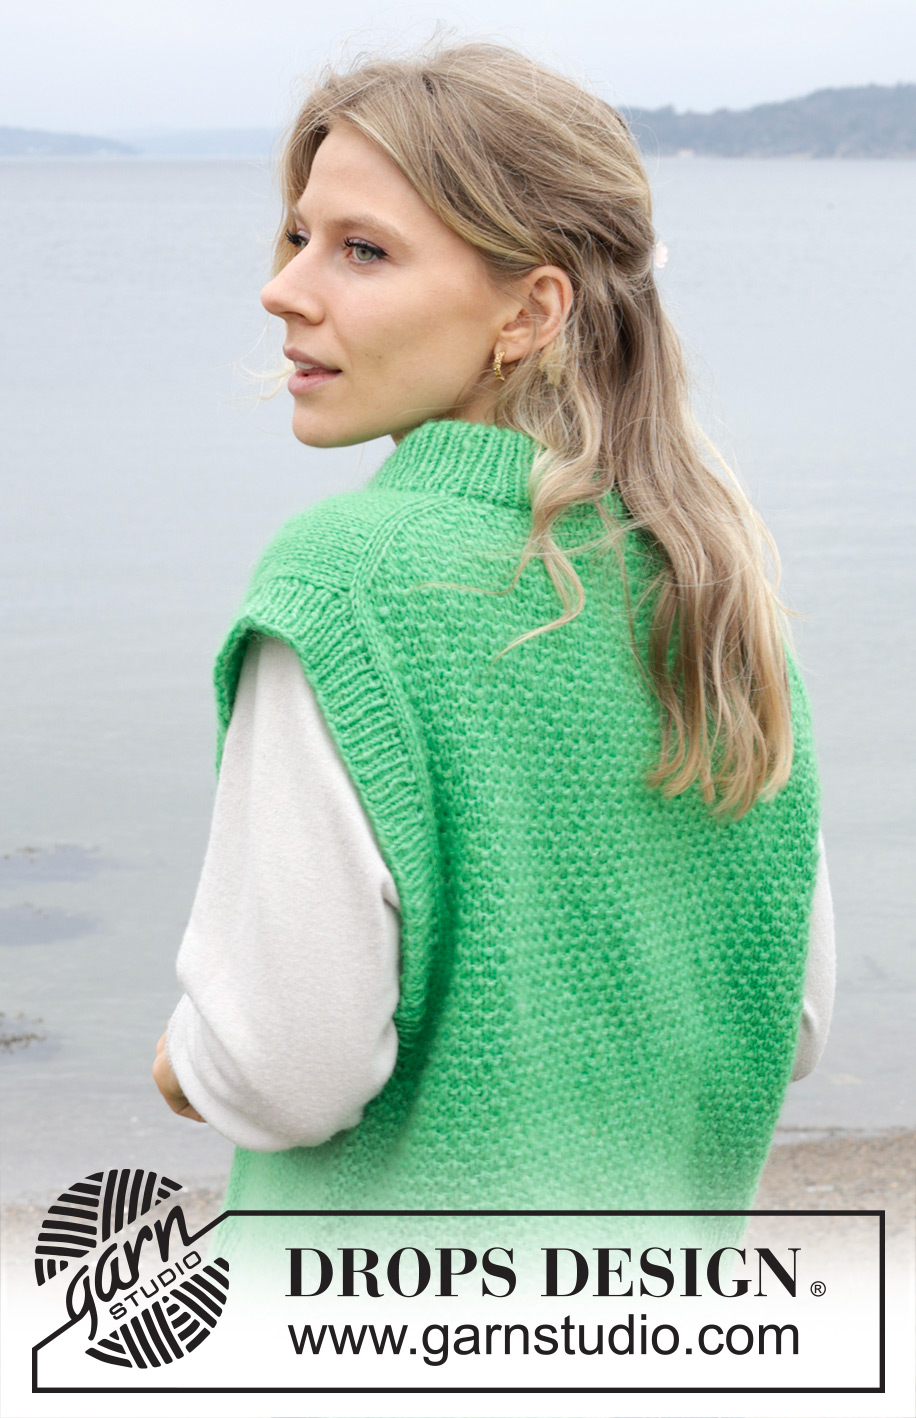
Knitted vest in DROPS Air. The piece is worked top down with European/diagonal shoulders, double neck, moss stitch on back piece and split in sides. Sizes S - XXXL.
DROPS 244-30 |
|||||||||||||
|
------------------------------------------------------- EXPLANATIONS FOR THE PATTERN: ------------------------------------------------------- EDGE STITCH (for front piece and split): Work 1 edge stitch on each side. This stitch is knitted from both the right and wrong side (garter stitch). PATTERN: See diagram A.1. The diagram shows all rows in the pattern from the right side. INCREASE TIP FROM THE RIGHT SIDE: Increase towards the left AFTER MARKER / 3 stitches: Use left needle to pick up yarn between 2 stitches from row below, pick up yarn from the front and knit in the stitch loop that is on the back of the needle. Increase towards the right BEFORE MARKER / 3 stitches: Use left needle to pick up yarn between 2 stitches from row below, pick up yarn from the back and knit in the stitch loop that is on the front side of the needle. INCREASE TIP FROM THE WRONG SIDE: Increase towards the right AFTER MARKER: Use left needle to pick up yarn between 2 stitches from row below, pick up yarn from the back and purl in the stitch loop that is on the front side of the needle. Increase towards the left BEFORE MARKER: Use left needle to pick up yarn between 2 stitches from row below, pick up yarn from the front and purl in the stitch loop that is on the back side of the needle. INCREASE TIP-1 (for armholes): All increases are worked from the right side! Increase 1 stitch inside 3 stockinette stitches by making 1 yarn over which is worked twisted on the next row to avoid a hole. The increased stitches are worked into A.1 on back piece/in stockinette stitch on front piece. INCREASE TIP-2 (evenly spaced): Increase 1 stitch by making 1 yarn over which is worked twisted on the next row to avoid a hole. ------------------------------------------------------- START THE PIECE HERE: ------------------------------------------------------- VEST - SHORT OVERVIEW OF THE PIECE: The pattern uses both long and short needles; start with the length which fits the number of stitches and change when necessary. The piece is started back and forth, casting on stitches at the back of the neck and working the back piece top down while increasing stitches on each side for the shoulders, which become slightly diagonal. The back piece is worked as far as the armholes. The front piece is then worked in 2 sections, knitting up stitches along 1 back shoulder, increasing for the neckline. This is repeated on the other shoulder. The 2 front sections are joined when the neckline is finished and worked until the armholes are finished. The front and back pieces are then joined and the body worked in the round. Stitches are knitted up around the armholes. Stitches are knitted up around the neckline and the neck is worked in the round, then folded double to the inside. BACK PIECE: Cast on 35-35-37-37-39-39 stitches with circular needle size 5 MM = US 8 and DROPS Air. Purl 1 row from the wrong side. Insert 1 marker inside the 3 outermost stitches on each side. Keep the markers in this position on every row onwards. Work A.1 back and forth, with the outermost 3 stitches on each side worked in stockinette stitch. AT THE SAME TIME increase AFTER the marker at the beginning of the row and BEFORE the marker at the end of the row – read INCREASE TIP FROM RIGHT SIDE. On the next row (wrong side) increase in the same way – read INCREASE TIP FROM WRONG SIDE. The increased stitches are worked into A.1. Increase like this from both the right and wrong side a total of 17-19-20-22-22-24 times = 69-73-77-81-83-87 stitches. REMEMBER THE KNITTING GAUGE! Work 2 rows without further increases, with 3 stockinette stitches on each side. Move the markers to the outermost stitch on each side – the piece is now measured from here. Work A.1 with 3 stockinette stitches on each side. When the piece measures 21-22-22-21-19-18 cm = 8¼"-8¾"-8¾"-8¼"-7½"-7" from the markers, increase 1 stitch on each side for the armholes – read INCREASE TIP-1. Increase like this every 2nd row (each row from the right side) a total of 6-6-7-8-11-13 times = 81-85-91-97-105-113 stitches. After the last increase, work back from the wrong side. The piece measures approx. 26-27-28-28-29-30 cm = 10¼"-10⅝"-11"-11"-11⅜"-11¾" from the markers, measured along the armhole. Cut the strand, place the stitches on a stitch holder. FRONT PIECE: Start with left shoulder (when garment is worn). Knit up 19-21-22-24-24-26 stitches inside the outermost stitch along the left back shoulder (i.e., knit up 1 stitch in each of the 17-19-20-22-22-24 rows + 2 stitches as far as the marker). Work stockinette stitch back and forth with 1 EDGE STITCH on each side – read description above. When the piece measures 7-7-8-8-8-8 cm = 2¾"-2¾"-3⅛"-3⅛"-3⅛"-3⅛" from the knitted-up stitches, increase for the neckline at the beginning of each row from the right side after the 3 stitches – remember INCREASE TIP FROM RIGHT SIDE. Increase 1 stitch 4-4-4-4-5-5 times = 23-25-26-28-29-31 stitches. Work back from the wrong side, cut the strand, place the stitches on a stitch holder and work the right front shoulder as follows: Start by the marker and knit up 19-21-22-24-24-26 inside the outermost stitch along the right back shoulder. Work stockinette stitch back and forth with 1 edge stitch on each side. When the piece measures 7-7-8-8-8-8 cm = 2¾"-2¾"-3⅛"-3⅛"-3⅛"-3⅛" from the knitted-up stitches, increase for the neckline at the end of each row from the right side, before the 3 stitches – remember INCREASE TIP FROM RIGHT SIDE. Increase 1 stitch 4-4-4-4-5-5 times = 23-25-26-28-29-31 stitches. Work back from the wrong side. Work as follows from the right side: Stockinette stitch over the right front piece, cast on 23-23-25-25-25-25 stitches for the neckline, work stockinette stitch over the 23-25-26-28-29-31 stitches on the left front piece = 69-73-77-81-83-87 stitches. Continue the stockinette stitch back and forth with 1 edge stitch on each side. When the piece measures 29-30-30-31-29-28 cm = 11⅜"-11¾"-11¾"-12¼"-11⅜"-11" from the knitted-up stitches, increase for the armholes in the same way as on the back piece = 81-85-91-97-105-113 stitches. Work back from the wrong side. The piece measures approx. 34-35-36-38-39-40 cm = 13⅜"-13¾"-14¼"-15"-15¼"-15¾", measured along the armhole. Cut the strand. The back and front pieces are now joined together. BODY: Cast on 2-3-4-5-6-7 stitches for the armhole, knit the 81-85-91-97-105-113 stitches from the front piece, cast on 4-6-8-10-12-14 stitches for the second armhole, continue A.1 from the right side over the 81-85-91-97-105-113 stitches from the back piece and cast on 2-3-4-5-6-7 stitches = 170-182-198-214-234-254 stitches. Insert 1 marker-thread in the middle of the 4-6-8-10-12-14 stitches cast on under each sleeve. Allow the threads to follow your work onwards; they are used when working the split in each side. Work in the round, with stockinette stitch on the front piece and A.1 on the back piece. When the piece measures 46-48-50-51-53-55 cm = 18"-19"-19¾"-20"-21"-21⅝", measured from the top front shoulder, divide for the split in each side as follows: Place the 85-91-99-107-117-127 stitches on the back piece on a stitch holder and work the front piece. FRONT PIECE: Change to circular needle size 3.5 MM = US 4. Knit 1 row from the right side and increase 26-28-28-32-34-38 stitches evenly spaced – read INCREASE TIP-2 = 111-119-127-139-151-165 stitches. Work as follows from the wrong side: 1 edge stitch, * purl 1, knit 1 *, work from *-* until there are 2 stitches left, purl 1 and 1 edge stitch. Continue this rib back and forth for 8-8-8-9-9-9 cm = 3⅛"-3⅛"-3⅛"-3½"-3½"-3½". Bind off – you can use Italian bind-off. The vest measures approx. 54-56-58-60-62-64 cm = 21¼"-22"-22¾"-23⅝"-24⅜"-25¼" from the top of the shoulder. BACK PIECE: Work in the same way as the front piece. SLEEVE EDGES: Lay the piece flat and insert 1 marker at the top of the armholes (top of shoulder). Start from the right side at the bottom of the armhole and knit up 124-130-136-142-148-154 stitches around the armhole, with short circular needle size 3.5 MM = US 4 – make sure you have equal numbers of stitches on each side of the armhole. Work rib in the round (knit 1, purl 1). AT THE SAME TIME every 2nd round, decrease 2 stitches under the sleeve as follows: Work until there is 1 stitch left before the knitted stitch mid-under the sleeve, slip 2 stitches as if to knit together, knit 1 and pass the slipped stitches over the knitted stitch (= 2 stitches decreased). This will give you a neat sleeve edge. Work until the rib measures 4 cm = 1½". Bind off in the same way as on the front and back pieces. Work the other sleeve edge in the same way. NECK: Start on one shoulder and knit up from the right side 98-98-108-108-114-114 stitches around the neck, inside 1 edge stitch, using short circular needle size 3.5 MM = US 4. Work rib in the round (knit 1, purl 1) for 11-11-11-13-13-13 cm = 4⅜"-4⅜"-4⅜"-5⅛"-5⅛"-5⅛". Bind off a little loosely. Fold the neck double to the inside and sew down. To avoid the neck being tight and rolling outwards, it is important that the seam is elastic. |
|||||||||||||
Diagram explanations |
|||||||||||||
|
|||||||||||||
 |
|||||||||||||
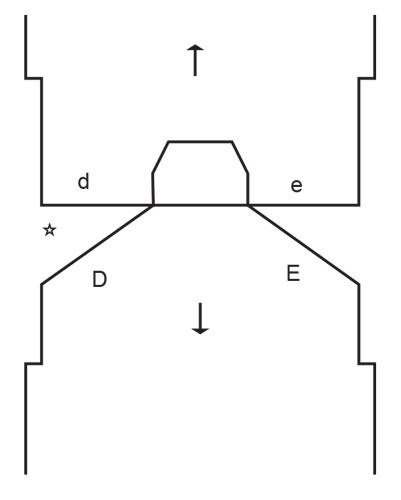 |
|||||||||||||
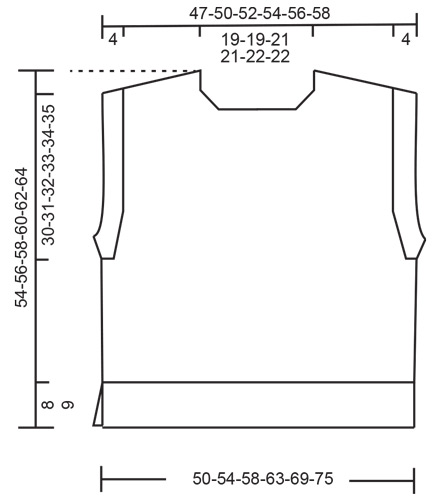 |
|||||||||||||
Have you finished this pattern?Tag your pictures with #dropspattern #feelthebeatvest or submit them to the #dropsfan gallery. Do you need help with this pattern?You'll find 29 tutorial videos, a Comments/Questions area and more by visiting the pattern on garnstudio.com. © 1982-2026 DROPS Design A/S. We reserve all rights. This document, including all its sub-sections, has copyrights. Read more about what you can do with our patterns at the bottom of each pattern on our site. |
|||||||||||||







Post a comment to pattern DROPS 244-30
We would love to hear what you have to say about this pattern!
If you want to leave a question, please make sure you select the correct category in the form below, to speed up the answering process. Required fields are marked *.