
Popular categories
Looking for a yarn?


Comments / Questions (152)
![]() Danaé Loeb wrote:
Danaé Loeb wrote:
Bonjour, J'arrive au raglan mais ne comprends pas cette phrase : Diminuer 27-30-32-36-38 fois au total tous les 2 tours et 7 fois tous les tours. Pouvez-vous la détailler svp ? Merci d'avance !
29.01.2025 - 14:17DROPS Design answered:
Bonjour Mme Loeb, vous allez maintenant diminuer pour le raglan (8 mailles à chaque tour de diminutions) comme indiqué sous RAGLAN: au tout début des explications, d'abord tous les 2 tours, soit (1 tour avec diminutions, 1 tour sans diminutions) x 27 fois en ttaille M - suivez les indications SUR L'ENDROIT, puis vous diminuez pour le raglan 7 fois tous les tours = aussi bien sur l'endroit (comme avant) que sur l'envers (suivez les indications SUR L'ENVERS ci-dessus. Bon tricot!
29.01.2025 - 16:31
![]() Linda wrote:
Linda wrote:
Hej, i resåren stickas diagram A1 två gånger efter varann i strl XL. Det innebär 4 avigmaskor i rad. Är det rätt?
27.01.2025 - 16:42DROPS Design answered:
Hej Linda. Ja det stämmer. Mvh DROPS Design
28.01.2025 - 08:17
![]() Anni wrote:
Anni wrote:
Tähän en ole saanut vastausta: Koko XL, onko ohje oikein? 28 silmukalla A1, joustinneuleeseen tulee sen mukaan 4 nurjaa silmukkaa. Samoin mallineule näyttää epäsymmetriseltä, kun palmikoiden väliin jää 4 nurjaa silmukkaa. Onkohan kysymystä ymmärretty? Onko joku XL koon tekijällä tullut samaa ongelmaa?
18.01.2025 - 17:53DROPS Design answered:
Hei, tarkistamme tämän ohjeen piirroksia. Ohjeeseen tehdään tarvittaessa korjaus, jotta työhön ei tulisi 4 peräkkäistä nurjaa silmukkaa.
28.01.2025 - 19:24
![]() Inge Knudsen wrote:
Inge Knudsen wrote:
Jeg skak i gang med at strikke Ice Island opskriften, men synes, det er voldsomt mange masker, der skal slås op til en størrelse XL = 344 masker. Er det et korrekt tal?
03.01.2025 - 14:10DROPS Design answered:
Hei Inge. Ja, det er riktig. Det er en vrangbord som trekker seg sammen. Når vrangborden er ferdig felles det også 30 masker = 310 masker. mvh DROPS Design
07.01.2025 - 13:41
![]() Anni wrote:
Anni wrote:
Koko XL, onko ohje oikein? 28 silmukalla A1, joustinneuleeseen tulee sen mukaan 4 nurjaa silmukkaa. Samoin mallineule näyttää epäsymmetriseltä, kun palmikoiden väliin jää 4 nurjaa silmukkaa.
03.01.2025 - 11:02
![]() Aicha Nasri wrote:
Aicha Nasri wrote:
Je tricote le modèle en xxl, j' ai pris la longueur de la personne pour la qu elle je fais le pull de la côte jusqu'aux aisselles, elle est 40 cm .,alors que vous préconisez 35cm .n ,est ce pas trop ce je fais ?
24.12.2024 - 20:06DROPS Design answered:
Bonjour Mme Nasri, le bas du pull (avant les emmanchures) mesure 36 cm en taille XXXL (5 cm de côtes + 31 cm de point fantaisie), mais 72 cm de longueur totale en prenant en compte les 31 cm du raglan et les 5 cm de l'épaule, pensez à vérifier/ajuster sur la longueur totale du pull mesuré. Bon tricot!
02.01.2025 - 11:11
![]() D J Williams wrote:
D J Williams wrote:
It would be more helpful if I could read all the comments made in different languages rather than just my own language We are united by a love of knitting and may be experiencing the same issues yet I cannot read other comments and questions Can’t you add a translate button
19.12.2024 - 09:03
![]() Davina Williams wrote:
Davina Williams wrote:
I have started to knit ice island for my husband. I got Quite a way up the pattern and had to pull it out because the repeats of A5 and A8 didn’t look right. The pattern looked unbalanced. So I’ve started again and combined A5 & A8 to cover the 28 stitches instead of 2 x A5 . Much better to look at in my opinion. Has anyone else had this issue?
19.12.2024 - 09:01
![]() Anna wrote:
Anna wrote:
Dzień dobry. Mam pytanie o dodawanie oczek pod rękawem. W opisie mamy :Dalej przerabiać nowe oczka wg schematów A.9/A.10, aż będzie wystarczająca liczba oczek na cały motyw. Jak przerabiać oczka w 3 okrążeniu schematu A9 i A10 gdzie jest czarna kreska? Czy dodane oczka zawsze przerabiamy na prawo i dopiero gdy będzie 8 oczek dodanych, to wtedy przerabiamy schemat czyli przekładamy 3 oczka z tyłu drutu i robimy warkocz?
11.12.2024 - 10:31DROPS Design answered:
Witaj Aniu, dokładnie jest tak jak piszesz. Miłej pracy!
12.12.2024 - 08:49
![]() JALLAIS wrote:
JALLAIS wrote:
Je commence par la manche pour faire ce pull et je m’aperçois dès le premier rang après les côtés, je ne suis pas raccord .c\'est une taille L et je trouve 76 mailles au lieu de 75. Pouvez vous m’aider merci
10.12.2024 - 10:55DROPS Design answered:
Bonjour Mme Jallais, mettez bien un marqueur entre chaque diagramme pour bien repérer chacun d'entre eux: A.4 (1 m), A.9(8m), A.6 (17 m), A.7 (24 m), A.6 (17 m), A.10(8 m) = 1+8+17+24+17+8=75 m. Bon tricot!
11.12.2024 - 09:15
|
|||||||||||||||||||||||||||||||
Ice Island#iceislandsweater |
|||||||||||||||||||||||||||||||
 |
 |
||||||||||||||||||||||||||||||
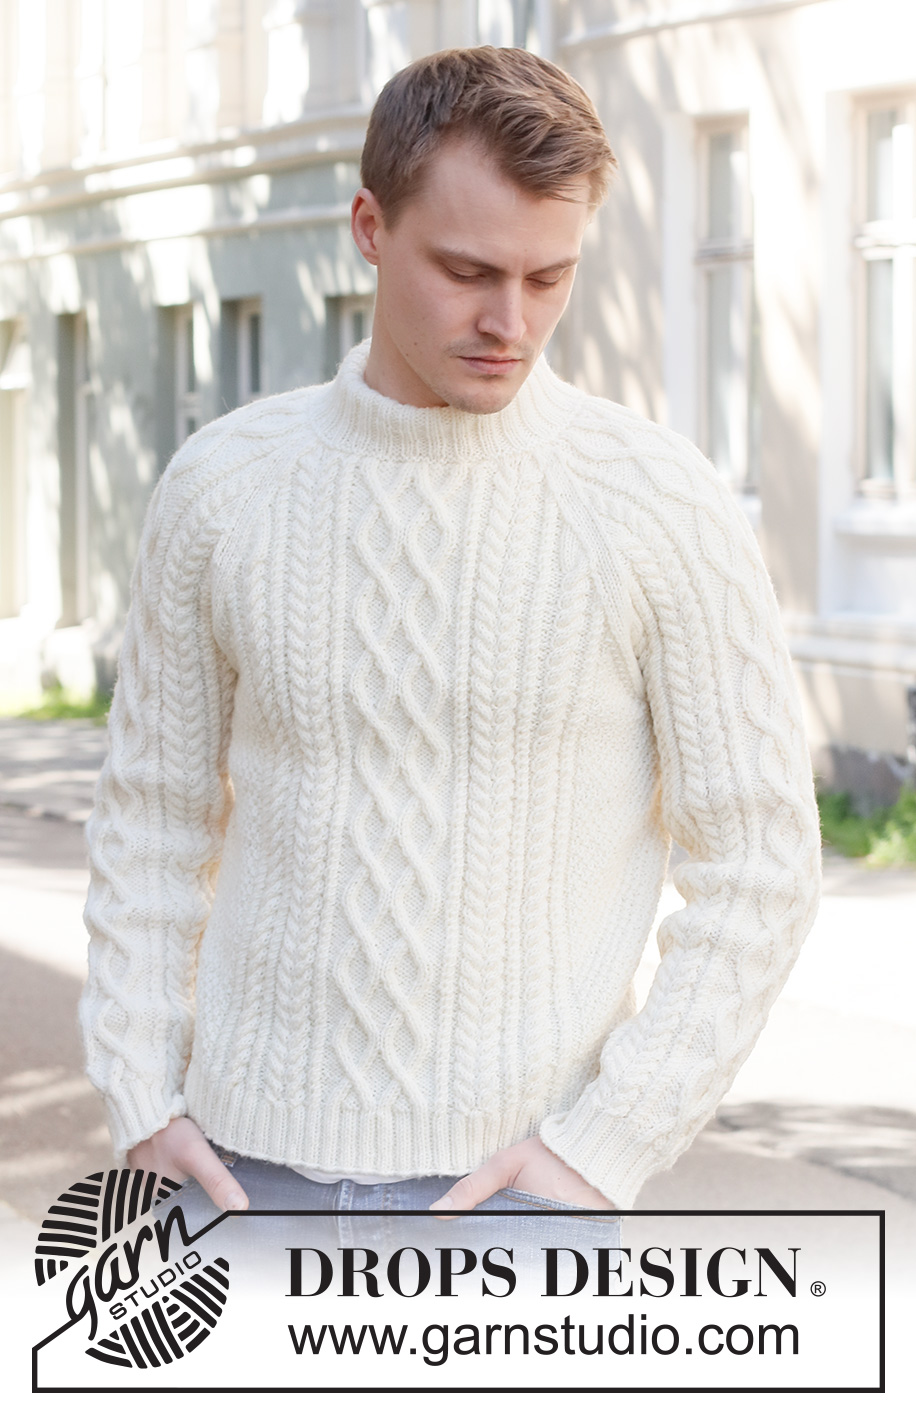
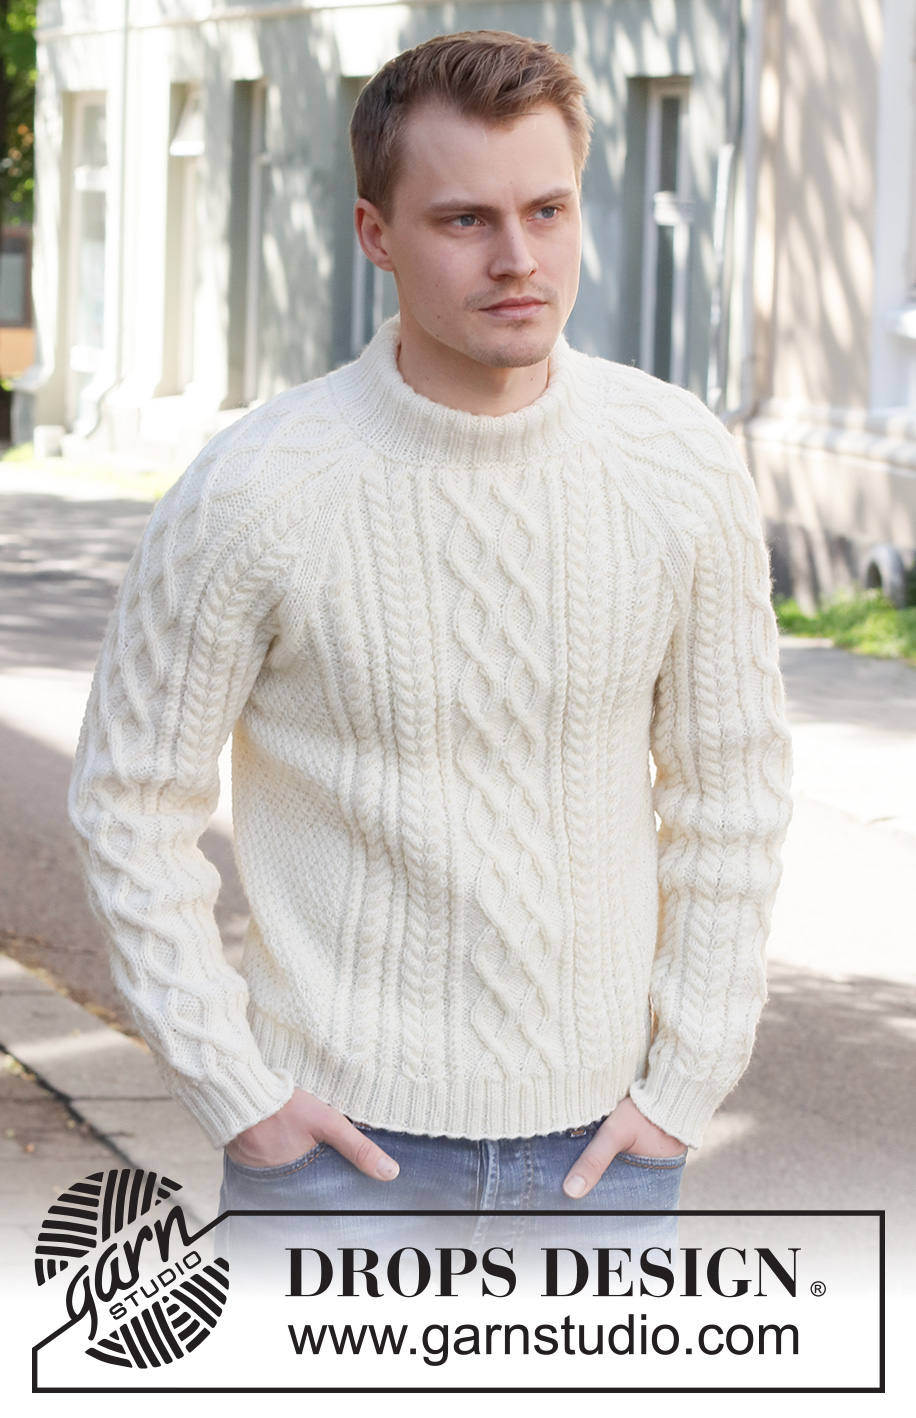
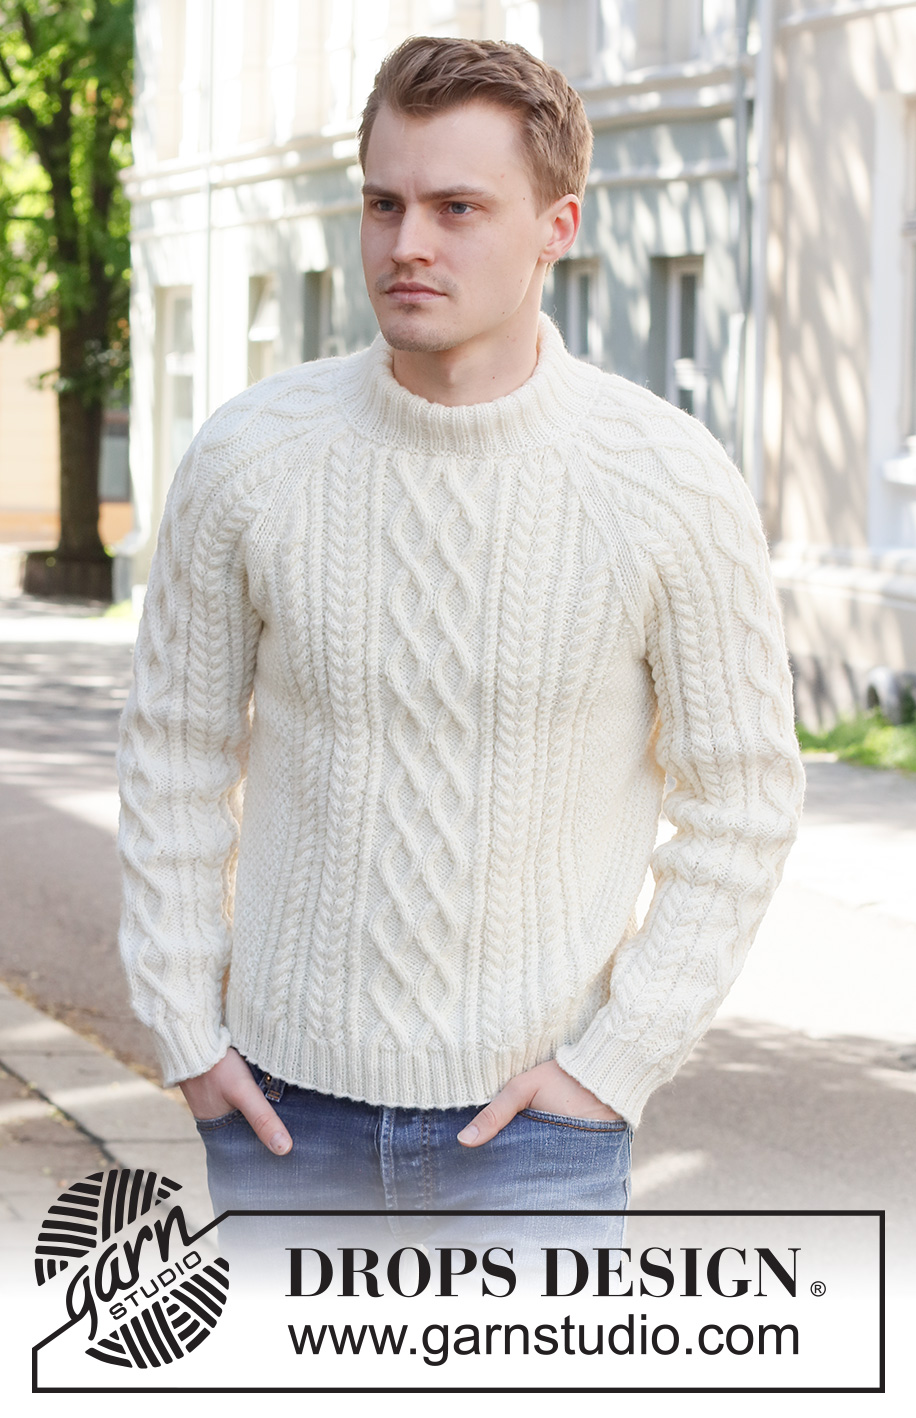
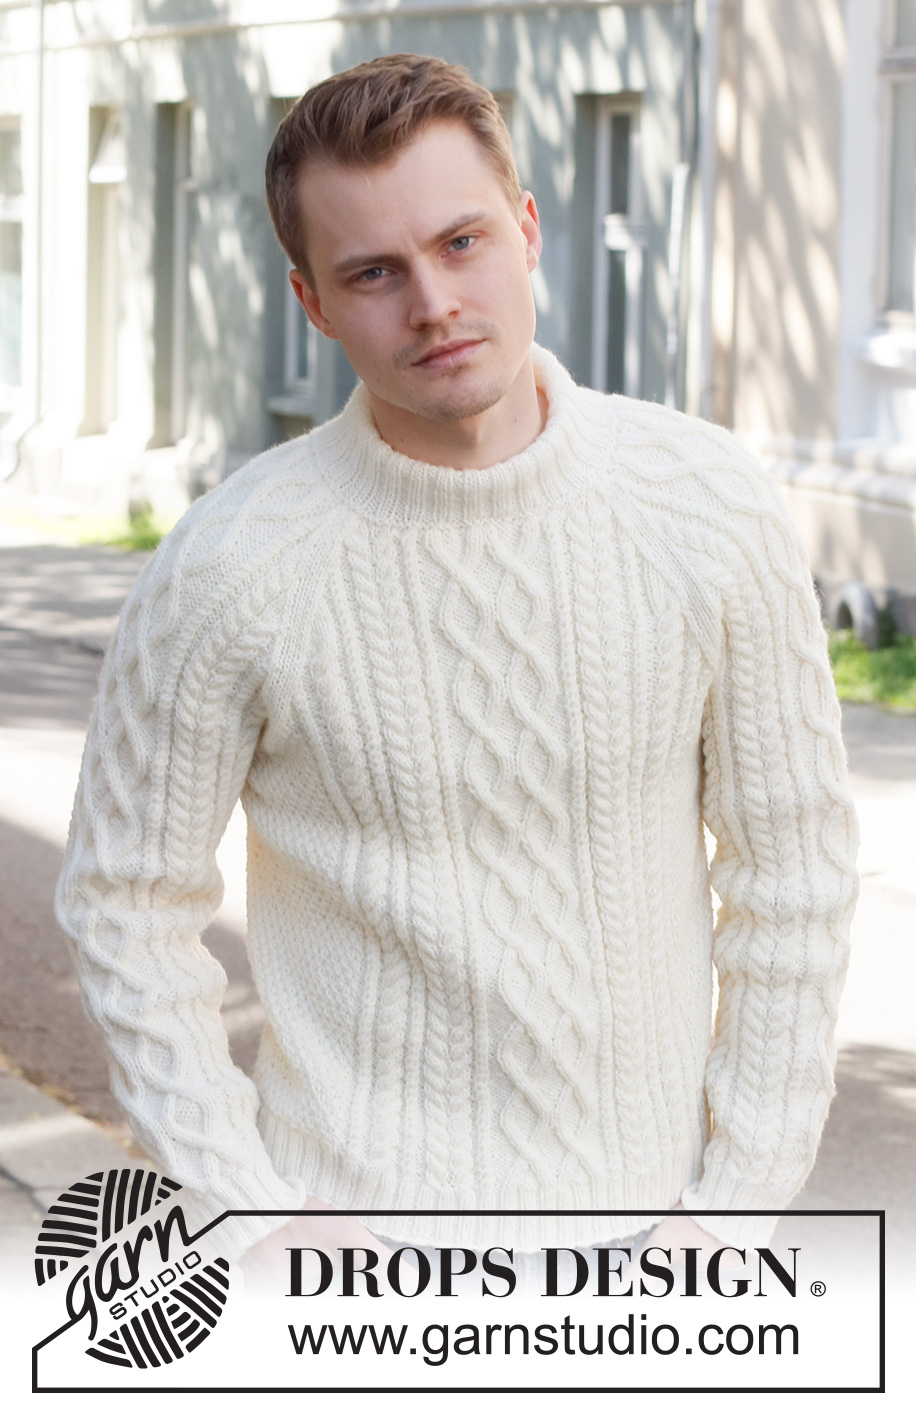
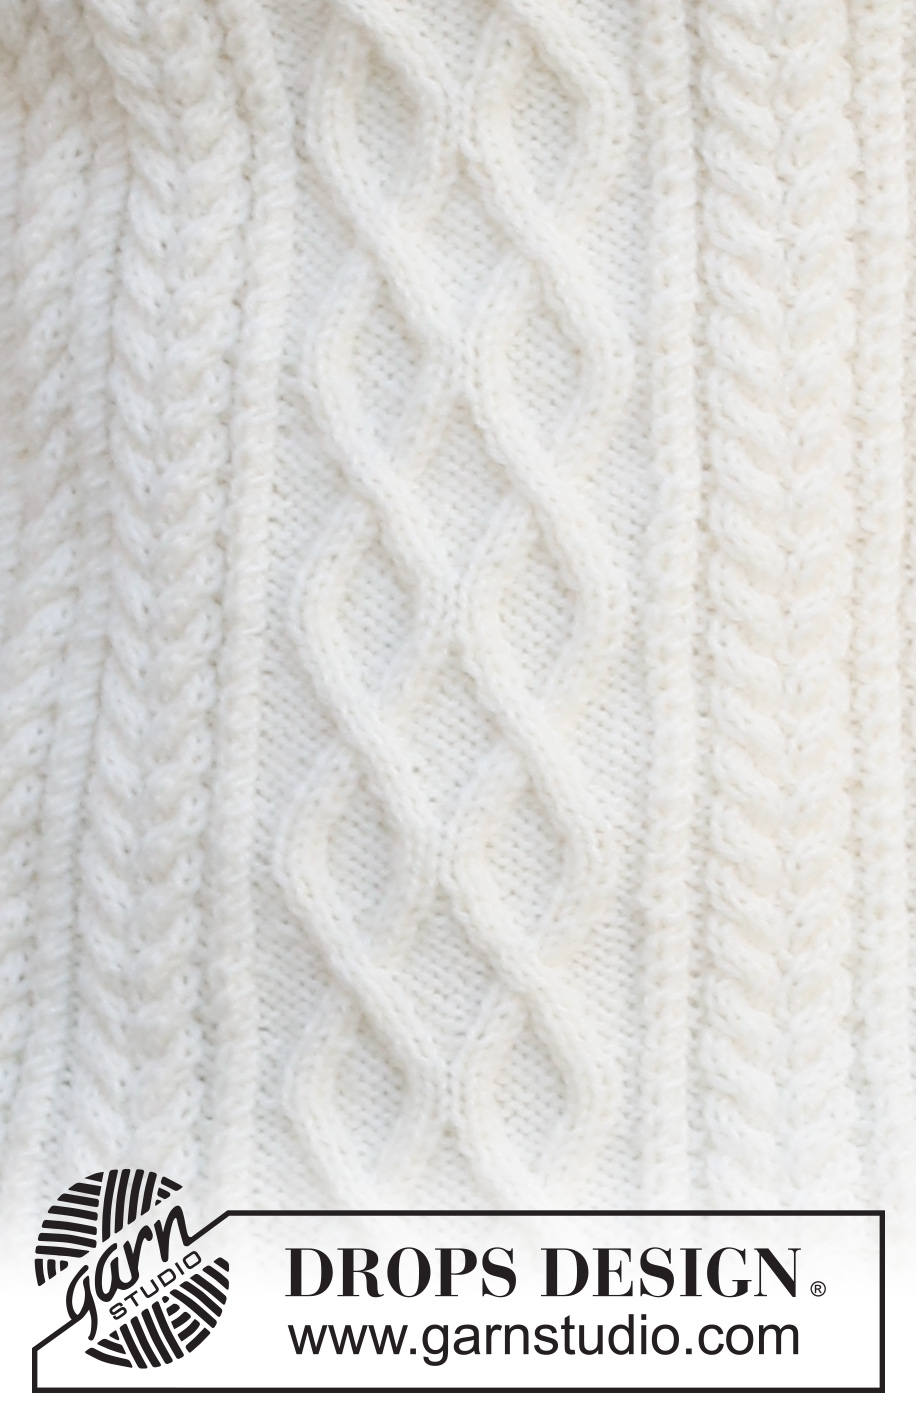
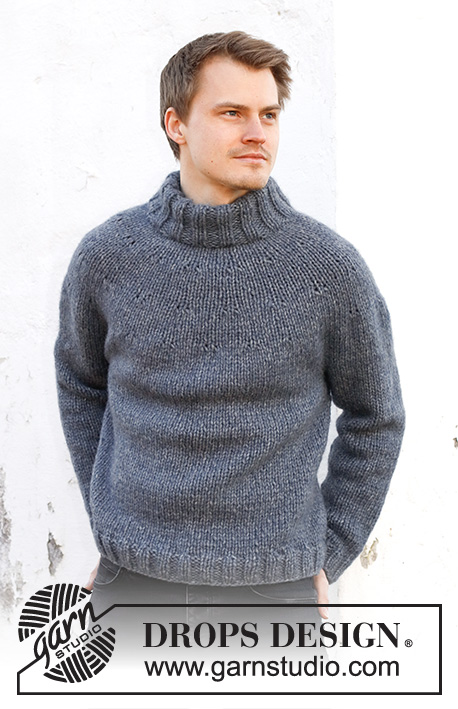
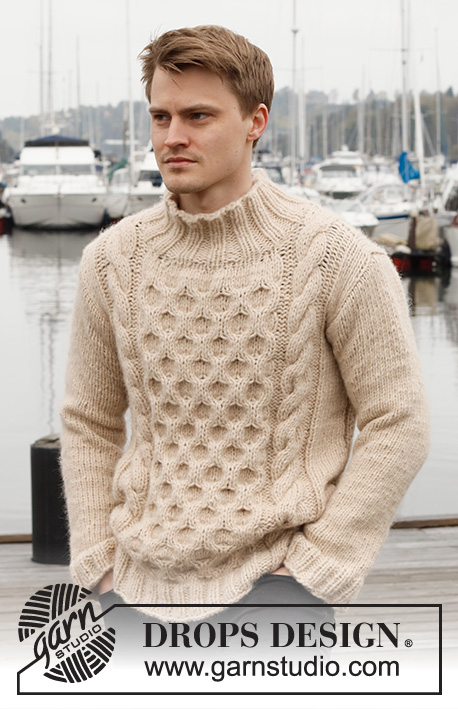
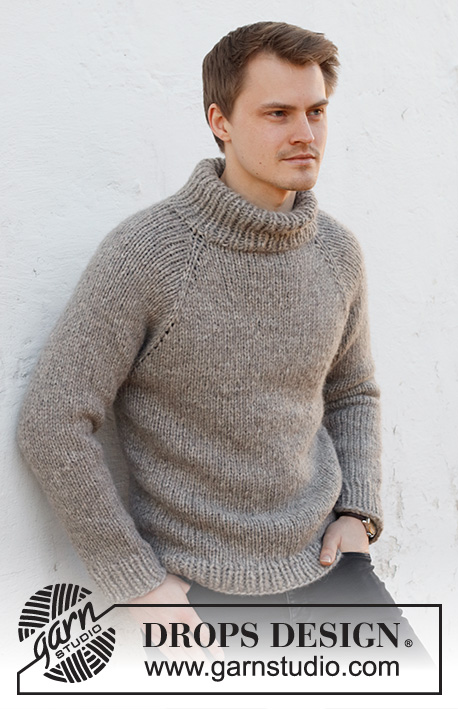
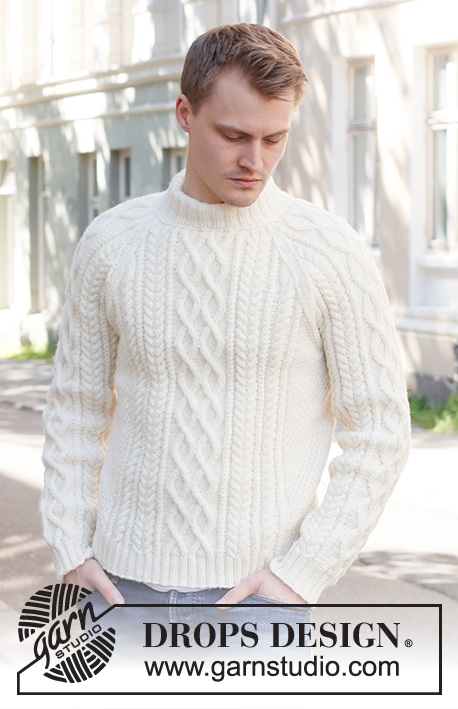
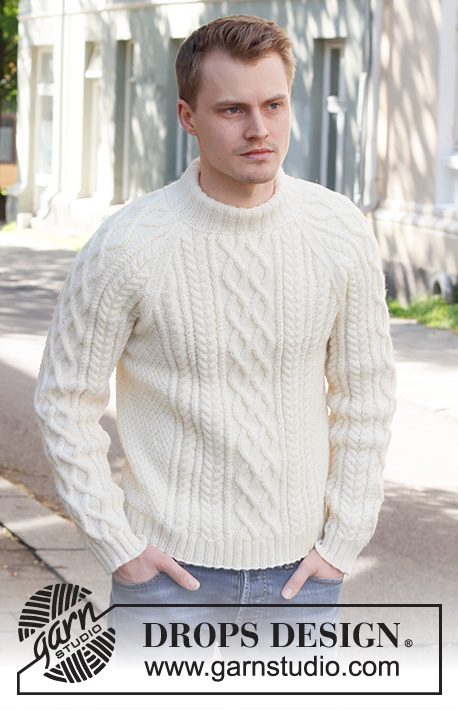
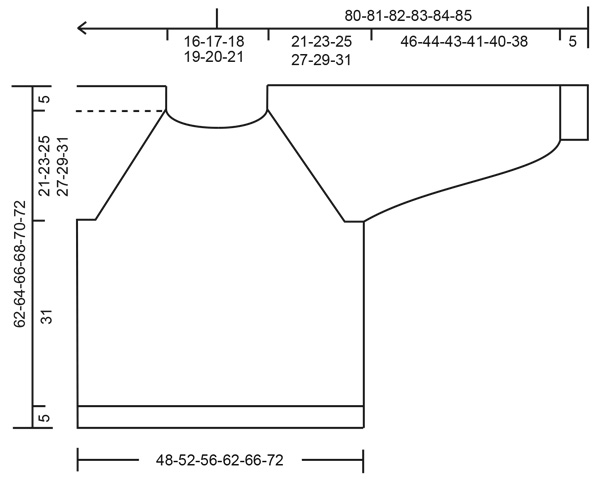
Knitted sweater for men in DROPS Karisma. The piece is worked with raglan, cables and double neck. Sizes S - XXXL.
DROPS 224-10 |
|||||||||||||||||||||||||||||||
|
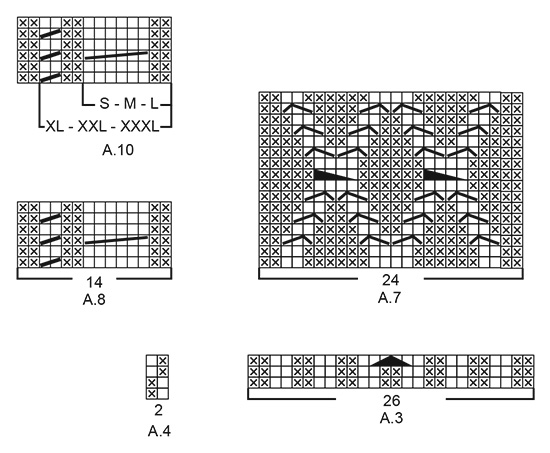
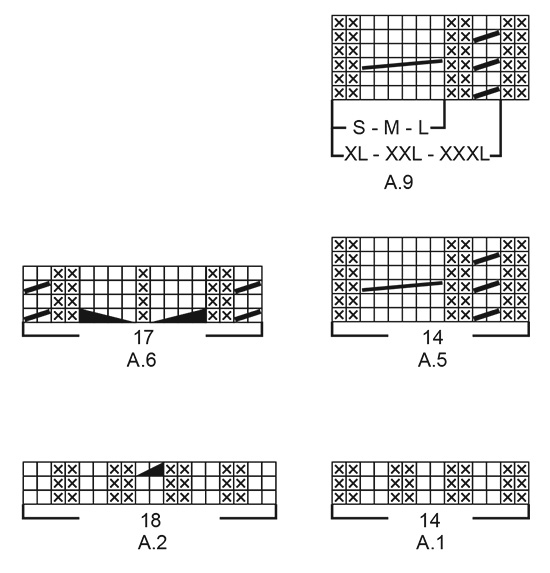
------------------------------------------------------- EXPLANATIONS FOR THE PATTERN: ------------------------------------------------------- KNITTING TIP: In sizes XL, XXL and XXXL, there will be 4 purl stitches next to each other when A.1 is worked 2 times in width. So the rib will match under A.5/A.8, which is worked after the rib. PATTERN: See diagrams A.1 to A.10. The diagrams show all rows in the pattern from the right side. DECREASE/INCREASE TIP (evenly spaced): To work out how to decrease/increase evenly, count the number of stitches to be decreased/increased over (e.g. 23 stitches), and divide by the number of decreases/increases to be made (e.g. 6) = 3.8. In this example, decrease by knitting together approx. each 3rd and 4th stitch. When increasing, make 1 yarn over after approx. each 4th stitch. On the next round work the yarn overs twisted to avoid holes. INCREASE TIP (sleeves): Increase 2 stitches under the sleeve by making 1 yarn over on each side of the marker-stitch as follows: Work the marker-stitch (always the first stitch in A.4), 1 yarn over, pattern as far as the marker-stitch, 1 yarn over (= 2 stitches increased). On the next round work the yarn overs twisted to avoid holes. Then work the new stitches into A.9/A.10 until you have room for a complete repeat, then work the stitches in A.4. RAGLAN: Decrease to raglan on each side of the marker, in each transition between body and sleeves as follows. FROM RIGHT SIDE: AFTER THE MARKER: Knit 1, slip 1 stitch as if to knit, knit 1 and pass the slipped stitch over the knitted stitch (= 1 stitch decreased) BEFORE THE MARKER: Work until there are 3 stitches left before the marker, knit 2 together, knit 1 (= 1 stitch decreased). FROM WRONG SIDE: AFTER THE MARKER: Purl 1, purl 2 together (= 1 stitch decreased) BEFORE THE MARKER: Work until there are 3 stitches left before the marker, purl 2 twisted together, purl 1 (= 1 stitch decreased). ------------------------------------------------------- START THE PIECE HERE: ------------------------------------------------------- SWEATER – SHORT OVERVIEW OF THE PIECE: The body is worked in the round with circular needle as far as the armholes. The sleeves are worked in the round with double pointed needles/short circular needle, bottom up. The body and sleeves are placed on the same circular needle and the yoke worked, decreasing to raglan at the same time. Stiches are bind off for the neck mid-front and the piece continued back and forth. The neck is worked to finish. BODY: Cast on 272-288-304-344-360-392 stitches with circular needle size 3.5 MM = US 4 and DROPS Karisma. Knit 1 round. Then work the following rib: Purl 1, knit 2, * purl 2, knit 2 *, work from *-* over the next 20-24-28-24-28-36 stitches, work A.1 over the next 14-14-14-28-28-28 stitches (= 1-1-1-2-2-2 repeats of 14 stitches – read KNITTING TIP), A.2 (= 18 stitches), A.3 (= 26 stitches), A.2, A.1 over the next 14-14-14-28-28-28 stitches (= 1-1-1-2-2-2 repeats of 14 stitches – read KNITTING TIP), * knit 2, purl 2 *, work from *-* over the next 44-52-60-52-60-76 stitches, knit 2, A.1 over the next 14-14-14-28-28-28 stitches – read KNITTING TIP, A.2, A.3, A.2, A.1 over the next 14-14-14-28-28-28 stitches – read KNITTING TIP, * knit 2, purl 2 *, work from *-* over the next 20-24-28-24-28-36 stitches, knit 2 and purl 1. Continue this rib – NOTE: In diagrams A.2 and A.3 repeat the first 2 rounds onwards. When 1 round remains before the piece measures 5 cm = 2", decrease stitches as follows: Work stockinette stitch over the first 23-27-31-27-31-39 stitches and decrease 6-6-6-6-6-8 stitches evenly over these stitches – read DECREASE/INCREASE TIP, work A.1 as before over the next 14-14-14-28-28-28 stitches, work the last round in A.2 (= 18 stitches, 1 stitch decreased), work the last round in A.3 (= 26 stitches, 2 stitches decreased), work the last round in A.2 (= 18 stitches, 1 stitch decreased), A.1 as before over the next 14-14-14-28-28-28 stitches, work stockinette stitch over the next 46-54-62-54-62-78 stitches and decrease 13-13-13-13-13-17 stitches evenly over these stitches, A.1 as before over the next 14-14-14-28-28-28 stitches, work the last round in A.2 (= 18 stitches, 1 stitch decreased), work the last round in A.3 (= 26 stitches, 2 stitches decreased), work the last round in A.2 (= 18 stitches, 1 stitch decreased), A.1 as before over the next 14-14-14-28-28-28 stitches, work stockinette stitch over the last 23-27-31-27-31-39 stitches and decrease 7-7-7-7-7-9 stitches evenly over these stitches = 238-254-270-310-326-350 stitches. The rib is now finished. Insert 1 marker in the first stitch and 1 marker in the 120th-128th-136th-156th-164th-176th stitch (= sides). Allow these markers to follow your work onwards; they are used when binding off for the armholes. Change to circular needle size 4.5 MM = US 7. Work the next round as follows: A.4 over the first 17-21-25-21-25-31 stitches, A.5 over the next 14-14-14-28-28-28 stitches (= 1-1-1-2-2-2 repeats of 14 stitches), A.6 (= 17 stitches), A.7 (= 24 stitches), A.6, A.8 over the next 14-14-14-28-28-28 stitches (= 1-1-1-2-2-2 repeats of 14 stitches), A.4 over the next 33-41-49-41-49-61 stitches (marker sits in the middle of these stitches), A.5 over the next 14-14-14-28-28-28 stitches, A.6, A.7, A.6, A.8 over the next 14-14-14-28-28-28 stitches and A.4 over the last 16-20-24-20-24-30 stitches. Continue this pattern. REMEMBER THE KNITTING GAUGE! When the piece measures 36 cm = 14¼" in all sizes, bind off for the armholes as described below. There is approx. 26-28-30-32-34-36 cm = 10¼"-11"-11¾"-12½"-13⅜"-14¼" left to finished length. Adjust so that next round is an odd numbered row in the diagrams, and bind off the first 6-6-7-7-8-8 stitches, continue the pattern until there are 5-5-6-6-7-7 stitches left before the second marker-stitch, bind off 11-11-13-13-15-15 stitches, work until there are 5-5-6-6-7-7 stitches left on the round and bind off 5-5-6-6-7-7 stitches = 108-116-122-142-148-160 stitches on the front piece and 108-116-122-142-148-160 stitches on the back piece. Cut the strand. Lay the piece to one side and work the sleeves. SLEEVES: Cast on 56-60-60-64-64-68 stitches with double pointed needles size 3.5 MM = US 4 and DROPS Karisma. Knit 1 round, then work rib in the round (knit 2, purl 2) for 5 cm = 2". Knit 1 round where you increase 19-15-15-19-19-15 stitches evenly spaced – remember DECREASE/INCREASE TIP = 75-75-75-83-83-83 stitches. Insert 1 marker in the first stitch – allow the marker to follow your work onwards; it is used when increasing under the sleeve. Change to double pointed needles size 4.5 MM = US 7. Work the next round with pattern as follows: A.4 over the first stitch (marker-stitch), A.9 (= 8-8-8-12-12-12 stitches – start the diagram by the mark for your size and work from right to left), A.6 (= 17 stitches), A.7 (= 24 stitches), A.6, A.10 (= 8-8-8-12-12-12 stitches – start at the first stitch in A.10 and work from right to left as far as the mark for your size). Continue this pattern. When the piece measures 8-10-7-8-9-6 cm = 3⅛"-4"-2¾"-3⅛"-3½"-2⅜", increase 2 stitches under the sleeve – read INCREASE TIP. Increase like this every 4-2½-2½-2½-2-2 cm = 1½"-1"-1"-1"-¾"-¾" a total of 11-15-17-15-17-19 times = 97-105-109-113-117-121 stitches – NOTE: The increased stitches are first worked in A.9/A.10 until there is room for a complete repeat, then worked in A.4. Continue working until the sleeve measures approx. 51-49-48-46-45-43 cm = 20"-19¼"-19"-18"-17¾"-17" (shorter measurements in larger sizes due to wider neck and longer yoke). Try the sleeve on and work to desired length. Adjust so that the next round is an odd numbered row in the diagrams and bind off for the armhole as follows: Bind off the first 6-6-7-7-8-8 stitches, work as before until there are 5-5-6-6-7-7 stitches left and bind off the last 5-5-6-6-7-7 stitches = 86-94-96-100-102-106 stitches. Cut the strand. Work the other sleeve in the same way. YOKE: Place the sleeves on the same circular needle size 4.5 MM = US 7 as the body, where stitches were bind off for the armholes (without working the stitches) = 388-420-436-484-500-532 stitches. Insert a marker thread in each transition between the body and sleeves = 4 marker threads. Allow the threads to follow your work onwards; they are used when decreasing to raglan. Start at the transition between the back piece and the left sleeve – you can insert a marker here to show the start of the round. Continue the pattern as before, with 2 stitches in stockinette stitch on each side of all 4 marker threads. OVERVIEW OF THE NEXT SECTION: On the next round start to decrease to raglan; you will also bind off stitches for the neck mid-front and finish working back and forth from mid-front. When there are not enough stitches for the cables, work stockinette stitch over these stitches. Read RAGLAN and NECK before continuing. RAGLAN: Decrease to RAGLAN on each side of all 4 marker threads – read description above. Decrease every 2nd round a total of 24-27-30-32-36-38 times, then every round 7-7-6-7-4-4 times. NECK: When the piece measures 55-57-59-60-62-64 cm = 21⅝"-22½"-23¼"-23⅝"-24⅜"-25¼" (adjust so the next round is an odd round in the diagrams), decrease 6-6-6-10-10-10 stitches evenly over the middle 24-24-24-32-32-32 in front – remember DECREASE/INCREASE TIP. Then place the middle 30-32-34-42-46-54 stitches on a thread for the neck. Work to the beginning of the round. Cut the strand. Start from the wrong side, by the neck and continue the pattern back and forth. AT THE SAME TIME bind off at the beginning of each row from the neck as follows: 2 stitches 1 time and 1 stitch 1-1-1-2-2-2 times on each side. After all the decreases to raglan and neck there are 98-104-102-112-116-124 stitches on the needle. Cut the strand. DOUBLE NECK: Start mid-back and knit up 134-142-142-162-170-186 stitches around the neck (including the stitches on the thread and on the needle) with short circular needle size 3.5 MM = US 4 and DROPS Karisma. On the next round decrease stitches to avoid the neck being too loose – knit 1 round and decrease to 104-108-112-116-120-124 stitches evenly spaced. Purl 1 round and knit 1 round. Work the next round as follows: Knit 1, * purl 2, knit 2 *, work from *-* until there are 3 stitches left, purl 2 and knit 1. Continue this rib until the neck measures 8-8-8-10-10-10 cm = 3⅛"-3⅛"-3⅛"-4"-4"-4". On the next round increase all purl-2 to purl-3 by making 1 yarn over after each purled section (the yarn overs are purled twisted on the next round to avoid holes). Continue working until the neck measures 11-11-11-13-13-13 cm = 4⅜"-4⅜"-4⅜"-5⅛"-5⅛"-5⅛". Switch to circular needle size 4.5 mm = US 7 and cast off loosely. Bind off with knit over knit and purl over purl. Fold the neck double to the inside and sew down. To avoid the neck being tight and rolling outwards, it is important that the seam is elastic. ASSEMBLY: Sew the opening under each sleeve. |
|||||||||||||||||||||||||||||||
Diagram explanations |
|||||||||||||||||||||||||||||||
|
|||||||||||||||||||||||||||||||
 |
|||||||||||||||||||||||||||||||
 |
|||||||||||||||||||||||||||||||
 |
|||||||||||||||||||||||||||||||
Have you finished this pattern?Tag your pictures with #dropspattern #iceislandsweater or submit them to the #dropsfan gallery. Do you need help with this pattern?You'll find 28 tutorial videos, a Comments/Questions area and more by visiting the pattern on garnstudio.com. © 1982-2026 DROPS Design A/S. We reserve all rights. This document, including all its sub-sections, has copyrights. Read more about what you can do with our patterns at the bottom of each pattern on our site. |
|||||||||||||||||||||||||||||||


With over 40 years in knitting and crochet design, DROPS Design offers one of the most extensive collections of free patterns on the internet - translated to 17 languages. As of today we count 324 catalogs and 12290 patterns - 12280 of which are translated into English (US/in).
We work hard to bring you the best knitting and crochet have to offer, inspiration and advice as well as great quality yarns at incredible prices! Would you like to use our patterns for other than personal use? You can read what you are allowed to do in the Copyright text at the bottom of all our patterns. Happy crafting!
Post a comment to pattern DROPS 224-10
We would love to hear what you have to say about this pattern!
If you want to leave a question, please make sure you select the correct category in the form below, to speed up the answering process. Required fields are marked *.