Comments / Questions (287)
![]() Chriss wrote:
Chriss wrote:
Sorry for the typo errors. Competent should have been the word not compliant...
12.08.2019 - 13:31
![]() Chriss wrote:
Chriss wrote:
Loving the design. Very quick to make. But some of the written patterns seems to be over complicated. If you put arches from dc to dc instead oval loops on the diagram it would make sense that you are going from dc, chains to making a dc... I'm a compliant crocheter but even I'm finding the wording over repetitive. Needs precise and shorter explanations. But I am able to understand the British crochet terms. Great work overall. X
12.08.2019 - 13:27
![]() Chriss wrote:
Chriss wrote:
Hi, on the next round after the armhole and chains. It says inc 9 does that mean increase or including 9 treble groups. If it increases does that mean do 2 treble groups in one 12chain space plus 1 extra in armhole chain space? I do think another treble is required in armhole space. Instead of 6 do 7 for all sizes. Cheers Chriss
12.08.2019 - 13:20DROPS Design answered:
Dear Chriss, you have to increase evenly on the round, ie you will have to increase as if there wouldn't be any chain spaces for armholes, there should be some increases between these chain spaces as well as in the chain spaces. Happy crocheting!
12.08.2019 - 14:34
![]() Corinne wrote:
Corinne wrote:
What happened to the diagrams showing the pictures of each step? that was super helpful and now the link is not working to those pages
07.08.2019 - 15:59DROPS Design answered:
Dear Corinne, for security reasons we had to close down the forum, you will find here how to read diagrams - for any further individual assistance, please feel free to contact the store where you bought the yarn - even per mail or telephone. Happy crocheting!
08.08.2019 - 09:27
![]() Gisela wrote:
Gisela wrote:
Hay un video explicativo? Porque luego del patrón a1 no sé cómo seguir. Gracias
02.08.2019 - 22:56DROPS Design answered:
Hola Gisela. No hay un vídeo completo sobre este patrón. Tienes que continuar según la talla. Para las tallas L/XL-XXL/XXXL trabajar con A.2. Para la talla S/M comenzar ya con A.3. Si sigues teniendo problemas, acude a la tienda DROPS más cercana, dónde te podrán dar ayuda más personalizada.
27.10.2019 - 23:07
![]() Laura Finney wrote:
Laura Finney wrote:
With 22 pages of questions on how to figure out this pattern wouldn't you think it was time to rewrite the pattern so most people with some crochet knowledge could make this wrap? it's a very pretty cardigan but really I'm terrified to even start to make it.
30.07.2019 - 03:29DROPS Design answered:
Dear Mrs Finney, The DROPS patterns are knitted and crocheted by thousands and thousands of people around the world. We understand however that in certain countries, with different knitting/crochet traditions than Scandinavia, our patterns might be written in a way that differs from what some are used to. But of course we want everyone to understand our patterns, so that’s why we have created an extensive library of tutorial videos as well as step by step lessons that explain how to follow the techniques we use and how to read the diagrams in our patterns. Give them a try!
06.08.2019 - 10:51
![]() Verónica wrote:
Verónica wrote:
Tiene el tutorial en español?, no entiendo las instrucciones que están escritas. Muchas gracias.
22.06.2019 - 05:08DROPS Design answered:
Hola Veronica. En este link tienes las explicaciones en español: https://www.garnstudio.com/pattern.php?id=7632&cid=23
23.06.2019 - 22:44
![]() Roxana wrote:
Roxana wrote:
Hola quisiera saber si hay algun video en español
11.06.2019 - 16:16
![]() Veronika Urban wrote:
Veronika Urban wrote:
Ich finde dieses Modell einfah und total chick!
02.06.2019 - 22:35
![]() Almudena wrote:
Almudena wrote:
Si hago la talla M, tengo que hacer el A2 o paso directamente al A3. Con cuántos grupos acabó la A3 en la talla M?
27.04.2019 - 00:06DROPS Design answered:
Hola Almudena. Para la talla M no se trabaja el diagrama A.2. Después de completar A.3 tienes que tener 72 grupos de p.a.d.
28.04.2019 - 20:38
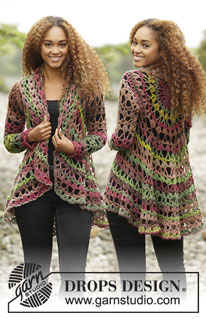
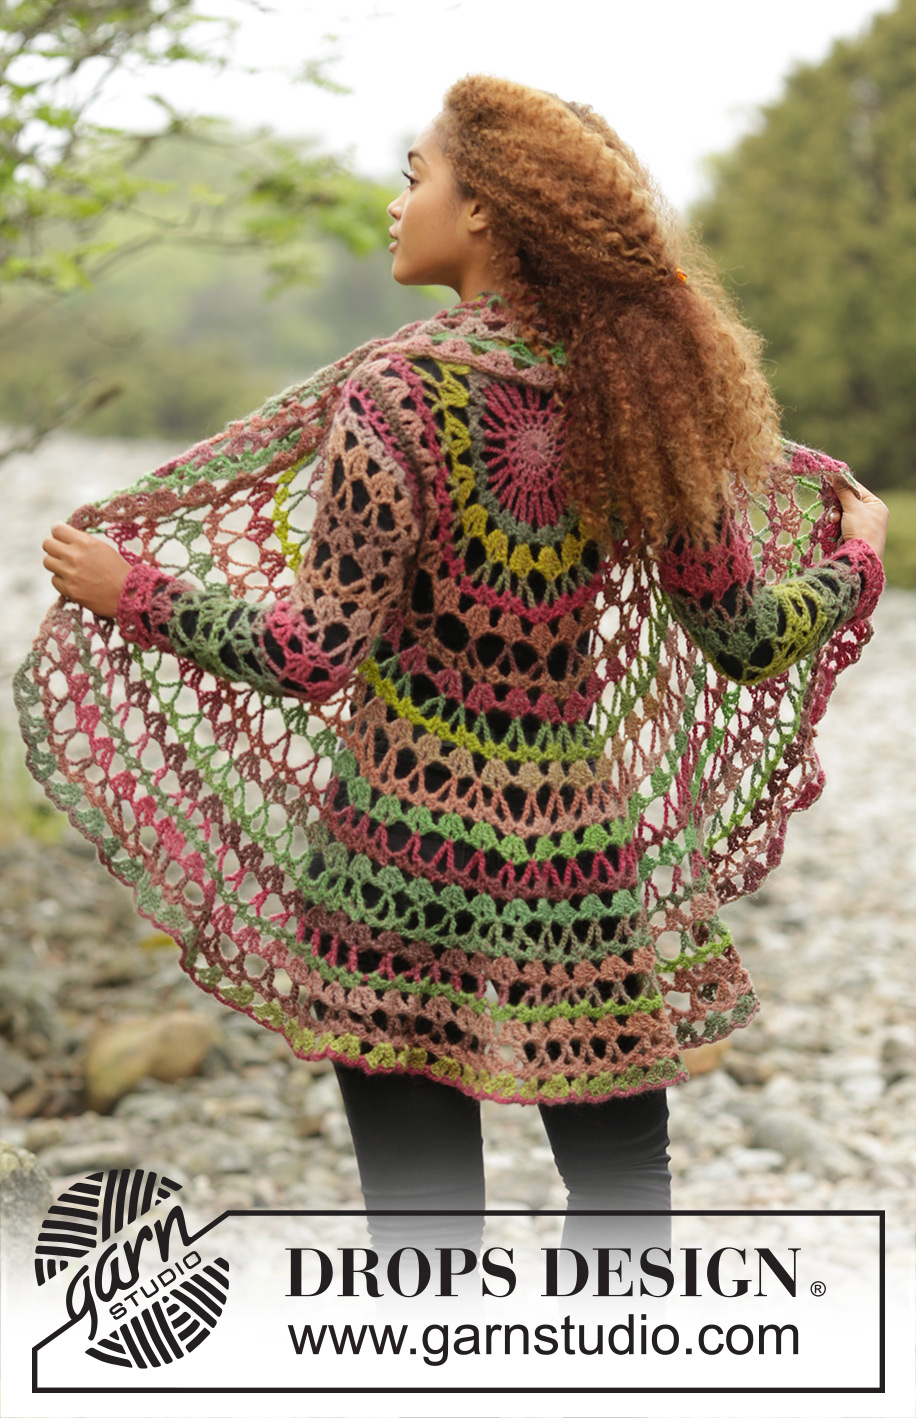
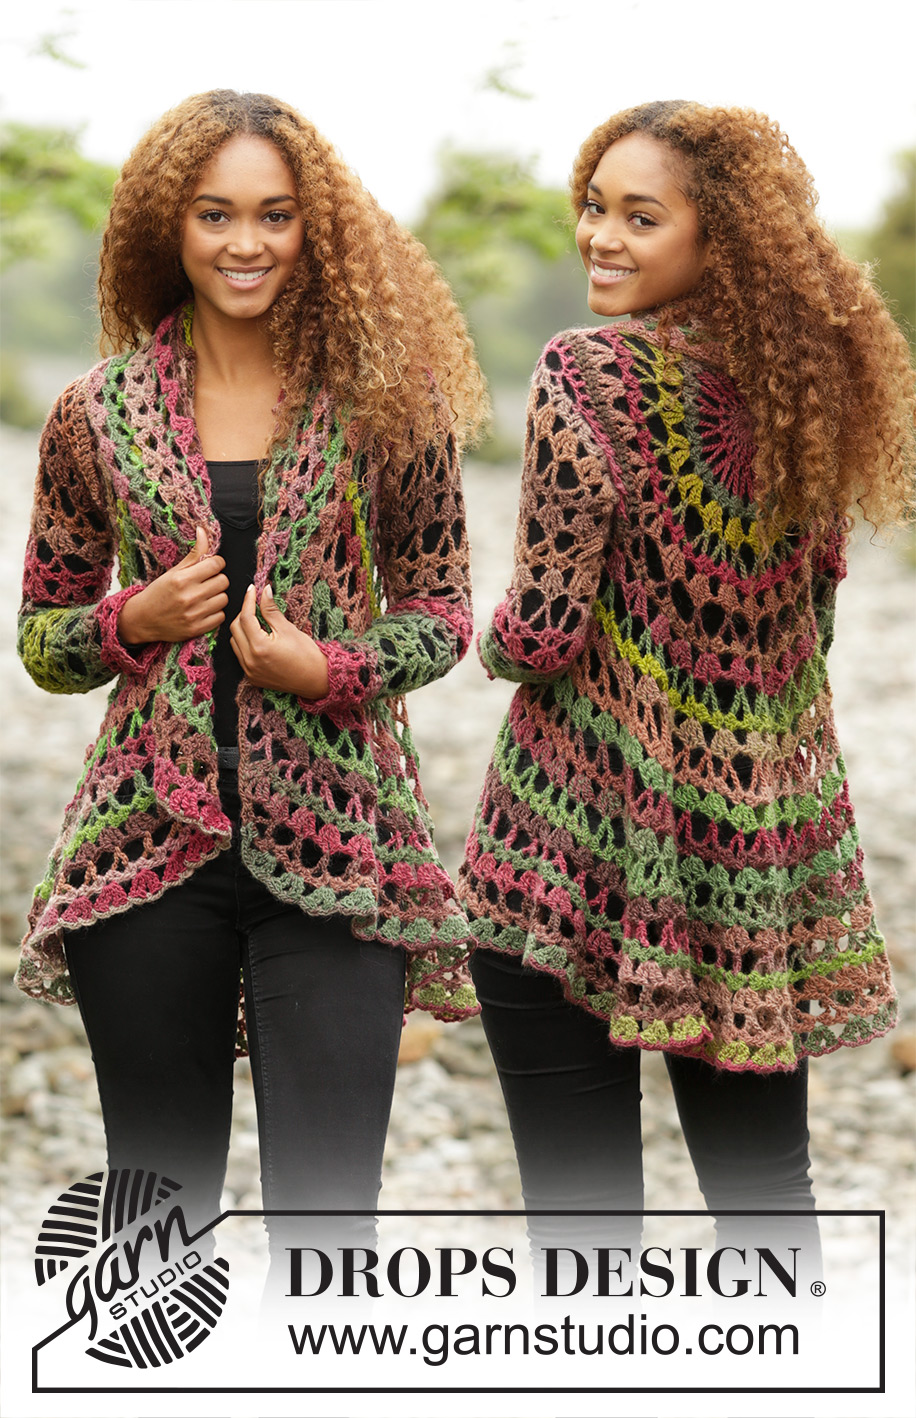
Fall Festival#fallfestivaljacket |
||||||||||||||||||||||||||||||||||||||||||||||
 |
 |
|||||||||||||||||||||||||||||||||||||||||||||
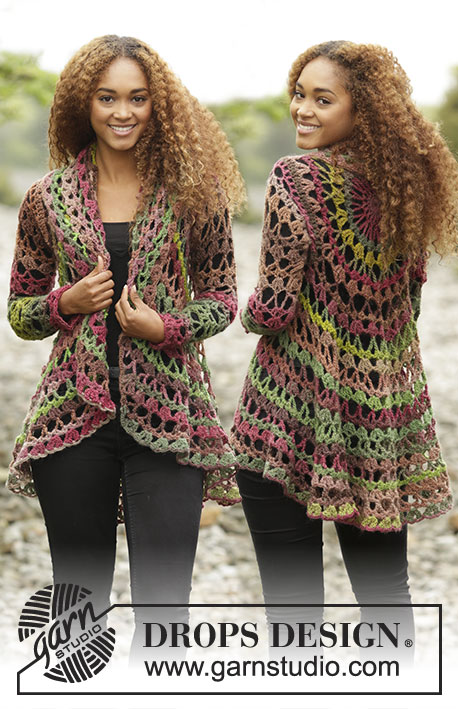
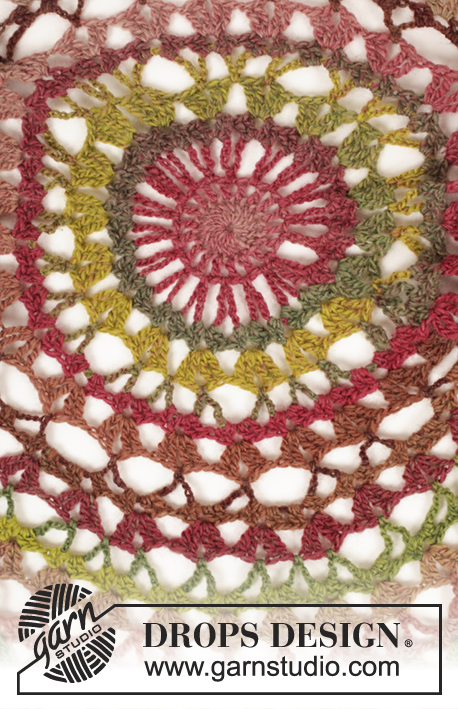
Crochet jacket worked in a circle in 1 strand DROPS Big Delight or 1 strand DROPS Fabel together with 1 strand DROPS Flora. Size: S - XXXL.
DROPS 171-21 |
||||||||||||||||||||||||||||||||||||||||||||||
|
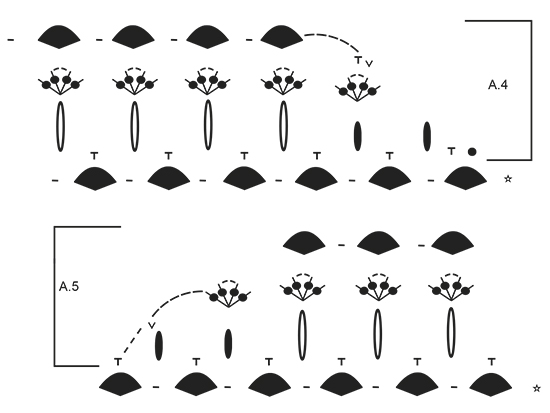
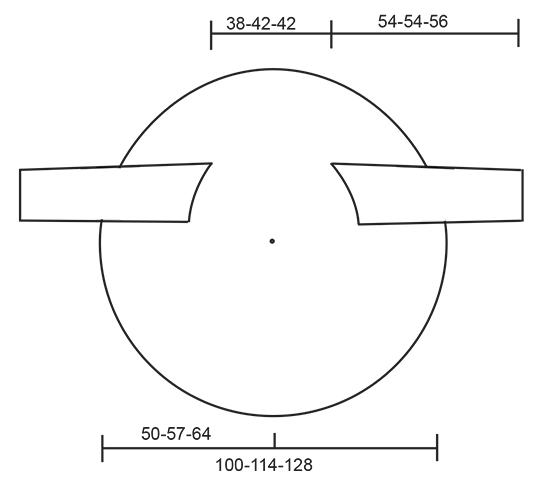
PATTERN: See diagrams A.1 to A.5. CROCHET INFO: Replace first sc at beg of round with ch 1, finish round with 1 sl st in 1st ch at beg of round. Replace first dc at beg of round with ch 3, finish round with 1 sl st in 3rd ch from beg of round. Replace first tr at beg of round with ch 4, finish round with 1 sl st in 4th ch from beg of round. ---------------------------------------------------------- JACKET WORKED IN A CIRCLE: Crochet 4 ch on hook SIZE 5.5 mm/US 9 with Big Delight (or DROPS Fabel and DROPS Flora) and form a ring with 1 sl st in first ch. Then work according to A.1. READ CROCHET INFO! REMEMBER THE CROCHET GAUGE! When A.1 has been worked, circle measures approx. 33 cm / 13" in diameter and there are 27 tr-groups on round. Size L/XL-XXL/XXXL: Work according to A.2, on first round in A.2 inc 9 ch-spaces evenly (inc the same way as on 6th round in A.1, inc 1 ch-space as follows: Work 1 sc around ch-space in the middle of tr-group, 9 ch, 1 sc around ch between tr-groups, 9 ch, 1 sc around ch-space in the middle of next tr-group) = 36-36 ch-spaces. Work A.2 1 time vertically. ALL SIZES: = 27-36-36 tr-groups. Work next round as round 1 in A.3, AT THE SAME TIME work armholes as follows: 1 sc around ch-space in the middle of tr-group, work 30-33-36 loose ch, skip 5-6-7 tr-groups, 1 sc around ch-space in the middle of next tr-group (armhole has been worked), * 12 ch, 1 sc around ch-space in the middle of next tr-group *, repeat from *-* 8-14-12 times in total, work 30-33-36 loose ch, skip 5-6-7 tr-groups, 1 sc around ch-space in the middle of next tr-group (another armhole has been worked), * 12 ch, 1 sc around ch-space in the middle of next tr-group *, repeat from *-* the entire round and finish with 1 sl st in first sc at beg of round (instead of 1 sc around next ch-space). Work next round as round 2 in A.3 as follows: Work the same way as before with 2 dc + 2 ch + 2 dc around every ch-space, around every ch-space for armhole work 6-7-8 dc-groups, AT THE SAME TIME inc 9 dc-groups evenly on round, inc 1 dc-group by working 2 dc + 2 ch + 2 dc + 2 dc + 2 ch + 2 dc around 1 ch-space = 36-45-45 dc-groups. ROUND 3: Work 2 tr + 2 ch + 2 tr around ch-space in the middle of every dc-group and 1 ch between every tr-group = 36-45-45 tr-groups with 1 ch between each. Continue to work according to A.3, AT THE SAME TIME inc 9 ch-spaces evenly every time 1st round is worked, as follows: ROUND 1: Work sl sts until middle of first ch-space (in the middle of a tr-group), 1 sc, * 12 ch, 1 sc around next ch-space in the middle of a tr-group *, repeat from *-* the entire round AT THE SAME TIME inc 9 ch-spaces evenly on round = 45-54-54 ch-spaces (finish round with 6 ch and 1 dtr in first sc at beg of round). ROUND 2: Work 2 dc + 2 ch + 2 dc around every ch-space the entire round = 45-54-54 dc-groups. ROUND 3: Work 2 tr + 2 ch + 2 tr around every ch-space in dc-group and 1 ch between every tr-group the entire round = 45-54-54 tr-group with 1 ch between each. Repeat 1st-3rd round 3-3-4 more times, AT THE SAME TIME inc 9 ch-spaces every time 1st round is worked = 72-81-90 tr-group. To get an oval shape on jacket work back and forth only over the bottom 47-54-61 tr-groups, do not work over the middle 25-27-29 tr-groups at the top of neck. Beg from RS and repeat 1st-3rd row in A.3 as before 2 times in total (i.e. back is 6 rows longer vertically), to get a nice transition on every turn work as shown in A.4 and A.5, AT THE SAME TIME inc 7 ch-spaces every time 1st row is worked (= 86-95-104 tr-groups in total on round incl tr-groups towards the neck). Finish with 1 round ch-spaces around the entire jacket (from RS) as follows: * ch 4, 1 sc around ch-space in the middle of a tr-group, ch 4, 1 sc before next tr-group *, repeat from *-* the entire round, fasten off. SLEEVE: Work 60-66-72 dc around armhole (approx. 5 dc in every tr-group and approx. 30-33-36 dc around ch-space – beg mid under sleeve). Work next round as follows: * 1 dc in first/next dc, ch 1, skip 1 dc *, repeat from *-* the entire round = 30-33-36 dc + 30-33-36 ch. Continue to work as follows: ROUND 1: * ch 6, skip 5 sts, 1 sc in next st *, repeat from *-* the entire round = 10-11-12 ch-spaces. ROUND 2: Work 2 dc + 2 ch + 2 dc around every ch-space the entire round = 10-11-12 dc-groups. ROUND 3: Work 2 tr + 2 ch + 2 tr around every ch-space in dc-group and 1 ch between every tr-group the entire round = 10-11-12 tr-group with 1 ch between each. ROUND 4: * 12 ch, 1 sc around ch-space in the middle of tr-group *, repeat from *-* the entire round = 10-11-12 ch-spaces but at the same time dec 1 ch-space on round mid under sleeve as follows: 1 sc around ch-space in the middle of next to last tr-group on round, ch 6, 1 dc around ch-space in the middle of tr-group to be skipped, ch 6, 1 sc around ch-space in the middle of next tr-group). On new round work dc-group mid under sleeve in dc between the 2 ch-spaces with 6 ch = 9-10-11 dc-groups. Repeat 2nd-4th round and dec at the same time 1 ch-space every 3rd round so that there is 1 tr-group/ch-space less on round. When there are 5-6-7 tr-groups/ch-spaces on round, work without dec until piece measures 54-54-56 cm / 21¼"-21¼"-22", or desired measurements, try the jacket while working. Fasten off and repeat on the other sleeve. |
||||||||||||||||||||||||||||||||||||||||||||||
Diagram explanations |
||||||||||||||||||||||||||||||||||||||||||||||
|
||||||||||||||||||||||||||||||||||||||||||||||
 |
||||||||||||||||||||||||||||||||||||||||||||||
 |
||||||||||||||||||||||||||||||||||||||||||||||
 |
||||||||||||||||||||||||||||||||||||||||||||||
 |
||||||||||||||||||||||||||||||||||||||||||||||
Have you finished this pattern?Tag your pictures with #dropspattern #fallfestivaljacket or submit them to the #dropsfan gallery. Do you need help with this pattern?You'll find 7 tutorial videos, a Comments/Questions area and more by visiting the pattern on garnstudio.com. © 1982-2026 DROPS Design A/S. We reserve all rights. This document, including all its sub-sections, has copyrights. Read more about what you can do with our patterns at the bottom of each pattern on our site. |
||||||||||||||||||||||||||||||||||||||||||||||










Post a comment to pattern DROPS 171-21
We would love to hear what you have to say about this pattern!
If you want to leave a question, please make sure you select the correct category in the form below, to speed up the answering process. Required fields are marked *.