
Popular categories
Looking for a yarn?


Comments / Questions (28)
![]() Carlota wrote:
Carlota wrote:
POST-4 CONCLUSION: No entiendo nada. ¿Para qué dan explicaciones sobre el TIPS para el aumento y TIPS para disminución y luego explican las cosas de otra manera? ¿QUE ES LO QUE HAY QUE HACER?
25.09.2011 - 03:29
![]() Carlota wrote:
Carlota wrote:
POST-3 AHORA EMPIEZAN LAS EXPLICACIONES DEL GORRITO Y DICEN: Aum 1 pt después de M-1 en vtas alternas. Dism 1 pt de cada lado de M-2 en vtas alternas. Aum 1 pt antes de M-3 en vtas alternas. Aum 1 pt después de M-3 en cada 4ª vta. Dism 1 pt de cada lado de M-4 en cada 4ª vta. Aum 1 pt antes de M-5 en cada 4ª vta. Aum 1 pt después de M-5 en vtas alternas. Dism 1 pt antes de M-7 en vtas alternas
25.09.2011 - 03:27
![]() Carlota wrote:
Carlota wrote:
POST-2 y TIPS para disminución: "Dism 1 pt de cada lado del pt con MP. Empezar 1 pt antes del pt con MP. Colocar 1 pt en una ag aux por detrás de la pieza, desl 1 pt (= pt con MP), tejer juntos de derecho el pt sig y el pt en la ag aux, pasar pt desl por encima".
25.09.2011 - 03:26
![]() Carlota wrote:
Carlota wrote:
Envío el comentario en 4 post porque en uno no cabe POST 1 Estoy intentando hacer este gorrito, pero me encuentro con un problema en el patrón. Antes de empezar el patrón del gorrito hay unas explicaciones llamadas TIPS para aumento: "Aum 1 pt antes y después del pt con marcapuntos (MP) haciendo 1 HEB (lazada). En la vta sig tejer la HEB retorcida (es decir, tejer por atrás de la HEB en vez de adelante) para evitar que se forme un agujero".
25.09.2011 - 03:24
![]() Marie wrote:
Marie wrote:
Merci! Je le commencerai bientot!
27.07.2011 - 19:54
![]() Drops Design France wrote:
Drops Design France wrote:
Bonjour Marie, vous commencez le bonnet par 6 rangs point mousse et placez ensuite 7 marqueurs. Vous continuez au point mousse et au rang suivant (= au 7ème rang à partir du début du bonnet), vous allez commencer les augmentations et les diminutions telles qu'indiquées juste après.
25.07.2011 - 10:03
![]() Marie wrote:
Marie wrote:
Je suis débutante et voudrais tricoter ce modèle, parcontre je ne comprend pas cette partie des instruction :"Continuer au point mousse – EN MÊME TEMPS, au 1er rang, commencer à augmenter et diminuer" Est-il question du premier rand du tricot ou du premier rang suivant les 6 rangs, mentionné au début des instruction. Merci
23.07.2011 - 21:56
![]() Martine wrote:
Martine wrote:
Modèle facile mais demande de la patience car en 2.5 & point mousse
12.02.2011 - 13:08
|
|
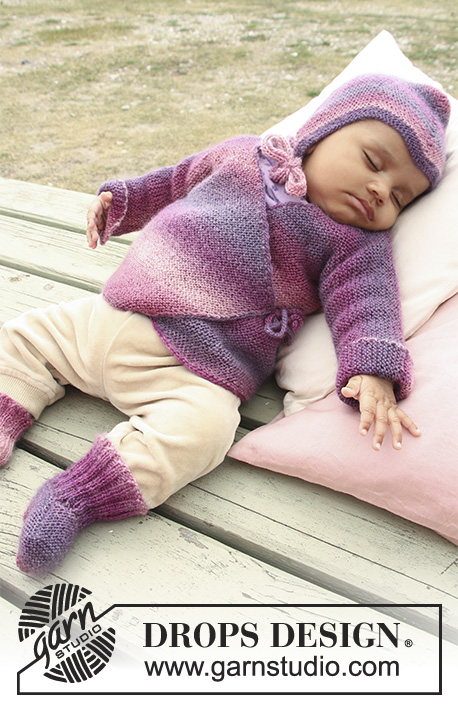
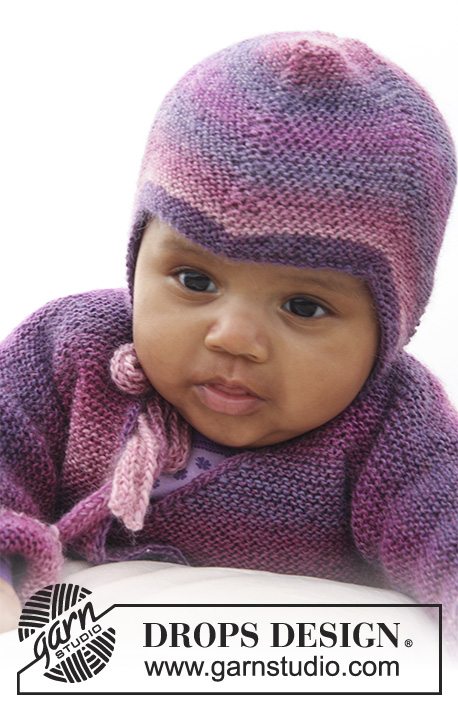
Sweet Evelina Hat#sweetevelinahat |
|
 |
 |
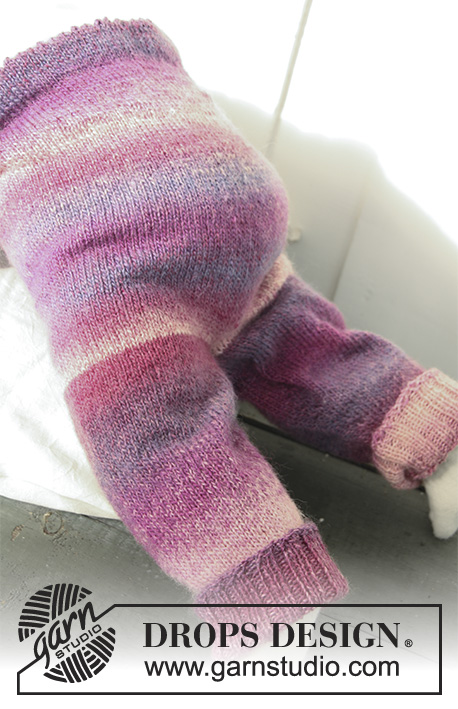
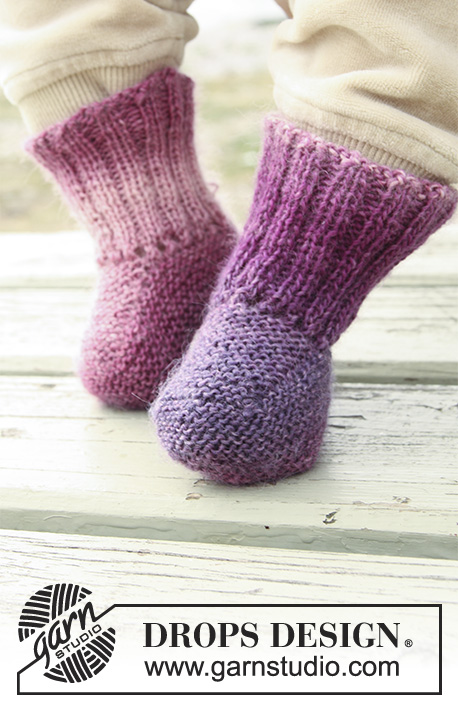
Knitted hat in garter st for baby and children in DROPS Delight
DROPS Baby 20-2 |
|
|
INCREASE TIP: All inc are done from RS. Inc 1 st before and after st with marker by making 1 YO. On next round knit YO twisted (i.e knit in the back loop of YO instead of front) to avoid holes. DECREASE TIP: All dec are done from RS. Dec 1 st on each side of st with marker. Beg 1 st before st with marker. Put 1 st on a cable needle behind the piece, slip 1 st (= st with marker), K next st and st on cable needle tog, psso. ---------------------------------------------------------- HAT: Worked back and forth on needle – K all rows (= garter st). Cast on 119-127-135 (139-145) sts on needle size 2.5 mm / US 1or 2 with Delight. K 6 rows (1st row = RS). Insert 7 markers in the piece as follows (from RS): 1st marker in the 1st st on needle, 2nd marker in the 22nd-24th-26st (28th-31st) st, 3rd marker in the 43rd-47th-51st (55th-61st) st, 4th marker in the 60th-64th-68th (70th-73rd) st, 5th marker in the 77th-81st-85th (85th-85th) st, 6th marker in the 98th-104th-110th (112th-115th) st and 7th marker in the last st on the needle. Continue to K – AT THE SAME TIME on 1st row, beg to inc and dec – SEE INCREASE TIP AND DECREASE TIP! Inc 1 st after 1st marker on every other row. Dec 1 st on each side of the 2nd marker every other row. Inc 1 st before 3rd marker on every other row. Inc 1 st after 3rd marker on every 4th row. Dec 1 st on each side of the 4th marker every 4th row. Inc 1 st before 5th marker on every 4th row. Inc 1 st after 5th marker on every other row. Dec 1 st on each side of the 6th marker every other row. Inc 1 st before 7th marker on every other row. When piece measures 13-15-16 (18-19) cm / 5⅛"-6"-6¼" (7"-8") (measured from bottom tip at 2nd and 6th marker) work next row from RS as follows: * K1, K2 tog *, repeat from *-* WHILE binding off. ASSEMBLY: Back of hat = bind off edge, i.e. 2 whole tips and 2 half tips. The 2nd of the 3 whole tips in the opposite side of the piece = cast on edge, goes down to the forehead at the front. Sew the hat tog edge to edge with 1 stitch in each st along the bind off edge as follows: Sew first half tip tog with first half of first whole tip. Continue to sew second half of first whole tip tog with first half of second whole tip. Then sew the other half of the second whole tip tog with the last half tip. Finish by sewing the hat tog mid back – make sure to sew edge to edge to avoid chunky seams. TIES: Cast on 4 sts on needle size 2.5 mm / US 1 with Delight. Knit as follows: * K1, place yarn in front of piece (towards you), slip 1 st as if to P, place yarn behind piece (from you) *, repeat from *-* the rest of row and on all rows. This becomes a tie worked in the round. bind off when the tie measures approx. 20-22-24 (26-28) cm / 8"-8¾"-9½" (10¼"-11"). Knit one more tie. Sew one tie at the bottom of each tip on each side. |
|
Have you finished this pattern?Tag your pictures with #dropspattern #sweetevelinahat or submit them to the #dropsfan gallery. Do you need help with this pattern?You'll find 7 tutorial videos, a Comments/Questions area and more by visiting the pattern on garnstudio.com. © 1982-2026 DROPS Design A/S. We reserve all rights. This document, including all its sub-sections, has copyrights. Read more about what you can do with our patterns at the bottom of each pattern on our site. |
|


With over 40 years in knitting and crochet design, DROPS Design offers one of the most extensive collections of free patterns on the internet - translated to 17 languages. As of today we count 325 catalogs and 12298 patterns - 12288 of which are translated into English (US/in).
We work hard to bring you the best knitting and crochet have to offer, inspiration and advice as well as great quality yarns at incredible prices! Would you like to use our patterns for other than personal use? You can read what you are allowed to do in the Copyright text at the bottom of all our patterns. Happy crafting!
Post a comment to pattern DROPS Baby 20-2
We would love to hear what you have to say about this pattern!
If you want to leave a question, please make sure you select the correct category in the form below, to speed up the answering process. Required fields are marked *.