
Popular categories
Looking for a yarn?














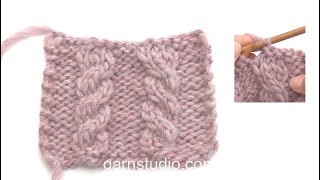
















Comments / Questions (627)
 Marianna wrote:
La parte dietro è lavorata come il davanti?
21.10.2026 - 12:42DROPS Design answered:
Buongiorno Marianna, i motivi vengono lavorati anche sul dietro. Buon lavoro!
31.10.2026 - 15:33
 Tania wrote:
When working the charts back and forth, how do you knit the cable patterns on the wrong side? Thank you!
18.10.2026 - 21:02DROPS Design answered:
Dear Tania, when you work the charts back and forth the odd numbered rows are worked on the right side, while the even numbered rows are worked from the wrong side. All cable rows are on right side rows (row 3 on the charts, row 7 as well in M.1 and M.3). Wrong side rows are worked opposite as seen, so you read them from left to right and purl the stitches on white square symbols or knit them on black square symbols. However, when looking at the cable from the right side, the stitches worked in the wrong side will be seen as shown in the chart (the white squares as knitted, the black squares as purled) so the cable pattern will look the same as it did when you worked in the round; this is the reason why charts back and forth are read and worked in the opposite way on wrong side rows. Happy knitting!
18.10.2026 - 21:11
Tania wrote:
After casting off for armholes, how do you knit back and forth and stay in the cable pattern?
18.10.2026 - 16:53DROPS Design answered:
Dear Tania, the cast off for the armholes is worked over the section in M.2, so it won't affect the cable pattern. On the other hand, when you work back and forth the charts are read differently; the rows on the right side (including the rows with the cables) are worked as before. But the rows on the wrong side are worked opposite to how they are seen (so a knit row in a wrong side row would need to be purled, so that it looks like a knitted row from the right side). Therefore, the pattern will be maintained as you work back and forth. Happy knitting!
18.10.2026 - 20:41
Tania wrote:
I need a video on how to “bind off 6 sts for armhole each side”, please. I also need a video on how to work the Back Piece, please.
17.10.2026 - 22:50DROPS Design answered:
Dear Tania, there is no complete video tutorial for this pattern. For the armholes you work as follows: Cast off the first 3 stitches, work over the front piece stitches until there are 3 stitches left before the next marker, cast off 3 stitches before the marker and 3 stitches after the marker. Now continue working the remaining stitches over the back piece until there are 3 stitches left before the 1st marker (the final 3 stitches on the round), cast off these last 3 stitches. Then, continue only over the back piece, working back and forth over all stitches and casting off 2 stitches (and later on 1 stitch) at the beginning of each row; casting off 2 stitches at the beginning of a right side row and 2 stitches at the beginning of a wrong side row counts as casting off 1 time. Happy knitting!
18.10.2026 - 20:07
Kayla wrote:
Hello! I am currently casting off for armhole shaping on a L and am struggling with the instructions. “Bind off to shape the armhole each side at beg of every row: 2 sts 2 times and 1 st 3 times = 128 sts. Continue in pattern.” When it states beginning of every row is it meaning Dec on each side of needle or only when you turn your work? Also, are the Dec worked all together in the same row or one set per row? Thank you so much!
13.10.2026 - 01:48DROPS Design answered:
Dear Kayla, you will cast off the stitches at the beginning of each row from both right side and wrong side, so in L cast off 2 stitches at the beg of next 4 rows (= 2 sts 2 times each side) and 1 stitch at the beginning of next 6 rows (1 st 3 times each side). Happy knitting!
13.10.2026 - 09:39
 AnneLise Eikeland wrote:
Hei Jeg får ikke maskeantallet til og stemme Strikker i XL str. Strikkerførst forklart til 8 masker N este over 52 m neste over 16 m Neste 52 m så de siste 8 maskene Det blir 136 masker Jeg masker da til overs XL er 312 masker tilsamme
09.10.2026 - 15:28DROPS Design answered:
Hei AnneLise. I str. XL legges det opp 290 masker, når vrangborden måler 5 cm økes det 22 makser = 290 + 22 = 312 masker. Sett 2 merketråder, ved start og ved maske 156. Så strikkes det slik: M.2 over de første 8 m + M.3 (= 8 m) + M.4 (10 m) + M.3 (=8 m) + M.4 (= 10 m) + M.3 (=8 m) + M.1 over de neste 52 m + M.3 (= 8 m) + M.4 (10 m) + M.3 (=8 m) + M.4 (= 10 m) + M.3 (=8 m) + M.2 over de neste 16 m + M.3 (= 8 m) + M.4 (10 m) + M.3 (=8 m) + M.4 (= 10 m) + M.3 (=8 m) + M.1 over de neste 52 m + M.3 (= 8 m) + M.4 (10 m) + M.3 (=8 m) + M.4 (= 10 m) + M.3 (=8 m) + M.2 over de siste 8 m = 312 masker. mvh DROPS Design
12.10.2026 - 14:01
Johanne wrote:
Når jeg begynner på bilen str L skal jeg ha 276 masker, men når jeg regner sammen maskeantallene i mønstrene (17+52+34+52+17) får jeg kun 172 masker. Hva slags mønster skal være på de 104 gjenstående maskene?
30.09.2026 - 17:31DROPS Design answered:
Hej Johanne, vi har forklaret tidligere hvordan du strikker over de 276 masker. Her ser du teksten på engelsk, men det er samme diagram osv: M.2 over 17 sts, M.3 (8 sts), M.4 (10 sts), M.3, M.1 over 52 sts, M.3, M.4, M.3, M.2 over 34 sts, M.3, M.4, M.3, M.1 over 52 sts, M.3, M.4, M.3, M.2 over 17 sts = 17+8+10+8+52+8+10+8+34+8+10+8+52+8+10+8+17=276 sts.
01.10.2026 - 13:12
 Hartmut wrote:
Hallo liebes Drops team ich noch mal am Armausschnitt hatte ich kein Problem. Ich bin oben am Rücken bezweifelt auch am Halsausschnitt. die Maschenabnahme im Tipp habe ich nicht verstanden. Lgr harry
29.09.2026 - 10:04DROPS Design answered:
Lieber Hartmut, beim Rückenteil sind es keine Abnahme für Halsausschnitt, alle Maschen werden auf einmal abgekettet, gleichzeitig als man Maschen in den Zöpfe abnehmen wird - siehe TIPP ZUM ABKETTEN: am Anfang der Anleitung, so wissen Sie wie viele Maschen in jedem Diagram abnehmen sollen. In diesem Video zeigen wir, wie man abkettet und gleichzeitig abnimmt. Viel Spaß beim Stricken!
30.09.2026 - 07:29
Hartmut wrote:
Hallo bin der Harry und stricke den Dreams of Aran Pullover. Ich komm mit der Abnahme am Rücken nicht zurecht. Ist es im Wechsel 1Mstrick3n dann 2Mzus.strick3n und die davor drüber ziehen 1M str. Vorherige drüber ziehen 2M zus str. und die davor drüber ziehen und das im wechsel. Uber eine Antwort würde ich mich sehr freuen. Harry
25.09.2026 - 17:38DROPS Design answered:
Lieber Hartmut, sind Sie bei dem Armausschnitt? in die 5. Grösse werden Sie so abketten: 2 Maschen 3 Mal beidseitig = 2 Maschen am Anfang der 6 nächsten Reihen (die Maschen abketten und nicht abnehmen), dann 1 Masche 4 Mal beidseitig = 1 Masche am Anfang der 8 nächsten Reihen abketten. Viel Spaß beim Stricken!
28.09.2026 - 07:50
 Anne Bluck wrote:
Front piece. I am struggling to understand the middle cast off of 48 sts for the neck and at the same time decrease 12 sts evenly on the 48 on cast off row. What would be the ratio for casting off to the decreases and how many sts would I have left on my needle at the end of that row? Thank you,
31.08.2026 - 11:18DROPS Design answered:
Dear Mrs Bluck, you need to decrease while casting off (see video) to get a straight edge, decrease in the different diagrams as explained under DECREASE TIP at the beginning of the pattern. Happy knitting!
01.09.2026 - 19:42
|
|||||||||||||||||||
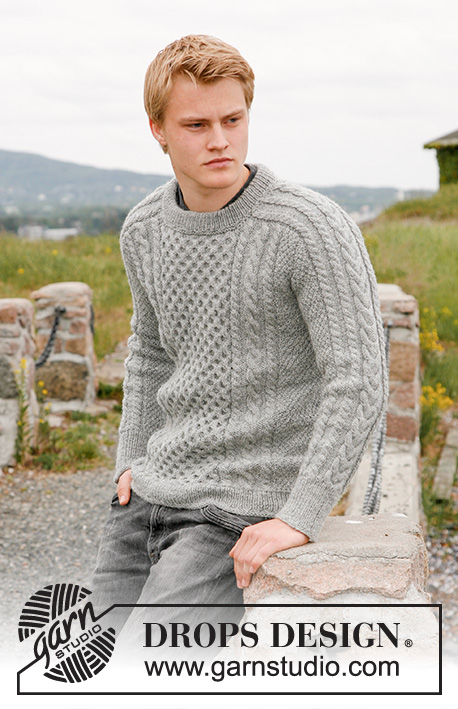
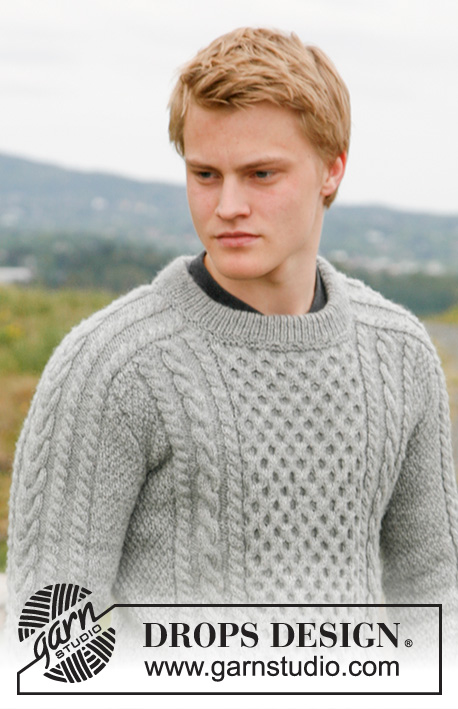
Dreams of Aran#dreamsofaransweater |
|||||||||||||||||||
 |
 |
||||||||||||||||||
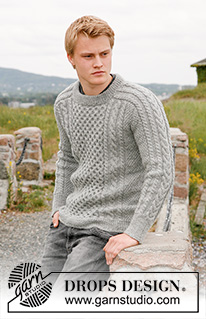
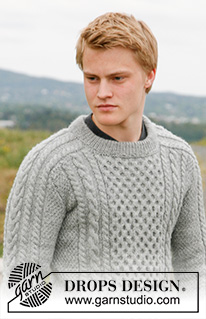
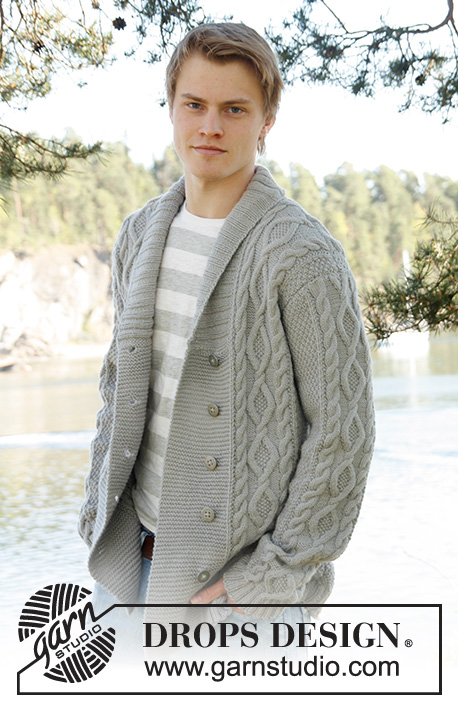
Men's knitted sweater with cables in DROPS Karisma, DROPS Puna or DROPS Merino Extra Fine. Size 13/14 years - XXXL.
DROPS 135-3 |
|||||||||||||||||||
|
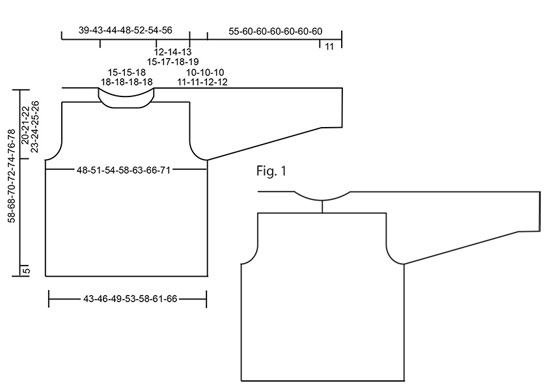
SWEATER– SHORT OVERVIEW OF THE PIECE: The sleeve is worked upwards, continued onto the shoulder and along the neck, top back. The neck-stitches at the top of the sleeve are decreased towards the front piece and a small section of the sleeve is continued along the top of the back piece and later sewn together mid-back, so the neck is higher at the back than at the front – see Fig.1. GARTER ST (in the round): K 1 round, P 1 round. PATTERN: See diagram M.1 – M.5. Diagrams show the pattern from RS. DECREASING TIP: Work 1 st as in diagram, work 2 sts tog, pass over the first st on needle = 2 dec sts. Dec as follows in the different diagrams M.1 (= 44-44-52-52-52-52-52 sts): 10-10-12-12-12-12-12 sts. M.3 (= 8 sts): 2 sts. M.4 (= 10 sts): 3 sts. M.5 (= 16 sts): 6 sts. -------------------------------------------------------- -------------------------------------------------------- BODY PIECE: Worked in the round. Cast on 208-230-250-270-290-310-330 sts on circular needle size 3.5 mm / US 4 with Karisma. Work 4 rounds GARTER ST – see above – and continue in rib K1/P1. When piece measures 5 cm / 2" work 2 rounds garter st, AT THE SAME TIME inc 20-10-6-6-22-18-18 sts evenly on last round = 228-240-256-276-312-328-348 sts. Insert 2 markers in piece, 1 at beg of round and 1 after 114-120-128-138-156-164-174 sts (= each side). Change to circular needle size 4 mm / US 6 and work PATTERN as follows – see above: Size 13/14 – L: M.2 on the first 9-12-12-17 sts, M.3, M.4, M.3, M.1 on the next 44-44-52-52 sts, M.3, M.4, M.3, M.2 on the next 18-24-24-34 sts, M.3, M.4, M.3, M.1 on the next 44-44-52-52 sts, M.3, M.4, M.3, M.2 on the last 9-12-12-17 sts. Size XL-XXXL: M.2 on the first 8-12-17 sts, M.3, M.4, M.3, M.4, M.3, M.1 on the next 52-52-52 sts, M.3, M.4, M.3, M.4, M.3, M.2 on the next 16-24-34 sts, M.3, M.4, M.3, M.4, M.3, M.1 on the next 52-52-52 sts, M.3, M.4, M.3, M.4, M.3, M.2 on the last 8-12-17 sts. REMEMBER THE GAUGE! Continue in pattern like this. AT THE SAME TIME when piece measures 9 cm / 3½" inc 1 st each side of both markers (work inc sts into M.2 as you go along). Repeat the inc on every 6-8-8-9-9-9-10 cm / 2⅜"-3⅛"-3⅛"-3½"-3½"-3½"-4" a total of 5 times = 248-260-276-296-332-348-368 sts. When piece measures 38-47-48-49-50-51-52 cm / 15"-18½"-19"-19¼"-19¾"-20"-20½" bind off 6 sts for armhole each side (= 3 sts each side of marker) and complete each piece separately (make sure cable rows are from RS after dividing piece). BACK PIECE: = 118-124-132-142-160-168-178 sts. Continue back and forth on circular needle. Bind off to shape the armhole each side at beg of every row: 2 sts 2-2-2-2-2-3-4 times and 1 st 1-1-2-3-4-4-5 times = 108-114-120-128-144-148-152 sts. Continue in pattern. When piece measures 49-59-61-63-65-67-69 cm / 19¼"-23¼"-24"-24¾"-25½"-26⅜"-27⅛" (adjust so that next row is row 7 in diagram M.1, M.3 and M.4) bind off, AT THE SAME TIME dec 24-24-26-26-36-36-36 sts in diagram on binding off row – see DECREASING TIP! FRONT PIECE: = 118-124-132-142-160-168-178 sts. Bind off for armhole as described for back piece. When piece measures 46-56-58-60-62-64-66 cm / 18"-22"-22¾"-23⅝"-24⅜"-25¼"-26" (adjust so that next row is first or 5th row in M.1) bind off the middle 40-40-48-48-48-48-48 sts for neck, AT THE SAME TIME dec 10-10-12-12-12-12-12 sts evenly on the 40-40-48-48-48-48-48 sts on bind off row. Now complete each shoulder separately. Bind off 2 sts on neckline on next row. When piece measures 49-59-61-63-65-67-69 cm / 19¼"-23¼"-24"-24¾"-25½"-26⅜"-27⅛" (adjust to back piece) bind off, AT THE SAME TIME dec 7-7-7-7-12-12-12 sts in diagram on bind off row. RIGHT SLEEVE: Worked in the round. Cast on 56-58-60-62-64-66-68 sts on double pointed needles size 3.5 mm / US 4 with Karisma. Work 4 rounds garter st and continue in rib K1/P1 until piece measures 10 cm / 4". Work 2 rounds garter st, AT THE SAME TIME inc 2 sts evenly on last round = 58-60-62-64-66-68-70 sts. Insert a marker at beg of round. Change to double pointed needles size 4 mm / US 6 and continue in pattern on next round as follows: M.2 on the first 5-6-7-8-9-10-11 sts, M.3 2 times, M.5, M.3 2 times, M.2 on the last 5-6-7-8-9-10-11 sts. Continue in pattern like this. AT THE SAME TIME when piece measures 13-12-13-12-12-14-13 cm / 5⅛"-4¾"-5⅛"-4¾"-4¾"-5½"-5⅛" inc 1 st each side of marker. Work inc sts into M.2 as you go along. Repeat the inc on every 2-2.5-2-2-2-1.5-1.5 cm / ¾"-⅞"-¾"-¾"-¾"-½"-½" a total of 14-15-16-17-18-19-20 times = 86-90-94-98-102-106-110 sts. When piece measures 45-50-50-49-49-48-48 cm / 17¾"-19¾"-19¾"-19¼"-19¼"-19"-19" bind off 6 sts mid under sleeve (= 3 sts each side of marker) and complete piece back and forth on needle (make sure to have cable row from RS after dividing piece). Bind off for sleeve cap each side at the beg of every row: 2 sts 2-4-6-7-9-10-12 times and 1 st 12-10-8-8-6-6-4 times = 48 sts left on needle for all sizes. Piece measures 55-60-60-60-60-60-60 cm / 21⅝"-23⅝"-23⅝"-23⅝"-23⅝"-23⅝"-23⅝". Now measure piece from here! Continue in pattern on remaining sts until piece measures 12-14-13-15-17-18-19 cm / 4¾"-5½"-5⅛"-6"-6¾"-7"-7½". Now bind off on right side of piece, at the beg of every row from RS as follows: 24 sts 1 time ((AT THE SAME TIME as 14 of these 24 sts K2 tog before they are bound off),), 3 sts 2 times. Work 3 rows without dec. Bind off 1 st on next row = 17 sts left for all sizes. Continue until piece measures 19-21-22-24-26-27-28 cm / 7½"-8¼"-8¾"-9½"-10¼"-10⅝"-11". Bind off, AT THE SAME TIME dec 4 sts evenly in diagram on bind off row. The whole sleeve now measures approx 74-81-82-84-86-87-88 cm / 29⅛"-32"-32¼"-33"-33⅞"-34¼"-34⅝". LEFT SLEEVE: Like right sleeve, but bind off at the top at the opposite side, i.e. at the beg of every row from WS. ASSEMBLY: Set in sleeves. Sew shoulder sts from body piece to M.3 each side of sleeve (in outer loops of sts). Sew the top of sleeves tog mid back and sew to back piece. NECKLINE: Pick up 94-94-108-108-108-108-108 sts round neckline on small circular needle size 3.5 mm / US 4 with Karisma. Work 4 rounds garter st, AT THE SAME TIME on last row inc 22-22-26-26-26-26-26 sts evenly = 116-116-134-134-134-134-134 sts. Continue in rib K1/P1. When rib measures 8 cm / 3" work 2 rounds garter st and bind off. Fold neck double towards WS and fasten, garter st to garter st. |
|||||||||||||||||||
Diagram explanations |
|||||||||||||||||||
|
|||||||||||||||||||
 |
|||||||||||||||||||
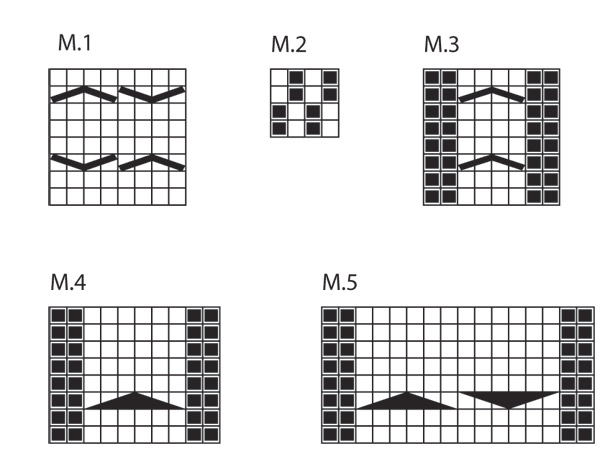 |
|||||||||||||||||||
Have you finished this pattern?Tag your pictures with #dropspattern #dreamsofaransweater or submit them to the #dropsfan gallery. Do you need help with this pattern?You'll find 13 tutorial videos, a Comments/Questions area and more by visiting the pattern on garnstudio.com. © 1982-2026 DROPS Design A/S. We reserve all rights. This document, including all its sub-sections, has copyrights. Read more about what you can do with our patterns at the bottom of each pattern on our site. |
|||||||||||||||||||






With over 40 years in knitting and crochet design, DROPS Design offers one of the most extensive collections of free patterns on the internet - translated to 17 languages. As of today we count 333 catalogs and 12532 patterns - 12522 of which are translated into English (US/in).
We work hard to bring you the best knitting and crochet have to offer, inspiration and advice as well as great quality yarns at incredible prices! Would you like to use our patterns for other than personal use? You can read what you are allowed to do in the Copyright text at the bottom of all our patterns. Happy crafting!
Post a comment to pattern DROPS 135-3
We would love to hear what you have to say about this pattern!
If you want to leave a question, please make sure you select the correct category in the form below, to speed up the answering process. Required fields are marked *.