
Popular categories
Looking for a yarn?






































Comments / Questions (55)
 Annie Håkansson wrote:
Hej! Jag tror att det är fel i mönstret. Det står i beskrivningen ”Sticka 6 framkantsmaskor, * 2 avigmaskor, 2 rätmaskor*, sticka från *-* tills det återstår 8 maskor, sticka 2 rätmaskor, avsluta med 6 framkantsmaskor. ” Jag tror att det ska vara …..tills det återstår 8 maskor, sticka 2 aviga maskor, avsluta …….. Mvh Annie
16.10.2026 - 19:55
 France wrote:
Oups, Canada et non France. Manches: SVP juste me dire comment tricoter les 35 mailles selon À.1 à À.3 incluant A.4. Merci beaucoup !
31.07.2026 - 00:11
 France wrote:
7/8 ans. Manches: J’ai fait rang avec 3 motifs, puis rg avec 4 motifs. Rendue au prochain rg de motif, j’ai 176 mailles sur ce rang dont 35 entre les marqueurs de la manche. SVP m’expliquer comment faire ce rang considérant que vous dites (NB: Les augmentations des manches ne vont pas continuer comme indiqué dans A.1 et A.3 car on augmente maintenant tous les 4 rangs. A.4 montre 1 motif à répéter, veiller à bien placer le motif ajouré pour qu’il continue comme avant. ) Merci
30.07.2026 - 20:53DROPS Design answered:
Bonjour France, quand vous augmentez tous les 4 rangs pour les manches, les augmentations ne vont plus être exactement comme dans A.1 et A.3, mais bien tous les 4 rangs (tous les 2 rangs sur l'endroit), autrement dit, tricotez le point ajouré comme avant (A.4 montre un motif à répéter) et augmentez au début et à la fin des manches tous les 4 rangs. Bon tricot!
04.08.2026 - 17:32
 Sheila wrote:
Hej. Jeg har stillet et spørgsmål om knaphul men det er ikke relevant og jeg kan ikke slette det. Venlig hilsen Sheila Kjærgaard
25.07.2026 - 10:39
Sheila wrote:
Hej. Jeg kan ikke forstå at knaphul skal laves så tæt på blusen. Jeg strikker i str 3-4 år og der står: efter mønsteret slå om, strik 2 ret sammen og strik 2 ret og derefter strik de sidste 2 m(i-cord). På billederne ser det ud til at der er strikket 1 ret, slå om, 2 ret sammen og 1 ret og de de sidste 2 (i-cord). Hvad er rigtigt? Venlig hilsen Sheila Kjærgaard
24.07.2026 - 22:23DROPS Design answered:
Hei Sheila. Er riktig slik det står, men du kan fint justere knappehullet til slik du mener blir penest på den jakken du strikker. mvh DROPS Design
06.08.2026 - 08:59
 Elisa wrote:
Quando devo ripetere il giro 5 dei motivi nel 13 giro, dall' inizio come devo fare? Dal.marker devo sempre ,dopo averlo spostato,un dritto un gettato,poi iniziare con A1 quindi 1 dritto,2 ins 1 gettato ecc,quindi A2-A2-A3 e finire con due maglie a dritto prima del marker che segna la fine della manica? Ho capito bene? La sequenza dei diagrammi inizia e finisce sempre dopo -prima un paio di maglie dal marker?
10.07.2026 - 00:24DROPS Design answered:
Buongiorno Elisa, la sequenza dei diagrammi è all'interno dei segnapunti e degli aumenti del raglan. Buon lavoro!
09.08.2026 - 13:11
Margareta Nordlander wrote:
Förstår inte mönstret som ska stickas på ärmarna. kan ni inte beskriva istället hur många maskor som stickas i rätstickning innan två maskor stickas tillsammans och innan omslaget ska göras för hål. Har köpt garn från er till två tröjor som jag vill sticka till mina barnbarnsbarn. Tacksam om jag får svart snart.
27.06.2026 - 16:11DROPS Design answered:
Hei Margareta. Design avd. har dessverre ikke mulighet til å omskrive en allerede publisert oppskrift. Om du har problemer med å skjønne hvordan strikke etter diagram, kan du ta en titt under: TIPS & HJELP - DROPS Lektioner - Läs ett mönster - Hur man läser stickdiagram. mvh DROPS Design
30.06.2026 - 08:02
 Kaarrokkeen Lisäykset A4-kohdassa wrote:
En ymmärrä kohtaa, jossa siirrytään tekemään A4-kaavion mukaisia lisäyksiä. Hihaan lisätään joka 4.kierros 2 silmukkaa, mutta kaavio on tasaisesti 8 silmukkaa leveä. Mitä lisätyille silmukoille tehdään?
23.06.2026 - 22:47DROPS Design answered:
Hei, piirroksessa A.4 näet yhden kokonaisen mallikerran. Kun lisäät silmukoita hihoja varten joka 4.kerroksella, neulo lisätyillä silmukoilla mallineuletta piirroksen A.4 mukaan.
24.06.2026 - 17:22
May-Den wrote:
Bonjour, Je ne comprends pas l'empiècement pour la partie correspondant aux manches: "16 mailles envers en augmentant 3 mailles à intervalles réguliers (manche)"; cela veut dire que l'on commence la manche avec 19 mailles, or les diagrammes A1-A2-A3 débutent avec 17 mailles. Je ne comprends pas, est-ce qu'il faut compter différemment ?
17.05.2026 - 20:24DROPS Design answered:
Bonjour May-Den, on a effectivement ainsi 19 m pour les manches: 1 m maille endroit (après le fil marqueur = maille du raglan), les 17 m des diagrammes et 1 m endroit (avant le fil marqueur suivant = maille du raglan), notez que l'on augmente avant/après les 2 m des raglans avec le fil marqueur entre elles. Bon tricot!
18.05.2026 - 12:06
 Carolyn wrote:
Hello! Because I don’t have a flat example of the arm sleeve lace pattern, I don’t understand the note you made about: “NOTE! When A.1 to A.3 is finished in height, work 1 more repeat of A.2 in width between A.1 and A.3.” Does this mean complete another 8 rows without A3. and A1.- A2 only? Thanks 🙂
13.05.2026 - 18:22DROPS Design answered:
Dear Carolyn, when diagrams have been worked in height, you have worked a total of 8 rows and you have increased 4 sts in A.1 and 4 sts in A.3. You will now work as follows: A.1 over the first 5 sts previous A.1 and A.2 over the next 4 sts + over the first 4 sts A.2; then repeat A.2 and finish with A.2 over the last 4 sts last A.2 + over the first 4 sts A.3 then work A.3 over the last 4 sts previous A.3. You have now worked 1 repeat of A.2 more between A.1 and A.3. Happy knitting!
15.05.2026 - 07:49
|
|||||||||||||
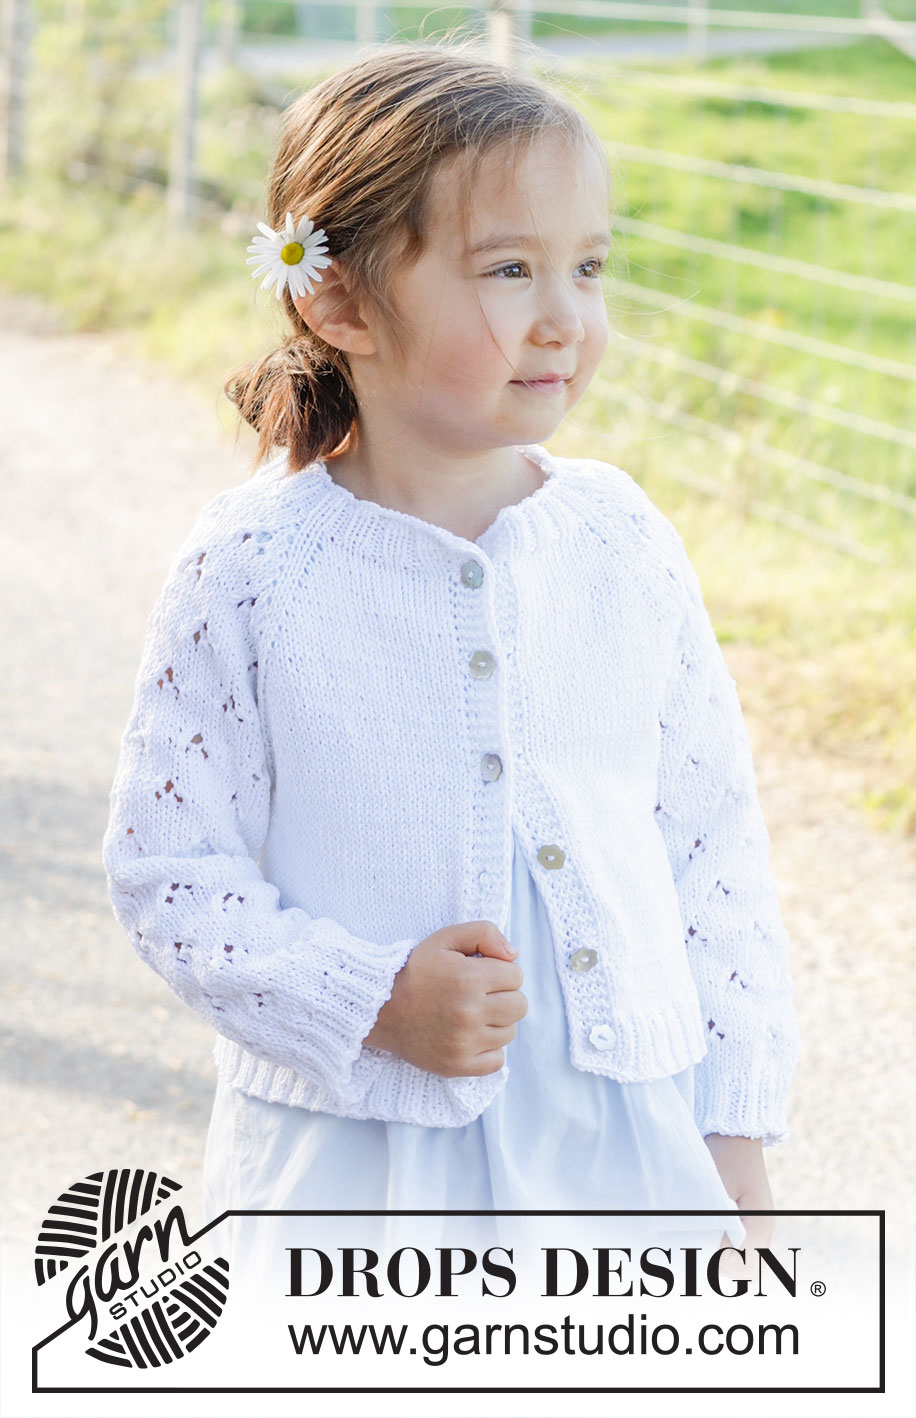
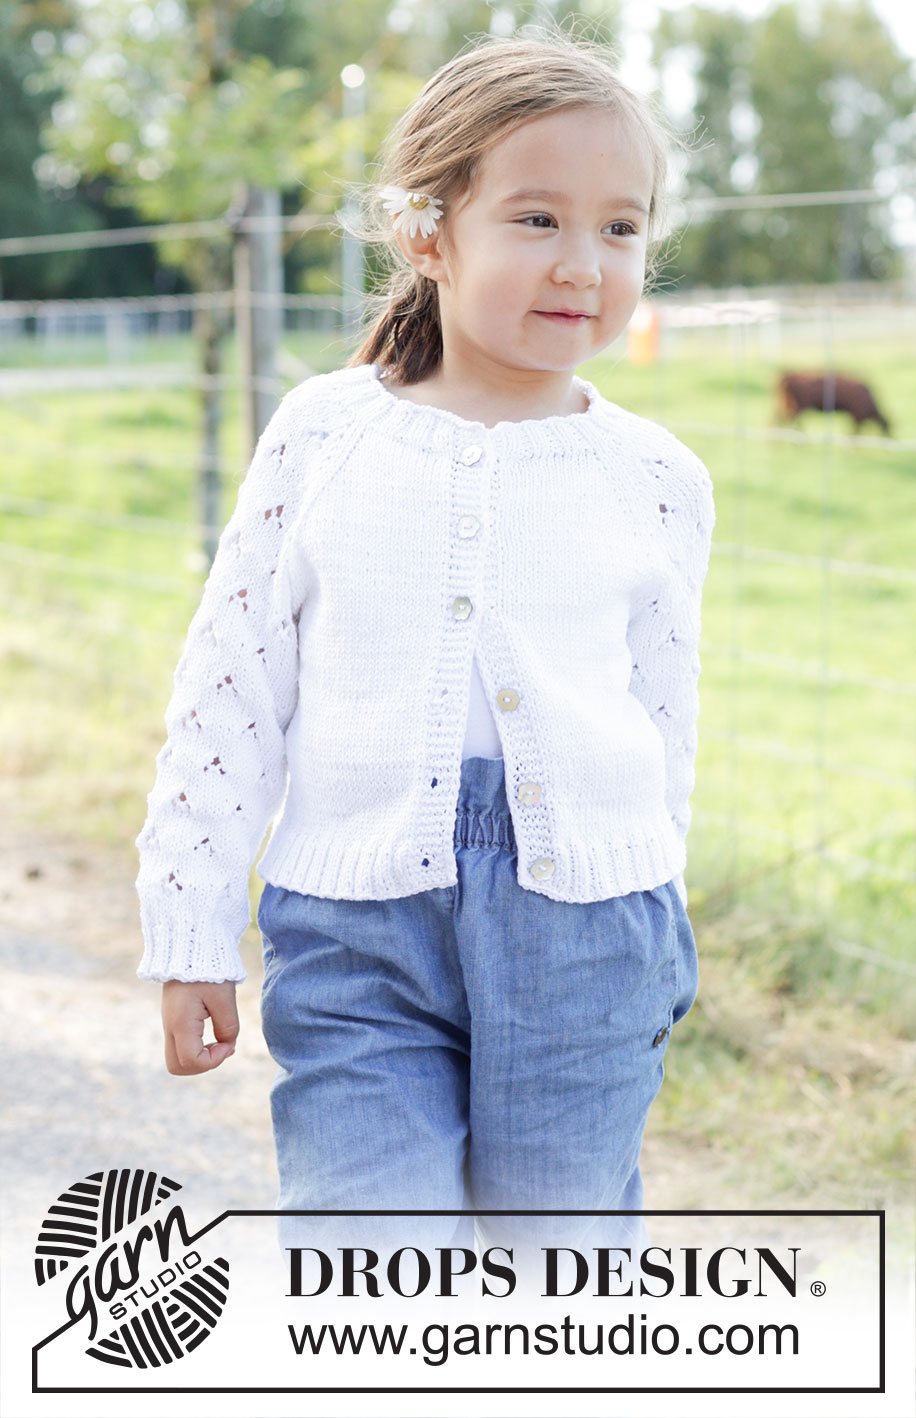
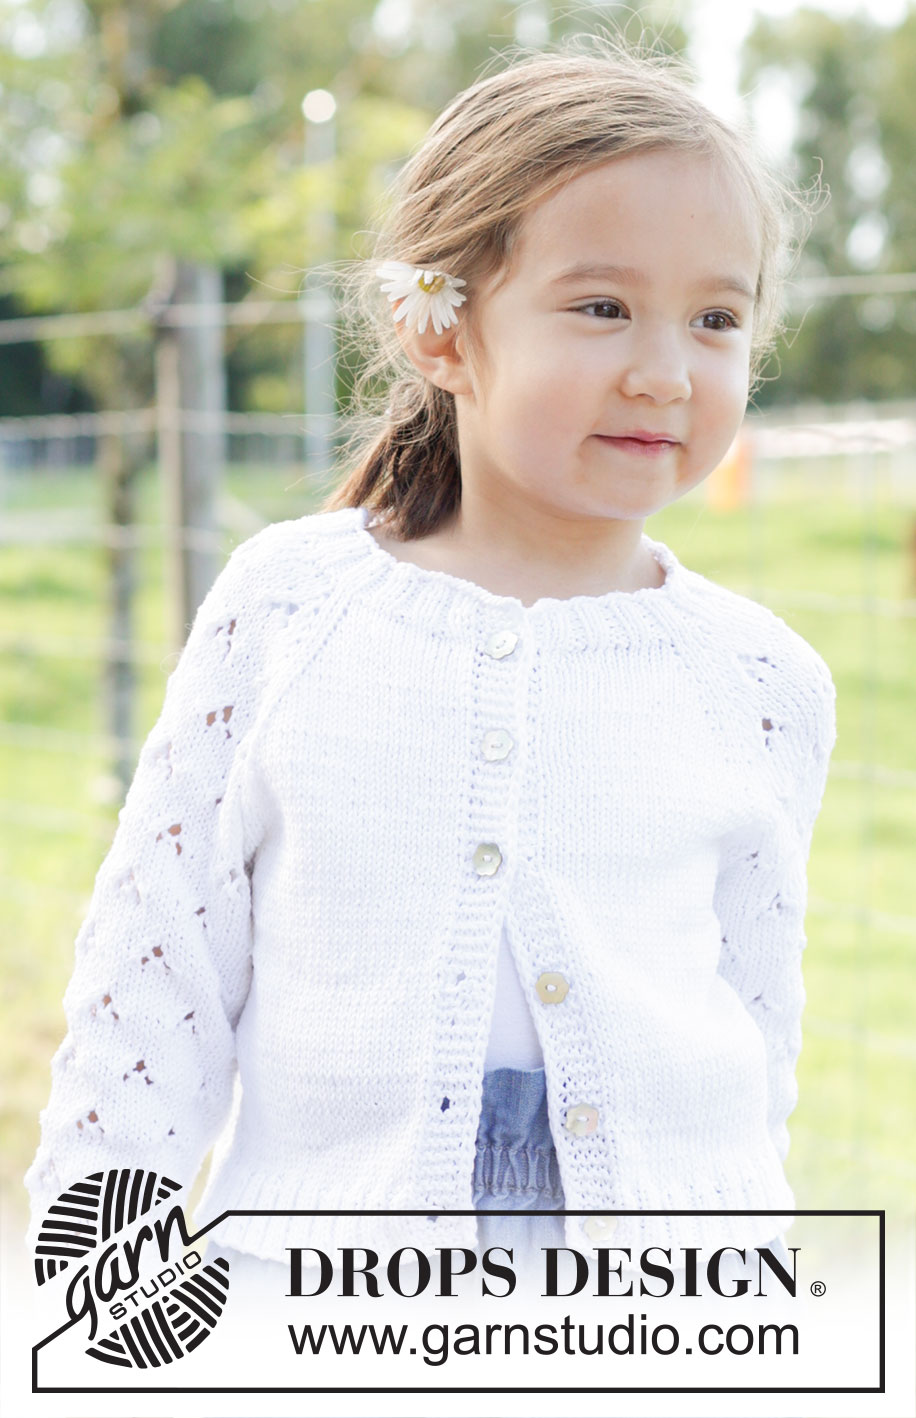
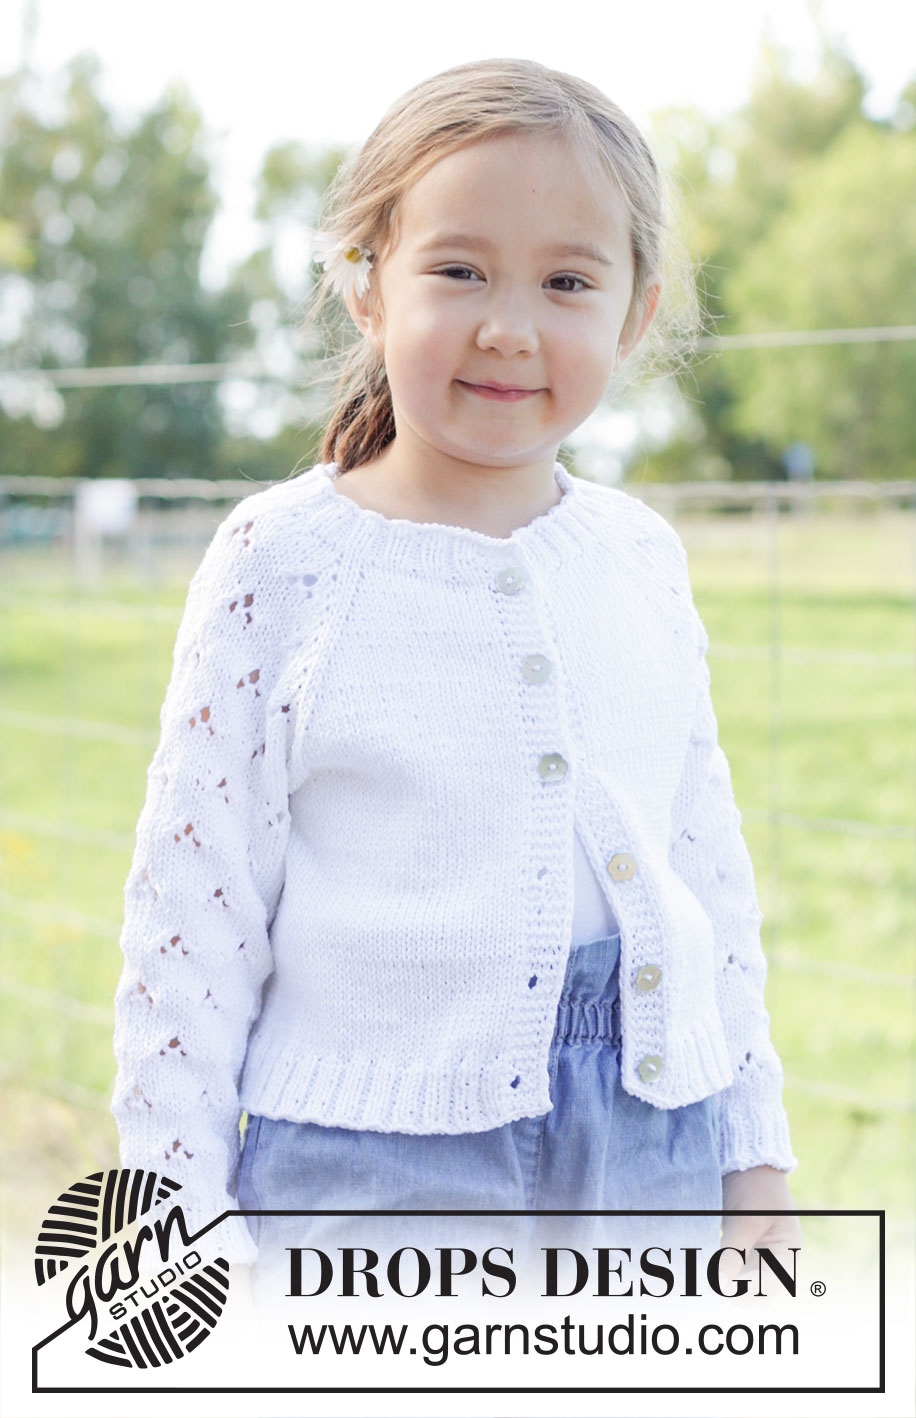
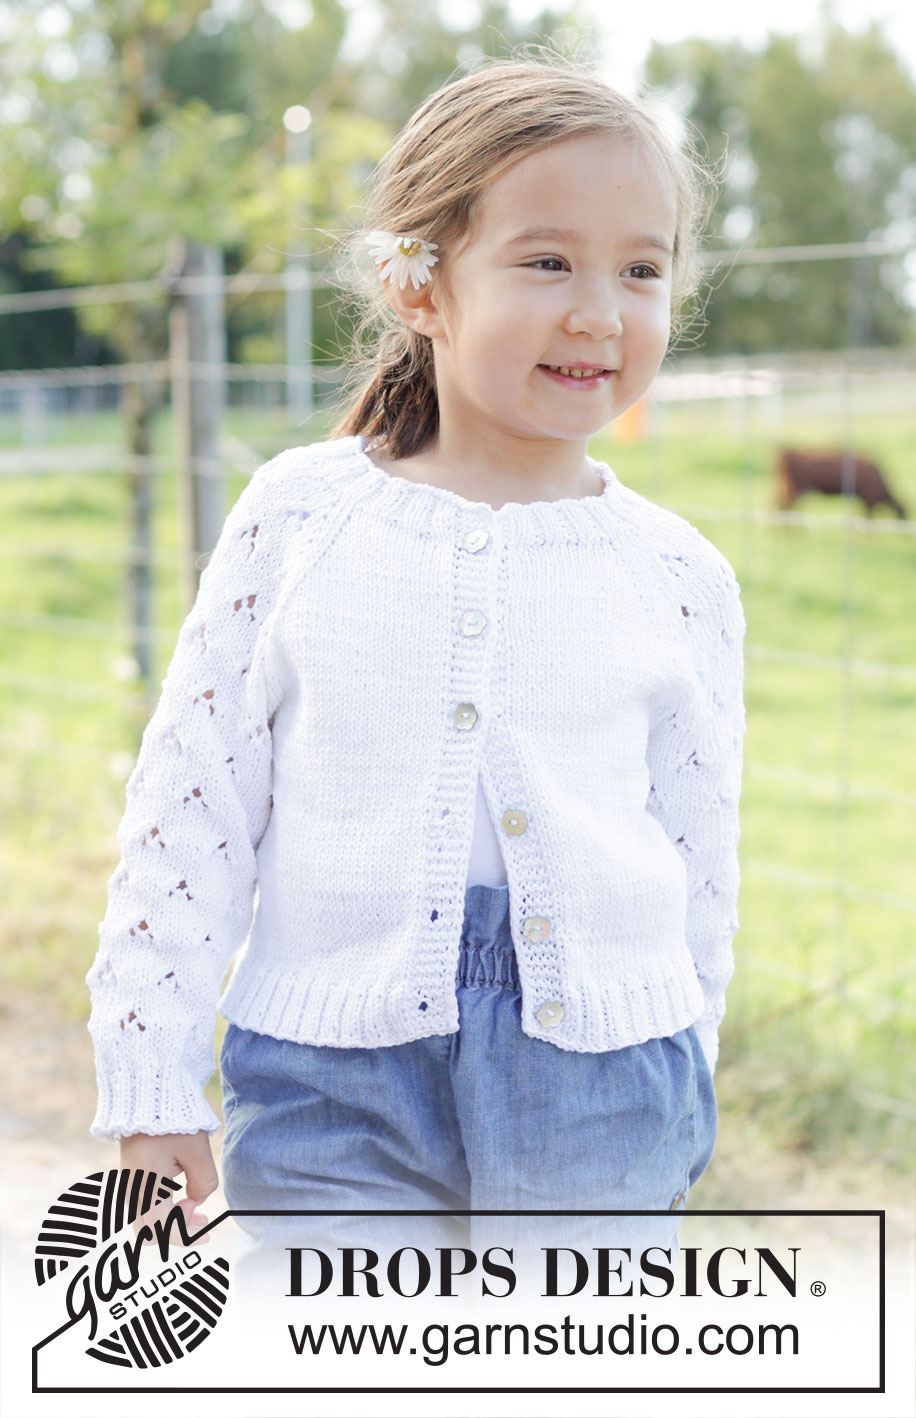
Daisy Fields Cardigan#daisyfieldscardigan |
|||||||||||||
 |
 |
||||||||||||
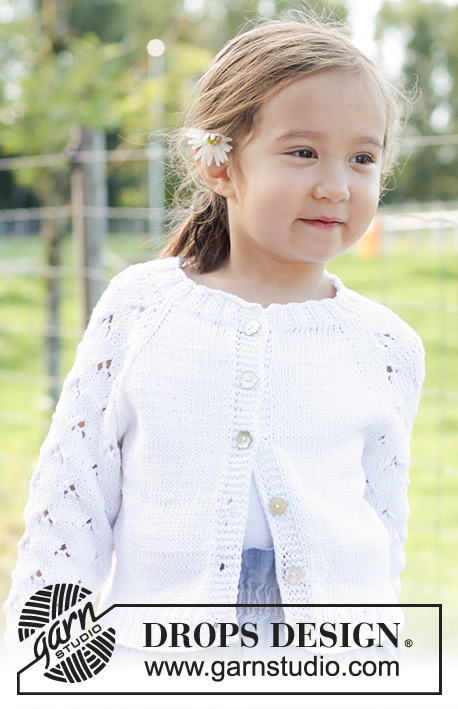
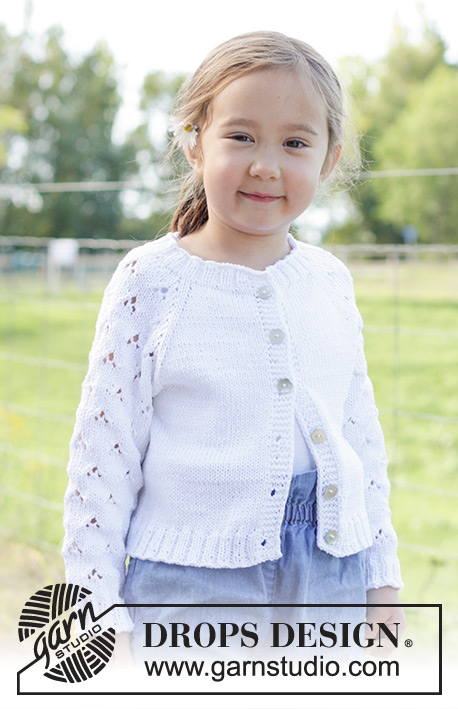
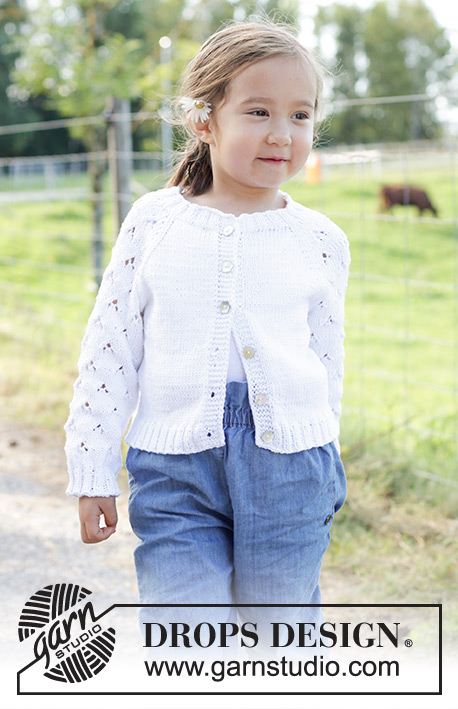
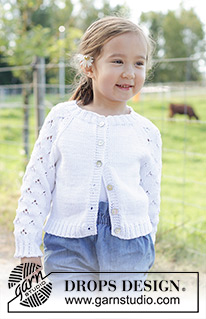
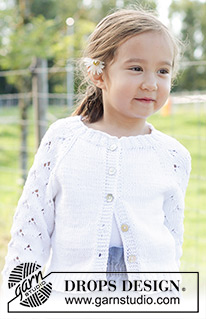
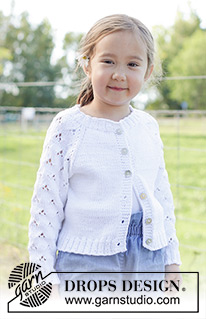
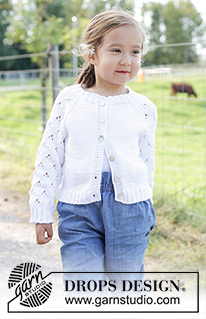
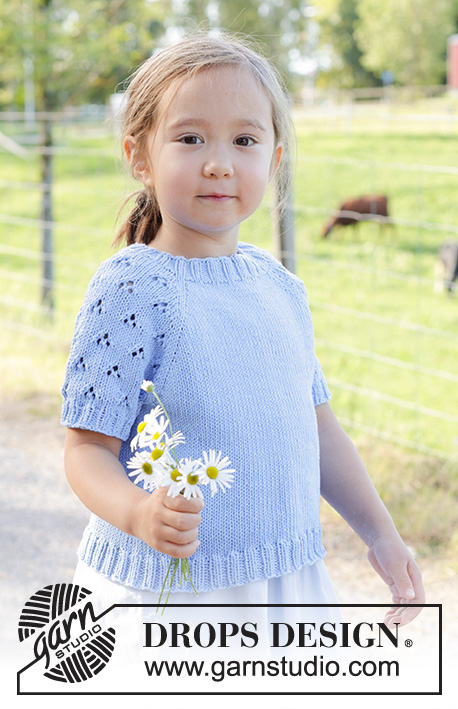
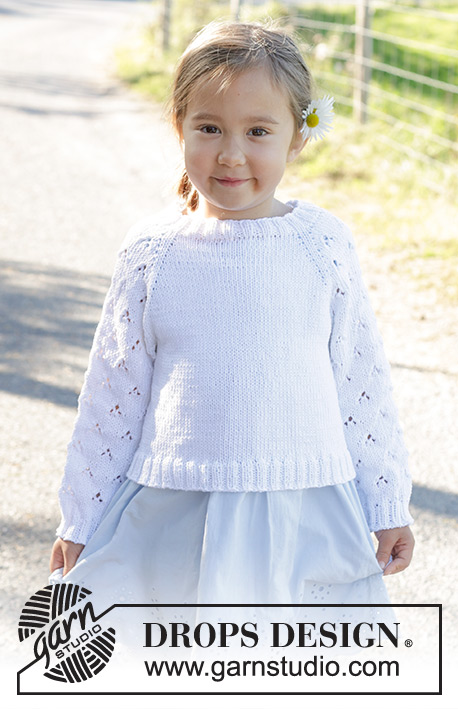
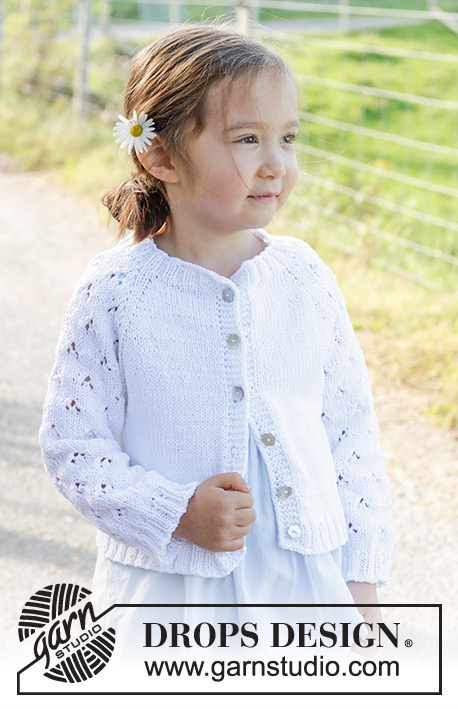
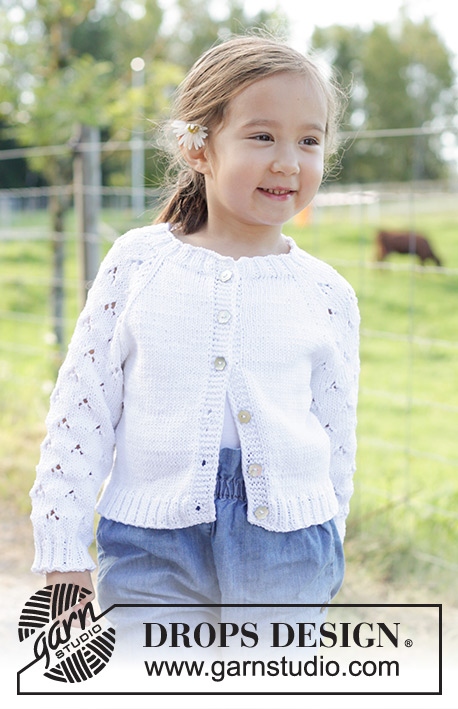
Knitted jacket for children in DROPS Muskat. The piece is worked top down with raglan, lace pattern on the sleeves and I-cord bands. Sizes 2 – 12 years.
DROPS Children 48-2 |
|||||||||||||
|
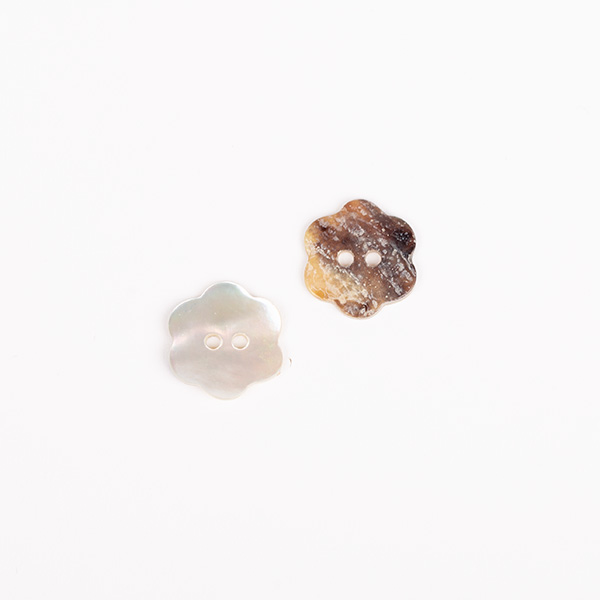
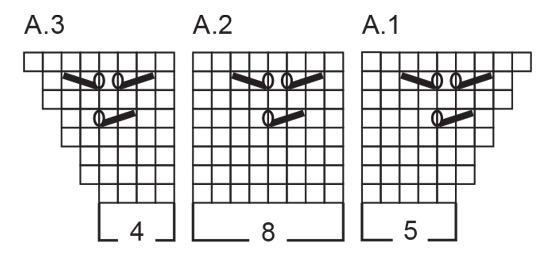
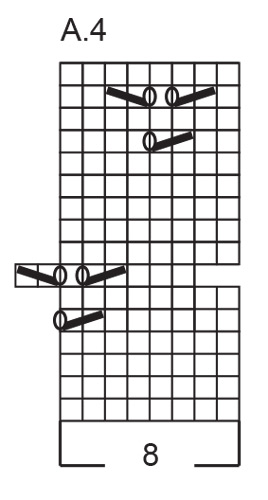
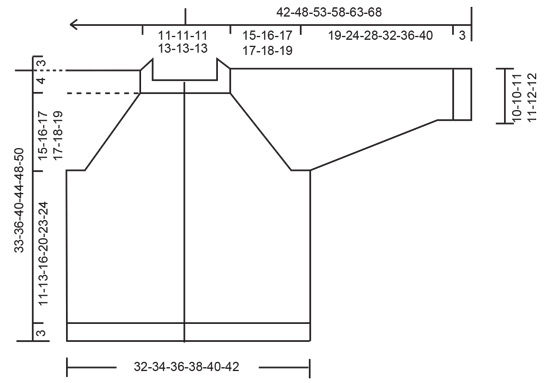
------------------------------------------------------- EXPLANATIONS FOR THE PATTERN: ------------------------------------------------------- GARTER STITCH (worked back and forth): Knit all rows. EDGE STITCHES (I-cord): WORK 2 EDGE STITCHES AT BEGINNING OF ROW: Slip 1 stitch purl-wise with the strand in front, knit 1. WORK 2 EDGE STITCHES AT END OF ROW: Work until there are 2 stitches left on the row, slip 1 stitch purl-wise with the strand in front, knit 1. Repeat at the beginning and end of each row. BUTTONHOLES: Work buttonholes on the right band (when the garment is worn). Work from the right side when there are 4 stitches left on the row as follows: Make 1 yarn over, knit 2 together, 2 edge stitches. On the next row (wrong side), knit the yarn over to leave a hole. The first buttonhole is worked on the first row after the neck. The other 5-5-5-6-6-6 buttonholes are then worked with 5-5½-6½-6-6½-7 cm = 2"-2⅛"-2½"-2⅜"-2½"-2¾" between each one. NOTE: The bottom buttonhole is worked in the transition between the stockinette stitch and rib. PATTERN: See diagrams A.1 to A.4. The diagrams show all rows in the pattern from the right side. RAGLAN: Increase 1 stitch before/after 2 knitted stitches in each transition between body and sleeves. The marker-threads sit between these 2 stitches. Increase 1 stitch by making 1 yarn over, which is purled twisted on the next row to avoid a hole. DECREASE TIP (for sleeves): Decrease 1 stitch on each side of the marker-thread as follows: Work until there are 3 stitches left before the marker-thread, knit 2 together, knit 2 (marker-thread sits between these 2 stitches), slip 1 stitch knit-wise, knit 1 and pass the slipped stitch over the knitted stitch (2 stitches decreased). ------------------------------------------------------- START THE PIECE HERE: ------------------------------------------------------- JACKET – SHORT OVERVIEW OF THE PIECE. The neck and yoke are worked back and forth with circular needle, from mid front and top down. The yoke is divided for body and sleeves and the body continued back and forth with circular needle. The sleeves are worked in the round with double pointed needles. NECK: Cast on 94-94-94-98-98-98 stitches with circular needle size 3 MM = US 2.5 and DROPS Muskat. Purl 1 row from the wrong side. Work as follows from the right side: 2 EDGE STITCHES – read description above, 4 GARTER STITCHES - read description above (= 6 band stitches), * knit 2, purl 2*, work from *-* until there are 8 stitches left, knit 2, work 4 garter stitches and 2 edge stitches (= 6 band stitches). Work this rib for approx. 3 cm = 1⅛", with the next row from the wrong side. YOKE: Change to circular needle size 4 MM = US 6. From the wrong side, insert 4 marker-threads and increase stitches as follows: Work 6 band stitches as before, purl 13-13-13-13-13-13 (front piece), insert 1 marker-thread, purl 16 and increase 3 stitches evenly spaced (sleeve), insert 1 marker-thread, purl 24-24-24-28-28-28 (back piece), insert 1 marker-thread, purl 16 and increase 3 stitches evenly spaced (sleeve), insert 1 marker-thread, purl 13-13-13-13-13-13 (front piece), 6 band stitches as before = 100-100-100-104-104-104 stitches. On the next row (right side) begin to increase for raglan and work diagrams A.1 to A.3 over the sleeve-stitches as follows: - remember the BUTTONHOLES – read description above. NOTE! When A.1 to A.3 is finished in height, work 1 more repeat of A.2 in width between A.1 and A.3. Work 6 band stitches, knit 12-12-12-12-12-12, increase 1 stitch for RAGLAN – read description above, knit 2 (marker-thread sits between these 2 stitches), increase 1 stitch for raglan, work A.1, A.2, A.3, increase 1 stitch for raglan, knit 2 (marker-thread sits between these 2 stitches), increase 1 stitch for raglan, knit 22-22-22-26-26-26, increase 1 stitch for raglan, knit 2 (marker-thread sits between these 2 stitches), increase 1 stitch for raglan, work A.1, A.2, A.3, increase 1 stitch for raglan, knit 2 (marker-thread sits between these 2 stitches), increase 1 stitch for raglan, knit 12-12-12-12-12-12, 6 band stitches. Continue with the bands, stockinette stitch on the front and back pieces, lace pattern on the sleeves and increase for raglan on each side of the 4 marker-threads every 2nd row a total of 9-9-7-8-8-7 times (including the first increase) = 172-172-156-168-168-160 stitches. Continue increasing every 2nd row but every 2nd increase is now only on the front and back pieces (4 increased stitches). I.e., increase on the front and back pieces every 2nd row, on the sleeves every 4th row. Increase like this 10-12-16-14-16-18 times on the front and back pieces (5-6-8-7-8-9 times on the sleeves). NOTE! The increases on the sleeves will not continue as shown in A.1 and A.3 because it is now increased on every 4th row. A.4 shows a repeat of the pattern, make sure it matches the established pattern. REMEMBER THE KNITTING GAUGE! After the last increase there are 232-244-252-252-264-268 stitches; you have increased 19-21-23-22-24-25 times on the front and back pieces and 14-15-15-15-16-16 times on the sleeves. Continue with the bands, stockinette stitch on the front and back pieces and lace pattern on the sleeves, without further increases, until the yoke measures 15-16-17-17-18-19 cm = 6"-6¼"-6¾"-6¾"-7"-7½", from the neck mid-front. Now divide for the body and sleeves as follows: Work the first 38-40-42-41-43-44 stitches as before (front piece), place the next 47-49-49-49-51-51 stitches on 1 thread for the sleeve, cast on 6-6-6-8-8-10 stitches (in side under sleeve), work 62-66-70-72-76-78 stockinette stitches (back piece), place the next 47-49-49-49-51-51 stitches on 1 thread for the sleeve, cast on 6-6-6-8-8-10 stitches (in side under sleeve), work the last 38-40-42-41-43-44 stitches as before (front piece). The body and sleeves are finished separately. The piece is now measured from here. BODY: = 150-158-166-170-178-186 stitches. Continue back and forth with stockinette stitch and 6 band stitches as before on each side. When the body measures 11-13-16-20-23-24 cm = 4⅜"-5⅛"-6¼"-8"-9"-9½" from the division, work 1 row from the right side and increase 16-16-16-20-20-20 stitches evenly spaced (do not increase over the bands) = 166-174-182-190-198-206 stitches. Change to circular needle size 3 MM = US 2.5 and work as follows from the wrong side: 6 band stitches, * purl 2, knit 2 *, work from *-* until there are 8 stitches left, knit 2, 6 band stitches. Continue this rib for 3 cm = 1⅛". Bind off with knit over knit and purl over purl when the piece measures 33-36-40-44-48-50 cm = 13"-14¼"-15¾"-17¼"-19"-19¾" from the shoulder. SLEEVES: Place the 47-49-49-49-51-51 stitches from the thread on the one side of the piece on double pointed needles size 4 MM = US 6 and knit up 1 stitch in each of the 6-6-6-8-8-10 stitches cast on under the sleeve = 53-55-55-57-59-61 stitches. Insert a marker-thread in the middle of the new stitches under the sleeve and allow it to follow your work onwards; it is used when decreasing under the sleeve. Start at the marker-thread and work pattern in the round according to A.4 – the stitches which do not fit into the pattern on each side under the sleeve are knitted. Make sure A.4 matches the established pattern from A.1-A.3. When the sleeve measures 2 cm =¾", decrease 1 stitch on each side of the marker-thread – read DECREASE TIP. Decrease like this every 3-4-5½-6-7-8 cm = 1⅛"-1½"-2⅛"-2⅜"-2¾"-3⅛" a total of 6-6-5-5-5-5 times = 41-43-45-47-49-51 stitches. Continue working until the sleeve measures 19-24-28-32-36-40 cm = 7½"-9½"-11"-12½"-14¼"-15¾" from the division (or to desired length. There is 3 cm = 1⅛" left). Knit 1 round and increase 7-5-7-5-7-5 stitches evenly spaced = 48-48-52-52-56-56 stitches. Change to double pointed needles size 3 MM = US 2.5 and work rib (knit 2, purl 2) for 3 cm = 1⅛". Bind off with rib. The sleeve measures approx. 22-27-31-35-39-43 cm = 8¾"-10⅝"-12¼"-13¾"-15¼"-17" from the division. Work the other sleeve in the same way. ASSEMBLY: Sew the buttons onto the left band. |
|||||||||||||
Diagram explanations |
|||||||||||||
|
|||||||||||||
 |
|||||||||||||
 |
|||||||||||||
 |
|||||||||||||
Have you finished this pattern?Tag your pictures with #dropspattern #daisyfieldscardigan or submit them to the #dropsfan gallery. Do you need help with this pattern?You'll find 21 tutorial videos, a Comments/Questions area and more by visiting the pattern on garnstudio.com. © 1982-2026 DROPS Design A/S. We reserve all rights. This document, including all its sub-sections, has copyrights. Read more about what you can do with our patterns at the bottom of each pattern on our site. |
|||||||||||||






With over 40 years in knitting and crochet design, DROPS Design offers one of the most extensive collections of free patterns on the internet - translated to 17 languages. As of today we count 333 catalogs and 12532 patterns - 12522 of which are translated into English (US/in).
We work hard to bring you the best knitting and crochet have to offer, inspiration and advice as well as great quality yarns at incredible prices! Would you like to use our patterns for other than personal use? You can read what you are allowed to do in the Copyright text at the bottom of all our patterns. Happy crafting!
Post a comment to pattern DROPS Children 48-2
We would love to hear what you have to say about this pattern!
If you want to leave a question, please make sure you select the correct category in the form below, to speed up the answering process. Required fields are marked *.