Comments / Questions (8)
![]() Toni Pidsadnick wrote:
Toni Pidsadnick wrote:
Correction needed: "BUTTONHOLES: Work buttonholes on the right band (when the garment is worn)." It's important to note that the button holes are on the right ONLY when making the woman's version of this pattern. Please correct it so that for the men's version, the button holes are always on the LEFT. Mens' buttons are always on the right. At least, that's how it is in Canada and the US. Maybe Europe too?
28.11.2025 - 20:08
![]() Suzanna Mårtensson wrote:
Suzanna Mårtensson wrote:
I mönstret står att man ska använda liten rundsticka 3 när man gör halskanten. I beskrivningen i början av beskrivningen att man ska använda rundsticka 3 längd 80 cm, rundsticka 4 som är 40 cm och ch 80 cm. Alltså det nämns inte rundsticka 3 som bör vara 40 cm.
05.06.2025 - 19:29DROPS Design answered:
Hei Suzanna. Halskanten strikkes frem og tilbake, så det spiller ingen rolle om man vil bruke 40 cm eller 80 cm. Når du skal strikke ermene kan du bruke settpinner, om du ikke har en liten (40 cm) rundpinne. mvh DROPS Design
10.06.2025 - 13:15
![]() Bianca Eijkhout wrote:
Bianca Eijkhout wrote:
Hoe kun je in hemelsnaam aan het begin van de meld 1steek afhalen de dan de draad voor het werk leggen en dan de volgende steek recht breien ? Zouden jullie mij dit uit kunnen leggen, hartelijk dank alvast
21.01.2025 - 18:44
![]() Caro wrote:
Caro wrote:
Hallo zusammen, Habt ihr einen Tipp für mich wenn der Ausschnitt für die Ärmel an der Achsel etwas zu eng geworden ist. Vielen Dank. Mit freundlichen Grüßen
30.12.2024 - 15:36DROPS Design answered:
Liebe Caro, wie meinen Sie mit "zu eng"? Brauchen Sie mehr Maschen unter die Ärmel? Dann können Sie vielleicht mehr Maschen anschlagen/auffassen? Oder vielleicht am besten Ihr DROPS Händler mal fragen, sicher kann man Ihnen dort weiterhelfen (auch per Telefon oder per E-Mail); Viel Spaß beim Stricken!
02.01.2025 - 14:56
![]() Marita Brockhoff wrote:
Marita Brockhoff wrote:
Hallo möchte diese Jacke stricken aber ohne Muster. Wieviel Wolle brauche ich dann? MfG M. Brockhoff
17.04.2024 - 16:30DROPS Design answered:
Liebe Frau Brockhoff, da diese Jacke mit Muster gestrickt wurde, haben wir leider nur die Garnmenge für das Farbige Muster und die Jacke haben wir nicht mehr; am besten zählen Sie alle Farben zusammen, wahrscheinlich brauchen Sie etwas weniger. Gerne kann Ihnen damit ihr DROPS Händler - auch per E-Mail or Telefon - weiter helfen. Viel Spaß beim Stricken!
18.04.2024 - 07:52
![]() Marie-Laure Bougant wrote:
Marie-Laure Bougant wrote:
Bonjour, Pouvons-nous remplacer les augmentations avec jeté par une augmentation intercalaire envers ? Merci d’avance. Marie-Laure
24.02.2024 - 14:38DROPS Design answered:
Bonjour Mme Bougant, vous pouvez tout à fait utiliser la technique que vous souhaitez pour augmenter. Bon tricot!
26.02.2024 - 08:17
![]() Marie-Laure wrote:
Marie-Laure wrote:
Bonjour, Pour le diagramme, chaque ligne représente un rang endroit puis envers? Dans ce cas devons nous faire les augmentations sur l'envers? Merci pour votre aide.
02.02.2024 - 19:08DROPS Design answered:
Bonjour Marie-Laure, effectivement, les diagrammes montrent tous les rangs, ceux sur l'endroit (que l'on doit lire de droite à gauche) mais aussi ceux sur l'envers (que l'on doit lire de gauche à droite); augmentez comme indiqué dans le diagramme, si c'est un rang sur l'envers, faites les jeté sur l'envers et tricotez les torse à l'endroit au rang suivant sur l'endroit. Bon tricot!
05.02.2024 - 08:00
![]() Ewa wrote:
Ewa wrote:
Om jag följer mönstret för knapphål, står det att knapphålen blir på höger sida om koftan sitter på. Då mönstret är en herrtröja borde väl knapphålen vara på vänster sida? Tacksam för svar då jag ska börja sticka koftan.
13.01.2024 - 23:33DROPS Design answered:
Hej Ewa, på den her model er knaphullerne på højre forkant og passer med billedet. MEN det stemmer, de fleste sætter knapperne på højre forkant på herrejakker, så gør du bare det :)
16.01.2024 - 12:23
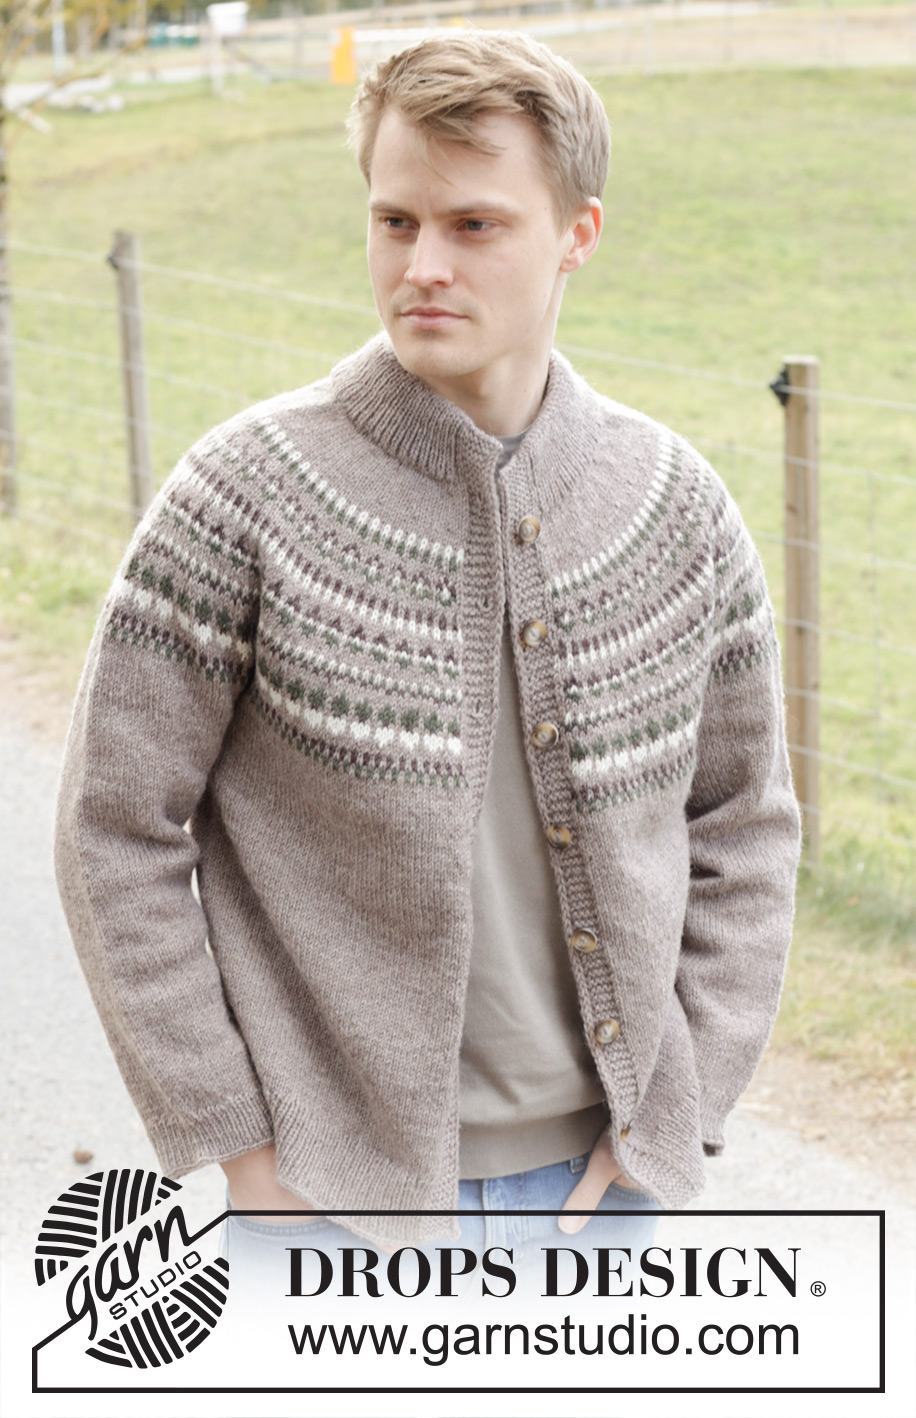
Boreal Circle Cardigan#borealcirclecardigan |
|||||||||||||
 |
 |
||||||||||||
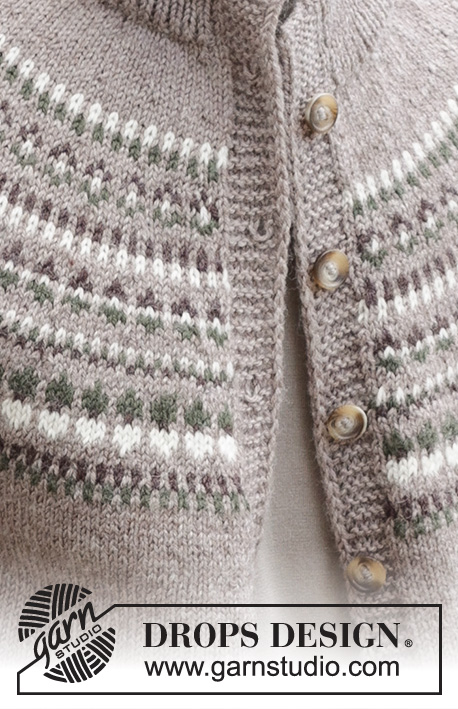
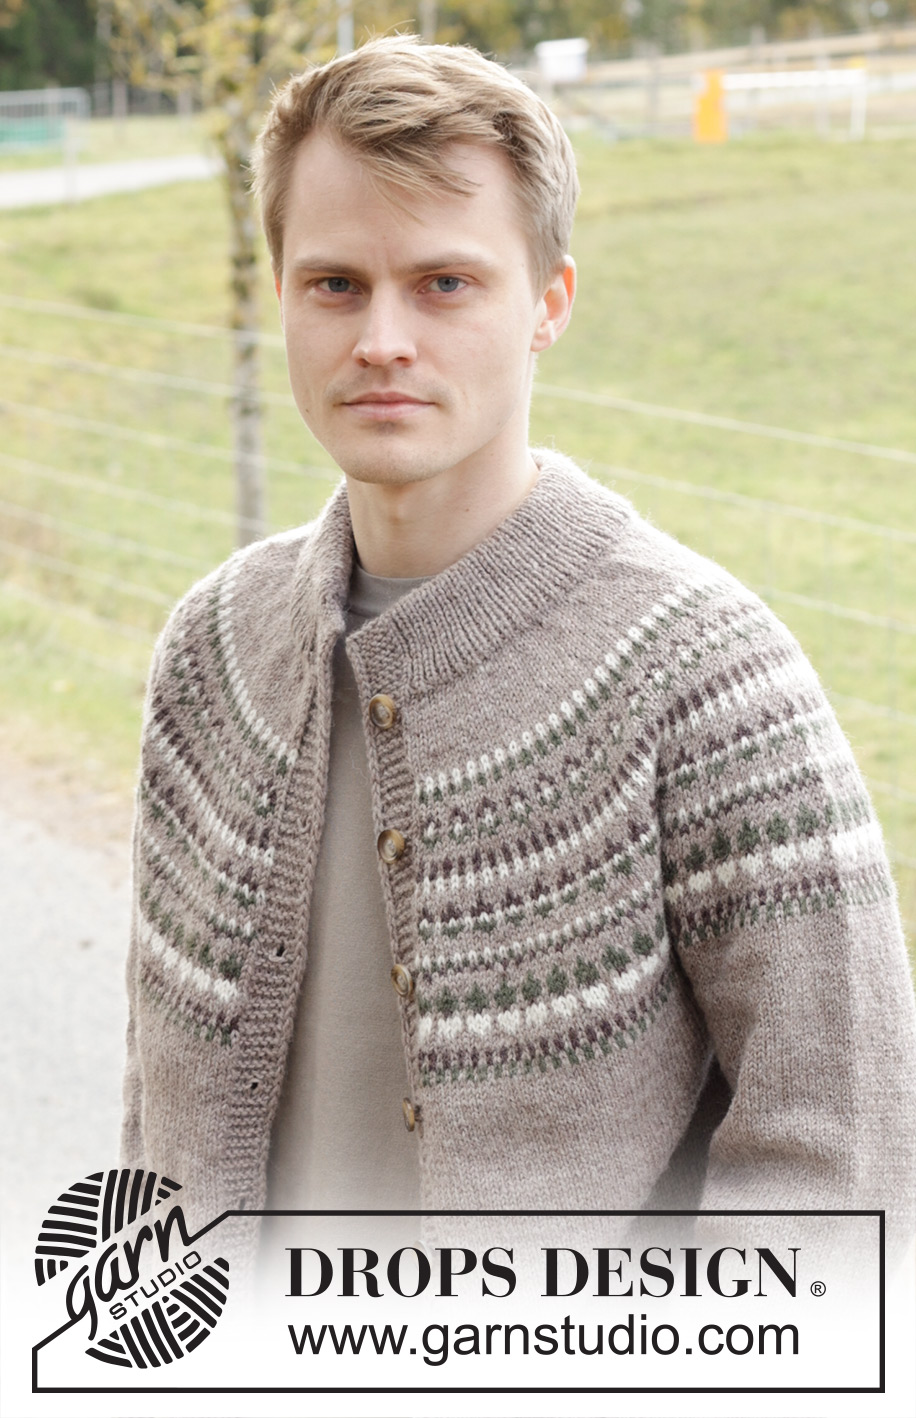
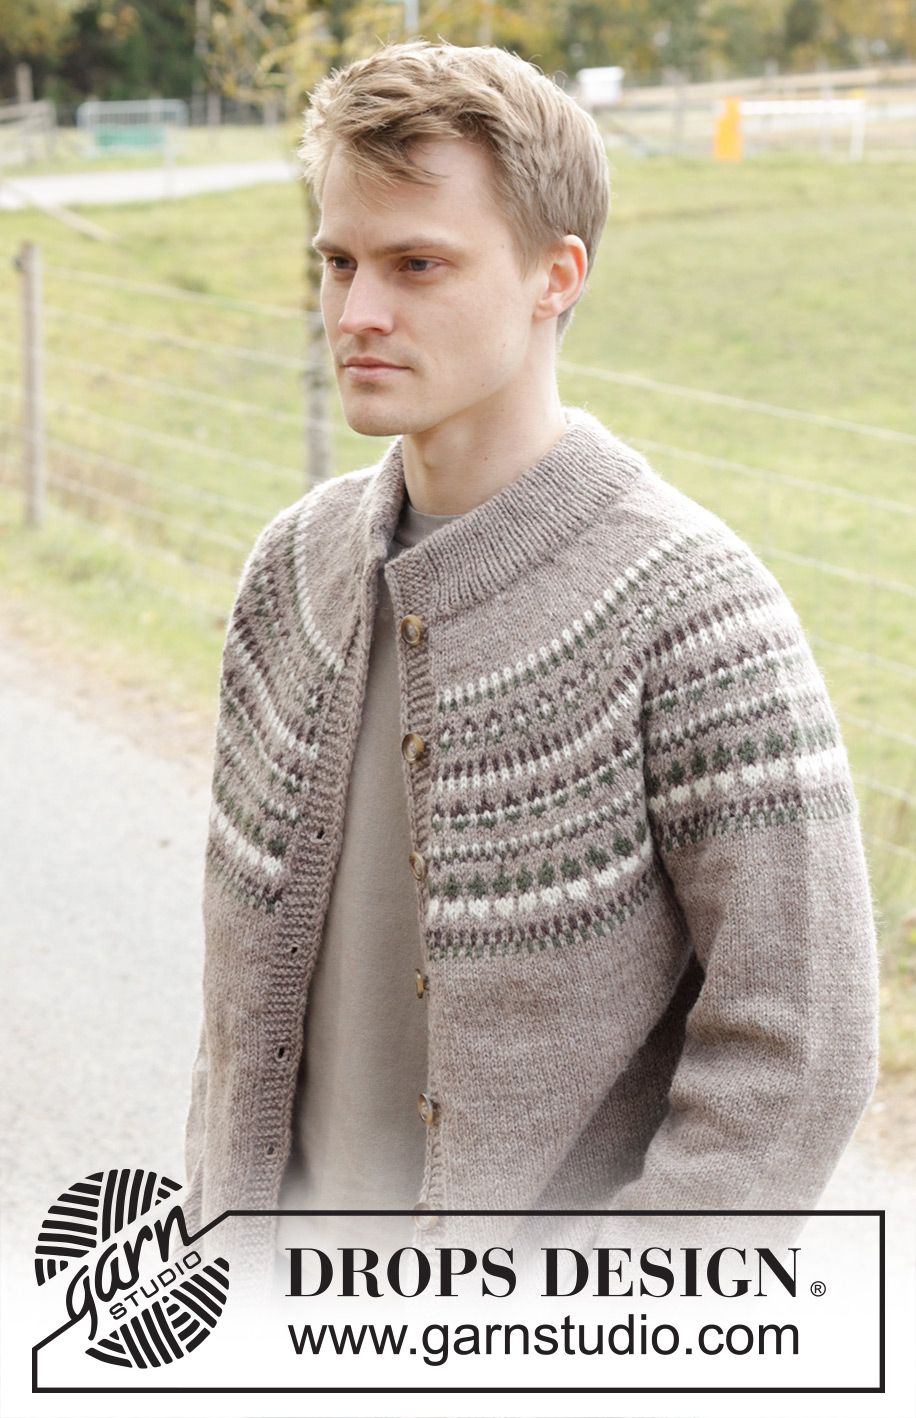
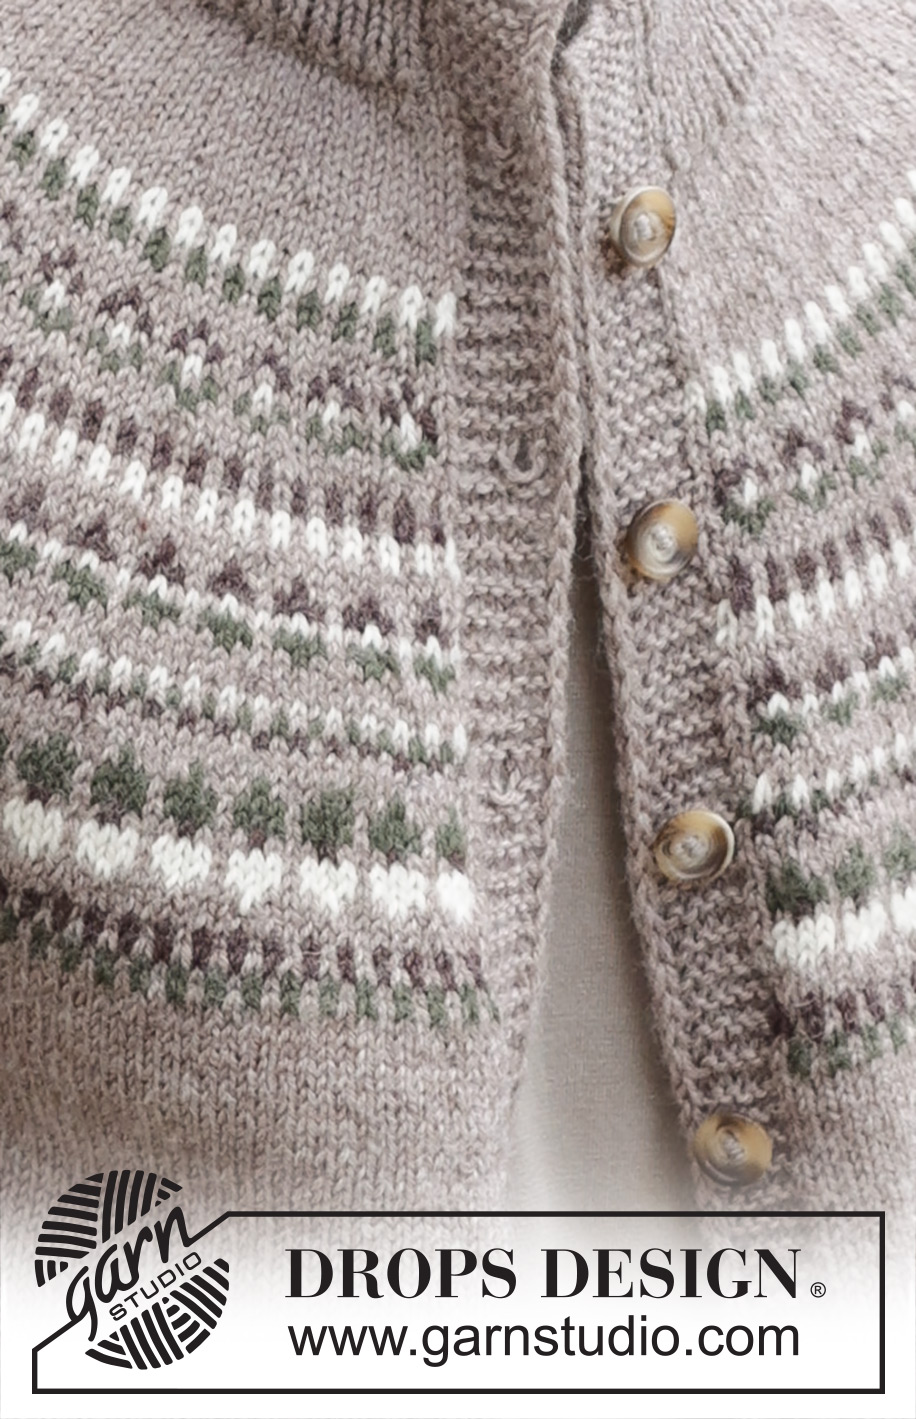
Knitted jacket for men in DROPS Karisma. The piece is worked top down with round yoke and Nordic pattern. Sizes S - XXXL.
DROPS 246-10 |
|||||||||||||
|
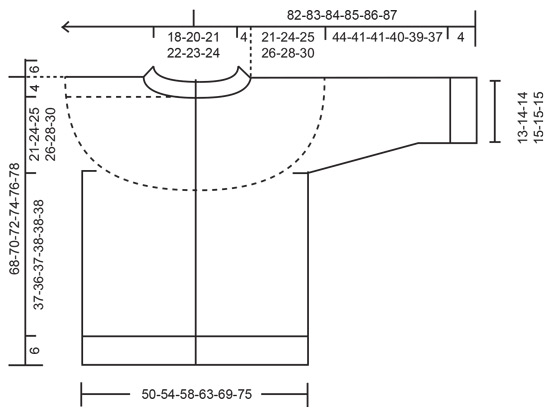
------------------------------------------------------- EXPLANATIONS FOR THE PATTERN: ------------------------------------------------------- GARTER STITCH (worked back and forth): Knit all rows. 1 ridge = knit 2 rows. PATTERN: See diagram A.1. The diagram is worked in stockinette stitch. INCREASE/DECREASE TIP (evenly spaced): To work out how to increase/decrease evenly, count the total number of stitches on needle (e.g., 139 stitches), minus the bands (e.g., 14 stitches) and divide the remaining stitches by the number of increases/decreases to be made (e.g., 16) = 7.8. In this example, increase by making 1 yarn over after alternately each 7th and 8th stitch (approx.). Do not increase over the bands. On the next row work the yarn overs twisted to avoid holes. When decreasing, knit together approx. each 7th and 8th stitch. EDGE STITCHES: Work 2 edge stitches at the beginning of the row as follows: Slip 1 stitch purl-wise with the strand in front, knit 1. Work 2 edge stitches at the end of the row as follows: Work until there are 2 stitches left on the row, slip 1 stitch purl-wise with the strand in front, knit 1. Repeat at the beginning and end of each row. BUTTONHOLES: Work buttonholes on the right band (when the garment is worn). Work from the right side when there are 4 stitches left on the row as follows: Make 1 yarn over, knit 2 together and knit 2. On the next row (wrong side), knit the yarn over to leave a hole. The first buttonhole is worked on the first row from the right side after the neck is finished. Then work the other 6-6-6-7-7-7 buttonholes with approx. 9-9½-10-8½-9-9 cm = 3½"-3⅝"-4"-3¼"-3½"-3½" between each one. The bottom buttonhole is worked in the transition between the stockinette stitch and rib. KNITTING TIP: To avoid the knitting gauge losing its elasticity when working pattern, it is important that the strands at the back are not tight. Use a size larger needle when working pattern if the piece becomes tight. DECREASE TIP (for sleeves): Decrease 1 stitch on each side of the marker-thread as follows: Work until there are 3 stitches left before the marker-thread, knit 2 together, knit 2 (marker-thread sits between these 2 stitches), slip 1 stitch knit-wise, knit 1 and pass the slipped stitch over the knitted stitch. ------------------------------------------------------- START THE PIECE HERE: ------------------------------------------------------- JACKET – SHORT OVERVIEW OF THE PIECE. The neck and yoke are worked back and forth with circular needle, from mid front and top down. The yoke is divided for body and sleeves and the body continued back and forth with circular needle. The sleeves are worked in the round with double pointed needles/short circular needle. DOUBLE NECK: Cast on 127-135-141-145-151-155 stitches with the short circular needle size 3 MM = US 2.5 and color light beige brown DROPS Karisma. Purl 1 row (= wrong side). Work as follows from the right side: 1 GARTER STITCH – read description above, * knit 1, purl 1 *, work from *-* until there are 2 stitches left, knit 1 and 1 garter stitch. Continue this rib. When rib measures 6 cm = 2⅜", cast on 6 new stitches at the end of the next 2 rows = 139-147-153-157-163-167 stitches. Continue the rib but now with 2 EDGE STITCHES outermost on each side and 5 garter stitches inside these edge stitches = 7 band stitches. The band stitches are always worked with color light beige brown. When the rib measures a total of 12 cm = 4¾", knit 1 row from the right side and decrease 16-16-18-18-20-20 stitches evenly spaced (do not decrease over the bands) - read INCREASE/DECREASE TIP. In addition, on this row work the first BUTTONHOLE – read description above = 123-131-135-139-143-147 stitches. Purl 1 row from the wrong side with the bands worked as before. Work yoke as explained below. YOKE: Change to circular needle size 4 MM = US 6. Read KNITTING TIP! Work as follows from the right side: 7 band stitches as before, work A.1 until there are 8 stitches left, work the first stitch in A.1 (so the pattern is symmetrical), 7 band stitches as before. REMEMBER THE KNITTING GAUGE! AT THE SAME TIME on each row with an arrow in the diagram, increase as follows: ARROW-1: Increase 24-28-28-32-36-40 stitches evenly spaced = 147-159-163-171-179-187 stitches. ARROW-2: Increase 24-28-32-36-36-40 stitches evenly spaced = 171-187-195-207-215-227 stitches. ARROW-3: Increase 24-28-32-36-36-40 stitches evenly spaced = 195-215-227-243-251-267 stitches. ARROW-4: Increase 24-28-32-36-36-40 stitches evenly spaced = 219-243-259-279-287-307 stitches. ARROW-5: Increase 28-28-32-36-40-40 stitches evenly spaced = 247-271-291-315-327-347 stitches. ARROW-6: Increase 28-28-32-36-40-40 stitches evenly spaced = 275-299-323-351-367-387 stitches. ARROW-7: Increase 28-32-32-36-40-44 stitches evenly spaced = 303-331-355-387-407-431 stitches. ARROW-8: Increase 31-31-31-35-39-43 stitches evenly spaced = 334-362-386-422-446-474 stitches. Continue with stockinette stitch and 7 band stitches on each side, using color light beige brown. When the yoke measures 21-24-25-26-28-30 cm = 8¼"-9½"-9¾"-10¼"-11"-11¾" from the neck, divide for the body and sleeves as follows: Work 56-61-64-69-74-80 stitches as before (front piece), place the next 62-66-72-80-82-84 stitches on a thread for the sleeve, cast on 6-6-8-8-10-12 stitches (in side under sleeve), work 98-108-114-124-134-146 stitches in stockinette stitch (back piece), place the next 62-66-72-80-82-84 stitches on a thread for the sleeve, cast on 6-6-8-8-10-12 stitches (in side under sleeve), work the last 56-61-64-69-74-80 stitches as before (front piece). The body and sleeves are finished separately. THE PIECE IS NOW MEASURED FROM HERE! BODY: = 222-242-258-278-302-330 stitches. Continue stockinette stitch with 7 band stitches on each side and color light beige brown until the body measures 37-36-37-38-38-38 cm = 14½"-14¼"-14½"-15"-15"-15" from the division. Work 1 row from the right side and increase 23-25-25-27-31-33 stitches evenly spaced (do not increase over the bands) = 245-267-283-305-333-363 stitches. Change to circular needle size 3 MM = US 2.5 and work as follows from the wrong side: 7 band stitches as before, * purl 1, knit 1 *, work from *-* until there are 8 stitches left, purl 1 and 7 band stitches as before. Continue this rib for 6 cm = 2⅜". Bind off a little loosely with knit from the right side. The jacket measures approx. 68-70-72-74-76-78 cm = 26¾"-27½"-28⅜"-29⅛"-29½"-30¾" from the shoulder. SLEEVES: Place the 62-66-72-80-82-84 stitches from the thread on the one side of the piece on short circular needle/double pointed needles size 4 MM = US 6 and knit up 1 stitch in each of the 6-6-8-8-10-12 stitches cast on under the sleeve = 68-72-80-88-92-96 stitches. Insert a marker-thread in the middle of the new stitches under the sleeve. Start at the marker-thread and work stockinette stitch in the round with color light beige brown. When the sleeve measures 3 cm = 1⅛", decrease 2 stitches mid under the sleeve – read DECREASE TIP. Decrease like this every 5-5-3½-2½-2½-2 cm = 2"-2"-1¼"-1"-1"-¾" a total of 8-8-11-14-15-16 times = 52-56-58-60-62-64 stitches. Continue working until the sleeve measures 44-41-41-40-39-37 cm = 17¼"-16⅛"-16⅛"-15¾"-15¼"-14½" from the division (or to desired length. There is approx. 4 cm left). Knit 1 round and increase 6-6-6-6-6-6 stitches evenly spaced = 58-62-64-66-68-70 stitches. Change to double pointed needles size 3 MM = US 2.5 and work rib (knit 1, purl 1) for 4 cm = 1½". Bind off a little loosely. The sleeve measures approx. 48-45-45-44-43-41 cm = 19"-17¾"-17¾"-17¼"-17"-16⅛". Work the other sleeve in the same way. ASSEMBLY: Fold the neck double to the inside and sew down. To avoid the neck being tight and rolling outwards, it is important that the seam is elastic. Sew together the openings on the bands with small stitches. Sew the buttons onto the left band. |
|||||||||||||
Diagram explanations |
|||||||||||||
|
|||||||||||||
 |
|||||||||||||
 |
|||||||||||||
Have you finished this pattern?Tag your pictures with #dropspattern #borealcirclecardigan or submit them to the #dropsfan gallery. Do you need help with this pattern?You'll find 31 tutorial videos, a Comments/Questions area and more by visiting the pattern on garnstudio.com. © 1982-2026 DROPS Design A/S. We reserve all rights. This document, including all its sub-sections, has copyrights. Read more about what you can do with our patterns at the bottom of each pattern on our site. |
|||||||||||||







Post a comment to pattern DROPS 246-10
We would love to hear what you have to say about this pattern!
If you want to leave a question, please make sure you select the correct category in the form below, to speed up the answering process. Required fields are marked *.