
Popular categories
Looking for a yarn?


Comments / Questions (29)
![]() Ebba wrote:
Ebba wrote:
På beskrivningen till bakstycket står det: När arbetet mäter 20-20-20-20-17-16 cm från markörerna, ökas det 1 maska i varje sida till ärmhål – läs ÖKNINGSTIPS-1. Jag ville bara dubbelkolla så att måtten stämmer. Varför ska den minsta storleken vara 20 cm lång, men den störta 16 cm? Borde det inte vara tvärt om att minst storlek är kortast?
06.02.2026 - 13:30DROPS Design answered:
Hei Ebba. Nei, i den minste str gjentas økningen kun 7 ganger totalt, mens i den største str. gjentas økningen 17 ganger totalt, slik at når økningene er ferdig måler arbeidet ca 25 cm i den minste str og 29 cm i den største str. mvh DROPS Design
09.02.2026 - 13:05
![]() Anita wrote:
Anita wrote:
Czy żyłka 40cm do rękawów nie będzie za krótka? Nie lepiej użyć 60cm?
10.12.2025 - 18:03DROPS Design answered:
Witaj Anito, oczywiście możesz użyć dłuższych drutów. Każdy pracuje inaczej, niektórzy wolą krótsze żyłki czy druty pończosznicze na rękawy, a niektórzy dłuższe druty i magic loop. Najważniejsze, aby było Ci wygodnie przerabiać. Pozdrawiamy!
11.12.2025 - 09:39
![]() Gabi Bödeker wrote:
Gabi Bödeker wrote:
Sehr schönes Muster
14.11.2025 - 11:59
![]() Robert Hall wrote:
Robert Hall wrote:
My question is if my comment below is true. What does that do for the front side? seems to me it will be 50 stitches short in width.
12.10.2025 - 18:17DROPS Design answered:
Dear Robert, in the back piece you have 44 stitches and then increase 2 stitches 25 times in total (this already includes both the increases from the right side and the wrong side) = 50 increases. 44+50 = 94 stitches. In the front piece we pick up stitches from the back, but we also have 94 stitches, before casting on for the armhole. So they both have the same width. Happy knitting!
12.10.2025 - 18:27
![]() Robert Hall wrote:
Robert Hall wrote:
I want to expand on my first comment. I just started working on the Clear Day Vest Pattern (english version). I am using the XL size, the patter says I will end with 94 stitches went all increases are complete. If you increase 2 stitches on front and 2 stitches on wrong side and do that 25 times it comes out to 100 stitches plus 44 cast stitches equals 144 stitches. please let me know if this is an error and what will the true count, please.
28.09.2025 - 15:45
![]() Robert Hall wrote:
Robert Hall wrote:
I just started working the clear day vest pattern (english verion ) and for the back increases the total stitch count is wrong. if you increase 2 in right side and 2 in wrong side that comes to 100 stitches plus 44 cast on = 144. please advise!!!!
26.09.2025 - 17:44
![]() Knitter wrote:
Knitter wrote:
Hello, may I ask what size is the vest in the picture? Thank you
23.08.2025 - 15:20DROPS Design answered:
Dear Knitter, our models usually wear an M size. Happy knitting!
24.08.2025 - 23:32
![]() Guion Chloe wrote:
Guion Chloe wrote:
Bonjour, Je commence l'étape du devant en taille S, j'ai donc 40 mailles en haut de mon dos. Hors on me demande de relever 23 mailles pour l'épaule gauche puis ce sera 23 mailles pour la droite et ensuite 25 pour l'encolure dos. Ça fait donc beaucoup plus que 40 mailles du départ. Je ne comprends pas comment faire le relevé des mailles pour débuter le devant.. Pourriez vous m'aider ? Merci d'avance, bonne journée
11.06.2025 - 22:03DROPS Design answered:
Bonjour Mme Guion, retrouvez ici, en vidéo ou bien là, en photos comment on doit relever les mailles des devants le long des épaules du dos: non pas dans les mailles relevées mais le long des rangs tricotés pour la largeur d'épaules. Bon tricot!
12.06.2025 - 09:23
![]() Jeanette Brandt Ottosson wrote:
Jeanette Brandt Ottosson wrote:
Är det meningen att framstycket ska vara längre än bakstycket när man stickor ihop fram och bakstycke?
04.03.2025 - 15:36DROPS Design answered:
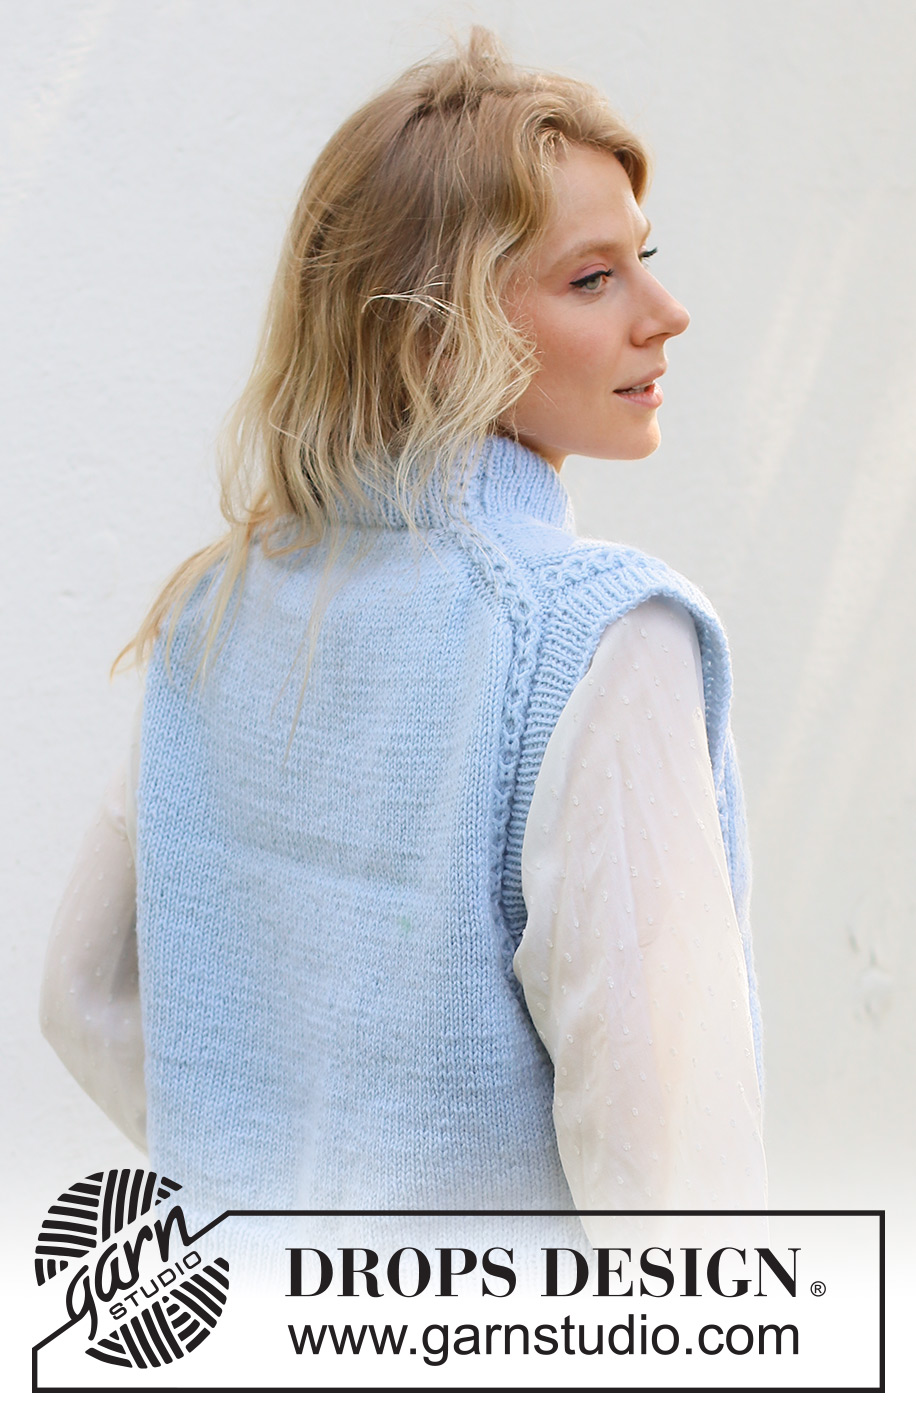
Hej Jeanette. Om du ser på bilderna så ser du att framstycket går över axeln så därför blir framstycket längre när det är en europeisk/sned axel. Mvh DROPS Design
05.03.2025 - 14:48
![]() Virginia Elvira Savario wrote:
Virginia Elvira Savario wrote:
Me encanta la puntada y todos sus proyectos E hilos feliz año
07.01.2025 - 10:50
|
|||||||||||||||||||
Clear Day Vest#cleardayvest |
|||||||||||||||||||
 |
 |
||||||||||||||||||
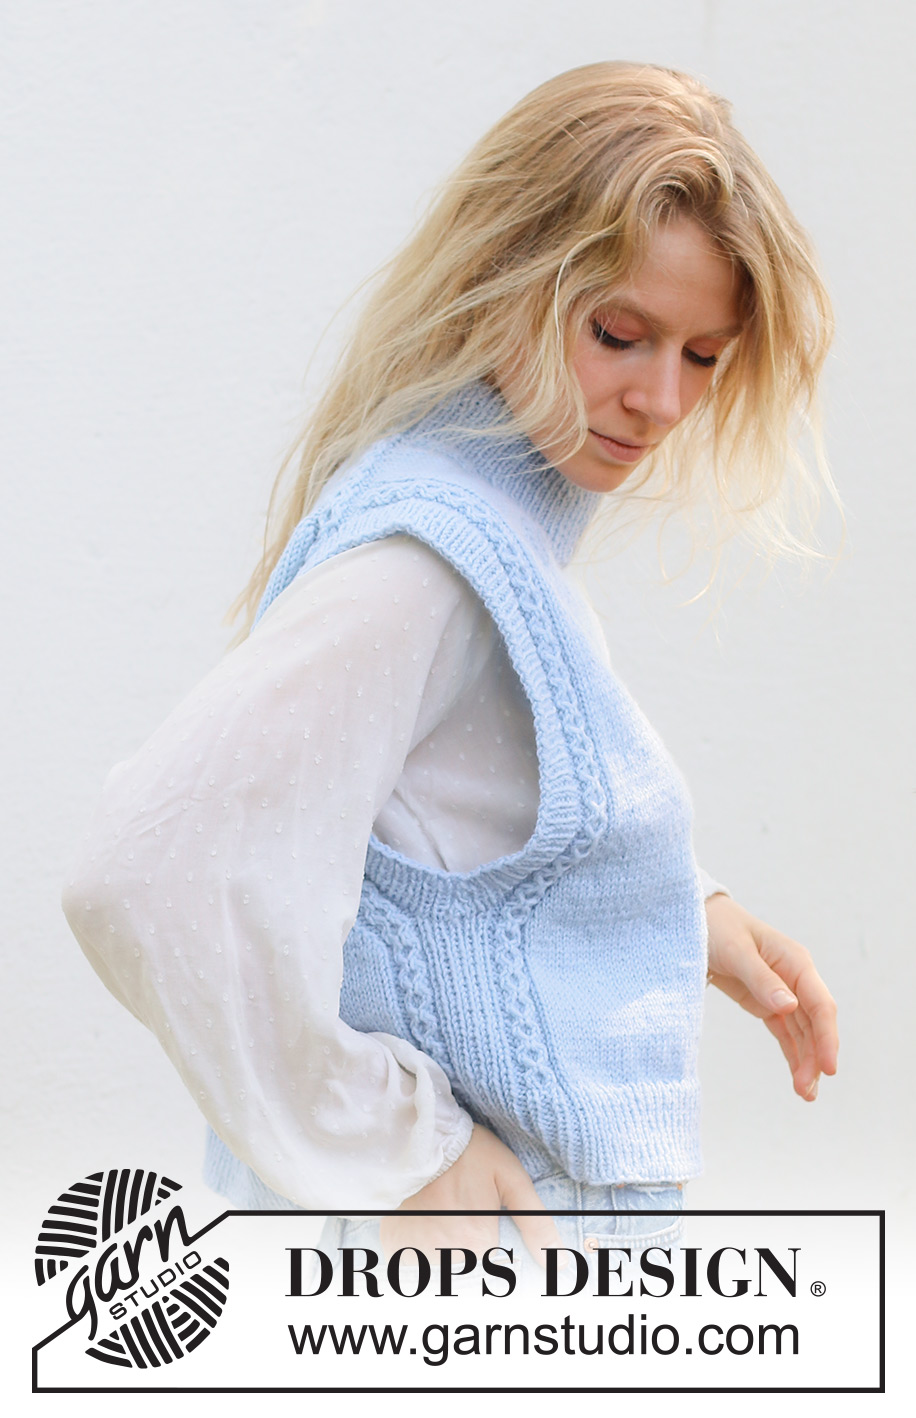
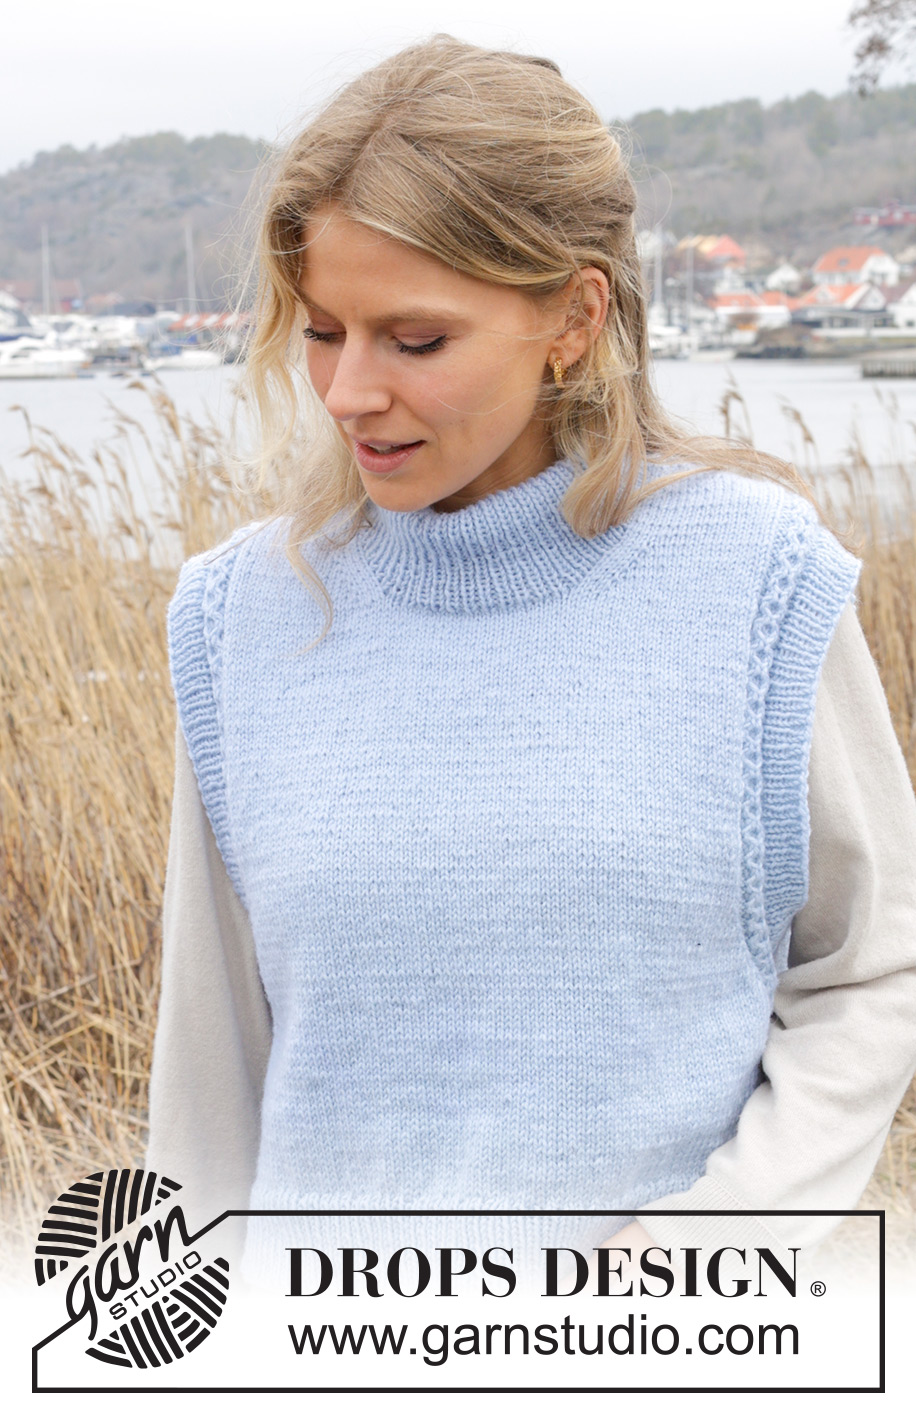
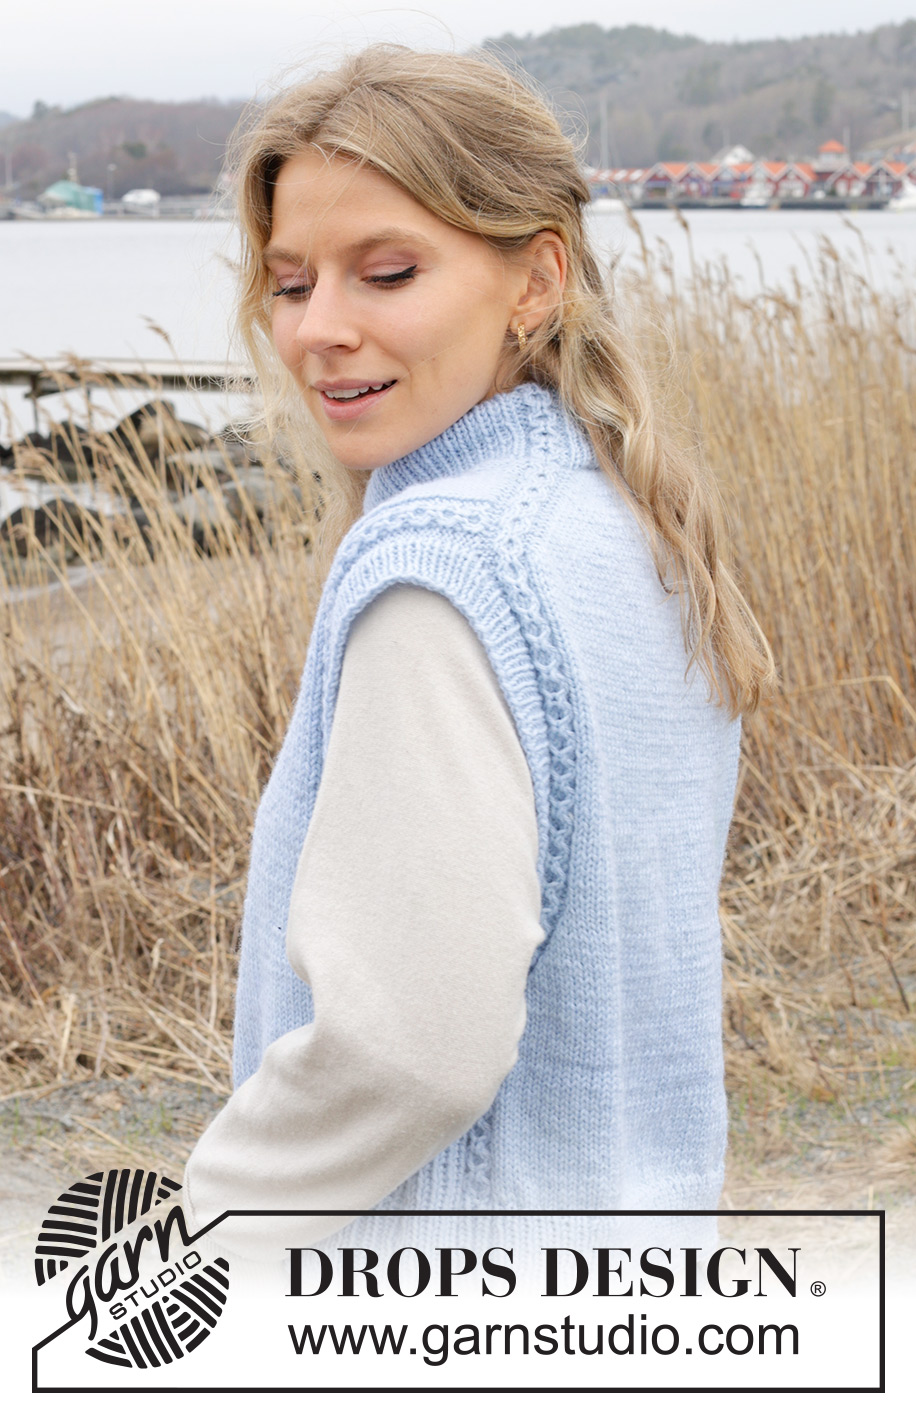
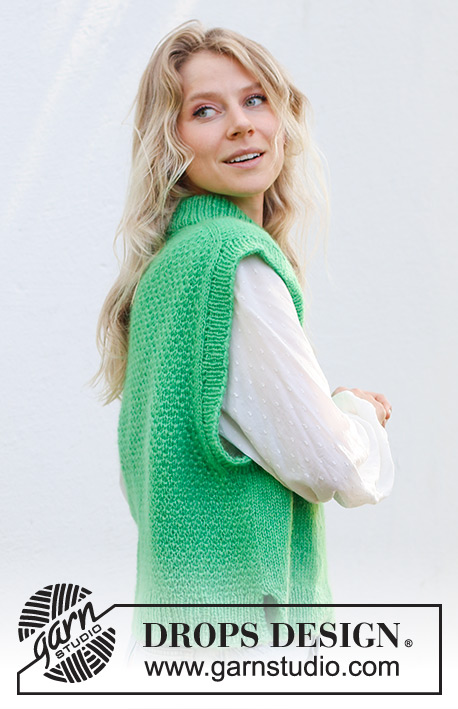
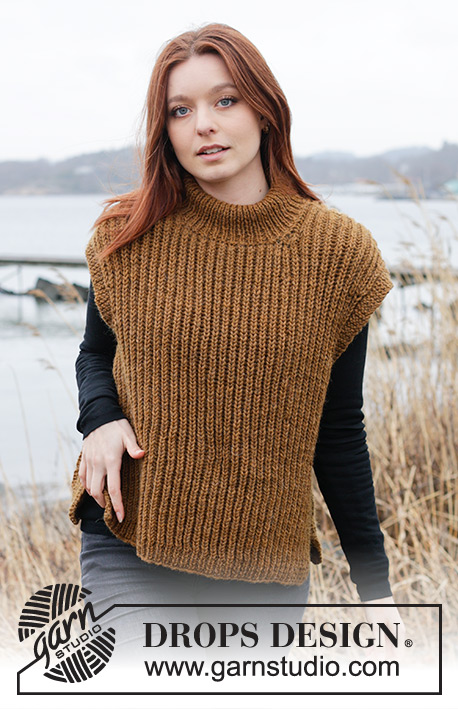
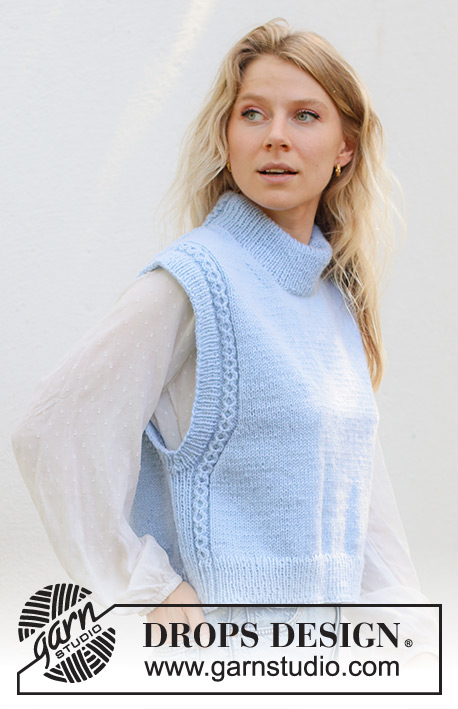
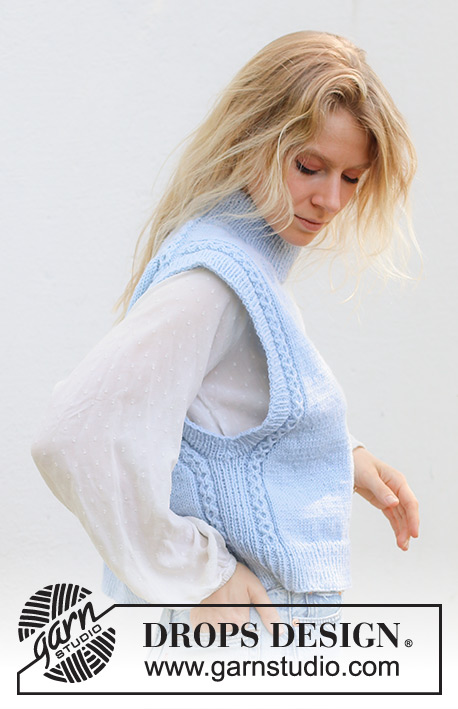
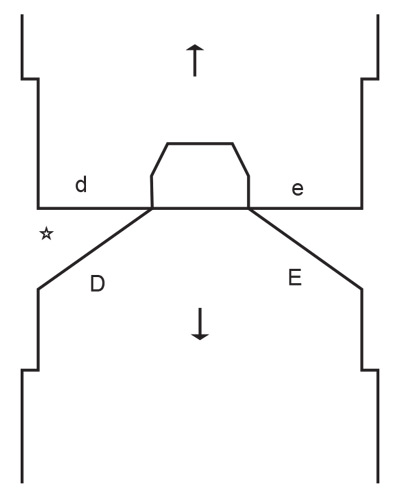
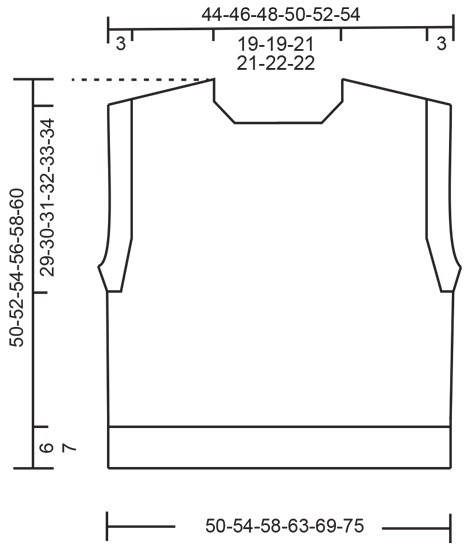
Knitted vest in DROPS Karisma or DROPS Daisy. The piece is worked top down with European/diagonal shoulders, double neck and cables. Sizes S - XXXL.
DROPS 243-33 |
|||||||||||||||||||
|
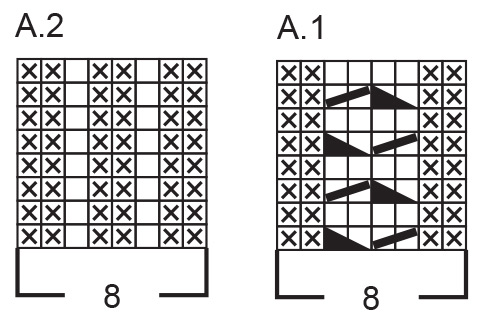
------------------------------------------------------- EXPLANATIONS FOR THE PATTERN: ------------------------------------------------------- EDGE STITCHES: 1 edge stitch is worked on each side of the piece. These edge stitches are knitted both from the right and wrong side (garter stitch). PATTERN: See diagrams A.1 and A.2. The diagrams show all rows in the pattern from the right side. INCREASE TIP FROM RIGHT SIDE: TOWARDS LEFT AFTER MARKER: Use left needle to pick up thread between 2 stitches from row below, pick up thread from front and knit stitch in back loop. TOWARDS RIGHT BEFORE MARKER: Use left needle to pick up thread between 2 stitches from row below, pick up thread from behind and knit stitch in front loop. INCREASE TIP FROM WRONG SIDE: TOWARDS LEFT AFTER MARKER: Use left needle to pick up thread between 2 stitches from row below, pick up thread from behind and purl stitch in front loop. TOWARDS RIGHT BEFORE MARKER: Use left needle to pick up thread between 2 stitches from row below, pick up thread from front and purl stitch in back loop. INCREASE TIP-1 (for armholes): All increases are worked from the right side! Increase 1 stitch inside 9 stitches (1 edge stitch + A.1) by making 1 yarn over. On the next row work the yarn over twisted to avoid a hole. Then work the new stitches in stockinette stitch. INCREASE TIP-2 (evenly spaced): Increase 1 stitch by making 1 yarn over which is worked twisted on the next round to avoid a hole. ------------------------------------------------------- START THE PIECE HERE: ------------------------------------------------------- VEST - SHORT OVERVIEW OF THE PIECE: The pattern uses both long and short needles; start with the length which fits the number of stitches and change when necessary. The piece is started back and forth, casting on stitches at the back of the neck and working the back piece top down while increasing stitches on each side for the shoulders, which become slightly diagonal. The back piece is worked as far as the armholes. The front piece is then worked in 2 sections, knitting up stitches along the left shoulder, increasing for the neckline. This is repeated on the right shoulder. The right and left shoulders are joined when the neckline is finished and worked until the armholes are finished. The front and back pieces are then joined and the body worked in the round. Stitches are knitted up around the armholes for the sleeve edge. Stitches are knitted up around the neckline and the neck is worked in the round, then folded double to the inside. BACK PIECE: Cast on 40-40-44-44-46-46 stitches with circular needle 4.5 MM = US 7 and DROPS Karisma or DROPS Daisy. Purl 1 row from the wrong side. Insert 1 marker inside the 9 outermost stitches on each side and keep them in this position on each following row. Work as follows from the right side: 1 EDGE STITCH – read description above, work A.1, increase 1 stitch AFTER the marker – read INCREASE TIP FROM RIGHT SIDE, work stockinette stitch until there are 9 stitches left, increase 1 stitch BEFORE the marker– read INCREASE TIP FROM RIGHT SIDE, work A.1, 1 edge stitch. Increase in the same way on the next row (wrong side), i.e. AFTER the marker at the beginning of the row and BEFORE the marker at the end of the row – read INCREASE TIP FROM WRONG SIDE (the increased stitches are worked in stockinette stitch). Continue the pattern and increase from both the right and wrong side a total of 21-23-23-25-26-28 times. REMEMBER THE KNITTING GAUGE! After the last increase, there are 82-86-90-94-98-102 stitches. Work 2 rows without increasing. Move the markers to the outermost stitch on each side – the piece is now measured from here. Continue with stockinette stitch, A.1 and 1 edge stitch on each side. When the piece measures 20-20-20-20-17-16 cm = 8"-8"-8"-8"-6¾"-6¼" from the markers, increase 1 stitch on each side for the armholes – read INCREASE TIP-1. Increase like this every 2nd row (each row from the right side) a total of 7-8-9-11-14-17 times (the increased stitches are worked in stockinette stitch) = 96-102-108-116-126-136 stitches. After the last increase, work back from the wrong side. The piece measures approx. 25-26-27-28-28-29 cm = 9¾"-10¼"-10⅝"-11"-11"-11⅜", measured from the markers along the armholes. Cut the strand and place the stitches on a stitch holder. FRONT PIECE: Start on the left shoulder (when the garment is worn). Knit up 23-25-25-27-28-30 stitches inside the outermost stitch along the left shoulder on the back piece (ie starting by the neck pick up 1 stitch in each of the 21-23-23-25-26-28 rows + 2 stitches to the marker). Work back as follows from the wrong side: 1 edge stitch, A.1 (starting with row 2 in the diagram), work stockinette stitch to the end of the row. Continue this pattern back and forth. When the piece measures 7-7-8-8-9-9 cm = 2¾"-2¾"-3⅛"-3⅛"-3½"-3½" from the knitted-up stitches, increase towards the left at the beginning of each row from the right side, after the first 4 stitches – remember INCREASE TIP FROM RIGHT SIDE. Increase like this, 4 more times (the increased stitches are worked in stockinette stitch) = 28-30-30-32-33-35 stitches. After the last increase, work the last row from the wrong side. Cut the strand and place the stitches on a stitch holder. Work the right shoulder as described below. Start at the marker and knit up 23-25-25-27-28-30 stitches inside the outermost stitch along the right shoulder on the back piece. Work back from the wrong side as follows: Stockinette stitch until there are 9 stitches left, work A.1 (starting with row 2 in the diagram) and 1 edge stitch. Continue this pattern until the piece measures 7-7-8-8-9-9 cm = 2¾"-2¾"-3⅛"-3⅛"-3½"-3½" from the knitted-up stitches. Now increase towards the right at the end of each row from the right side (before the last 4 stitches – remember INCREASE TIP FROM RIGHT SIDE. Increase like this, 4 more times (the increased stitches are worked in stockinette stitch) = 28-30-30-32-33-35 stitches. Work back from the wrong side. Work as follows from the right side: Work the stitches from the right front piece, cast on 26-26-30-30-32-32 stitches, then work the 28-30-30-32-33-35 stitches on the left front piece = 82-86-90-94-98-102 stitches. Continue with stockinette stitch, A.1 and 1 edge stitch on each side. When the piece measures 28-28-28-28-27-26 cm = 11"-11"-11"-11"-10⅝"-10¼" from the knitted-up stitches, increase for the armholes in the same way as on the back piece = 96-102-108-116-126-136 stitches. After the last increase, work back from the wrong side. The piece measures approx. 33-34-35-36-38-39 cm = 13"-13⅜"-13¾"-14¼"-15"-15¼", measured from the knitted-up stitches and measured along the armholes. BODY: Now join the front and back pieces: Work pattern as before over the 96-102-108-116-126-136 stitches on the front piece, cast on 7-9-11-13-15-17 stitches, work the 96-102-108-116-126-136 stitches from the back piece, cast on 7-9-11-13-15-17 stitches = 206-222-238-258-282-306 stitches. Work in the round, with stockinette stitch and pattern as before – the 9-11-13-15-17-19 stitches on each side between A.1, are worked in rib (knit 1, purl 1 – starting and ending with knit 1). Work until the piece measures 44-46-48-49-51-53 cm = 17¼"-18"-19"-19¼"-20"-21", measured from the top of the front shoulder. On the next round, increase evenly as follows: Knit 1, work A.2 over A.1, stockinette stitch over the next 78-84-90-98-108-118 stitches and increase 31-33-37-39-43-47 stitches evenly over these stitches – read INCREASE TIP-2, work A.2 over A.1, rib as before over the next 9-11-13-15-17-19 stitches, work A.2 over A.1, stockinette stitch over the next 78-84-90-98-108-118 stitches and increase 31-33-37-39-43-47 stitches evenly over these stitches, work A.2 over A.1 and rib as before over the last 8-10-12-14-16-18 stitches = 268-288-312-336-368-400 stitches. Change to circular needle size 3 mm = US 11. Continue as follows: Rib on each side, A.2 as before, in addition work rib (knit 1, purl 1) over the 109-117-127-137-151-165 stitches between A.2 on the front and back pieces (start and end the rib with knit 1). When the rib measures 6-6-6-7-7-7 cm = 2⅜"-2⅜"-2⅜"-2¾"-2¾"-2¾", bind off – you can use Italian bind off. The vest measures approx. 50-52-54-56-58-60 cm = 19¾"-20½"-21¼"-22"-22¾"-23⅝" from the top of the shoulder. SLEEVE EDGES: Lay the piece flat and insert 1 marker at the top of each armhole (mid shoulder). Start from the right side at the bottom of the armhole and knit up 140-146-152-160-166-172 stitches, around the armhole, inside 1 edge stitch with short circular needle size 3 MM = US 2.5 (with equal numbers of stitches on each side of the marker). Work rib in the round (knit 1, purl 1). AT THE SAME TIME every 2nd round, decrease 2 stitches under the sleeve as follows: Work until there is 1 stitch left before the first knitted stitch mid-under the sleeve, slip 2 stitches as if to knit together, knit 1 and pass the slipped stitches over the knitted stitch (= 2 stitches decreased). The sleeve edge will now lie neatly and not roll outwards. Work until the sleeve edge measures 3 cm = 1⅛". Bind off in the same way as on the body. Work the other sleeve edge in the same way. NECK: Using short circular needle size 3 MM = US 2.5, start from the right side just before A.1 on the left back shoulder, and knit up inside 1 edge stitch as follows: Knit up 1 stitch in each of the 8 stitches in A.1, 83-83-91-91-97-97 stitches around the neckline to A.1 on the right back shoulder (this stitch count must be divisible by 2 + 1), knit up 1 stitch in each of the 8 stitches in A.1 and 25-25-29-29-31-31 stitches along the back (stitch count must be divisible by 2 + 1) = 124-124-136-136-144-144 stitches. Work as follows: A.1 over the first 8 stitches, * knit 1, purl 1 *, work from *-* until there is 1 stitch left before the next A.1, knit 1, A.1, * knit 1, purl 1 *, work from *-* until there is 1 stitch left on the round, knit 1. Continue this pattern until the neck measures 11-11-11-13-13-13 cm = 4⅜"-4⅜"-4⅜"-5⅛"-5⅛"-5⅛". Bind off a little loosely. Fold the neck double to the inside and sew down. To avoid the neck being tight and rolling outwards, it is important that the seam is elastic. |
|||||||||||||||||||
Diagram explanations |
|||||||||||||||||||
|
|||||||||||||||||||
 |
|||||||||||||||||||
 |
|||||||||||||||||||
 |
|||||||||||||||||||
Have you finished this pattern?Tag your pictures with #dropspattern #cleardayvest or submit them to the #dropsfan gallery. Do you need help with this pattern?You'll find 30 tutorial videos, a Comments/Questions area and more by visiting the pattern on garnstudio.com. © 1982-2026 DROPS Design A/S. We reserve all rights. This document, including all its sub-sections, has copyrights. Read more about what you can do with our patterns at the bottom of each pattern on our site. |
|||||||||||||||||||


With over 40 years in knitting and crochet design, DROPS Design offers one of the most extensive collections of free patterns on the internet - translated to 17 languages. As of today we count 324 catalogs and 12290 patterns - 12280 of which are translated into English (US/in).
We work hard to bring you the best knitting and crochet have to offer, inspiration and advice as well as great quality yarns at incredible prices! Would you like to use our patterns for other than personal use? You can read what you are allowed to do in the Copyright text at the bottom of all our patterns. Happy crafting!
Post a comment to pattern DROPS 243-33
We would love to hear what you have to say about this pattern!
If you want to leave a question, please make sure you select the correct category in the form below, to speed up the answering process. Required fields are marked *.