Comments / Questions (28)
![]() Ellen wrote:
Ellen wrote:
Stämmer det verkligen att man ska maska av för halsen på bakstycket? De ska inte sättas på en tråd som på framstycket?
10.10.2023 - 20:13DROPS Design answered:
Hej Eller, ja vi maskar ofta av för halsen på bakstycket för att hålla ihop mitt bak :)
17.10.2023 - 13:09
![]() Olivia wrote:
Olivia wrote:
Hej :) Super opskrift - Jeg er en ny strikker og forstår ikke helt denne del i “FORSTYKKE”: “ Luk 2 masker af 2 gange og 1 maske 2 gange = 25-27-30-33-34-37 masker tilbage på skulderen.” Håber I kan hjælpe :) Mvh. Olivia
02.10.2023 - 11:38DROPS Design answered:
Hej Olivia, du lukker først 2 masker af, så 2 masker af igen, så 1 maske og sidst 1 maske igen, da har du 25 masker tilbage hvis du strikker den mindste størrelse :)
11.10.2023 - 07:57
![]() Mai wrote:
Mai wrote:
Jeg vil gerne lave denne model i garnet Alpaca nr. 7139, men ved ikke hvilken farve jeg skal vælge af Kid Silk garnet, så det passer bedst muligt sammen farvemæssigt.
22.09.2023 - 14:25DROPS Design answered:
Hej Mai, Kid-Silken passer fint med Alpaca selv om nuancen ikke er 100% samme. Vil du have den lidt mørkere skal du vælge Kid-Silk 37. Du kan altid spørge i butikken hvor de kan se begge garner :)
26.09.2023 - 15:37
![]() Věra Nováčková wrote:
Věra Nováčková wrote:
Dobrý den...prosím jak mám začít se vzorečkem na rukávu?...při 46okách mi vzor dle A1 nevychází....pokoušela jsem se jinak,aby střed řady vycházel prostředek vzoru A1....ale při přidávání ok se do toho zamotávám.....děkuji Nováčková
27.08.2023 - 10:37
![]() Věra Nováčková wrote:
Věra Nováčková wrote:
Děkuji.....tomu rozumím, jen nechápu proč takhle plést na konci.....vznikne mi nespletená mezera....rozumím tomu dobře, že tedy pravá strana přijde přišít na jednu stranu a druhá na druhou v podpaží ,?....Toho pruramku.......mě stále nejde do hlavy proč ten rukáv nemužu vsadit upleten bez té mezery.....děkuji Nováčková
21.08.2023 - 08:32DROPS Design answered:
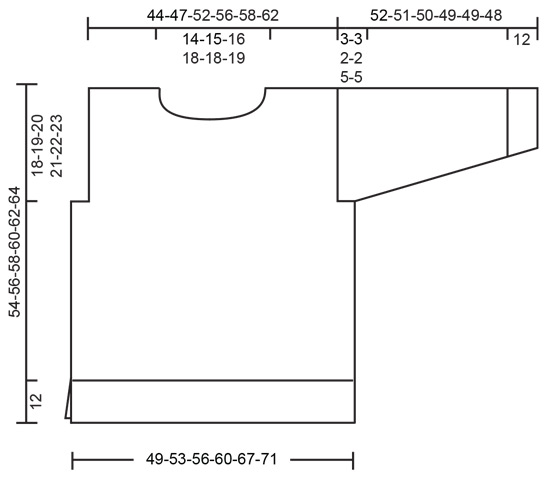
Ano, přesně tak - rukávovou hlavici pak přišijete po obou stranách průramku, střed hlavice (řady) by měl navazovat na ramenní šev. Vzniklý otvor v podpaží odpovídá počátečnímu ujmutí průramku - "jamce" v podpaží, viz přerušovaná linie v nákresu. Rukáv je takto tvarovaný proto, aby v podpaží lépe seděl a nebyl příliš úzký (hrudník není plochý, ale v podpaží má určitou šířku - tu právě vyrovnáváme tím ujmutím průramku). Hodně zdaru! Hana
21.08.2023 - 12:23
![]() Věra Nováčková wrote:
Věra Nováčková wrote:
Dobrý den....pletu rukáv v kruhových řadách na kruhové jehlici.....prosím jak mám uplést rukávovou hlavici?.....ty dva poslední cm nevím jak plést.....děkuji Nováčková
18.08.2023 - 12:08DROPS Design answered:
Dobrý den, Věro, rukávovou hlavici pleteme v řadách - tedy už ne do kruhu, ale po dokončení řady práci vždy otočíme a střídáme lícové/rubové řady. Pleteninu takto rozdělíme u značky v podpaží (dřívější začátek/konec kruhových řad). Hodně zdaru! Hana
20.08.2023 - 13:14
![]() Kristel Macgillavry-janssen wrote:
Kristel Macgillavry-janssen wrote:
Ik zie nergens staan hoeveel bollen er voor elke maat nodig zijn. Kunt u mij verwijzen aub?
26.07.2023 - 21:03DROPS Design answered:
Dag Kristel,
Bovenaan bij de lijst met materialen staat aangegeven hoeveel gram je nodig hebt in elke maat. Het eerste getal slaat op de eerste maat, het tweede getal op de tweede maat, enzovoorts. 1 bol alpaca weegt 50 gram en 1 bol Kid-Silk weegt 25 gram.
01.08.2023 - 20:48
![]() Mieke Baras wrote:
Mieke Baras wrote:
Deze trui wordt gebreid in alpaca en kid-silk. In de beschrijving van het eerste stuk wordt gesproken over drops flora. Is dat een vergissing?
11.03.2023 - 12:27DROPS Design answered:
Dag Mieke,
Oeps, dat is inderdaad een vergissing ja, het moet natuurlijk Alpaca zijn.
12.03.2023 - 11:40
![]() Egidia wrote:
Egidia wrote:
Buongiorno, vorrei fare questo modello ma non ho capito bene il diagramma. Come si inizia il primo giro? Quante maglie a diritto e quante al rovescio? E il secondo giro? Vi ringrazio
11.02.2023 - 11:19DROPS Design answered:
Buonasera Egidia, i diagrammi si leggono dal basso verso l'alto e da destra verso sinistra per i ferri di andata e da sinistra a destra per quelli di ritorno, se si lavora in piano. Nella lavorazione in tondo si leggono sempre da destra a sinistra. In questo caso il primo ferro del diagramma A.1 si lavora con tutte le maglie a diritto. Buon lavoro!
13.02.2023 - 16:18
![]() Renata Mariotto wrote:
Renata Mariotto wrote:
Il rovescio del lavoro è quello in cui la codina sta a destra? Grazie.
08.02.2023 - 18:36DROPS Design answered:
Buonasera Renata, il primo ferro è lavorato dal rovescio del lavoro. Buon lavoro!
10.02.2023 - 23:59
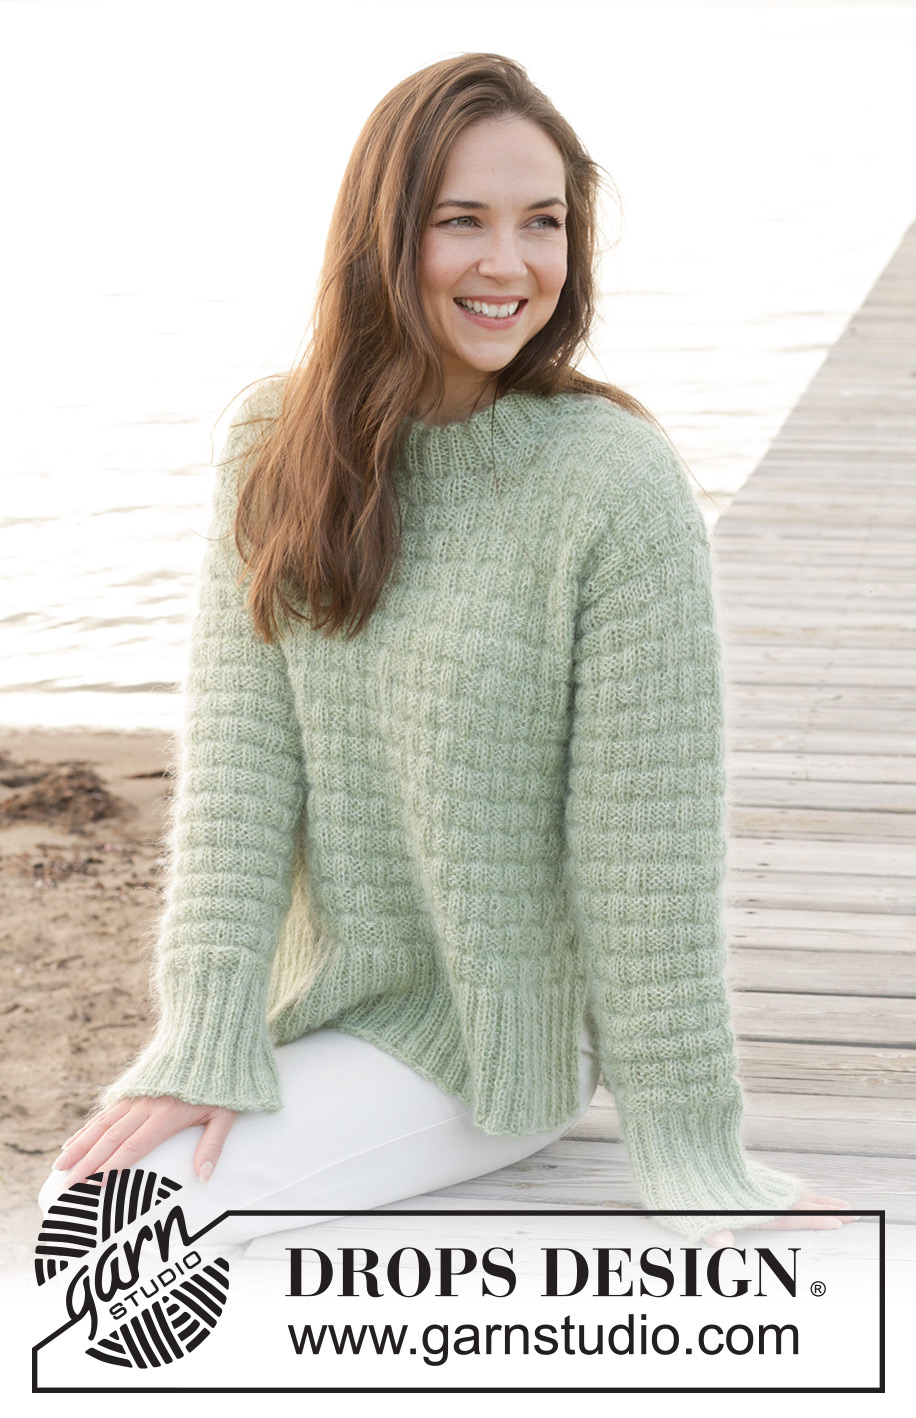
Scottish Thistle Sweater#scottishthistlesweater |
||||||||||
 |
 |
|||||||||
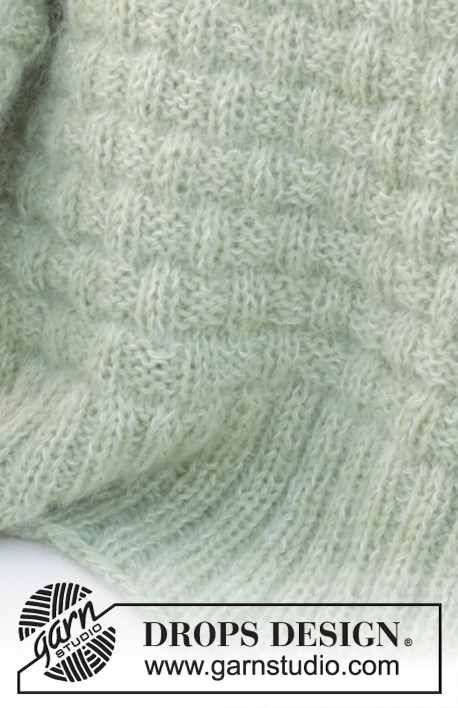
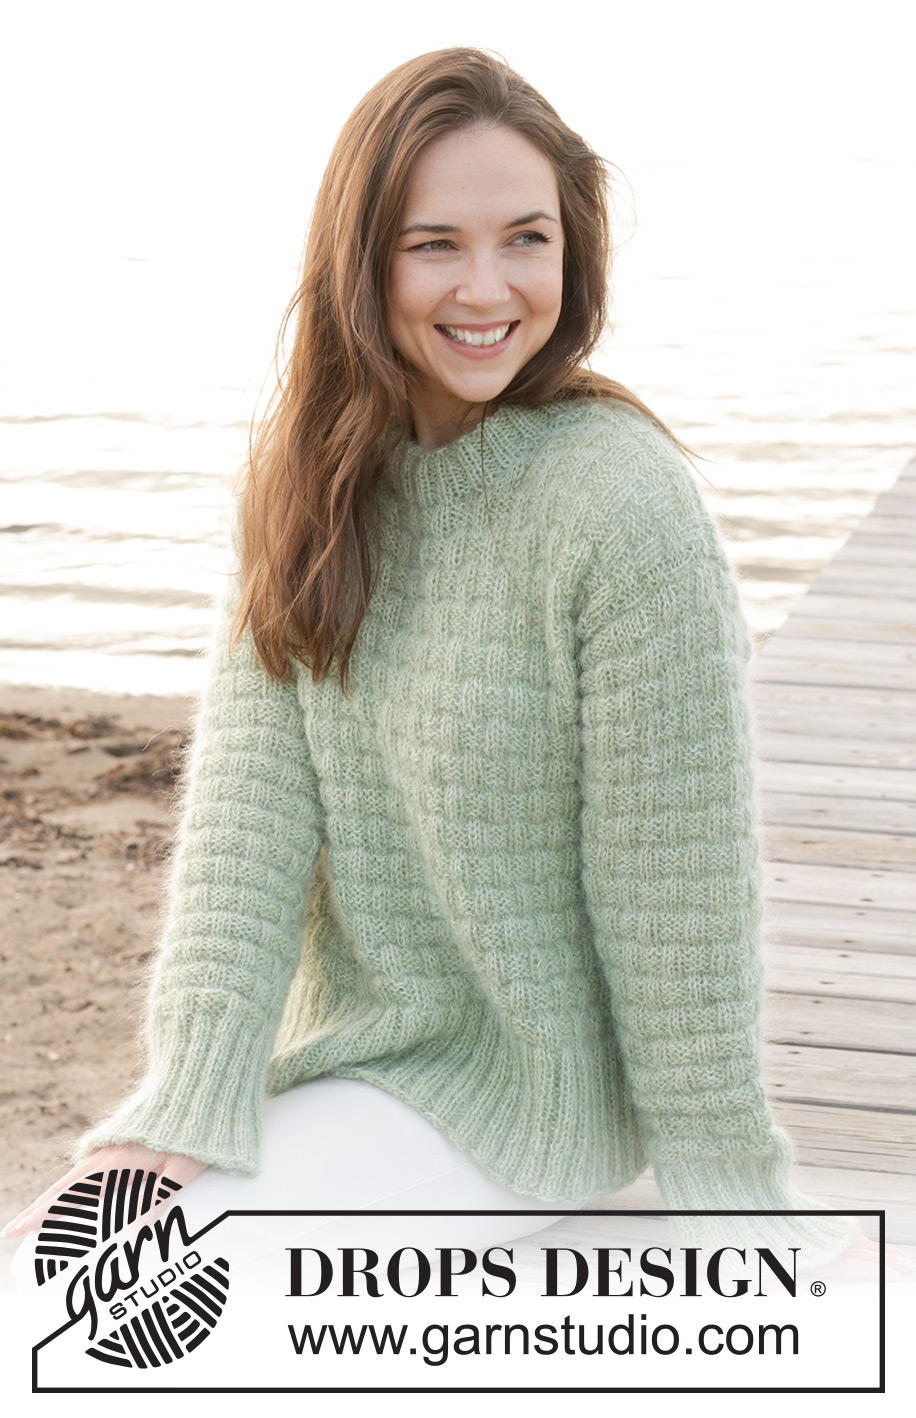
Knitted sweater in DROPS Alpaca and DROPS Kid-Silk. Piece is knitted bottom up with relief pattern and sewn-in sleeves. Size XS – XXL.
DROPS 241-6 |
||||||||||
|
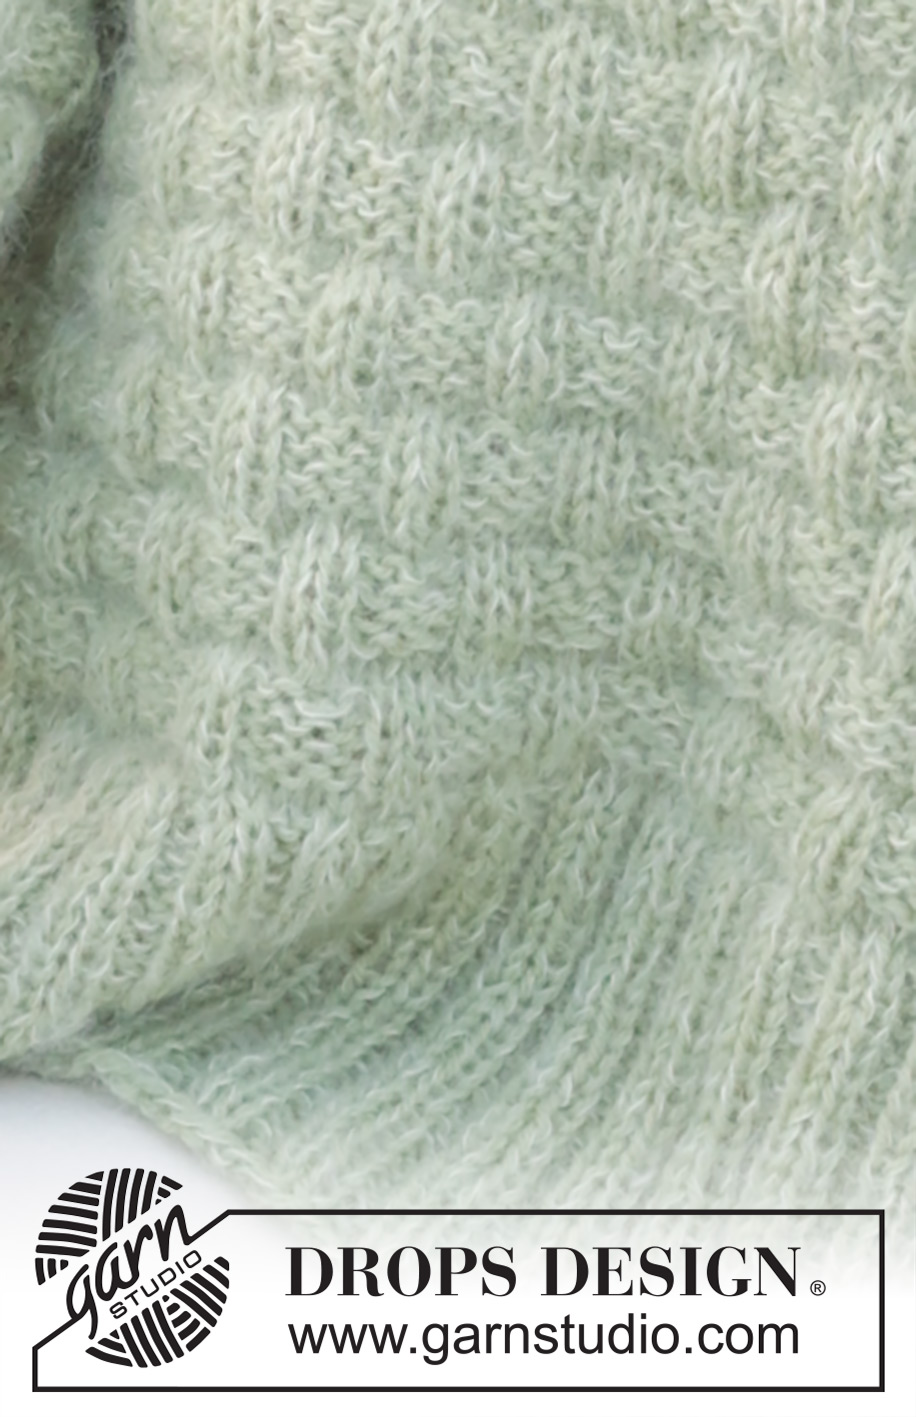
---------------------------------------------------------- EXPLANATION FOR THE PATTERN: ---------------------------------------------------------- GARTER STITCH (back and forth): Knit all rows. 1 ridge vertically = knit 2 rows. PATTERN: See diagram A.1. Diagrams show all rows in pattern seen from the right side. INCREASE TIP (applies to mid under sleeves): Work until there remains 1 stitch before the marking thread, make 1 yarn over, knit the next 2 stitches (the marking thread is between these 2 stitches), make 1 yarn over (= 2 stitches increased). On next round knit yarn overs twisted to avoid holes. Then work the new stitches in pattern (A.1). ---------------------------------------------------------- START THE PIECE HERE: ---------------------------------------------------------- SWEATER - SHORT OVERVIEW OF THE PIECE: Front and back piece back and forth on circular needle, bottom up until rib has been worked, then place piece together. Body is worked in the round on circular needle up to armholes. Then finish back piece and front piece back and forth on circular needle separately until finished measurements. Work sleeves in the round on double pointed needles/short circular needle to the finished measurements. Finish with a double neck edge. FRONT PIECE: Cast on 110-118-126-138-154-166 stitches on circular needle size 4 MM = US 6 with 1 strand DROPS Alpaca and 1 strand DROPS Kid-Silk (= 2 strands). Purl 1 row from wrong side. Then work rib as follows: 2 stitches in GARTER STITCH - read explanation above - * knit 2, purl 2 *, work from *-* until 4 stitches remain, knit 2 and finish with 2 stitches in garter stitch. Continue rib like this for 12 cm = 4¾" - finish after a row from wrong side. Put piece aside and work the back piece. BACK PIECE: Cast on the same number of stitches as on front piece and work the same way as front piece until rib measures 12 cm = 4¾" - finish after a row from wrong side. BODY: Put piece together as follows: Knit over stitches from back piece and decrease at the same time 26-28-30-36-40-46 stitches evenly, knit over stitches from front piece and decrease at the same time 26-28-30-36-40-46 stitches evenly = 168-180-192-204-228-240 stitches on needle. Switch to circular needle size 5 MM = US 8. Insert 1 marker thread at beginning of round and 1 marker thread after 84-90-96-102-114-120 stitches (in the sides on body). Move the marker threads upwards when working; they should be used for armhole. Work A.1 in the round. REMEMBER THE KNITTING GAUGE! When piece measures 36-37-38-39-40-41 cm = 14¼"-14½"-15"-15¼"-15¾"-16⅛", bind off for armholes as follows: Begin 5-5-4-3-8-7 stitches before marker thread at the beginning of round, bind off 10-10-8-6-16-14 stitches for armhole, work as before until 5-5-4-3-8-7 stitches remain before marker thread in the other side, bind off 10-10-8-6-16-14 stitches for armhole, work as before the rest of round. Finish front and back piece separately. FRONT PIECE: = 74-80-88-96-98-106 stitches. Begin from wrong side and continue A.1 with 1 stitch in garter stitch in each side. When piece measures 47-49-50-52-53-55 cm = 18½"-19¼"-19¾"-20½"-21"-21⅝", slip the middle 12-14-16-18-18-20 stitches on a thread for neck, and finish each shoulder separately. Continue as before and bind off stitches for neck on every row from neck as follows: Bind off 2 stitches 2 times and 1 stitch 2 times = 25-27-30-33-34-37 stitches remain on shoulder. Bind off when piece measures 54-56-58-60-62-64 cm = 21¼"-22"-22¾"-23⅝"-24⅜"-25¼". Work the other shoulder the same way. BACK PIECE: = 74-80-88-96-98-106 stitches. Begin from wrong side and work pattern and 1 stitch in garter stitch in each side the same way as on front piece. When piece measures 52-54-56-58-60-62 cm = 20½"-21¼"-22"-22¾"-23⅝"-24⅜", bind off the middle 22-24-26-28-28-30 stitches for neck, and finish each shoulder separately. Bind off for neck at the beginning of every row from neck as follows: Bind off 1 stitch 1 time = 25-27-30-33-34-37 stitches remain on shoulder. Work until piece measures 54-56-58-60-62-64 cm = 21¼"-22"-22¾"-23⅝"-24⅜"-25¼". Bind off. Work the other shoulder the same way. SLEEVES: Cast on 60-64-64-68-68-72 stitches on double pointed needles size 4 MM = US 6 with 1 strand of each quality (= 2 strands). Knit 1 round. Then work rib (knit 2/purl 2) in the round for 12 cm = 4¾". Knit 1 round while decreasing 14-16-14-16-14-18 stitches evenly = 46-48-50-52-54-54 stitches. Switch to double pointed needles size 5 MM = US 8. Insert 1 marking thread at the beginning of the round = mid under sleeve. Let the marking thread follow onwards, it is used for the increases. In addition insert 1 marking thread between the middle 2 stitches on top of sleeve. Count from this marking thread to know how pattern should start mid under sleeve. The marking thread mid on top of sleeve should be in the middle of A.1. Work A.1 in the round. When piece measures 14-14-14-14-15-15 cm = 5½"-5½"-5½"-5½"-6"-6", increase 2 stitches mid under sleeve – read INCREASE TIP. Increase like this every 4½-4½-4-3½-2½-2½ 8-8-9-10-11-12 times in total = 62-64-68-71-75-78 stitches. When sleeve measures 50-49-48-47-44-43 cm = 19¾"-19¼"-19"-18½"-17¼"-17", work sleeve cap back and forth (from the marking thread mid under sleeve) on circular needle til finished measurements. Bind off when sleeve measures 52-51-50-49-49-48 cm = 20½"-20"-19¾"-19¼"-19¼"-19". Work the other sleeve the same way. ASSEMBLY: Sew shoulder seams inside bind-off edge. Sew sleeve cap to armhole. Then sew vent at the top of sleeve to bottom of armhole - see chart. DOUBLE NECK EDGE: Use a short circular needle size 4 MM = US 6, start at one shoulder seam and pick up approx. 72 to 92 stitches around the neck (including stitches on thread). Number of stitches must be divisible 4. Work rib (knit 2/purl 2) for 5 cm = 2". Purl a row from wrong side and continue with (knit 2/purl 2) for another 5 cm = 2". Neck now measures approx. 10 cm = 4", and bind off with knit over knit and purl over purl. Fold the rib down on inside of garment. Fasten rib to get a double neck edge. To avoid a tight neck edge that sticks out it is important to keep the seam elastic. |
||||||||||
Diagram explanations |
||||||||||
|
||||||||||
 |
||||||||||
 |
||||||||||
 |
||||||||||
Have you finished this pattern?Tag your pictures with #dropspattern #scottishthistlesweater or submit them to the #dropsfan gallery. Do you need help with this pattern?You'll find 28 tutorial videos, a Comments/Questions area and more by visiting the pattern on garnstudio.com. © 1982-2026 DROPS Design A/S. We reserve all rights. This document, including all its sub-sections, has copyrights. Read more about what you can do with our patterns at the bottom of each pattern on our site. |
||||||||||







Post a comment to pattern DROPS 241-6
We would love to hear what you have to say about this pattern!
If you want to leave a question, please make sure you select the correct category in the form below, to speed up the answering process. Required fields are marked *.