
Popular categories
Looking for a yarn?




































Comments / Questions (87)
 Lucette wrote:
Pour la taille 0/1 et pour toutes les tailles . pouvez-vous m'indiquer ou son reprise les 4 mailles de raglan au moment de la séparation du corps et des manches. exemple pour la taille 0/1 on a bien 184 mailles moins les manches 76 mailles plus les 12 mailles rajoutées sous les bras on a donc 120 mailles il est indiqué 116 mailles
02.11.2026 - 00:06DROPS Design answered:
Bonjour Lucette, quand toutes les augmentations sont faites vous devez avoir 180 mailles et non 184 mailles, vous avez commencé par 75 m, augmenté 9 m =84 m puis augmenté 12 x 8 m pour le raglan = 96+84=180 mailles. Bon tricot!
02.11.2026 - 10:01
Chauvin Christine wrote:
Bonjour, Je souhaite effectuer votre modèle Little bee Cardigan et commencer par l’échantillon mais les 24 mailles en aiguille 2,5 ou même 3 ne font pas 10 cm , mais 7,5 cm en 3 et 7 cm en 2. Merci de votre aide. Cordialement Mme chauvin
30.09.2026 - 11:27DROPS Design answered:
Bonjour Mme Chauvin, si votre échantillon est trop serré, vous n'aurez pas les bonnes mesures finales, vous pouvez éventuellement essayer de le bloquer pour voir si vous arrivez aux 10 x 10 cm, sinon, il vous faudra essayer avec des aiguilles plus grosses (de la même façon, bloquez votre échantillon au préalable pour voir si cela peut aider). Retrouvez d'autres infos ici sur la tension. Bon tricot!
01.10.2026 - 08:25
 Kaidi wrote:
Good evening! I have a question as I am knitting raglan for the first time. I have worked until here: Increase like this every row from the right side 12-14-16-17 (18-19) times = 180-204-220-240 (252-268) stitches. As I am working on 1/3 months I have 204 stiches now, but my work isn't 10 cm yet to start dividing for the body and sleeves. From marker my work lenght is 7 cm. What should I do? Should I just knit on(without raglan) until I have 10 cm and then divide? Thanks in advance!
12.07.2026 - 19:31DROPS Design answered:
Dear Kaidi, from the marker up to the end of the increases you have worked approx. 30 rows (28 rows with the raglan increases +2 initial rows with increases and markers). According to the gauge: 24 stitches in width and 32 rows in height with stocking stitch = 10 x 10 cm. So you should be very close to the 10cm mark. Then, the remainder up to 10 cm can be just knitted, without increases, until you get to 10cm and then divide. However, if you have 3cm left then there may be some problem with your knitting gauge; check it before continuing. Happy knitting!
13.07.2026 - 01:15
 Gabriele wrote:
Wenn ich eine Jacke mit Kraus-rechts-Rand stricke (der Rest ist Muster) dann zieht der Kraus-rechts-Rand immer (nach oben) zusammen. Was mache ich falsch? Ich weiß, dass man eine zusätzliche Reihe kraus einfügen kann, aber wie?
24.06.2026 - 16:29DROPS Design answered:
Liebe Gabriele, eine zuzäztliche Krausrippe (verkürzte Reihe) können Sie über die Maschen der Blenden beidseitig stricken; diese stricken Sie je nach Ihrer Maschenprobe, wenn Sie beachten, daß die Blende die Arbeit etwas in der Höhe zieht. Viel Spaß beim Stricken!
25.06.2026 - 17:41
 Peggy wrote:
Kan ik ook met gewone naalden breien als er in het patroon rondbreinaalden genoemd worden?
18.06.2026 - 12:16DROPS Design answered:
Dag Peggy,
Om een patroon aan te passen om op rechte naalden te breien hebben we een instructie gemaakt. Deze vind je hier.
18.06.2026 - 21:13
Tricotin75 wrote:
Bonjour, En taille 12-18mois, après séparation des manches, il reste 140m pour les devant / dos et non pas 152m comme indiqué sur les explications, non?
20.05.2026 - 09:40DROPS Design answered:
Bonjour Tricotin 75, vous devez bien avoir 152 m après la division: 6 m de bordure devant + 32 m devant + 6 m sous la manche + 64 m dos + 6 m sous la manche + 32 m devant + 6 m bordure devant = 152. Bon tricot!
21.05.2026 - 08:33
 Carol Coleman wrote:
At the yolk section for 3rd size it says to increase 7 sts to 92 sts, then place markers, but at number is only 88 not 92.what is the correct position of markers to total 92, or us increase amount incorrect please?
16.04.2026 - 11:41DROPS Design answered:
Dear Mrs Coleman, note that the markers should be inserted in a stitch and not between stitches, so that you will have: 6+13+1+12+1+26+1+12+1+13+6=92 stitches. Happy knitting!
16.04.2026 - 16:37
 Mimmi wrote:
Saknar hur långt jag ska sticka efter jag delat arbetet under ärmarna. Det borde stå antal cm ner till resår avmaskningen. FRAM- OCH BAKSTYCKE: Byt till rundsticka 2,5. Sedan stickas det resår med början från avigsidan så här: Sticka 6 framkantsmaskor i rätstickning, * 1 avigmask
13.04.2026 - 18:56DROPS Design answered:
Hej Mimmi. Det kommer i meningen efter: "När arbetet mäter 10-13-14-16 (18-21) cm från delningen, ökas det 13-13-15-15 (17-19) maskor jämnt fördelat på nästa varv från rätsidan (det ökas inte över framkantsmaskorna) = 129-145-155-167 (177-191) maskor. Byt till rundsticka 2,5. Sedan stickas det resår med början från avigsidan så här:..." Mvh DROPS Design
16.04.2026 - 10:00
 Cinzia wrote:
Salve, nella spiegazione del raglan non capisco come fanno a formarsi 8 aumenti con 1 gettato solo per ogni segnapunti. Non devono essere 2 i gettati ai lati del segna punti?
28.03.2026 - 23:01DROPS Design answered:
Buonasera Cinzia, grazie per la segnalazione, abbiamo corretto il testo. Buon lavoro!
29.03.2026 - 23:15
Drapier wrote:
Bonjour. Je ne comprends pas l'empiècement : en taille 1/3 mois, je dois placer les marqueurs de la façon suivante : 6 mailles bordure + 13 mailles (devant) - marqueur - 12 mailles (manche) - marqueur - 26 mailles (dos) - marqueur - 12 mailles (manche) - marqueur - 13 mailles 6 mailles bordure Ce qui fait 88 mailles. Mais cela ne correspond pas aux 92 mailles que je devrais avoir sur mon aiguille. Où y a-t-il une erreur ? Merci d'avance
25.03.2026 - 08:35DROPS Design answered:
Bonjour Mme Drapier, notez que les marqueurs doivent être insérés chacun dans une maille, pas entre les mailles, autrement dit, vous aurez: 6+13+1+12+1+26+1+12+1+13+6=92 mailles. Bon tricot!
25.03.2026 - 15:44
|
|||||||
Little Bee Cardigan#littebeecardigan |
|||||||
 |
 |
||||||
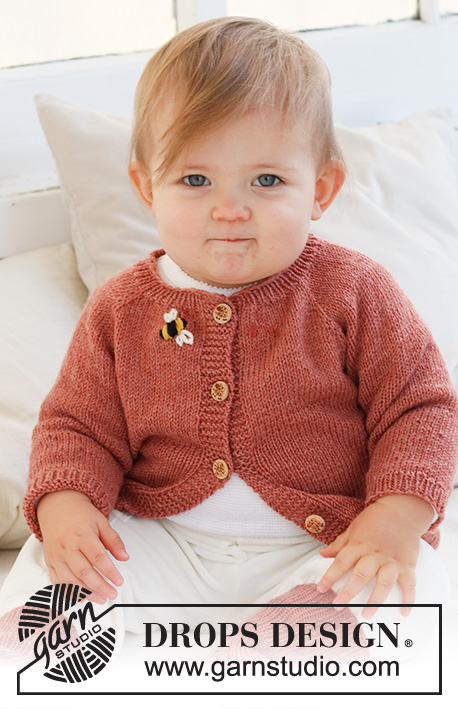
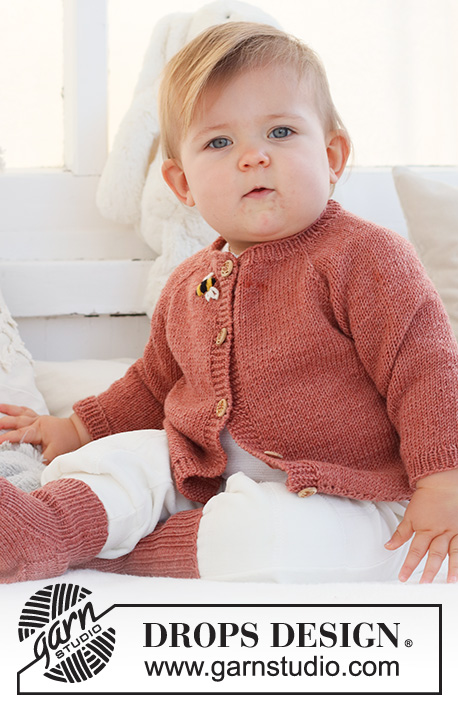
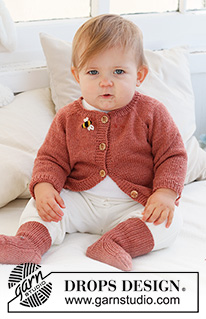
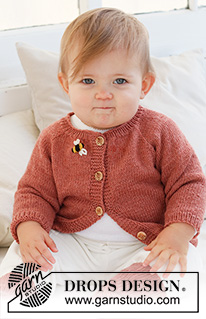
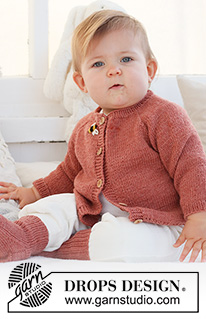
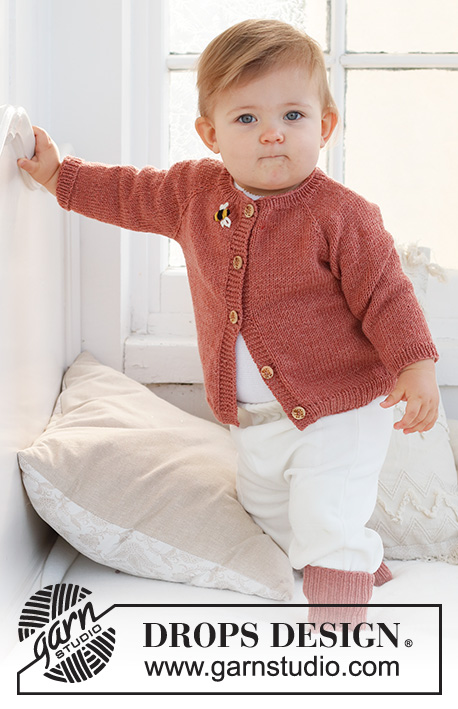
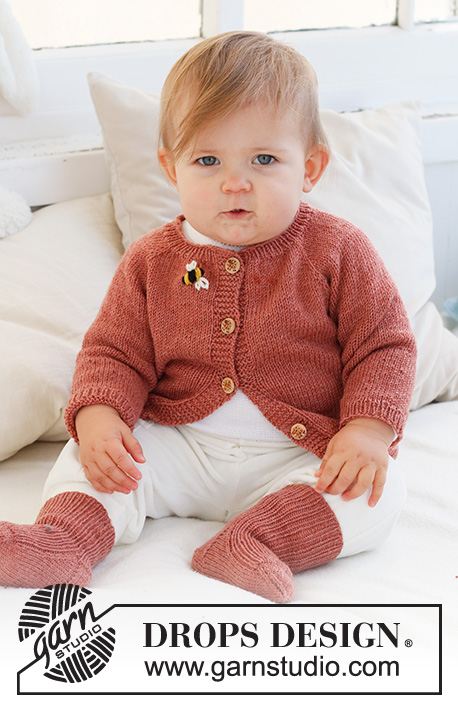
Knitted jacket for babies and children in DROPS BabyMerino. The piece is worked top down, with raglan and embroidered bee. Sizes 0 - 4 years.
DROPS Baby 42-4 |
|||||||
|
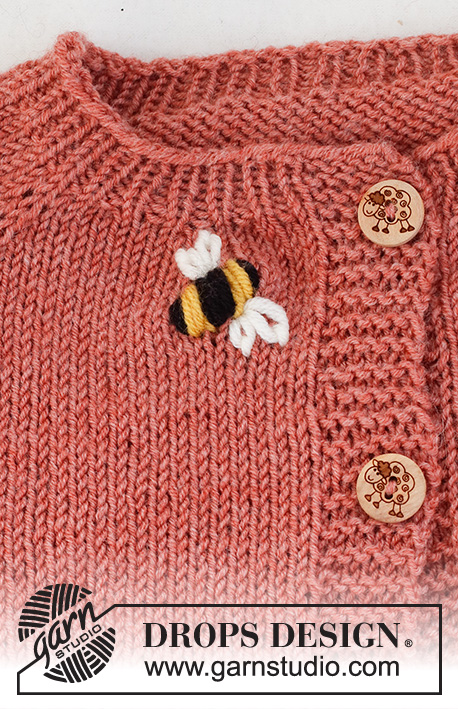
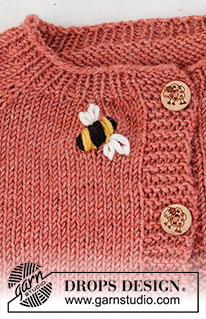
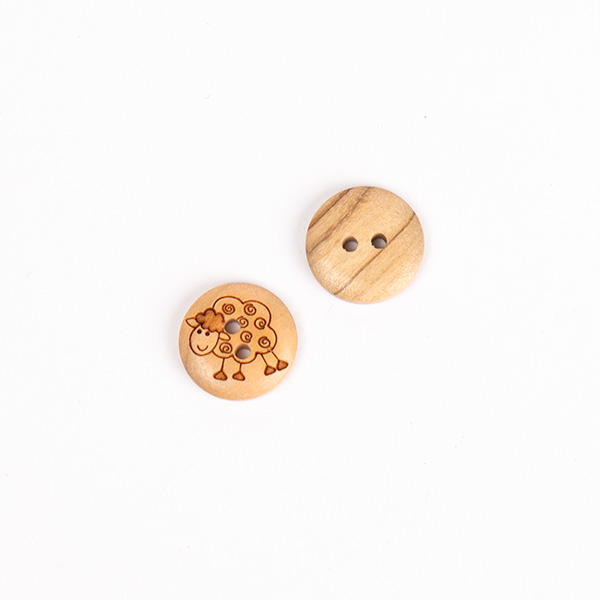
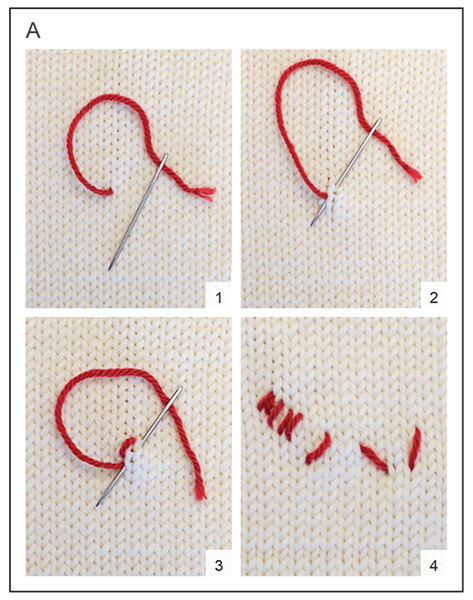
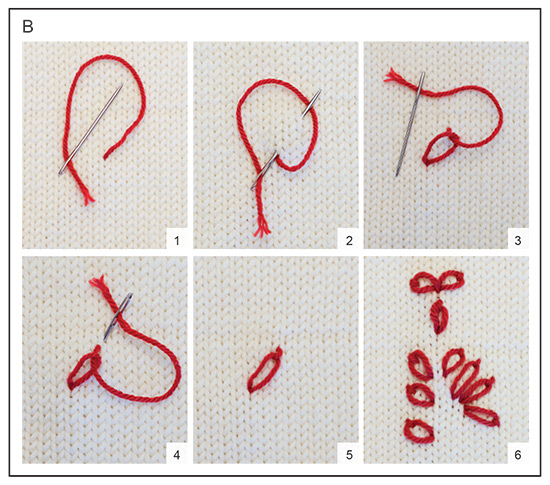
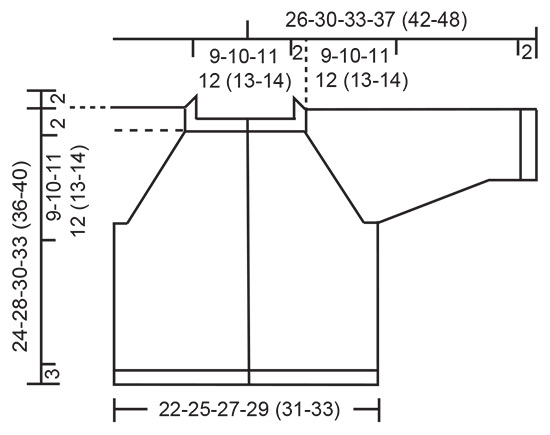
------------------------------------------------------- EXPLANATIONS FOR THE PATTERN: ------------------------------------------------------- RIDGE/GARTER STITCH (worked back and forth): Knit all rows. 1 ridge = knit 2 rows. RAGLAN: All increases are worked from the right side! Work to the marker-stitch, 1 yarn over, knit the marker-stitch, 1 yarn over. Increase like this at each marker-stitch (8 stitches increased). On the next row purl the yarn overs twisted to avoid holes. Then work the new stitches in stockinette stitch. DECREASE TIP (sleeves): Decrease 1 stitch on either side of the marker as follows: Work until there are 3 stitches left before the marker, knit 2 together, knit 2 (marker sits between these 2 stitches), slip 1 stitch as if to knit, knit 1 and pass the slipped stitch over the knitted stitch. BUTTONHOLES: Work buttonholes on the right band (when the garment is worn). Work from the right side when there are 3 stitches left on the row as follows: Make 1 yarn over, knit 2 together and knit 1. On the next row, knit the yarn over to leave a hole. The first buttonhole is worked when the neck measures 2 cm = ¾". Then work the other 4-4-4-4 (5-5) buttonholes with after 5-6-6½-7 (6½-7) cm = 2"-2⅜"-2½"-2¾" (2½"-2¾") between each one. ------------------------------------------------------- START THE PIECE HERE: ------------------------------------------------------- JACKET – SHORT OVERVIEW OF THE PIECE: The yoke is worked back and forth with circular needle. It is divided for the body and sleeves and the body continued back and forth. The sleeves are worked in the round with double pointed needles. NECK: Cast on 75-81-85-91 (95-99) stitches with circular needle size 2.5 MM = US 1.5 and DROPS Baby Merino. Purl 1 row from the wrong side with 6 band stitches in GARTER STITCH on each side – read description above. Then work rib as follows: 6 band stitches in garter stitch, * knit 1, purl 1 *, work from *-* until there are 7 stitches left, knit 1 and 6 band stitches in garter stitch. When the rib measures 2 cm = ¾", change to circular needle size 3 MM = US 2.5. Insert 1 marker after the band at the beginning of the row, the yoke is measured from this marker! YOKE: Work the next row from the right side: 6 band stitches in garter stitch, knit 63-69-73-79 (83-87) and increase 9-11-7-13 (13-17) stitches evenly spread and 6 band stitches in garter stitch = 84-92-92-104 (108-116) stitches. Work the first BUTTONHOLE – read description above. On the next row insert 4 markers as follows: Work 6 band stitches in garter stitch, purl 11-13-13-16 (17-19), insert 1 marker in the next stitch, purl 12, insert 1 marker in the next stitch, purl 22-26-26-32 (34-38), insert 1 marker in the next stitch, purl 12, insert 1 marker in the next stitch, purl 11-13-13-16 (17-19) and 6 band stitches in garter stitch. Continue with stockinette stitch and 6 band stitches in garter stitch on each side, increasing as follows: On the next row from the right side increase 1 stitch on each side of all the markers – read RAGLAN! Increase like this every row from the right side 12-14-16-17 (18-19) times = 180-204-220-240 (252-268) stitches. REMEMBER THE KNITTING GAUGE! When the piece measures 9-10-11-12 (13-14) cm = 3½"-4"-4⅜"-4¾" (5⅛"-5½") from the marker, divide for the body and sleeves as follows: Work 6 band stitches in garter stitch, 23-27-29-32 (34-37) stitches in stockinette stitch, place the next 38-42-46-50 (52-54) stitches on a thread for the sleeve, cast on 6 stitches, work 46-54-58-64 (68-74) stitches in stockinette stitch, place the next 38-42-46-50 (52-54) stitches on a thread for the sleeve, cast on 6 stitches, work 23-27-29-32 (34-37) stitches in stockinette stitch and 6 band stitches in garter stitch. BODY: = 116-132-140-152 (160-172) stitches. Continue back and forth with stockinette stitch and 6 band stitches in garter stitch on each side. When the piece measures 10-13-14-16 (18-21) cm = 4"-5⅛"-5½"-6¼" (7"-8¼") from the division, increase 13-13-15-15 (17-19) stitches evenly spaced on the next row from the right side (do not increase over the bands) = 129-145-155-167 (177-191) stitches. Change to circular needle size 2.5 MM = US 1.5 and work rib, starting from the wrong side as follows: 6 band stitches in garter stitch, * purl 1, knit 1 *, work from *-* until there are 7 stitches left, purl 1 and 6 band stitches in garter stitch. Continue this rib for 3 cm = 1⅛". Bind off. SLEEVES: Place the 38-42-46-50 (52-54) stitches from the thread on the one side of the piece on double pointed needles size 3 MM = US 2.5 and knit up 1 stitch in each of the 6 stitches cast on under the sleeve = 44-48-52-56 (58-60) stitches. Insert a marker in the middle of the new stitches under the sleeve. Start at the marker and work stockinette stitch in the round. When the sleeve measures 1 cm = ⅜" from the division, decrease 1 stitch on each side of the marker - read DECREASE TIP! Decrease like this every 2½-2½-1½-2 (2-3) cm = 1"-1"-½"-¾" (3/4"-1⅛") a total of 3-4-6-7 (7-7) times = 38-40-40-42 (44-46) stitches. When the sleeve measures 8-11-12-15 (18-23) cm = 3⅛"-4⅜"-4¾"-6" (7"-9"), increase 4-4-4-4 (6-6) stitches evenly spaced = 42-44-44-46 (50-52) stitches. Change to double pointed needles size 2.5 MM = US 1.5 and work rib (knit 1, purl 1) for 2 cm = ¾". Bind off. Work the other sleeve in the same way. BEE: Embroider a bee on the right front piece – see photo. The bee is worked with a single strand and flat stitch, the wings are worked with chain stitch. BEE – BLACK STRIPES: See diagram A and diagram explanations. Using black, start 3 cm = 1⅛" below the neck and 4 cm = 1½" from the band. Embroider 2 flat stitches, diagonally up to the right (towards the band), close together and 0.5 cm = ⅛" in length. Skip 0.5 cm = ⅛" diagonally up to the left and embroider 4 flat stitches close together and parallel to the first 2 stitches, 1 cm = ⅜" in length (= middle of body), skip 0.5 cm, work 2 flat stitches close together and parallel to the 4 stitches, 0.5 cm = ⅛" in length. BEE – MUSTARD STRIPES: Change to mustard. Embroider flat stitches between the black stripes - 4 stitches of the same length as the black stitches they are close to (2 mustard stripes). BEE - WINGS: Use color off white; the wings consist of 2 chain stitches, both starting from the same hole. Work as follows: STITCH 1: Work 1 chain stitch, 1-1.5 cm = ⅜"-½" in length from the middle of the bee - see diagram B and diagram explanations. STITCH 2: Work 1 chain stitch, 1-1.5 cm = ⅜"-½" in length, starting from the same place. Embroider a set of wings on the other side of the bee. ASSEMBLY: Sew the buttons onto the left band. |
|||||||
Diagram explanations |
|||||||
|
|||||||
 |
|||||||
 |
|||||||
 |
|||||||
Have you finished this pattern?Tag your pictures with #dropspattern #littebeecardigan or submit them to the #dropsfan gallery. Do you need help with this pattern?You'll find 22 tutorial videos, a Comments/Questions area and more by visiting the pattern on garnstudio.com. © 1982-2026 DROPS Design A/S. We reserve all rights. This document, including all its sub-sections, has copyrights. Read more about what you can do with our patterns at the bottom of each pattern on our site. |
|||||||






With over 40 years in knitting and crochet design, DROPS Design offers one of the most extensive collections of free patterns on the internet - translated to 17 languages. As of today we count 333 catalogs and 12532 patterns - 12522 of which are translated into English (US/in).
We work hard to bring you the best knitting and crochet have to offer, inspiration and advice as well as great quality yarns at incredible prices! Would you like to use our patterns for other than personal use? You can read what you are allowed to do in the Copyright text at the bottom of all our patterns. Happy crafting!
Post a comment to pattern DROPS Baby 42-4
We would love to hear what you have to say about this pattern!
If you want to leave a question, please make sure you select the correct category in the form below, to speed up the answering process. Required fields are marked *.