
Popular categories
Looking for a yarn?
































Comments / Questions (171)
 Catherine wrote:
Bonjour, Je ne vois pas où on fait le point mousse ? Merci pour votre aide
14.08.2026 - 23:40DROPS Design answered:
Bonjour Catherine, on va tricoter au point mousse les mailles sous les manches avant de rabattre celles des emmanchures puis on tricote 1 m lisière au point mousse de chaque côté quand on continue en allers et retours. Bon tricot!
17.08.2026 - 08:14
 Lea wrote:
Hi ☺️ I really love the pattern so far. One question for the decreases on the front. I start knitting on the wrong side and on the next right side I start decreasing. Do I make the 2 decreases on the right side or the wrong side?
11.08.2026 - 18:00DROPS Design answered:
Hi Lea, You decrease every 2nd row (each row from the right side) for the armhole. And decrease on every row (both from the right and wrong side) for the neckline. Regards, Drops Team.
12.08.2026 - 06:04
 Anna wrote:
"82-92-102-116-130-142 stitches remain on round for back piece" I have a question about this part: what does it mean I have to do, simply knit those stitches?
01.08.2026 - 14:41DROPS Design answered:
Hi Anna, The back piece is continued in pattern as before. Regards, Drops Team.
02.08.2026 - 07:01
Krissy wrote:
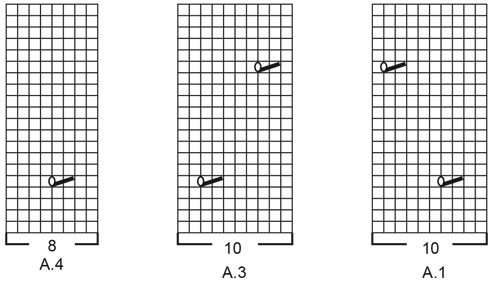
Can you please explain why I do not get the small holes in the correct sequence for A1, A3 & A4. As I understand it (cost timer), that say for A1, I would do 3 rows of 10, then 9 rows of 10, and work up the chart. When I’ve done 20 rows, I start at the bottom of that chart and work up again. Is that correct? The same for A3 & A4? My holes end up in a straight line up 1st attempt, then just too close and too far apart next times. What am I doing wrong? There are no tutorial videos in English
29.07.2026 - 22:04
Nina wrote:
Tolles Top! Mir ist aufgefallen, dass als Abnahmetipp 2 in Rückreihen „2M links verschränkt zusammenstricken“ genannt wird. Bei den Hilfsvideos werden jedoch 2M links (unverschränkt) zusammengestrickt. Bitte ergänzen Sie doch das passende Video. Danke!
25.07.2026 - 10:59
Carole Or wrote:
Bonjour lorsque l'on commence le demi devant gauche, je me questionne sur la poursuite du diagramme A2 au fur et a mesure des diminution côté encolure. Est ce qu\'il faut les poursuivre ? Si oui comment ? Notamment les rangs envers ( les rangs \"Retour \") Merci pour vos précieux conseils. Carole
18.07.2026 - 14:46DROPS Design answered:
Bonjour Carole, vous devez effectivement continuer A.2 dans la mesure du possible, mais si vous n'avez pas suffisamment de mailles pour un motif ajouré, tricotez ces mailles en jersey. Les rangs envers de A.2 se tricotent comme indiqué ans la légende "sur l'envers" des symboles (= une case blanche se tricote à l'envers sur l'envers et un carré noir se tricote à l'endroit sur l'envers). Bon tricot!
06.08.2026 - 09:33
 Danuta wrote:
Dzień dobry. Dziękuję za odpowiedź. Oglądałam film, ale to zostało pominięte :( Bardzo mi zależy na zrozumieniu. Robiłam juz kilka waszych wzorów i nie miałam takiego problemu. Proszę o pomoc.
17.07.2026 - 13:44DROPS Design answered:
Witaj Danuto, ze wzoru wynika, że ta część dżersejem na boku, która początkowo ma 14 o. a na końcu dodawania oczek 24 o. ,jest bez dziurek. Co do styku A.3 i A.1 to go nie ma ponieważ między tymi schematami jest 14 o. dżersejem. Pozdrawiam!
24.07.2026 - 10:57
Muriel wrote:
Bonjour , tricotez maintenant 2 côtes au point mousse (en rond): cela équivaut bien à 4 rangs soit 1 rang endroit, 1 rang envers, 1 rang endroit et 1 rang envers ? ( en respectant les diagrammes bien sûr) Merci
16.07.2026 - 18:22DROPS Design answered:
Bonjour Muriel, tout à fait, pendant les 4 tours suivants vous tricoterez les mailles point mousse 1 fois à l'endroit, 1 fois à l'envers, 1 fois à l'endroit, 1 fois à l'envers, et les autres mailles comme avant. Bon tricot!
03.08.2026 - 16:43
Danuta wrote:
Robię rozmiar XS. Nie rozumiem kiedy i w jaki sposób dodawane oczka zmienić we wzór fantazyjny. Nie ma żadnego zdjęcia pokazującego dokładnie bok. Początkowo na bokach jest 14 oczek jersey - brak dziurek, w miarę dodawania oczek będzie już szeroki pas 24 oczek bez dziurek? Czy dziurki mają się nagle pojawić np w połowie boku kiedy będzie wystarczająco dużo oczek? i druga kwestia - miejsce styku A3 oraz A1 nie pasuje do siebie.
16.07.2026 - 00:58DROPS Design answered:
Witaj Danuto, istnieje film na yt jak od początku do końca wykonać ten top, u Dagny Zielińskiej. Jeśli dalej będziesz miała wątpliwości to zapraszam. Pozdrawiamy!
17.07.2026 - 09:55
 Kamila wrote:
Hello, I would like to knit the top longer. How should I proceed about the shape - decrease/increase stitches or leave it straight? Thank you Kamila
13.07.2026 - 11:23DROPS Design answered:
Hi Kamila, We would recommend that you continue straight to the length you wish, before beginning to increase. So work the number of extra cms you want before starting on the instructions at 5-5-5-6-6-6 cm in the text. Regards, Drops Team.
15.07.2026 - 06:23
|
||||||||||||||||
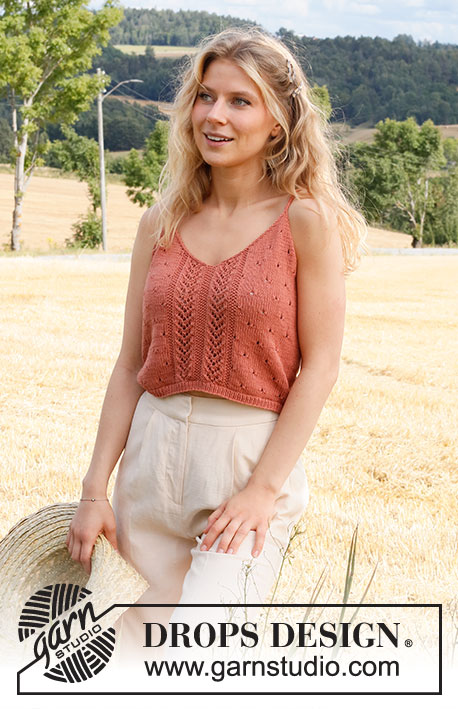
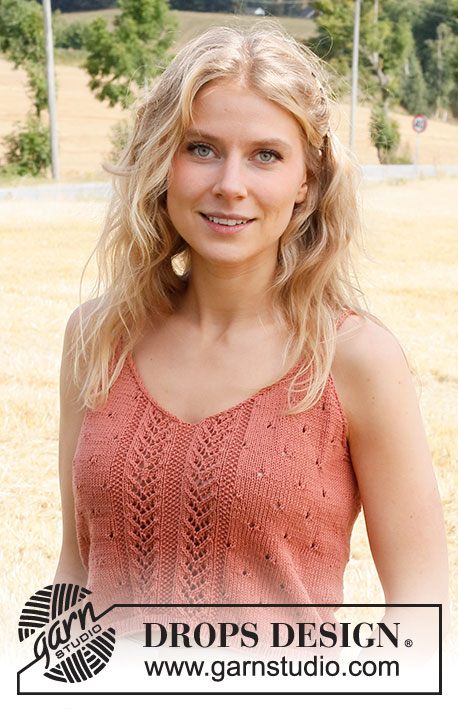
Heart on Fire#heartonfiretop |
||||||||||||||||
 |
 |
|||||||||||||||
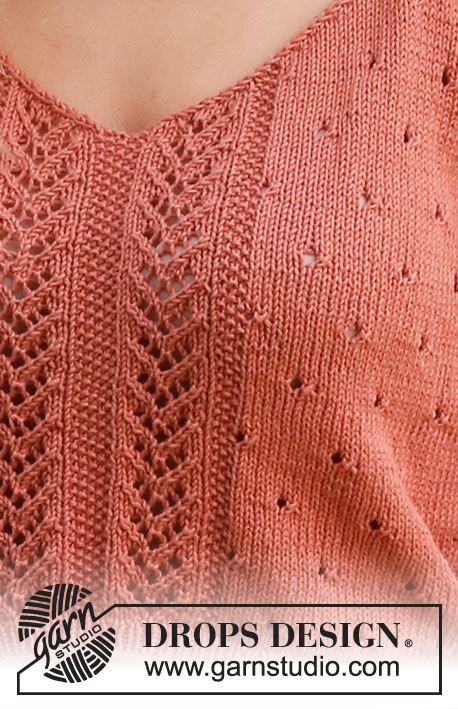
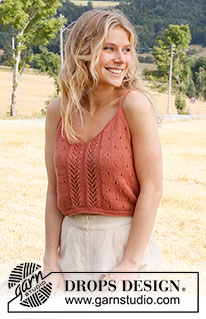
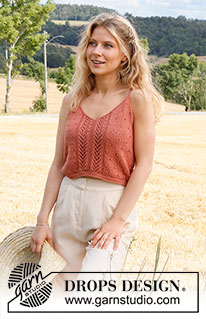
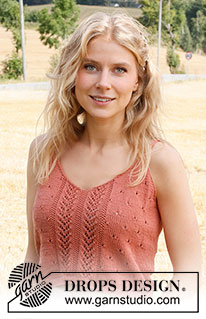
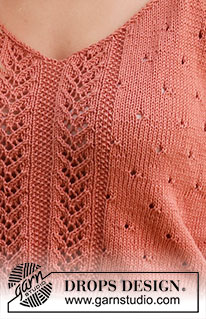
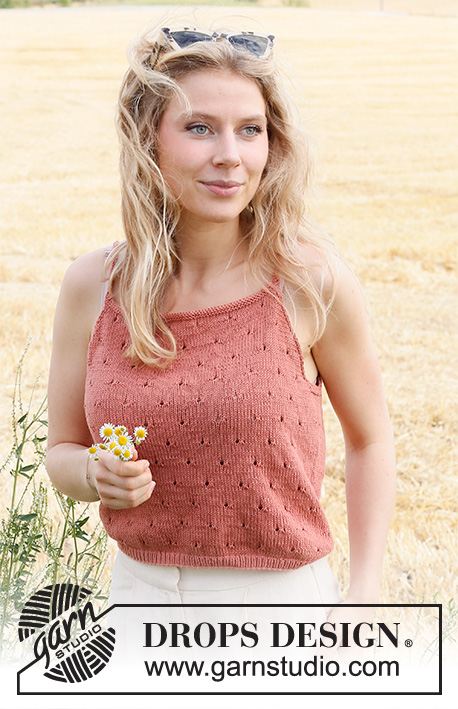
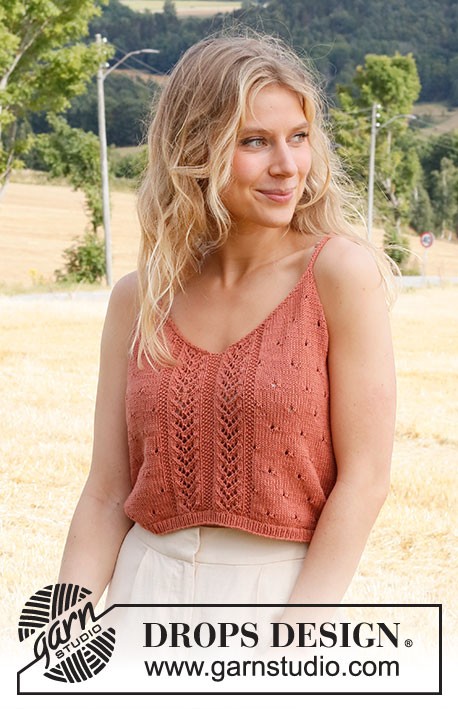
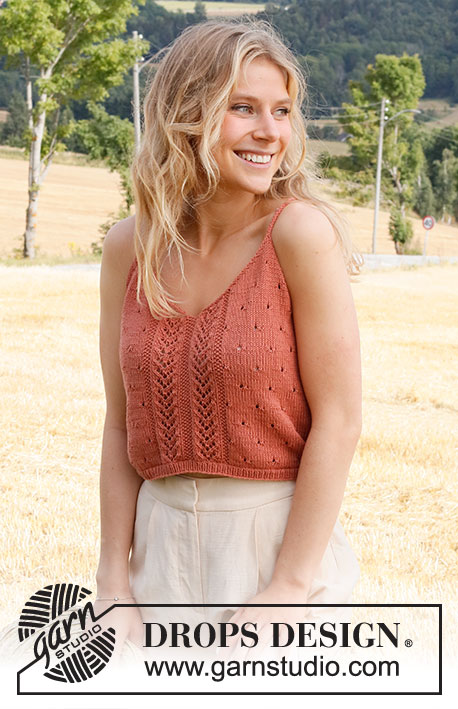
Knitted top in DROPS Safran or DROPS Magic. Piece is knitted with lace pattern and V-neck. Size: XS - XXL.
DROPS 223-27 |
||||||||||||||||
|
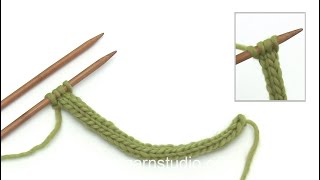
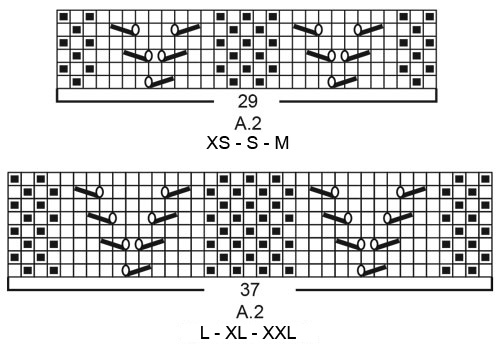
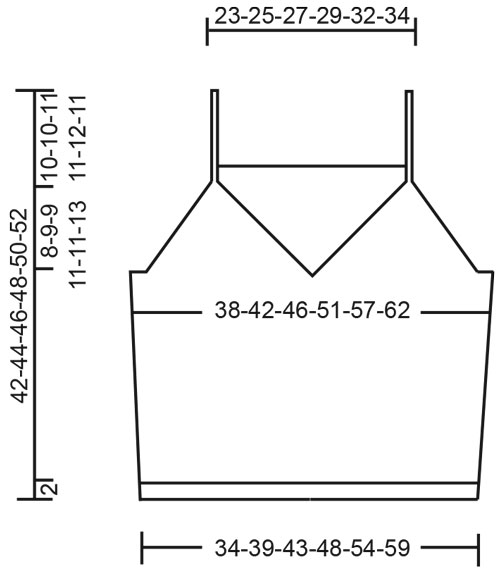
------------------------------------------------------- EXPLANATION FOR THE PATTERN: ------------------------------------------------------- GARTER STITCH (worked in the round): 1 ridge vertically = 2 rounds, i.e. knit 1 round and purl 1 round. GARTER STITCH (back and forth): Knit all rows. 1 ridge vertically = knit 2 rows. PATTERN: See diagrams A.1 to A.4. Choose diagram for your size (applies to A.2). Diagrams show all rows in pattern seen from the right side. DECREASE TIP-1 (evenly spaced): To calculate how to decrease evenly use the total number of stitches on row (e.g. 174 stitches) and divide stitches by number of decreases to be done (e.g. 10) = 17.4. In this example work alternately approx. every 16th and 17th stitch and every 17th and 18th stitch together. DECREASE TIP-2 (applies to the armholes and V-neck): Decrease inside 1 edge stitch in garter stitch. FROM RIGHT SIDE: DECREASE AS FOLLOWS AFTER 1 EDGE STITCH IN GARTER STITCH: Slip 1 stitch knitwise, knit 1, pass slipped stitch over stitch worked DECREASE AS FOLLOWS BEFORE 1 EDGE STITCH IN GARTER STITCH: Work until 2 stitches remain before edge stitch in garter stitch, knit these 2 together. FROM WRONG SIDE: DECREASE AS FOLLOWS AFTER 1 EDGE STITCH IN GARTER STITCH: Purl 2 together. DECREASE AS FOLLOWS BEFORE 1 EDGE STITCH IN GARTER STITCH: Work until 2 stitches remain before edge stitch in garter stitch, purl these 2 twisted together. INCREASE TIP (applies to sides of body): Work until 2 stitches remain before marker thread, make 1 yarn over, knit 4 (marker thread is in the middle of these 4 stitches), make 1 yarn over (= 2 stitches increased at the marker thread and 4 stitches increased on increase round in total). On next round knit yarns over twisted to avoid holes. Then work the new stitches in stockinette stitch until they fit the pattern. ------------------------------------------------------- START THE PIECE HERE: ------------------------------------------------------- TOP - SHORT OVERVIEW OF THE PIECE: Work body in the round on circular needle, from the bottom and up to armholes. Then finish front piece and back piece separately. Divide the front piece mid front for V-neck, and work the two parts back and forth on circular needle separately until finished measurements, then work strap on each front piece. Work back piece back and forth on circular needle until finished measurements. Sew straps from front piece on to back piece. BODY: Cast on 174-196-216-244-272-298 stitches on circular needle size 2.5 MM = US 1.5 with Safran or Magic. Knit 1 round. Then work rib in the round (= knit 1/purl 1) for 1½ to 2 cm = ½" to ¾". When rib is done, knit 1 round while decreasing 9-11-11-13-13-15 stitches evenly - read DECREASE TIP-1= 165-185-205-231-259-283 stitches. Switch to circular needle size 3 MM = US 2.5. Insert 1 marker thread at beginning of round and 1 marker thread after 83-93-103-115-129-141 stitches. 82-92-102-116-130-142 stitches remain on round for back piece. Move the marker threads upwards when working; they should be used for increase later in the sides on body. Work next round as follows: Work 7-2-7-9-6-2 stitches in stockinette stitch, work A.1 over the next 20-30-30-30-40-50 stitches (= 2-3-3-3-4-5 repetitions of 10 stitches), work A.2 (= 29-29-29-37-37-37 stitches), work A.3 over the next 20-30-30-30-40-50 stitches (= 2-3-3-3-4-5 repetitions of 10 stitches), work 14-4-14-18-12-4 stitches in stockinette stitch (marker thread is in the middle of these stitches), work A.1 over the next 60-80-80-90-110-130 stitches (= 6-8-8-9-11-13 repetitions of 10 stitches), work A.4 (= 8 stitches), and finish with 7-2-7-9-6-2 stitches in stockinette stitch. Continue pattern like this. REMEMBER THE KNITTING GAUGE! When piece measures 5-5-5-6-6-6 cm = 2"-2"-2"-2⅜"-2⅜"-2⅜", increase 1 stitch on each side of both marker threads – read INCREASE TIP (= 4 stitches increased). Increase like this every 5-5-5-5½-5½-6 cm = 2"-2"-2"-2⅛"-2⅛"-2⅜" 4 times in total in each side = 181-201-221-247-275-299 stitches. Work until piece measures 23-24-25-25-26-27 cm = 9"-9½"-9¾"-9¾"-10¼"-10⅝" - adjust so that next round is an odd numbered round in A.1 (this is important to avoid the lace pattern begin worked from wrong side when piece is divided into front and back piece). Now work in 2 ridges in GARTER STITCH - read explanation above, over the middle 8-10-12-16-20-26 stitches in each side (i.e. work 4-5-6-8-10-13 stitches in garter stitch on each side of both marker threads – work the other stitches as before). After the 2 ridges bind off for armholes and V-neck, i.e. work next round as follows: Bind off 3-4-5-7-9-12 stitches for armhole, work 42-46-50-54-59-62 stitches as before (= left front piece), bind off 1 stitch (= mid front), work 42-46-50-54-59-62 stitches as before (= right front piece), bind off 6-8-10-14-18-24 stitches for armhole, work as before over stitches on back piece until 3-4-5-7-9-12 stitches remain on round, and bind off the last 3-4-5-7-9-12 stitches for armhole. Cut the yarn and pull yarn through last stitch Finish back piece and front pieces separately. BACK PIECE: = 84-92-100-110-120-126 stitches. Begin from wrong side and continue pattern back and forth with 1 edge stitch in garter stitch in each side. AT THE SAME TIME on next row from right side begin decrease for armholes - read DECREASE TIP-2. Decrease for armholes in each side on every other row (i.e. every row from right side) 14-16-18-20-22-22 times in total in each side = 56-60-64-70-76-82 stitches. After last decrease work 1 row from wrong side as before. Switch to circular needle size 2.5 MM = US 1.5. Work 2 ridges back and forth over all stitches. Bind off knitting from right side. LEFT FRONT PIECE (when garment is worn): = 42-46-50-54-59-62 stitches. Begin from wrong side and continue pattern back and forth with 1 edge stitch in garter stitch in each side. AT THE SAME TIME on next row from right side begin decrease for armholes and V-neck and decrease as explained below – read DECREASE TIP-2: ARMHOLE: Decrease 1 stitch on every other row 13-14-15-17-18-20 times in total. V-NECK: Decrease 1 stitch on every row (i.e. from both right and wrong side) 24-27-30-32-36-37 times total. After all decreases for armholes and V-neck, 5 stitches remain on row for strap. Work strap as explained below. STRAP: Switch to 2 double pointed needles 2.5 MM = US 1.5 (slip stitches on one needle and work with the other). * Move stitches to the beginning of row, tighten yarn and knit the 5 stitches from right side *, work from *-* until strap measures approx. 18-18-19-20-21-20 cm = 7"-7"-7½"-8"-8¼"-8" (10-10-11-11-12-11 cm = 4"-4"-4⅜"-4⅜"-4¾"-4⅜" of this length belongs to front piece, the rest belongs to back piece - sew strap to back piece). Cut the yarn and pull yarn through the 5 stitches, tighten together and fasten. RIGHT FRONT PIECE (when garment is worn): = 42-46-50-54-59-62 stitches. Begin from wrong side and continue pattern back and forth with 1 edge stitch in garter stitch in each side. AT THE SAME TIME on next row from right side begin decreases for V-neck and armholes and decrease as explained below – read DECREASE TIP-2: V-NECK: Decrease 1 stitch on every row (i.e. from both right and wrong side) 24-27-30-32-36-37 times total. ARMHOLE: Decrease 1 stitch on every other row 13-14-15-17-18-20 times in total. After all decreases for V-neck and armholes, 5 stitches remain on row for strap. Work strap the same way as on left front piece. ASSEMBLY: Sew straps to back piece at the edge in each side. |
||||||||||||||||
Diagram explanations |
||||||||||||||||
|
||||||||||||||||
 |
||||||||||||||||
 |
||||||||||||||||
 |
||||||||||||||||
Have you finished this pattern?Tag your pictures with #dropspattern #heartonfiretop or submit them to the #dropsfan gallery. Do you need help with this pattern?You'll find 14 tutorial videos, a Comments/Questions area and more by visiting the pattern on garnstudio.com. © 1982-2026 DROPS Design A/S. We reserve all rights. This document, including all its sub-sections, has copyrights. Read more about what you can do with our patterns at the bottom of each pattern on our site. |
||||||||||||||||






With over 40 years in knitting and crochet design, DROPS Design offers one of the most extensive collections of free patterns on the internet - translated to 17 languages. As of today we count 333 catalogs and 12532 patterns - 12522 of which are translated into English (US/in).
We work hard to bring you the best knitting and crochet have to offer, inspiration and advice as well as great quality yarns at incredible prices! Would you like to use our patterns for other than personal use? You can read what you are allowed to do in the Copyright text at the bottom of all our patterns. Happy crafting!
Post a comment to pattern DROPS 223-27
We would love to hear what you have to say about this pattern!
If you want to leave a question, please make sure you select the correct category in the form below, to speed up the answering process. Required fields are marked *.