
Popular categories
Looking for a yarn?


Comments / Questions (91)
![]() Jane wrote:
Jane wrote:
Scusate, ripeto la domanda. Non ho capito la vostra risposta. Potreste essere più chiari?
31.03.2021 - 15:23DROPS Design answered:
Buonasera Jane, deve continuare a lavorare come impostato sul 1° giro e continuare a lavorare i ferri successivi dei diagrammi. Buon lavoro!
31.03.2021 - 23:29
![]() Jane wrote:
Jane wrote:
Buongiorno, Come continuare il diagramma dopo il 2° giro? Non capisco se devo seguire la spiegazione dello sprone (1maglia rasata, A.1, A.2 sulle 12 successive, A.3, 2 maglie rasate, A.1, A.2, A.3, 2 m. rasate, A.2 sulle 12 m.successive, A.3, 2maglie rasate, A.1, A.2,A.3, 1 m. rasata) oppure continuare come nel diagramma da A.1 ad A.3 senza aggiungere maglie rasate che non sono presenti nello schema. Grazie mille
30.03.2021 - 17:23DROPS Design answered:
Buonasera Jane, deve procedere con la lavorazione dei diagrammi come indicato. Buon lavoro!
30.03.2021 - 23:53
![]() Sabine wrote:
Sabine wrote:
Wie kann ich bei diesem Pullover eine Erhöhung im Nacken arbeiten?
29.03.2021 - 14:13DROPS Design answered:
Liebe Sabine, aufgrund des Musters ist es bei diesem Modell schwierig, eine Erhöhung in Form von verkürzten Reihen zu stricken. Sie könnten direkt nach der Halsblende verkürzte Reihen glatt rechts stricken, wenn es Ihnen nichts ausmacht, dass das Muster am Rückenteil dann erst nach ein paar Reihen glatt rechts beginnt. Zur Orientierung können Sie den Abschnitt "Erhöhung" in der Anleitung 205-4 nehmen, dieser Pullover hat eine ähnliche Maschenzahl. Gutes Gelingen!
05.04.2021 - 09:48
![]() Conny Van Den Bergh wrote:
Conny Van Den Bergh wrote:
Klopt het dat je in het telpatroon aan de verkeerde kant recht moet breien? Ziet er raar uit. Lijkt logischer dat het averecht moet zijn aan de verkeerde kant. En moeten de omslagen (uit de goede kant) recht gebreid worden aan de verkeerde kant?
22.03.2021 - 22:00DROPS Design answered:
Dag Conny,
Het werk wordt in de rondte gebreid, dus je breit steeds aan de goede kant van het werk. De omslagen worden op de volgende naald recht gebreid, zodat her een gaatje ontstaat. Als je alle even naalden in het telpatroon aan de verkeerde kant zou breien, zou dat inderdaad averecht moeten zijn. Dus recht aan de goede kant en averecht aan de verkeerde kant. Maar bij dit patroon brei je dus continu aan de goede kant.
02.04.2021 - 11:38
![]() Sara wrote:
Sara wrote:
Grazie. 1. Dove si inseriscono le 2 volte in più del diagramma A2 che si ottengono dopo gli aumenti? 2. Come posso continuare il motivo senza aumentare? Mi spiace ma la traduzione del modello non mi sembra molto chiara. Grazie mille della disponibilità
21.03.2021 - 23:25DROPS Design answered:
Buonasera Sara, le ripetizioni di A.2 saranno tra A.1 e A.3. Buon lavoro!
24.03.2021 - 19:57
![]() Sara wrote:
Sara wrote:
Non riesco a capire questo passaggio. GrazieSara Continuare questo motivo; sulle maniche gli aumenti sono incorporati nei diagrammi A.1 e A.3. Si aumentano 8 e 16 maglie in modo alternato ogni 2 giri. Ad ogni ripetizione completa di A.1 e A.3, ci saranno 2 ripetizioni in più di A.2 in larghezza. Aumentare ogni 2 giri per un totale di 18-20-20-22-24-26 volte = 288-312-324-348-384-408 maglie. Il lavoro misura circa 16-18-19-20-21-24 cm. Continuare con il motivo ma senza ulteriori aumenti;
20.03.2021 - 11:56DROPS Design answered:
Buonasera Sara, quale parte di questo passaggio non le è chiara? Buon lavoro!
21.03.2021 - 23:13
![]() Bente wrote:
Bente wrote:
Jeg får ikke diagram A1 og A3 til å stemme. A1 Første runde står det slik jeg leser det at du skal strikke 1 kast, 1 rett, 1 kast, ta masken løst av pinnen strikke en maske og løfte masken over som da blir 1 maske, for så å strikke 1 rett. Da får jeg 5 masker og ikke 4 som det står i diagrammet.
10.03.2021 - 11:36
![]() Susanne Rückemann wrote:
Susanne Rückemann wrote:
Ich stricke mit der Strickmaschine. Wenn ich beide Garne wie in der Anleitung gleichzeitig verstricke, wie viel m Lauflänge gabe ich dann auf 100 m? Wie viel Garn von jeder Sorte benötige ich für einen Pullover in XXXL?
01.03.2021 - 13:43DROPS Design answered:
Liebe Frau Rückemann, die Garnangaben in beiden Garnen finden Sie oben im Kopfzeilen - in grams, beachten Sie nur, daß BabyAlpaca Silk in 50 g /Knäuel kommt und Kid-Silk in 25 g/Knäuel. Viel Spaß beim stricken!
01.03.2021 - 14:40
![]() Katharina wrote:
Katharina wrote:
Wäre es möglich, das Musterschema nochmals darzustellen für die Runden ohne Raglanzunahmen? Ich tue mich da wirklich schwer, und das, obwohl ich eine geübte Strickerin bin.
28.02.2021 - 09:08DROPS Design answered:
Liebe Katharina, wenn Sie weiterstricken sollen, aber nicht mehr für das Raglan zunehmen, stricken Sie das Muster wie zuvor, nur die Raglanzunahmen nicht mehr stricken, dh bei A.1 und A.3 sollen Sie jeweils 1 Umschlag für 1 Abnahmen haben (beachten Sie, daß die Maschenanzahl jetzt immer die gleiche bleibt). Viel Spaß beim stricken!
01.03.2021 - 09:23
![]() Iris wrote:
Iris wrote:
Er godt igang med den fine bluse, men er ikke sikker på at jeg forstår, den del hvor der står man skal stoppe med udtagningerne. For på tegningen er det vist at udtagningerne fortsætter hele vejen til under armene, det ser også sådan ud på billederne. Hvis jeg stopper med udtagningerne efter 19 cm (324m) og strikker indtil 26 cm bliver de sidste 7 cm vel et rør, er det korrekt forstået at det skal være det? Håber I vil hjælpe, så jeg kan komme videre 😊
22.02.2021 - 15:10DROPS Design answered:
Hej Iris, jo det stemmer, det er for at få ærmegabet dybere uden at ærmet og bærestykket bliver bredere. God fornøjelse!
25.02.2021 - 14:55
|
|||||||||||||||||||
Galatea#galateasweater |
|||||||||||||||||||
 |
 |
||||||||||||||||||
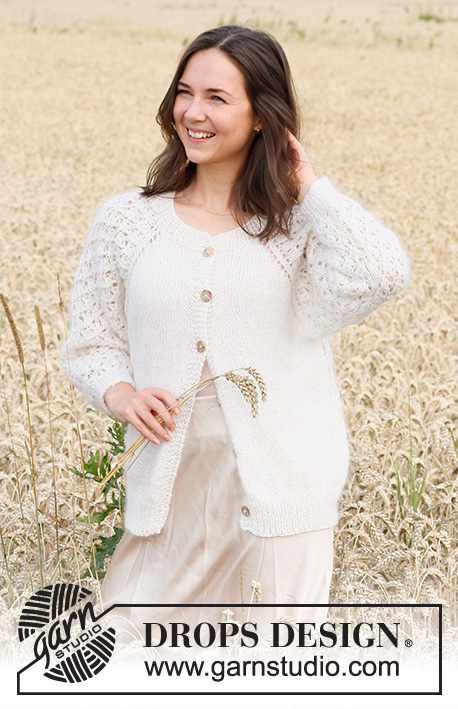
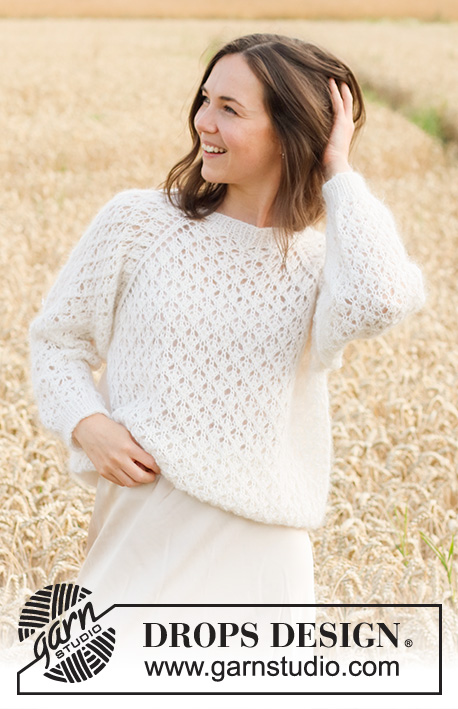
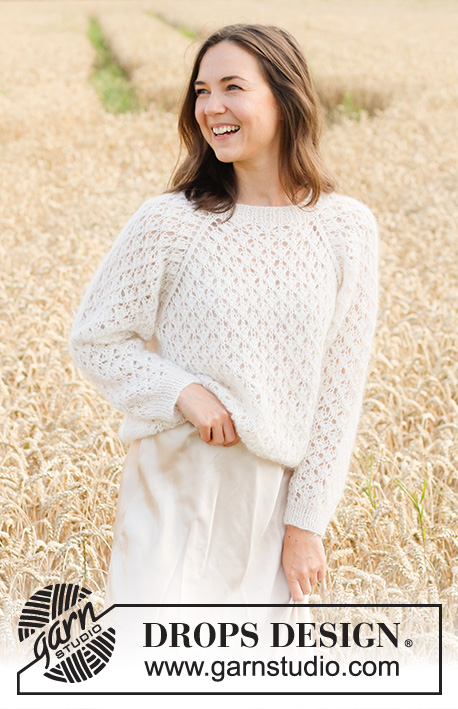
Knitted sweater in 1 strand DROPS Kid-Silk and 1 strand DROPS BabyAlpaca Silk. The piece is worked top down with raglan and lace pattern. Sizes S - XXXL.
DROPS 220-3 |
|||||||||||||||||||
|
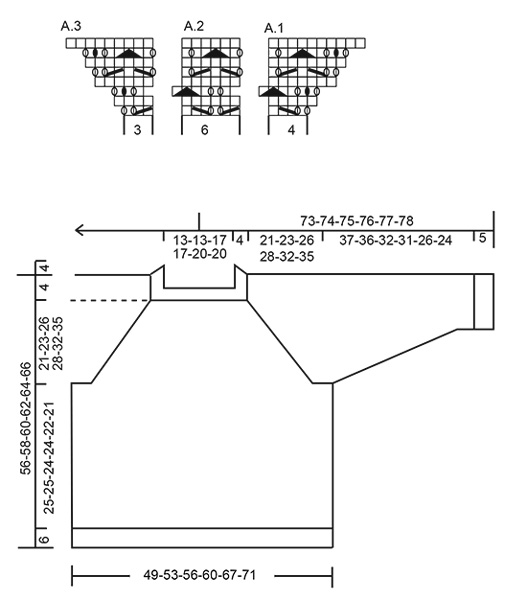
------------------------------------------------------- EXPLANATIONS FOR THE PATTERN: ------------------------------------------------------- PATTERN: See diagrams A.1 to A.3 DECREASE TIP-1 (for sleeves): Decrease 1 stitch on either side of the marker thread as follows: Work until there are 3 stitches left before the marker-stitch, knit 2 together, knit 3 (marker thread sits in the middle of these stitches), slip 1 stitch as if to knit, knit 1 and pass the slipped stitch over the knitted stitch (2 stitches decreased). DECREASE TIP-2 (evenly spaced): To work out how to decrease evenly, count the total number of stitches on the needle (e.g. 50 stitches) and divide by the number of decreases to be made (e.g. 8) = 6.25. In this example knit approx. each 5th and 6th stitch together. BINDING-OFF TIP: To avoid the bind-off edge being tight you can bind off with a larger size needle. If the edge is still tight, make 1 yarn over after approx. each 4th stitch at the same time as binding off; the yarn overs are bind off as normal stitches. ------------------------------------------------------- START THE PIECE HERE: ------------------------------------------------------- SWEATER – SHORT OVERVIEW OF THE PIECE: The neck and yoke are worked in the round with circular needle, top down. The round starts between the left sleeve and the back piece. The yoke is divided for body and sleeves and the body continued in the round with circular needle. The sleeves are worked in the round with short circular needle/double pointed needles, top down. The piece is worked with 1 strand Baby Alpaca Silk and 1 strand Kid-Silk (= 2 strands). NECK: Cast on 72-72-84-84-96-96 stitches with circular needle size 4 MM = US 6 and 1 strand Kid-Silk and 1 strand Baby Alpaca Silk (= 2 strands). Knit 1 round. Then work rib (knit 1, purl 1) for 4 cm = 1½". Insert 1 marker at the beginning of the round. The yoke is measured from this marker. Change to circular needle size 5 MM = US 8. REMEMBER THE KNITTING GAUGE! YOKE: Continue as follows: Work 1 stitch in stockinette stitch, work A.1 (= 4 stitches), A.2 over the next 12-12-18-18-24-24 stitches (= 2-2-3-3-4-4 repeats of 6 stitches), A.3 (= 3 stitches), 2 stitches in stockinette stitch, A.1, A.2, A.3, 2 stitches in stockinette stitch, A.1, A.2 over the next 12-12-18-18-24-24 stitches (= 2-2-3-3-4-4 repeats of 6 stitches), A.3, 2 stitches in stockinette stitch, A.1, A.2, A.3, 1 stitch in stockinette stitch. Continue this pattern; all increases are drawn in A.1 and A.3. You increase 8 and 16 stitches alternately, every 2nd round. Each time A.1 and A.3 are completed in height, there will be 2 more repeats of A.2 in width. Increase every 2nd round a total of 18-20-20-22-24-26 times = 288-312-324-348-384-408 stitches. The piece measures approx. 16-18-19-20-21-24 cm = 6¼"-7"-7½"-8"-8¼"-9½". Continue the pattern but without further increases; stitches which do not fit into the pattern in the sides are worked in stockinette stitch. Continue working until the piece measures 21-23-26-28-32-35 cm = 8¼"-9"-10¼"-11"-12½"-13¾" from the marker on the neck. Now divide the yoke for the body and sleeves on the next round as follows (continuing the pattern): Work 75-81-87-93-105-111 stitches (= back piece), place the next 69-75-75-81-87-93 stitches on 1 thread for the sleeve, cast on 9 stitches (in side under the sleeve), work 75-81-87-93-105-111 stitches as before (= front piece), place the next 69-75-75-81-87-93 stitches on 1 thread for the sleeve, cast on 9 stitches. Body and sleeves are finished separately. Cut the strand. BODY: = 168-180-192-204-228-240 stitches. Continue with A.2 over all stitches; make sure the pattern matches the pattern on the yoke. Continue working until the piece measures 25-25-24-24-22-21 cm = 9¾"-9¾"-9½"-9½"-8¾"-8¼" from the division (there is approx. 6 cm = 2⅜" left to finished length, you can try the sweater on and work to desired length). Change to circular needle size 4 MM = US 6 and work rib (knit 1, purl 1) for 6 cm = 2⅜". Bind off with knit over knit and purl over purl – read BINDING-OFF TIP! The sweater measures approx. 56-58-60-62-64-66 cm = 22"-22¾"-23⅝"-24⅜"-25¼"-26" from the shoulder down. SLEEVES: Place the 69-75-75-81-87-93 stitches from the thread on the one side of the piece on double pointed needles/short circular needle size 5 MM = US 8 and knit up 1 stitch in each of the 9 stitches cast on under the sleeve = 78-84-84-90-96-102 stitches. Insert a marker in the middle of the 9 stitches under the sleeve. Allow the marker to follow your work onwards; it will be used when decreasing under the sleeve. Continue pattern A.2 in the round, making sure the pattern matches the pattern on the yoke. When the sleeve measures 3 cm = 1⅛" from the division in all sizes, decrease 2 stitches under the sleeve – read DECREASE TIP-1. Decrease like this every 2½-2-1½-1½-1-1 cm = 1"-¾"-½"-½"-⅜"-⅜" a total of 14-16-16-17-19-20 times = 50-52-52-56-58-62 stitches; stitches which do not fit into the pattern under the sleeve are worked in stockinette stitch. Continue working until the sleeve measures 37-36-32-31-26-24 cm = 14½"-14¼"-12½"-12¼"-10¼"-9½" from the division (there is approx. 5 cm = 2" left to finished length, you can try the sweater on and work to desired length). NOTE: Shorter measurements in larger sizes due to wider neck and longer yoke. Knit 1 round where you decrease 10 stitches evenly spaced in all sizes – read DECREASE TIP-2 = 40-42-42-46-48-52 stitches. Change to double pointed needles size 4 MM = US 6 and work rib (knit 1, purl 1) for 5 cm = 2". Bind off with knit over knit and purl over purl – remember BINDING-OFF TIP! The sleeve measures approx. 42-41-37-36-31-29 cm = 16½"-16⅛"-14½"-14¼"-12¼"-11⅜" from the division. Work the other sleeve in the same way. |
|||||||||||||||||||
Diagram explanations |
|||||||||||||||||||
|
|||||||||||||||||||
 |
|||||||||||||||||||
Have you finished this pattern?Tag your pictures with #dropspattern #galateasweater or submit them to the #dropsfan gallery. Do you need help with this pattern?You'll find 27 tutorial videos, a Comments/Questions area and more by visiting the pattern on garnstudio.com. © 1982-2026 DROPS Design A/S. We reserve all rights. This document, including all its sub-sections, has copyrights. Read more about what you can do with our patterns at the bottom of each pattern on our site. |
|||||||||||||||||||


With over 40 years in knitting and crochet design, DROPS Design offers one of the most extensive collections of free patterns on the internet - translated to 17 languages. As of today we count 324 catalogs and 12245 patterns - 12235 of which are translated into English (US/in).
We work hard to bring you the best knitting and crochet have to offer, inspiration and advice as well as great quality yarns at incredible prices! Would you like to use our patterns for other than personal use? You can read what you are allowed to do in the Copyright text at the bottom of all our patterns. Happy crafting!
Post a comment to pattern DROPS 220-3
We would love to hear what you have to say about this pattern!
If you want to leave a question, please make sure you select the correct category in the form below, to speed up the answering process. Required fields are marked *.