
Looking for a yarn?


Comments / Questions (73)
![]() Anna Krafft wrote:
Anna Krafft wrote:
Hallo! Ich finde den Teil für die Schulterabnahme schwer zu verstehen. Ich starte mit 88 M und habe wie in der Anleitung beschrieben 2x16M + 2x12M für die Schultern und 28M für den Hals. Durch einen Kommentar kam ich darauf, dass es 32M (28M+4M für die beiden schrägen Abnahmen zur Schulter hin) für den Hals sein müssen, was durch die Anleitung nicht klar wird. Ich hatte mich gewundert, dass ich nur auf 84 und nicht wie geplant auf 88M komme.
24.08.2023 - 19:35DROPS Design answered:
Liebe Frau Kraft, am Anfang jeder Reihe vom Armloch legen Sie so still: 4 Maschen 4 Mal dann die letzen 12 Maschen (= 28 Maschen für jede Schulter) und gleichzeitig ketten Sie für den Hals ab: die mittleren 28 Maschen (dann wird jede Schulter separat gestrickt) + 1 Masche 2 Mal (32 Maschen für Halsausschnitt), so haben Sie: 28 Maschen (Schulter) + 32 Maschen (Halsausschnitt) + 28 Maschen (Schulter) = 88 Maschen. Viel Spaß beim stricken!
25.08.2023 - 08:39
![]() Edyta wrote:
Edyta wrote:
Jaki najlepiej wybrać ścieg strukturalny na próbkę? Z góry dziękuję.
04.08.2023 - 18:07DROPS Design answered:
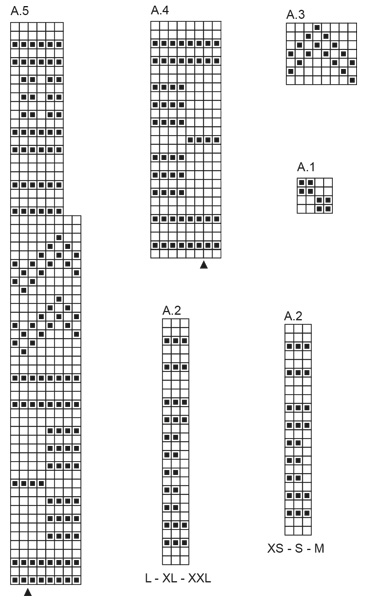
Witaj Edyto, chyba najprostszy będzie A.4. Pozdrawiamy!
04.08.2023 - 19:21
![]() Edyta wrote:
Edyta wrote:
Dziękuję. A ta włóczka Włóczka - MERINO EXTRA FINE - DROPS 50g ? A także ile bym jej potrzebowała
26.07.2023 - 20:49DROPS Design answered:
Witaj Edyto, aby wykonać ten sweter (zaprojektowany na grupę włóczek C) musiałabyś włóczkę DROPS Merino Extra Fine, która należy do Grupy włóczek B, z czymś połączyć np. z DROPS Kid-Silk. Sweter będzie bardziej puszysty, jak to będzie wyglądać zobacz TUTAJ. Ale Kid -Silk może podgryzać wrażliwych. Za to używając samej Merino Extra Fine, cały wzór (miary i obliczenia) trzeba będzie mocno zmodyfikować . Big Merino wydaje mi się optymalnym wyborem w twoim przypadku. Ale wybór należy do Ciebie :)
27.07.2023 - 08:42
![]() Edyta wrote:
Edyta wrote:
Dzień dobry. Chciała bym zrobić sobie taki sweterek, tylko żeby włóczka była miła w dotyku, żeby mnie "nie gryzła" bo jestem uczulona. Jaką włóczkę by Pani mi poleciła? Proszę o pomoc i poradę. Pozdrawiam serdecznie Edyta
26.07.2023 - 18:04DROPS Design answered:
Witaj Edyto, polecam DROPS Big Merino, czyli drugą sugerowaną włóczkę we wzorze. Merynos nie gryzie, ale lubi się rozciągać, szczególnie gdy przerabia się go luźno. Przed pracą koniecznie zrób próbkę i wypierz. Jeśli po wysuszeniu będzie za duża (za mało oczek na 10 cm w stosunku do próbki podanej na górze wzoru), wybierz cieńsze druty. Powodzenia!
26.07.2023 - 19:39
![]() Ruthsy wrote:
Ruthsy wrote:
Hello I have 15 yarn balls of drops Alaska so I only can make size S, but I always make size M in drops patterns which usually have the dimensions of the horizontal lower part as this one in small, so my question is, if I wanted it as the one that the model wears, which size should I make? Thank you very much.
22.07.2023 - 19:05DROPS Design answered:
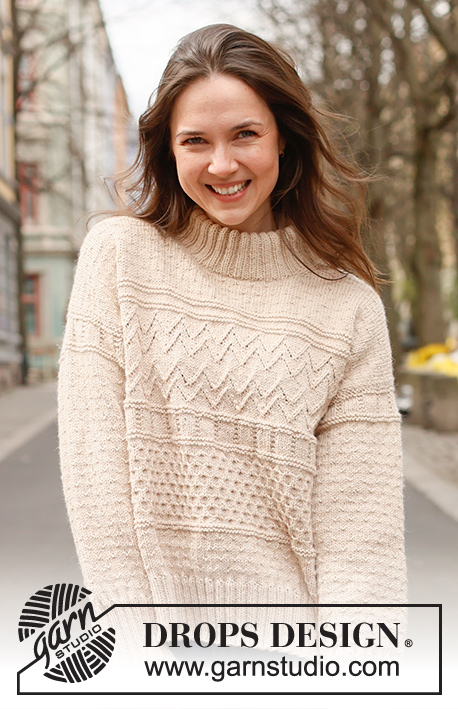
Dear Ruthsy, the smallest size is XS, not S size. The model usually wears an M size in our photos. This specific sweater is a wide garment, meant to not be too tight. We always recommend not checking the sizes indicated but rather choose which sweater size you want to work according to the measurements in the schematic of the garment. Happy knitting!
23.07.2023 - 19:36
![]() Maria Grazia Melchionda wrote:
Maria Grazia Melchionda wrote:
Buongiorno! grazie per i vostri bellissimi pattern e tutte le istruzioni allegate! vi chiedo: poiché io non lavoro in tondo, è possibile adattare questo pattern a una lavorazione in piano? come posso fare? grazie mille! maria grazia
11.07.2023 - 11:10DROPS Design answered:
Buongiorno Maria Grazia, si deve riadattare il motivo alla lavorazione in piano. Per un aiuto così personalizzato può rivolgersi al suo rivenditore DROPS di fiducia. Buon lavoro!
16.07.2023 - 13:35
![]() Ragnhild Button wrote:
Ragnhild Button wrote:
The shoulder decrease instructions don’t make sense. I start with 88 stitches. Pattern says “slip 4 stitches 4 times, then the last 12 stitches towards the neck”. But 4 stitches 4 times = 16 stitches which leaves 88-16 = 72, the “last” 12 stitches for the neck, but what do I do with the remaining 60 stitches? I have read all questions and answers but this problem has unfortunately been explained properly. I do hope you can help and explain this so I can complete this beautiful jersey.
05.07.2023 - 18:24DROPS Design answered:
Dear Mrs Button, you should work diagonal shoulder and neck at the same time, this means you first slip the stitches on each side on a thread at the beg of every row from shoulder as explained, then you will cast off the middle stitches for neck + 2 sts at the beg of every row from neck, so that you get 28 sts for each shoulder (4 sts 4 times + 12 sts 1 time on a thread), cast off 32 sts for neck (28 middle sts+ 1 st 2 times on each shoulder) = 88 sts in total. Happy knitting!
06.07.2023 - 10:08
![]() Connie Fortney wrote:
Connie Fortney wrote:
I am a little confused about the sleeve. When I have picked up 86 stitches all the way around the sleeve (size 2), why am I not just knitting in the round right away? My 68 stitches go all around the arm hole, should I be leaving a gap in the bottom? I mean not be picking up from the middle of the underarm? I hope that makes sense.
29.05.2023 - 21:54DROPS Design answered:
Hi Connie, The first cms back and forth are for the sleeve cap and the sleeve is joined and worked in the round when the sleeve cap is finished. The opening at the bottom of the armhole is sewn together to finish. This gives you a looser sleeve with a better fit into the armhole. Happy knitting!
30.05.2023 - 06:52
![]() Caroline Quidoz wrote:
Caroline Quidoz wrote:
Je me questionne sur la longueur du col doublé. Dans les instructions, il est inscrit de mettre un marqueur après 4 cm de côtes 4/4 ( taille m) et tricoter 9 cm en côtes 2/2 à partir du marqueur. Ça ne devrait pas être 9 cm total de côtes? Soit 5 cm depuis le marqueur?
14.04.2023 - 02:25DROPS Design answered:
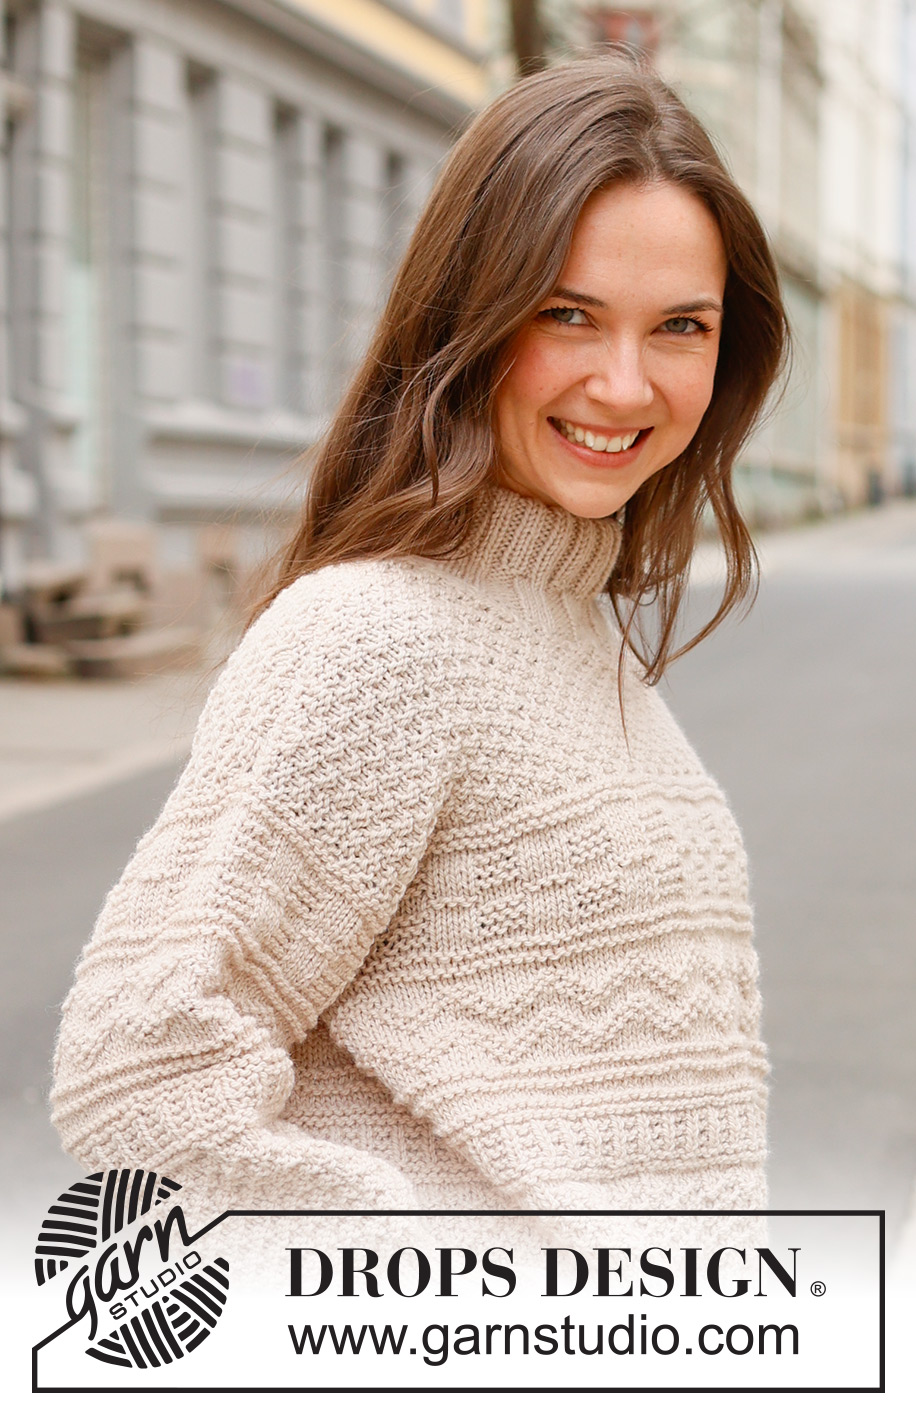
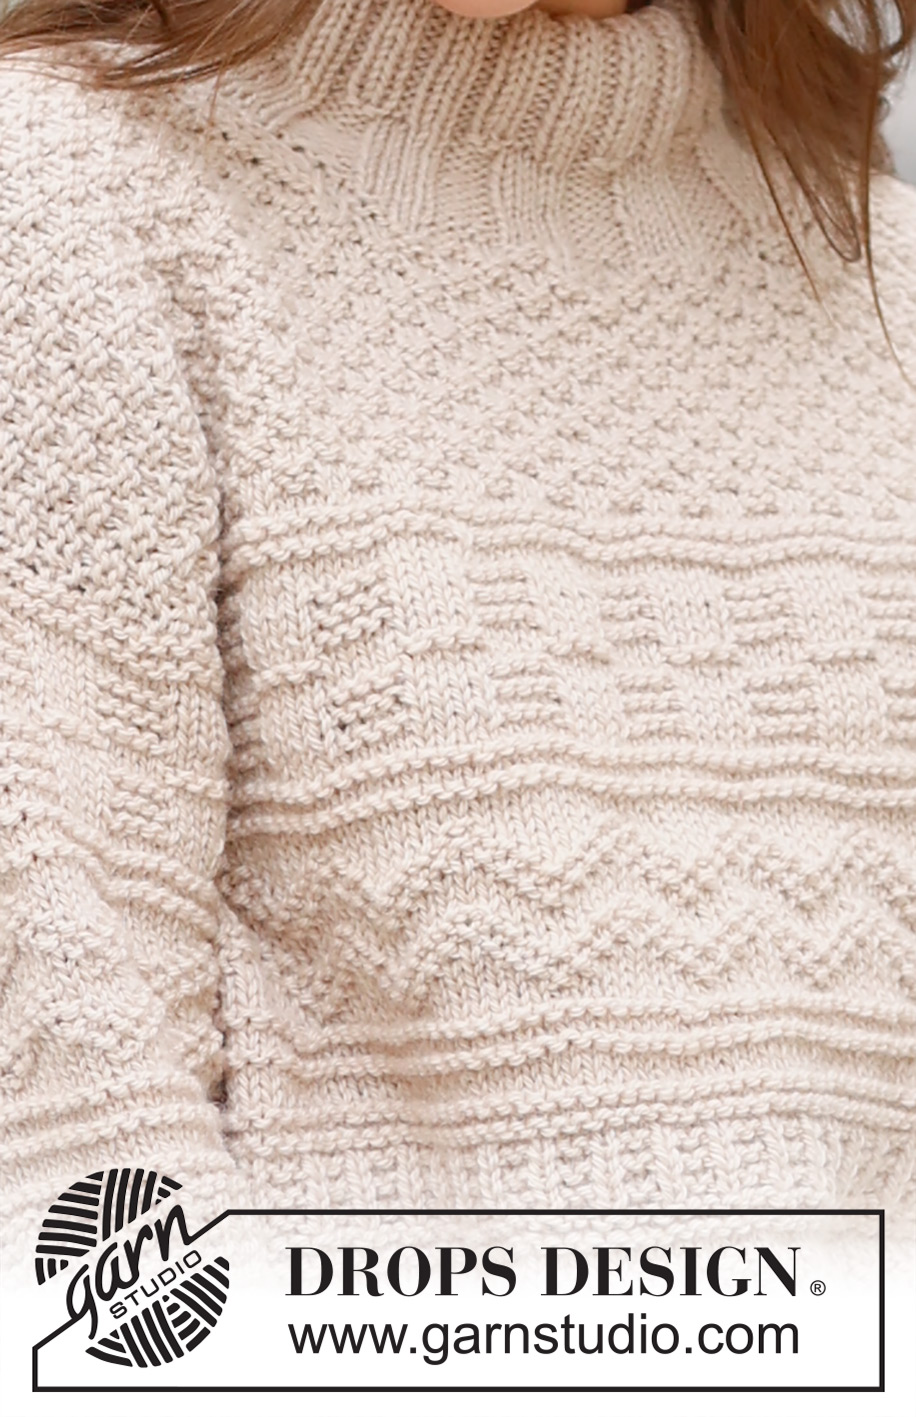
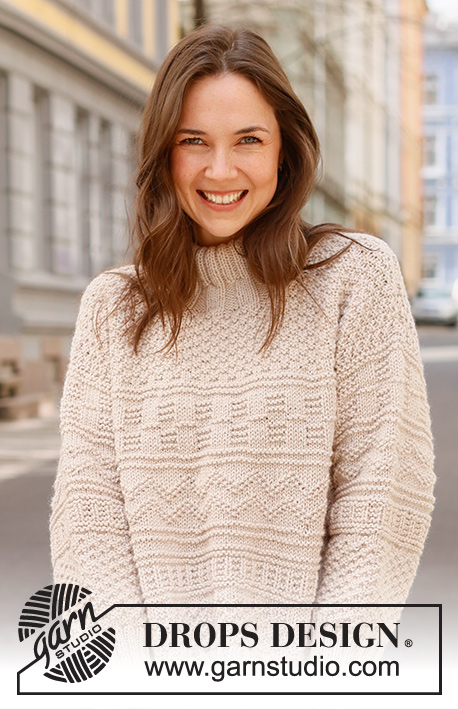
Bonjour Mme Quidoz, les 4 premiers cm de côtes 4 m end/4 m env ne seront pas doublés, seulement les 9-11 derniers cm du col tricotés en côtes 2 m end/2 m env. Sur la dernière photo, on voit bien les 2 sortes de côtes et la partie 4/4 avant le col doublé (en 2/2). Bon tricot!
14.04.2023 - 08:04
![]() Mai wrote:
Mai wrote:
Hi, I am on the diagonal shoulder part which , I haven’t never work on a diagonal shoulder before. So it’s confusing many sts do you have to slip off per side and it’s every other row? Can you provide a more clear example.
26.03.2023 - 01:26DROPS Design answered:
Dear Mai, For example, for the smallest size, you slip from the side the first 4 stitches for one shoulder and the first 4 for the second shoulder on the next row. When you start casting off for the neck, you will separate both shoulders and will slip 4 stitches at the start of every other row from the shoulder 3 more times (you should have 16 stitches for each shoulder). Then slip the last 10 stitches on each side for each shoulder towards the neck. This video should help you visualize how to slip the stitches: https://www.garnstudio.com/video.php?id=301&lang=en. Happy knitting!
26.03.2023 - 22:26
|
|||||||||||||
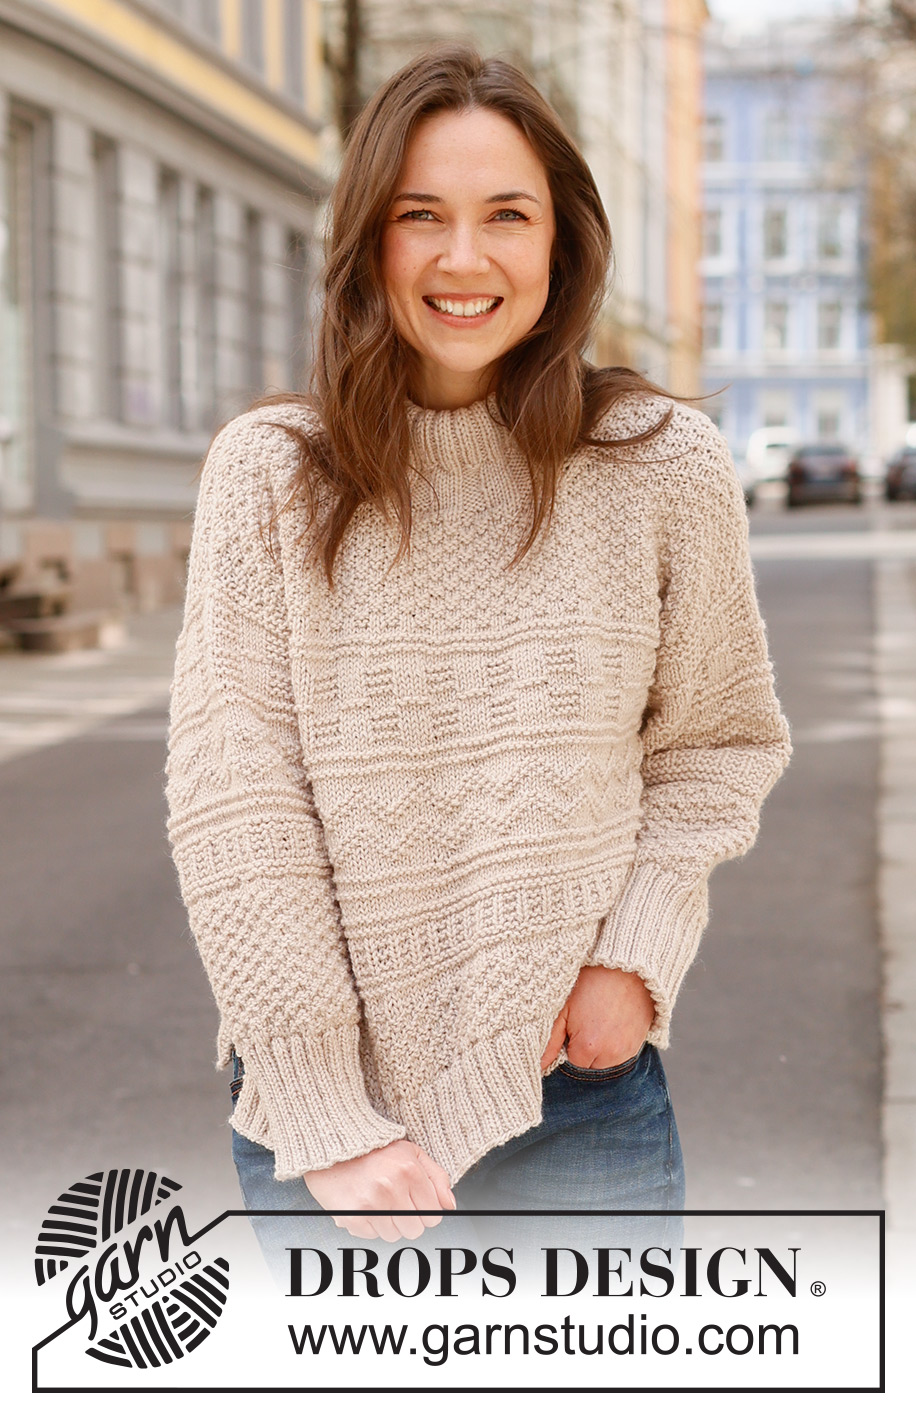
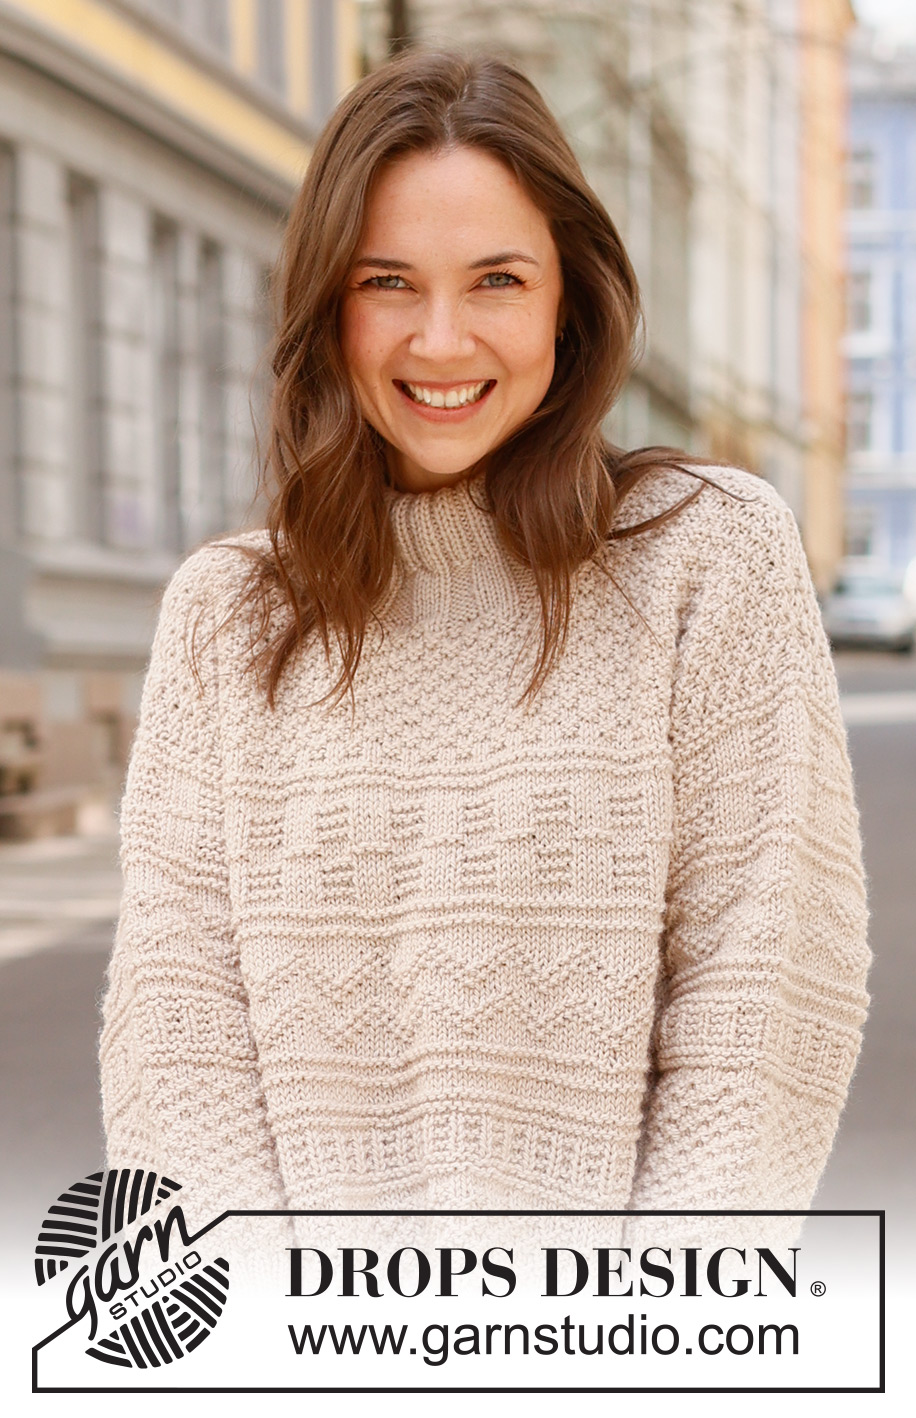
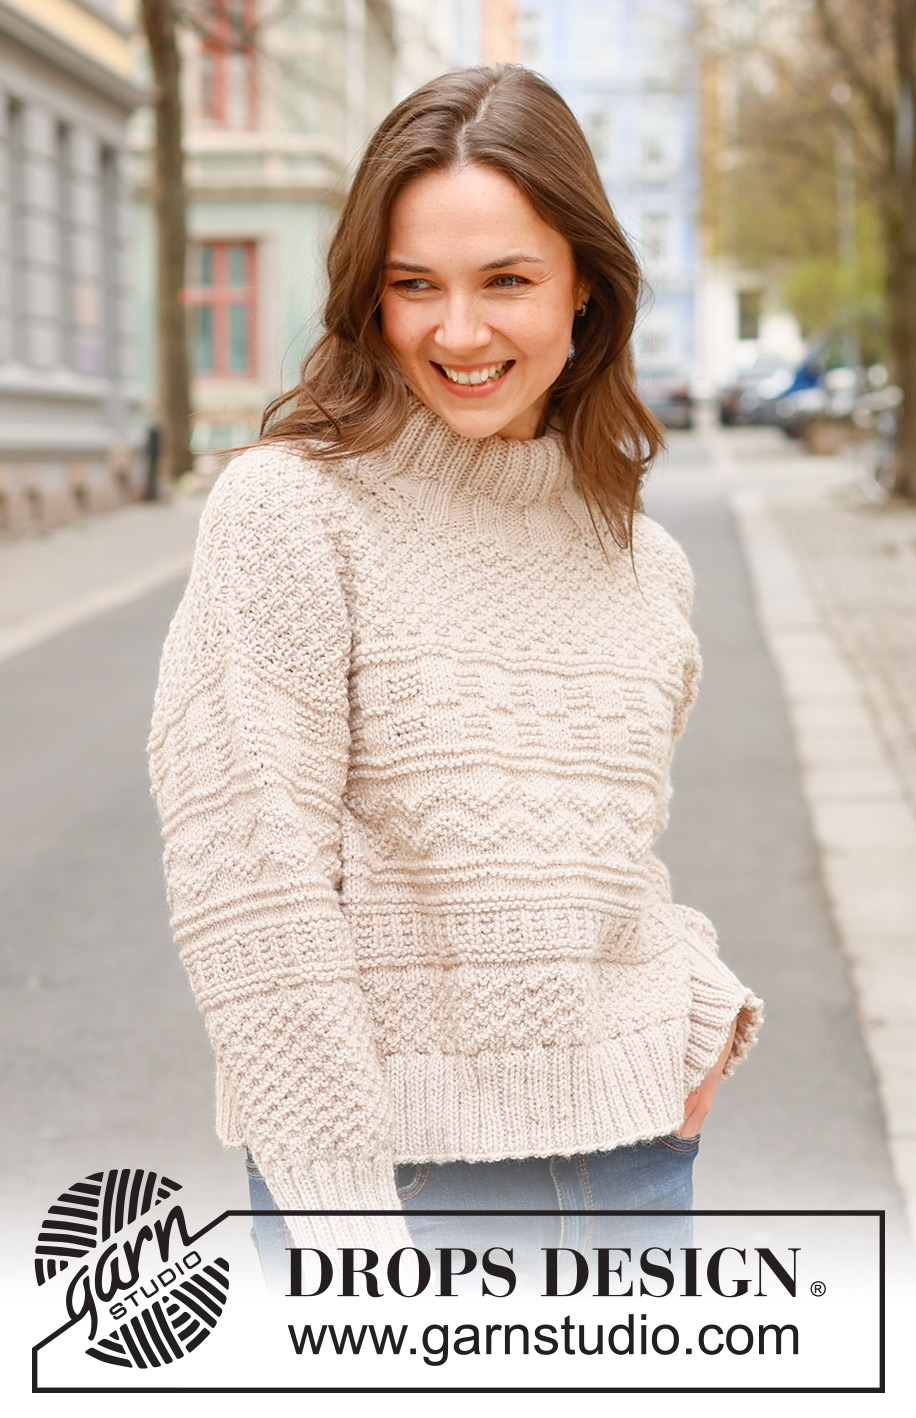
Around Town#aroundtownsweater |
|||||||||||||
 |
 |
||||||||||||
Knitted jumper in DROPS Alaska or DROPS Big Merino. Piece is knitted bottom up with relief pattern and double neck edge. Size XS – XXL.
DROPS 237-7 |
|||||||||||||
|
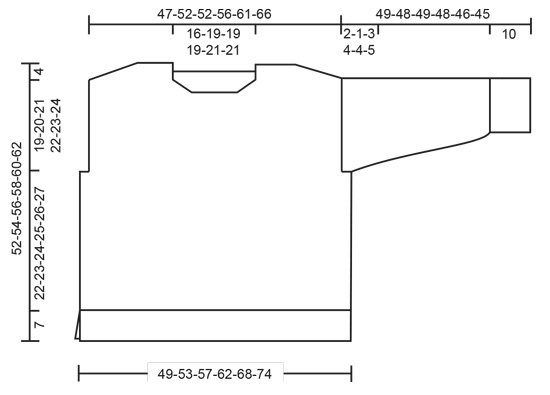
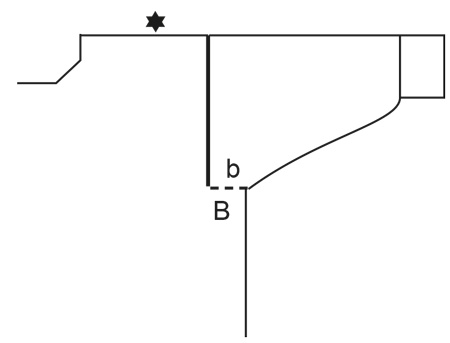
---------------------------------------------------------- EXPLANATION FOR THE PATTERN: ---------------------------------------------------------- GARTER STITCH (back and forth): Knit all rows. 1 ridge vertically = knit 2 rows. PATTERN: See diagrams A.1 to A.5. Choose diagram for your size (applies to A.2). Diagrams show all rows in pattern seen from the right side. DECREASE TIP-1 (applies to neck): All decreases are done from the right side! DECREASE AT BEGINNING OF ROW AS FOLLOWS FROM RIGHT SIDE: Work 2 stitches in stocking stitch, slip 1 stitch knitwise, knit 1, pass slipped stitch over stitch worked (1 stitch decreased). DECREASE AS FOLLOWS AT THE END OF ROW FROM RIGHT SIDE: Work until 4 stitches remain, knit 2 together and 2 stitches in stocking stitch (1 stitch decreased). DECREASE TIP-2 (applies to mid under sleeves): Decrease 1 stitch on each side of marker thread as follows: Work until 2 stitches remain before marker thread, knit/purl 2 together depending on pattern, marker thread, slip 1 stitch knitwise, knit 1, pass slipped stitch over stitch worked/purl 2 twisted together depending on pattern (2 stitches decreased). ---------------------------------------------------------- START THE PIECE HERE: ---------------------------------------------------------- JUMPER - SHORT OVERVIEW OF THE PIECE: Front and back piece back and forth on circular needle, bottom up until rib has been worked, then place piece together. Body is worked in the round on circular needle up to armholes. Then finish back piece and front piece back and forth on circular needle separately until finished measurements. Sew the shoulder seams. Pick up stitches along armholes and work the sleeves top down. Work sleeve cap back and forth on circular needle, work the rest of sleeve in the round on double pointed needles/a short circular needle, top down. Finish with a double neck edge. BACK PIECE: Cast on 110-118-126-138-150-162 stitches on circular needle size 3.5 mm with DROPS Alaska or DROPS Big Merino. Purl 1 row from wrong side. Work next row as follows from right side: 2 stitches in GARTER STITCH - read explanation above - * knit 2, purl 2 *, work from *-* until 4 stitches remain, knit 2 and finish with 2 stitches in garter stitch. Continue rib like this for 7 cm – adjust after a row from wrong side. Put piece aside and work the front piece. FRONT PIECE: Cast on the same number of stitches as on back piece and work piece the same way as back piece until piece measures 7 cm - finish after a row from wrong side. BODY: Put piece together as follows: Knit stitch from front piece and decrease at the same time 26-28-30-32-34-36 stitches evenly, knit over stitch from back piece and decrease at the same time 26-28-30-32-34-36 stitches evenly = 168-180-192-212-232-252 stitches on needle (84-90-96-106-116-126 stitches on front piece and 84-90-96-106-116-126 stitches on back piece). Switch to circular needle size 5 mm. Knit 1 round. Then work A.1 in the round on body. REMEMBER THE KNITTING TENSION! When piece measures 13-13-13-13-15-15 cm, work A.2 in the round - AT THE SAME TIME adjust number of stitches to 168-180-192-213-231-252 on the first round. On last round in A.2 increase 0-4-0-3-1-4 stitches evenly = 168-184-192-216-232-256 stitches. When A.2 has been worked, piece measures approx. 22-22-22-23-25-25 cm from cast-on edge on front/back piece. If the garment is shorter than this, continue in stocking stitch until correct measurements. Then work A.3 in the round on body. Repeat A.3 2-2-3-3-3-4 times in total vertically. When A.3 has been worked, piece measures approx. 27-27-30-31-33-35 cm from cast-on edge. If the garment is shorter than this, continue until correct measurements. Knit 1 round while decreasing 0-4-0-4-0-4 stitches evenly = 168-180-192-212-232-252 stitches. Insert 1 marker thread mid front and 1 marker thread mid back, insert in addition 1 marker in each side on body - this is done as follows: Insert 1 marker at beginning of round, count 42-45-48-53-58-63 stitches, insert 1 marker thread before next stitch (mid front), count 42-45-48-53-58-63 stitches, insert 1 marker before next stitch, count 42-45-48-53-58-63 stitches, insert 1 marker thread before next stitch (mid back). 42-45-48-53-58-63 stitches remain on round after last marker thread. Work A.4 as follows: Count out from symbol marked as the middle in diagram and marker thread mid from where pattern should start in the side, work A.4 as far as you can towards the marker in the side (marker thread mid front should fit symbol for the middle in A.4), then begin A.4 again the same way as on beginning of round, and work A.4 as far as you can until marker at the beginning of round (marker thread mid back should fit symbol for the middle in A.4). Continue pattern like this, and cast off for armholes as explained below. ARMHOLE: When piece measures 29-30-31-32-33-34 cm, cast off for armholes as follows: Begin 3-2-5-6-7-8 stitches remain before marker at the beginning of round, cast off 6-4-10-12-14-16 stitches for armhole, work as before until 3-2-5-6-7-8 stitches remain before marker in the other side, cast off 6-4-10-12-14-16 stitches for armhole, work as before the rest of round. Finish back piece and front piece separately. BACK PIECE: = 78-86-86-94-102-110 stitches. Begin from wrong side and continue A.4 with 1 stitch in garter stitch in each side. On last row from right side, increase 2 stitches evenly in all sizes = 80-88-88-96-104-112 stitches. When A.4 has been worked, A.1 with 1 stitch in garter stitch in each side. Repeat A.1 vertically until finished measurements. Then cast off for diagonal shoulder and neck as explained below. DIAGONAL SHOULDER: When piece measures 48-50-52-54-56-58 cm, slip stitches on a thread in each side for diagonal shoulder (to avoid cutting the yarn work stitches before slipping them on the thread): Slip stitches on a thread from the side as follows: 4-4-4-5-5-6 stitches 4 times and then the last the last 10-12-12-12-14-14 stitches towards the neck. When all stitches are on a thread, slip stitch back on needle size 5 mm. Purl 1 row from wrong side (to avoid a hole in the transitions where stitches where slipped on a thread, pick up the yarn between 2 stitches and purl them twisted together with first stitch on left needle). Cast off knitting from right side. NECK: At the same time when piece measures 49-51-53-55-57-59 cm, cast off the middle 24-28-28-28-32-32 stitches for neck and finish each shoulder separately. Continue A.1, continue to slip stitches on a thread for diagonal shoulder and work in addition the 3 stitches towards the neck in stocking stitch. AT THE SAME TIME on next row from right side, decrease 1 stitch for neck - read DECREASE TIP-1. Decrease like this on every row from right side 2 times in total. When all stitches have been cast off, piece measures approx. 52-54-56-58-60-62 cm from highest point on the shoulder and down. Repeat on the other shoulder. FRONT PIECE: = 78-86-86-94-102-110 stitches. Cast on and work pattern the same way as on back piece. In addition decrease for neck and diagonal shoulder as explained below. NECK: When piece measures 46-48-49-51-52-54 cm, slip the middle 20-24-24-24-26-26 stitches on a thread for neck, and finish each shoulder separately. Continue A.1 but work the outermost 3 stitches towards the neck in stocking stitch. AT THE SAME TIME on next row from right side, decrease 1 stitch for neck - read DECREASE TIP-1. Decrease like this on every row from right side 4-4-4-4-5-5 times in total. DIAGONAL SHOULDER: At the same time when piece measures 48-50-52-54-56-58 cm, slip stitches on a thread for diagonal shoulder the same way as on back piece, i.e. slip 4-4-4-5-5-6 stitches on a thread 4 times then slip the last 10-12-12-12-14-14 stitches towards the neck. When all stitches have been slipped on a thread, purl 1 row from wrong side as on back piece before casting off by knitting from right side. Repeat on the other shoulder. ASSEMBLY: Sew the shoulder seams. SLEEVES: Use circular needle size 5 mm and DROPS Alaska or DROPS Big Merino, pick up from right side 32-34-36-37-39-41 stitches from the bottom of armhole up to shoulder and 32-34-36-37-39-41 stitches from the shoulder and down to the bottom of armhole on the other side = 64-68-72-74-78-82 stitches along armhole. Insert 1 marker thread in the middle of the row - measure sleeve from this marker and use the marker thread when counting to where pattern should begin. Begin from wrong side and work A.5 as follows: Count out from the symbol marked as the middle in diagram and marker thread on sleeve where pattern should begin, and work A.5 back and forth with 1 stitch in garter stitch in each side. When sleeve measures 2-1-3-4-4-5 cm from where marker thread was inserted, put piece together on a short circular needle or double pointed needles size 5 mm – work the rest of sleeve in the round. Insert 1 marker thread at the beginning of round (mid under sleeve). Move marker thread upwards when working. Begin round mid under sleeve and continue pattern in the round (symbol for the middle in diagram should still fit marker thread mid on top of sleeve - pattern does not fit mid under sleeve). When piece measures 5-4-6-7-7-8 cm from where marker thread was inserted mid on top of sleeve, decrease 2 stitches mid under sleeve - read DECREASE TIP-2. Decrease like this every 4-4-3½-3-2½-2 cm 8-9-10-11-12-13 times in total = 48-50-52-52-54-56 stitches. When A.5 has been worked vertically, work A.1 in the round. Work until sleeve measures 39-38-39-38-36-35 cm from marker. 10 cm remain until finished measurements. Try the jumper and work to desired length before rib. Knit 1 round while increasing 12-14-12-16-18-16 stitches evenly = 60-64-64-68-72-72 stitches. Switch to double pointed needles size 3.5 mm. Work rib (knit 2/purl 2) for 10 cm. Loosely cast off. Sleeve measures approx. 49-48-49-48-46-45 cm from marker mid on top of sleeve. Work the other sleeve the same way. Sew bottom of armholes - see chart. DOUBLE NECK EDGE: Begin at one shoulder, use a short circular needle size 3.5 mm and pick up approx. 80-96-96-104-112-112 stitches around the neck inside 1 stitch (including stitches on thread). Work rib in the round (knit 4/purl 4 -adjust beginning of rib so that there are 4 purl stitches or 4 knit stitches on mid front). Insert 1 marker on row when rib measures 4 cm, use marker for measurements. Then work knit 2/purl 2 over all stitches. When rib measures 9-9-9-11-11-11 cm from marker, switch to a short circular needle size 5 mm. Cast off stitches with knit over knit and purl over purl. Fold the rib (knit 2/purl 2) down on the inside of garment. Fasten rib to get a double neck edge of approx. 4-4-4-5-5-5 cm. To avoid a tight neck edge that sticks out it is important to keep the seam elastic. |
|||||||||||||
Diagram explanations |
|||||||||||||
|
|||||||||||||
 |
|||||||||||||
 |
|||||||||||||
 |
|||||||||||||
Have you finished this pattern?Tag your pictures with #dropspattern #aroundtownsweater or submit them to the #dropsfan gallery. Do you need help with this pattern?You'll find 31 tutorial videos, a Comments/Questions area and more by visiting the pattern on garnstudio.com. © 1982-2025 DROPS Design A/S. We reserve all rights. This document, including all its sub-sections, has copyrights. Read more about what you can do with our patterns at the bottom of each pattern on our site. |
|||||||||||||


With over 40 years in knitting and crochet design, DROPS Design offers one of the most extensive collections of free patterns on the internet - translated to 17 languages. As of today we count 320 catalogues and 12095 patterns translated into English (UK/cm). 12095
We work hard to bring you the best knitting and crochet have to offer, inspiration and advice as well as great quality yarns at incredible prices! Would you like to use our patterns for other than personal use? You can read what you are allowed to do in the Copyright text at the bottom of all our patterns. Happy crafting!
Post a comment to pattern DROPS 237-7
We would love to hear what you have to say about this pattern!
If you want to leave a question, please make sure you select the correct category in the form below, to speed up the answering process. Required fields are marked *.