
Looking for a yarn?


Comments / Questions (32)
![]() Larysa wrote:
Larysa wrote:
For the V-Neck decrease, I know you have to decrease on every 2nd and 4th row a specified number of times. My question is would you decrease twice on row 4, as 2 is a multiple of 4. That would mean row 4, 8 and 12 would have 2 decreases. Is that correct? Thank you!
26.01.2025 - 20:55DROPS Design answered:
Hi Larysa, No, you decrease 1 stitch for the V-neck first every 4th row one time, then decrease 1 stitch every 2nd row the correct number of times and finally every 4th row again the correct number of times. So always 1 stitch decreased on a decrease row. Happy knitting!
27.01.2025 - 07:20
![]() Aurélie wrote:
Aurélie wrote:
Bonjour, Je ne comprends pas les explications pour la bordure droite. Où doit s'arrêter la bordure? Je n'ai pas d'anneau marqueur dans le dos selon les explications. La bordure n'est pas en une seule partie? Est-ce qu'il faut relever les mailles jusqu'à l'épaule opposée?
22.01.2025 - 23:50DROPS Design answered:
Bonjour Aurélie, le marqueur au milieu de l'encolure dos est indiqué à la fin du paragraphe ASSEMBLAGE; effectivement, la bordure des devants se tricote en 2 parties, pour le devant droit, on commence sur l'endroit en bas du devant et on termine au milieu de l'encolure dos = au marqueur; pour le devant gauche, on commence au marqueur et on termine en bas du devant gauche. Bon tricot!
23.01.2025 - 10:19
![]() Sue wrote:
Sue wrote:
I've just finished this and it's lovely- apart from it's too small! Made the medium size and it measures 3" smaller across the bust than the pattern says. I've double checked my tension and it's spot on, and I've used the correct size needles..... is this usual for Drops patterns?
26.08.2024 - 17:50DROPS Design answered:
Dear Sue, if your tension was right ( 17 sts in width = 10 cm / 4"), then the 91 sts for back piece minus 2 edge stitches (seam allowance) (for ex) should be approx. 52 cm, ie measurements shown in chart. It's easy to lose tension when working, make sure to keep the same tension as for the swatch or adjust neeedle size if needed. Happy knitting!
27.08.2024 - 09:07
![]() Carro wrote:
Carro wrote:
Vänster framkant måste det stå fel i antal maskor som ska minskas efter resåren väl? I storlek M lade jag upp 56 maskor och ska minska 11 så det ska bli 46 maskor. Det stämmer ju inte???? Måste bara 10 maskor minskning
15.08.2024 - 11:30
![]() Sietske Donkers wrote:
Sietske Donkers wrote:
Goedendag ik heb een vraag over de V hals. Er staat minder zo iedere 4e naald 1 keer. De 4e naald is averechts. Klopt dit? Doe ik dit 1x en ga ik dan door naar elke 2e naald 12 x? Ik minder toch in de naald met het werk aan de goede kant voor me? Graag hoor ik van u. Alvast bedankt Hartelijke groeten van Sietske
10.07.2024 - 14:26DROPS Design answered:
Dag Sietske,
Het gaat er met name om dat je om de 4 naalden mindert, dus als je op een bepaalde naald geminderd hebt, doe je dat 4 naalden later weer. De eerste mindernaald voor de v-hals is op de goede kant, zoals beschreven bij de V-hals, dus de eerstvolgende (na 4 naalden) ook.
11.07.2024 - 21:04
![]() Katie Franklin wrote:
Katie Franklin wrote:
Great pattern! Knitted this up with Knit Picks Wonderfluff in Wonderland Heather! [I live in the states so Drops is hard to come by :( ] I used 4.5 & 4 mm needles and I used ~300 grams of yarn. I wish I could post a picture here because it is such a lovely gift for my mother!
17.03.2024 - 18:16
![]() Barbora wrote:
Barbora wrote:
Hello, if Im beginning the test for knitting tension what size of needle am I suppose to use 4mm or 5 mm? It doesnt say in the manual. Thank you
28.01.2024 - 18:16DROPS Design answered:
Dear Barbora, the 4mm needles are only used for the rib. So, since we will only use the 5mm needles for the stocking stitch pattern we need to calculate the gauge with those. Happy knitting!
28.01.2024 - 23:15
![]() Iona Jeanie Eadie wrote:
Iona Jeanie Eadie wrote:
I understand your schematic drawings to calculate which size I should knit but can you please say which size the model is wearing as this will give the 'truest' indication of the size I need to knit. AND just to clarify: the bottom of the garment smallest size 49 (x 2) = 98cm, which = 38inches, and is this for the FINISHED garment? AND since it appears to be square in shape, does this mean the finished bust measurement would also be 38 inches please? :)
18.09.2023 - 21:04
![]() Iona Jeanie Eadie wrote:
Iona Jeanie Eadie wrote:
I understand your schematic drawings to calculate which size I should knit but can you please say which size the model is wearing as this will give the 'truest' indication of the size I need to knit. AND just to clarify: the bottom of the garment smallest size 49 (x 2) = 98cm, which = 38inches, and is this for the FINISHED garment? AND since it appears to be square in shape, does this mean the finished bust measurement would also be 38 inches please? :)
18.09.2023 - 21:03DROPS Design answered:
Dear Mrs Eadie, the shematic drawing shows the finished measurements in cm, so that width of piece on the bottom will be 49 cm in size S lying flat x 2 = 98 cm circumference. Our models most often wear a size S or a size M. Measuring a similar garment you have and like the shape will help you finding the best matching size, as every body is different. Happy knitting!
19.09.2023 - 09:07
![]() Flo wrote:
Flo wrote:
Hallo... Ein schönes Teil 😄. Gibt es die Anleitung auch in deutsch, Englisch oder französischer? Danke
24.07.2023 - 12:26DROPS Design answered:
Liebe Flo, alle unsere Anleitungen sind in deutsch, English und französisch erhältlich :) Klicken Sie auf dem dropdown Menu unter die Fotos um die Sprache zu ändern. Viel Spaß beim stricken!
28.07.2023 - 08:08
|
||||||||||||||||||||||
Sweetness Imprint#sweetnessimprintcardi |
||||||||||||||||||||||
 |
 |
|||||||||||||||||||||
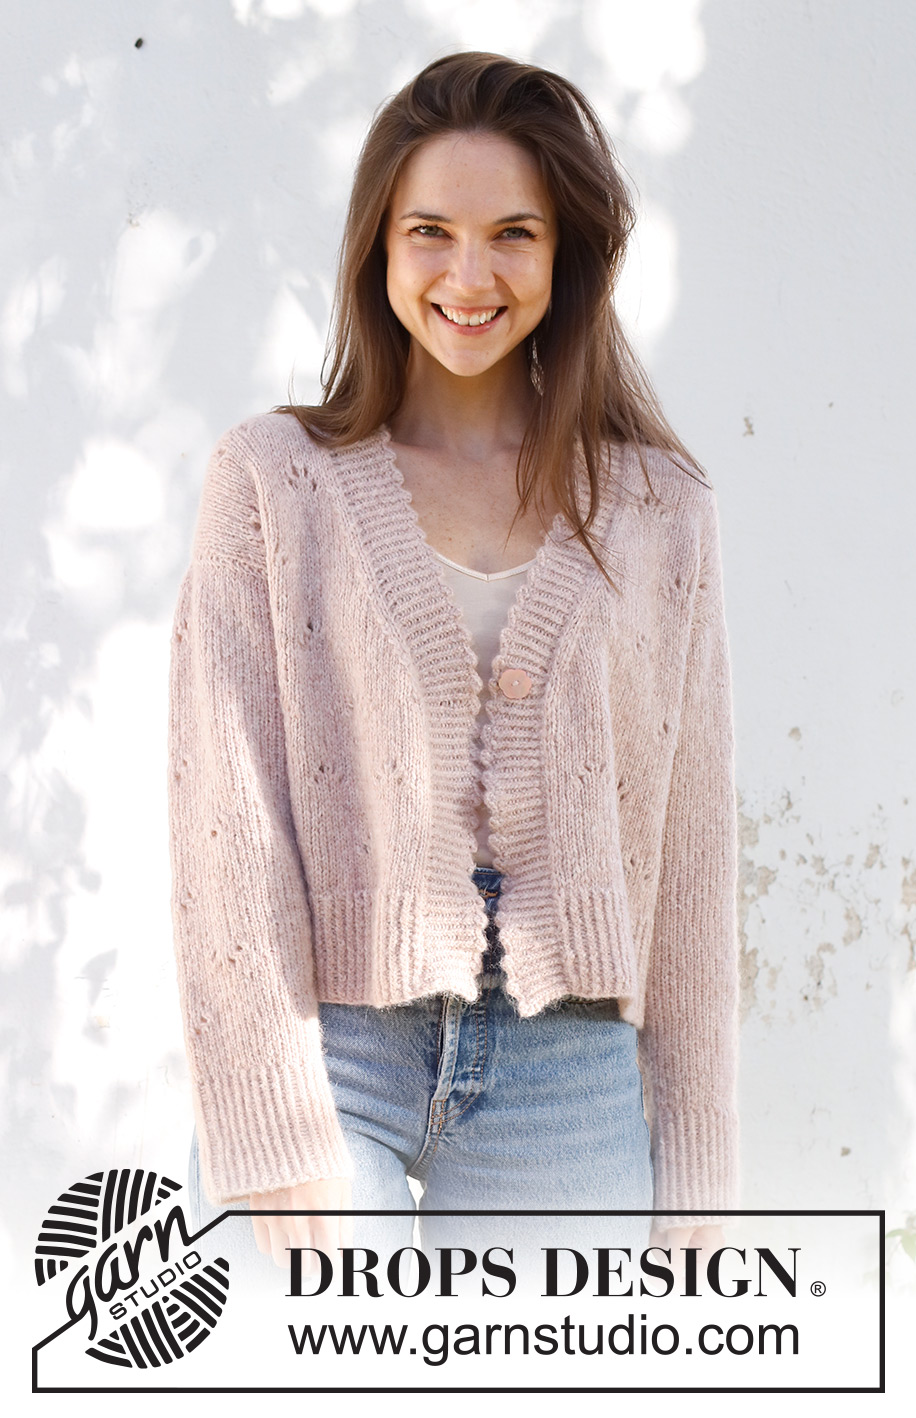
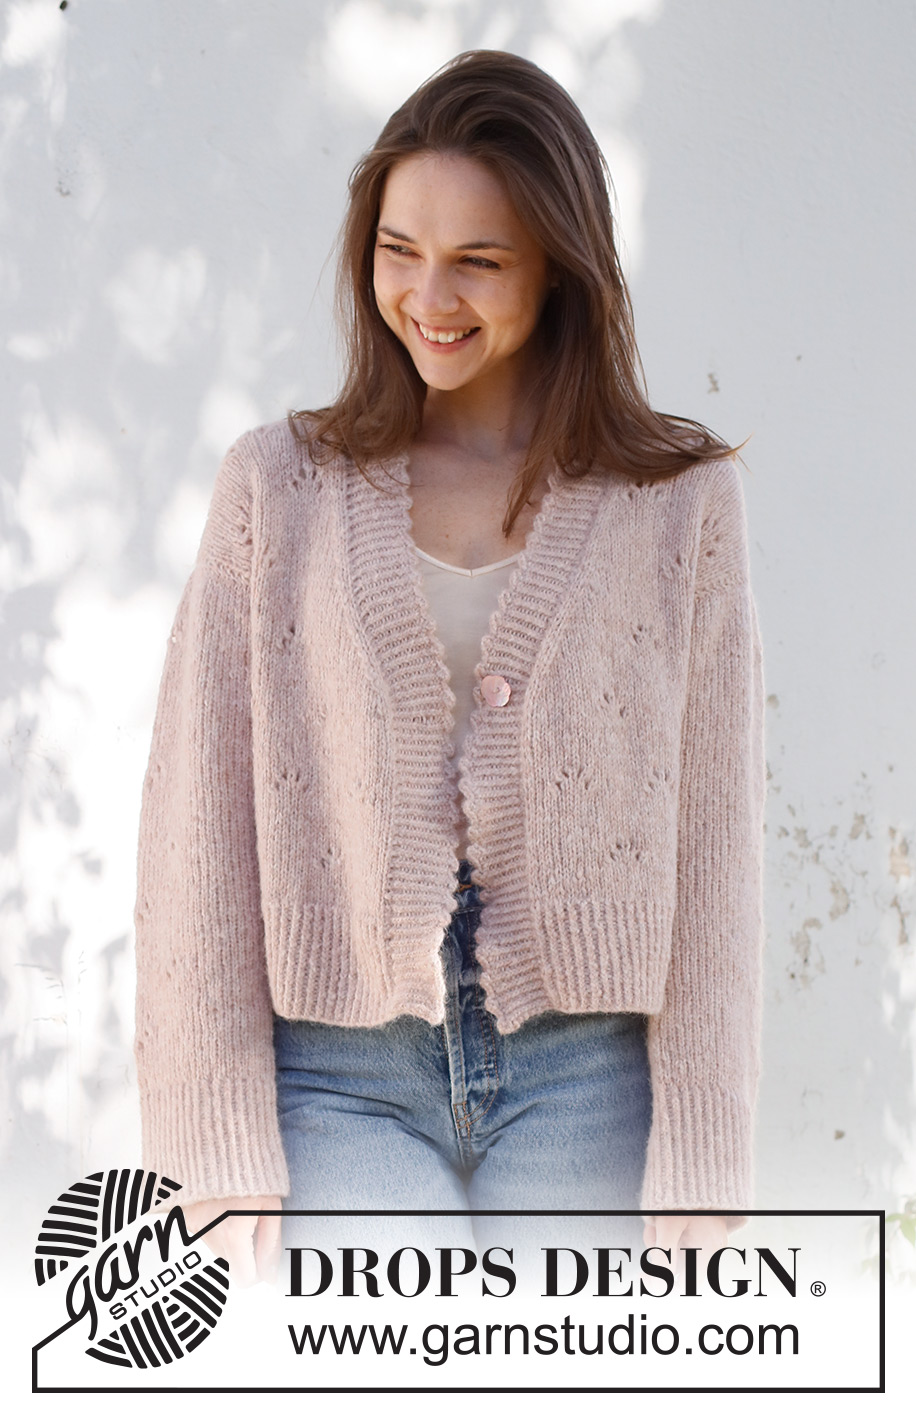
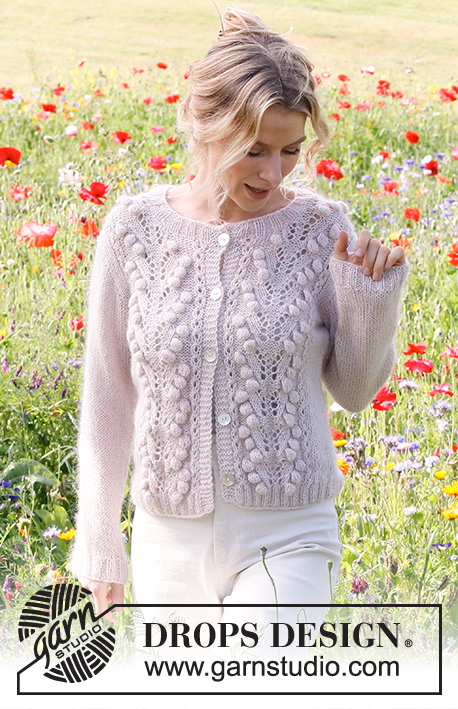
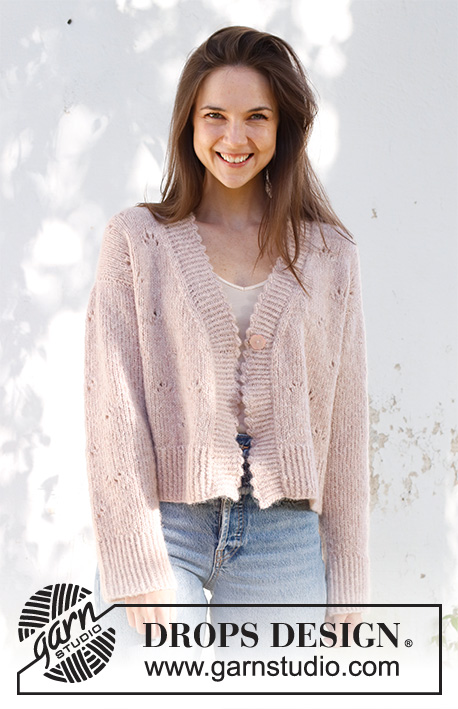
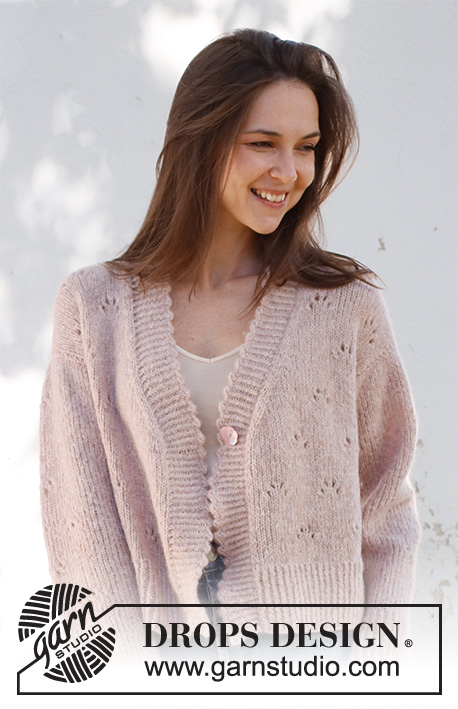
Knitted jacket in DROPS Air. The piece is worked bottom up, with lace pattern and picot-edges. Sizes S - XXXL.
DROPS 231-27 |
||||||||||||||||||||||
|
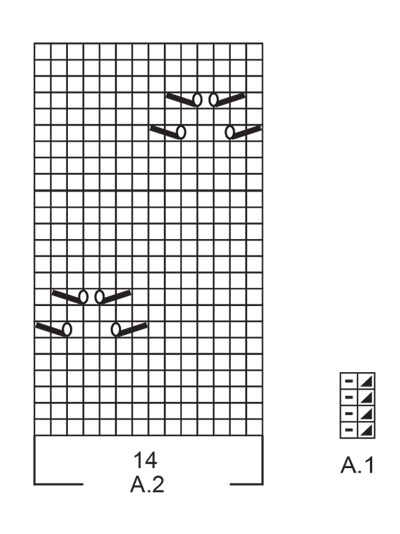
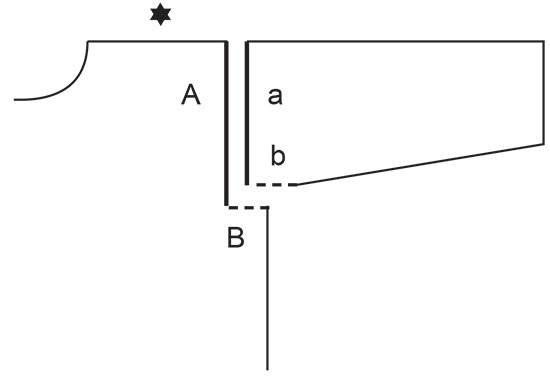
------------------------------------------------------- EXPLANATIONS FOR THE PATTERN: ------------------------------------------------------- RIDGE/GARTER STITCH (worked back and forth): Knit all rows. 1 ridge = knit 2 rows. PATTERN: See diagrams A.1 and A.2. The diagrams show all rows in the pattern from the right side. DECREASE/INCREASE TIP (evenly spaced): To work out how to decrease/increase evenly, count the total number of stitches on needle (e.g. 105 stitches), minus the edge stitches (e.g. 2 stitches) and divide the remaining 103 stitches by the number of decreases/increases to be made (e.g. 20) = 5.1. In this example, decrease by knitting together approx. each 4th and 5th stitch; do not decrease the edge stitches. When increasing, make 1 yarn over after approx. each 5th stitch. On the next row purl the yarn overs twisted to avoid holes. DECREASE TIP (for sleeves): Decrease 1 stitch on either side of the marker as follows: Work until there are 3 stitches left before the marker, knit 2 together, knit 2 (marker sits between these 2 stitches), slip 1 stitch as if to knit, knit 1 and pass the slipped stitch over the knitted stitch (2 stitches decreased). PICOT: Knit 1, * insert right needle between the next 2 stitches (not through the stitches), make 1 yarn over, pull the yarn over between the stitches and place on left needle *, work from *-* 2 more times (= 3 yarn overs on left needle), knit and bind off 7 stitches (= 1 stitch + 3 yarn overs + 3 stitches). Work from *-* and bind off 7 stitches in the same way along the whole edge. When there are not enough stitches to work another picot, bind off the remaining stitches as usual. Cut the strand and pull it through the last stitch. Fasten. BINDING-OFF TIP: To avoid the bind-off edge being tight you can bind off with a larger size needle. If the edge is still tight, make 1 yarn over after approx. each 4th stitch at the same time as binding off; the yarn overs are bind off as normal stitches. ------------------------------------------------------- START THE PIECE HERE: ------------------------------------------------------- JACKET – SHORT OVERVIEW OF THE PIECE: The back and front pieces are worked separately, back and forth on circular needle and bottom up. The sleeves are worked top down, first back and forth on circular needle then in the round with double pointed needles. The piece is sewn together and the bands worked with picot-edges. BACK PIECE: Cast on 104-112-120-126-140-154 stitches (including 1 edge stitch on each side) with circular needle size 4 MM = US 6 and DROPS Air. Work rib as follows: 1 edge stitch in GARTER STITCH – read description above, A.1 until there is 1 stitch left and 1 edge stitch in garter stitch. Continue this rib back and forth for 9 cm = 3½" – adjust so the next row is from the right side. Knit 1 row where you decrease 19-21-23-23-27-29 stitches evenly spaced – read DECREASE/INCREASE TIP = 85-91-97-103-113-125 stitches. Change to circular needle size 5 MM = US 8. Purl 1 row with 1 edge stitch in garter stitch on each side. Now work pattern as follows: 1 edge stitch in garter stitch, 3-6-9-5-10-16 stitches in stockinette stitch, A.2 over the next 70-70-70-84-84-84 stitches (= 5-5-5-6-6-6 repeats of 14 stitches), work the first 7 stitches in A.2, 3-6-9-5-10-16 stitches in stockinette stitch and 1 edge stitch in garter stitch. Continue this pattern until the piece measures 36-37-38-39-40-41 cm = 14¼"-14½"-15"-15¼"-15¾"-16⅛". REMEMBER THE KNITTING GAUGE! At the beginning of the next 2 rows bind off 2-4-4-4-7-11 stitches for the armholes = 81-83-89-95-99-103 stitches. Continue with pattern over the middle 77-77-77-91-91-91 stitches, 1 edge stitch in garter stitch on each side and stockinette stitch over the other 1-2-5-1-3-5 stitches until the piece measures 51-53-55-57-59-61 cm = 20"-21"-21⅝"-22½"-23¼"-24" – adjust so you have at least 2 rows of stockinette stitch after a lace pattern. Continue with stockinette stitch and 1 edge stitch in garter stitch on each side and bind off the middle 29-29-31-31-33-33 stitches for the neck. Each shoulder is finished separately. Bind off 1 stitch on the next row from the neck = 25-26-28-31-32-34 stitches on the shoulder. Continue working until the piece measures 54-56-58-60-62-64 cm = 21¼"-22"-22¾"-23⅝"-24⅜"-25¼". Bind off. Work the other shoulder in the same way. RIGHT FRONT PIECE: Cast on 52-56-60-64-72-78 stitches (including 1 edge stitch on each side) with circular needle size 4 MM = US 6 and DROPS Air. Work rib as follows: 1 edge stitch in garter stitch, A.1 until there is 1 stitch left and 1 edge stitch in garter stitch. Continue this rib back and forth for 9 cm = 3½" – adjust so the next row is from the right side. Knit 1 row where you decrease 9-10-10-11-13-13 stitches evenly spaced = 43-46-50-53-59-65 stitches. Change to circular needle size 5 MM = US 8. Purl 1 row with 1 edge stitch in garter stitch on each side. Now work pattern as follows: 1 edge stitch in garter stitch, 3-3-4-4-5-5 stitches in stockinette stitch, A.2 over the next 28-28-28-42-42-42 stitches (= 2-2-2-3-3-3 repeats of 14 stitches), work the first 7-7-7-0-0-0 stitches in A.2 (only applies to sizes S, M, and L; in the other sizes there are no more stitches in A.2), 3-6-9-5-10-16 stitches in stockinette stitch and 1 edge stitch in garter stitch. Continue this pattern. OVERVIEW OF THE NEXT SECTION: Now both the V-neck and armholes are worked at the same time – read the next section before continuing. V-NECK: When the piece measures 28-29-30-31-32-33 cm = 11"-11⅜"-11¾"-12¼"-12½"-13", start to decrease for the V-neck on the next row from the right side as follows: 1 edge stitch in garter stitch, knit 1, slip 1 stitch as if to knit, knit 1 and pass the slipped stitch over the knitted stitch (= 1 stitch decreased), work to end of row. Turn and purl back with 1 edge stitch in garter stitch on each side. Decrease like this every 4th row 1 time (= the first decrease is explained above), every 2nd row 12-12-13-13-14-14 times, then every 4th row 3 times = 16-16-17-17-18-18 stitches decreased – if the decreases occur in the middle of a lace pattern, work stockinette stitch instead of pattern. ARMHOLE: When the piece measures 36-37-38-39-40-41 cm = 14¼"-14½"-15"-15¼"-15¾"-16⅛", bind off 2-4-4-4-7-11 stitches for the armhole on the next row from the wrong side. When the decreases for the neck and armhole are finished there are 25-26-28-31-32-34 stitches on the shoulder. Continue with stockinette stitch and 1 edge stitch on garter stitch on each side until the piece measures 54-56-58-60-62-64 cm = 21¼"-22"-22¾"-23⅝"-24⅜"-25¼". Bind off. LEFT FRONT PIECE: Cast on 52-56-60-64-72-78 stitches (including 1 edge stitch on each side) with circular needle size 4 MM = US 6 and DROPS Air. Work rib as follows: 1 edge stitch in garter stitch, A.1 until there is 1 stitch left (adjust so you begin and end with 1 purl (from the right side) so the rib matches when the piece is sewn together, and 1 edge stitch in garter stitch. Continue this rib back and forth for 9 cm = 3½" – adjust so the next row is from the right side. Knit 1 row where you decrease 9-10-10-11-13-13 stitches evenly spaced = 43-46-50-53-59-65 stitches. Change to circular needle size 5 MM = US 8. Purl 1 row with 1 edge stitch in garter stitch on each side. Now work pattern as follows: 1 edge stitch in garter stitch, 3-6-9-5-10-16 stitches in stockinette stitch, start on stitch 1-1-1-7-7-7 in A.2 and continue A.2 over the next 28-28-28-35-35-35 stitches (= 2-2-2-2½-2½-2½ repeats of 14 stitches), work the first 7 stitches in A.2, 3-3-4-4-5-5 stitches in stockinette stitch and 1 edge stitch in garter stitch. Continue this pattern. OVERVIEW OF THE NEXT SECTION: Now both the V-neck and armholes are worked at the same time – read the whole section before continuing. V-NECK: When the piece measures 28-29-30-31-32-33 cm = 11"-11⅜"-11¾"-12¼"-12½"-13", start to decrease for the V-neck on the next row from the right side as follows: 1 edge stitch in garter stitch, pattern as before until there are 4 stitches left, knit 2 together (1 stitch decreased), knit 1 and 1 edge stitch in garter stitch. Purl 1 row with 1 edge stitch in garter stitch on each side. Decrease like this every 4th row 1 time (= the first decrease is explained above), every 2nd row 12-12-13-13-14-14 times, then every 4th row 3 times = 16-16-17-17-18-18 stitches decreased – if the decreases occur in the middle of a lace pattern, work stockinette stitch instead of pattern. ARMHOLE: When the piece measures 36-37-38-39-40-41 cm = 14¼"-14½"-15"-15¼"-15¾"-16⅛", bind off 2-4-4-4-7-11 stitches for the armhole on the next row from the right side. When the decreases for the neck and armhole are finished there are 25-26-28-31-32-34 stitches on the shoulder. Continue with stockinette stitch and 1 edge stitch on garter stitch on each side until the piece measures 54-56-58-60-62-64 cm = 21¼"-22"-22¾"-23⅝"-24⅜"-25¼". Bind off. SLEEVES: The sleeves are worked top down. Cast on 61-65-69-71-75-79 stitches with circular needle size 5 MM = US 8 and DROPS Air. Work stockinette stitch back and forth for 1-2-2-2-4-6 cm = ⅜"-¾"-¾"-¾"-1½"-2⅜". Then continue in the round as follows: Insert 1 marker at the beginning of the round; allow the marker to follow your work – it is used when decreasing under the sleeve. Change to double pointed needles size 5 MM = US 8. Work pattern in the round as follows: 20-22-24-25-27-29 stitches in stockinette stitch, A.2 over the next 14 stitches, work the first 7 stitches in A.2 (so the pattern is symmetrical) and 20-22-24-25-27-29 stitches in stockinette stitch. When the sleeve measures 3-4-4-4-6-8 cm = 1⅛"-1½"-1½"-1½"-2⅜"-3⅛" from the cast-on edge, decrease 1 stitch on each side of the marker – read DECREASE TIP. Decrease like this every 5½-4-3½-3½-3-2 cm = 2⅛"-1½"-1¼"-1¼"-1⅛"-¾" a total of 6-7-8-8-9-11 times = 49-51-53-55-57-57 stitches. Continue working until the sleeve measures 39-39-38-38-38-37 cm = 15¼"-15¼"-15"-15"-15"-14½" – adjust so you have worked at least 2 rows of stockinette stitch after a lace pattern. There is approx. 9 cm = 3½" left. Knit 1 round where you increase 11-13-13-13-13-13 stitches evenly spaced = 60-64-66-68-70-70 stitches. Change to double pointed needles size 4 MM = US 6 and work A.1 for 9 cm = 3½". Bind off with knit over twisted-knit and purl over purl – read BINDING-OFF TIP. The sleeve measures approx. 48-48-47-47-47-46 cm = 19"-19"-18½"-18½"-18½"-18". Work the other sleeve in the same way. ASSEMBLY: Sew the shoulder seams – start outermost and work in towards the neck. Sew the sleeve cap to the armhole and sew the split to the bottom of the armhole – see sketch. Sew the side seams from the armhole down, inside the 1 edge stitch. Insert 1 marker mid-back of neck; it is used when working the bands. RIGHT BAND: Start at the bottom of the right front piece, with circular needle size 4 MM = US 6 and DROPS Air. Knit up 139 to 163 stitches from the right side inside the 1 edge stitch as far as the marker at the back of the neck. The number of stitches should be divisible by 4 + 3. Turn and work rib (from the wrong side) as follows: 1 edge stitch in garter stitch, A.1 until there are 2 stitches left, AT THE SAME TIME as you increase at the beginning of the V-neck as follows (adjust so that the next stitch is a knitted stitch): * Knit 1, 1 yarn over *, work from *-* 4 times (= 4 stitches increased), work the first stitch in A.1 and 1 edge stitch in garter stitch = 143 to 167 stitches. On the next row work the yarn overs twisted to avoid holes, then work the new stitches into A.1. Continue this rib for 2 cm = ¾". Now work 1 buttonhole at the bottom of the V-neck. BUTTONHOLE: Make 1 yarn over (after 1 knit-twisted stitch), knit 2 together. On the next row knit the yarn over to leave a hole. Continue the rib until the band measures 4½ cm = 1⅝". Bind off with PICOT – read description above. LEFT BAND: Start at the marker on the neck and knit up the same number of stitches as on the right front piece with circular needle size 4 MM = US 6 and DROPS Air. Turn and work rib (from the wrong side) as follows: 1 edge stitch in garter stitch, A.1 until there are 2 stitches left, AT THE SAME TIME as you increase at the beginning of the V-neck as follows (adjust so that the next stitch a knitted stitch): * Knit 1, 1 yarn over *, work from *-* 4 times (= 4 stitches increased), work the first stitch in A.1 and 1 edge stitch in garter stitch = 143 to 167 stitches. On the next row work the yarn overs twisted to avoid holes, then work the new stitches into A.1. Continue this rib for 4½ cm = 1⅝". Bind off with picot. Sew the button onto the left band and sew the bands together at the back of the neck. |
||||||||||||||||||||||
Diagram explanations |
||||||||||||||||||||||
|
||||||||||||||||||||||
|
||||||||||||||||||||||

|
||||||||||||||||||||||
|
||||||||||||||||||||||
Have you finished this pattern?Tag your pictures with #dropspattern #sweetnessimprintcardi or submit them to the #dropsfan gallery. Do you need help with this pattern?You'll find 34 tutorial videos, a Comments/Questions area and more by visiting the pattern on garnstudio.com. © 1982-2025 DROPS Design A/S. We reserve all rights. This document, including all its sub-sections, has copyrights. Read more about what you can do with our patterns at the bottom of each pattern on our site. |
||||||||||||||||||||||


With over 40 years in knitting and crochet design, DROPS Design offers one of the most extensive collections of free patterns on the internet - translated to 17 languages. As of today we count 314 catalogs and 11822 patterns - 11812 of which are translated into English (US/in).
We work hard to bring you the best knitting and crochet have to offer, inspiration and advice as well as great quality yarns at incredible prices! Would you like to use our patterns for other than personal use? You can read what you are allowed to do in the Copyright text at the bottom of all our patterns. Happy crafting!
Post a comment to pattern DROPS 231-27
We would love to hear what you have to say about this pattern!
If you want to leave a question, please make sure you select the correct category in the form below, to speed up the answering process. Required fields are marked *.