
Looking for a yarn?


Comments / Questions (73)
![]() Sylvie Bergeron wrote:
Sylvie Bergeron wrote:
Bonjour ! Pour le modèle 237-7 grandeur large J'aimerais savoir si c'est bien 32 cm de long a partir du début des côtes que je commence les emmanchures ou après les côtes je trouve que c'est bas cela va faire des manches évasées . Ou c'est bien correcte comme indiquées Merci beaucoup
08.01.2024 - 19:06DROPS Design answered:
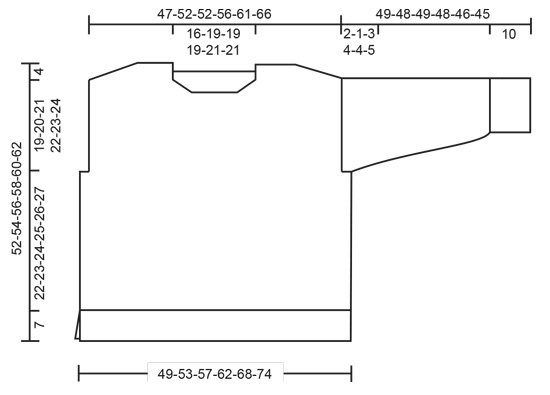
Bonjour Mme Bergeron, en taille L, vous commencez effectivement les emmanchures à 32 cm depuis le rang de montage, les emmanchures font 22 cm (cf schéma). Bon tricot!
09.01.2024 - 07:33
![]() Ingrid Jukes wrote:
Ingrid Jukes wrote:
Hi, I'm doing the back piece diagonal shoulder. When it says "slip stitch back on needle size 5 then purl 1 row from wrong side" does it mean put all of the stitches (including the ones on the thread) onto the 5mm needle and purl all of them? Or just put the middle stitches onto the 5mm needle and purl just those ones? It's very confusing.
26.12.2023 - 03:25DROPS Design answered:
Dear Ingrid, yes, after having slipped all stitches to the thread you slip them all back to the needles. Then purl 1 row over all of the stitches. Happy knitting!
28.12.2023 - 23:53
![]() Sylvie Bergeron wrote:
Sylvie Bergeron wrote:
Bonjour ! Je suis en train de faire le mod:237_7 Très beau modèle en passant . J'ai de la difficulté a comprendre biais des épaules le paragraphe complet Avez vous une vidéo pour des chandails tricoter de bas en haut Merci beaucoup et beau temps des fêtes
19.12.2023 - 18:00DROPS Design answered:
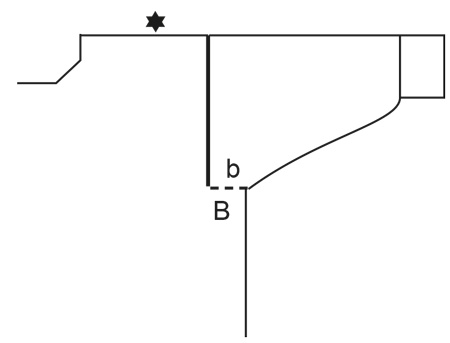
Bonjour Mme Bergeron et merci. Pour former le biais des épaules, vous allez tricoter des rangs raccourcis ainsi: en commençant par le côté emmanchure, tricotez 4,5 ou 6 m (cf taille), puis glissez ces mailles en attente, tricotez jusqu'à la fin du rang, tournez, et répétez de l'autre côté (sur l'envers), répétez ces 2 rangs en mettant toujours plus de mailles en attente. En même temps, vous allez former l'encolure comme indiqué, et terminer chaque épaule séparément en plaçant en attente les mailles en début de rang à partir de l'emmanchure. Bon tricot!
20.12.2023 - 07:54
![]() Ingrid Jukes wrote:
Ingrid Jukes wrote:
I'm up to the beginning of the diagonal shoulder in this pattern and it's not making any sense. I've also asked some very experienced knitters if they understand it and they don't. Could you explain it better please?
01.12.2023 - 06:19DROPS Design answered:
Dear Mrs Jukes, to make the diagonally shoulders you need to work short rows: at the beginning of every row from shoulders towards neck, work the first 4, 5 or 6 sts (see size) and slip them on a thread, finish row as before, turn and repeat on the next row. Then when you have to bind off for neck, you will continue each piece separately, slipping the stitches for shoulder on a thread at the beginning of each row starting from armhole, and casting off new stitches at the beginning of every row starting from neck. this video shows for another pattern how to work this kind of shoulders. Happy knitting!
01.12.2023 - 08:43
![]() Iwona wrote:
Iwona wrote:
Mam pytanie odpośnie fragmentu "skosy ramion". Dlaczego jest tam napisane, żeby zdejmować 4 razy po 4 oczka (dla mniejszego rozmiaru)? Chyba to źle rozumiem , bo to by oznaczało, że należy ściągnąć 16 oczek.Cały tez fragment instrukcji nie jest dla mnie jasny, proszę o pomoc. Dziękuję
23.11.2023 - 17:33DROPS Design answered:
Witaj, zamiast zdejmować o., możesz wykonać rzędy skrócone następująco (rzędy nieparzyste prawa strona robótki, parzyste lewa): 1.Przerobić 1 cały rząd, 2.Przerabiać rząd, aż zostaje 4 o., obrócić robótkę. 3.Przerobić rząd (jest mniejsza o 4 liczba o.). 4.Przerabiać rząd aż zostaje 4 o. przed poprzednim rzędem skróconym (8 o. na końcu rzędu), obrócić robótkę, itd. Jak wykonać rzędy skrócone znajdziesz TUTAJ. Dzięki temu ramię będzie dłuższe od strony dekoltu (więcej przerobionych rzędów z tej strony), a krótsze od strony podkroju rękawa (mniej rzędów). Pozdrawiamy!
24.11.2023 - 15:02
![]() Plovy Rolande wrote:
Plovy Rolande wrote:
Hallo op de foto’s zie ik tussen de verschillende patronen ribbelsteken, maar deze staan niet vermeld in het patroon . Zit er een foutje in de uitleg? Bedankt bij voorbaat
23.10.2023 - 16:42DROPS Design answered:
Dag Plovy,
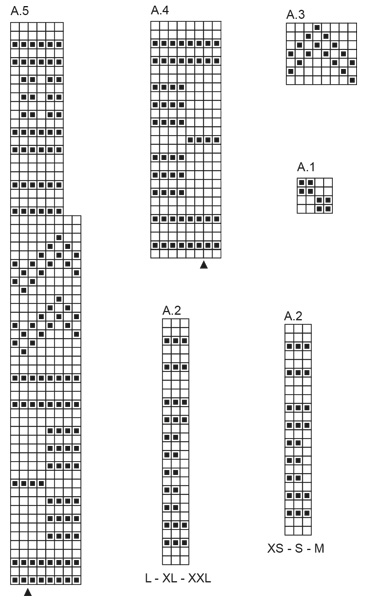
De ribbels staan wel in het patroon vermeld, dit zijn de rijen met gevulde blokjes (averecht aan de goede kant en recht aan de verkeerde kant) met de lege blokjes ertussen (recht aan de goede kant en averecht aan de verkeerde kant).
24.10.2023 - 08:05
![]() Antonella wrote:
Antonella wrote:
Gentilissimi, grazie per i vostri modelli e per le istruzioni sempre molto accurate e precise, e a tutti i tutorial che consentono di imparare tantissimo!!!! La mia è una segnalazione: DECREASE TIP-1 (applies to neck) - questo capoverso è rimasto in inglese. grazie mille)! Antonella
28.09.2023 - 16:34DROPS Design answered:
Buonasera Antonella, grazie per la segnalazione: abbiamo corretto il testo. Buon lavoro!
29.09.2023 - 23:57
![]() Antonella wrote:
Antonella wrote:
Gentilissimi, grazie per i vostri modelli e per le istruzioni sempre molto accurate e precise, e a tutti i tutorial che consentono di imparare tantissimo!!!! La mia è una segnalazione: DECREASE TIP-1 (applies to neck) - questo capoverso è rimasto in inglese. grazie mille)! Antonella
28.09.2023 - 15:59DROPS Design answered:
Buonasera Antonella, grazie per la segnalazione: abbiamo corretto il testo. Buon lavoro!
29.09.2023 - 23:58
![]() Nayfher wrote:
Nayfher wrote:
Estoy intentando entender la parte de los hombros diagonales y no lo consigo, algún vídeo donde lo pueden explicar mejor
18.09.2023 - 16:03DROPS Design answered:
Hola Nayfher, puedes ver los siguientes videos: https://www.garnstudio.com/video.php?id=1722&lang=es, https://www.garnstudio.com/video.php?id=1723&lang=es, y https://www.garnstudio.com/video.php?id=1724&lang=es
24.09.2023 - 22:46
![]() Anna Krafft wrote:
Anna Krafft wrote:
Hallo! Kann es sein, dass bei dem Ärmel das Muster A.1 vergessen wurde? Laut dem Foto ist der Ärmel als erstes mit A.1, dann mit A.5 und schließlich nochmal mit A.1 gestrickt worden, bevor das Bündchen kommt. In der Anleitung wird aber nach der Aufnahme der Ärmelmaschen direkt mit A.5 gestrickt. Wie weit muss hier denn nun A.1 gestrickt werden, bis ich mit A.5 anfangen muss?
09.09.2023 - 10:57DROPS Design answered:
Liebe Frau Krafft, die Ärmel beginnt mit A.5; die Reihe A.1 oben am Ärmel sind sicher das Muster von den Schultern. Viel Spaß beim stricken!
11.09.2023 - 09:03
|
|||||||||||||
Around Town#aroundtownsweater |
|||||||||||||
 |
 |
||||||||||||
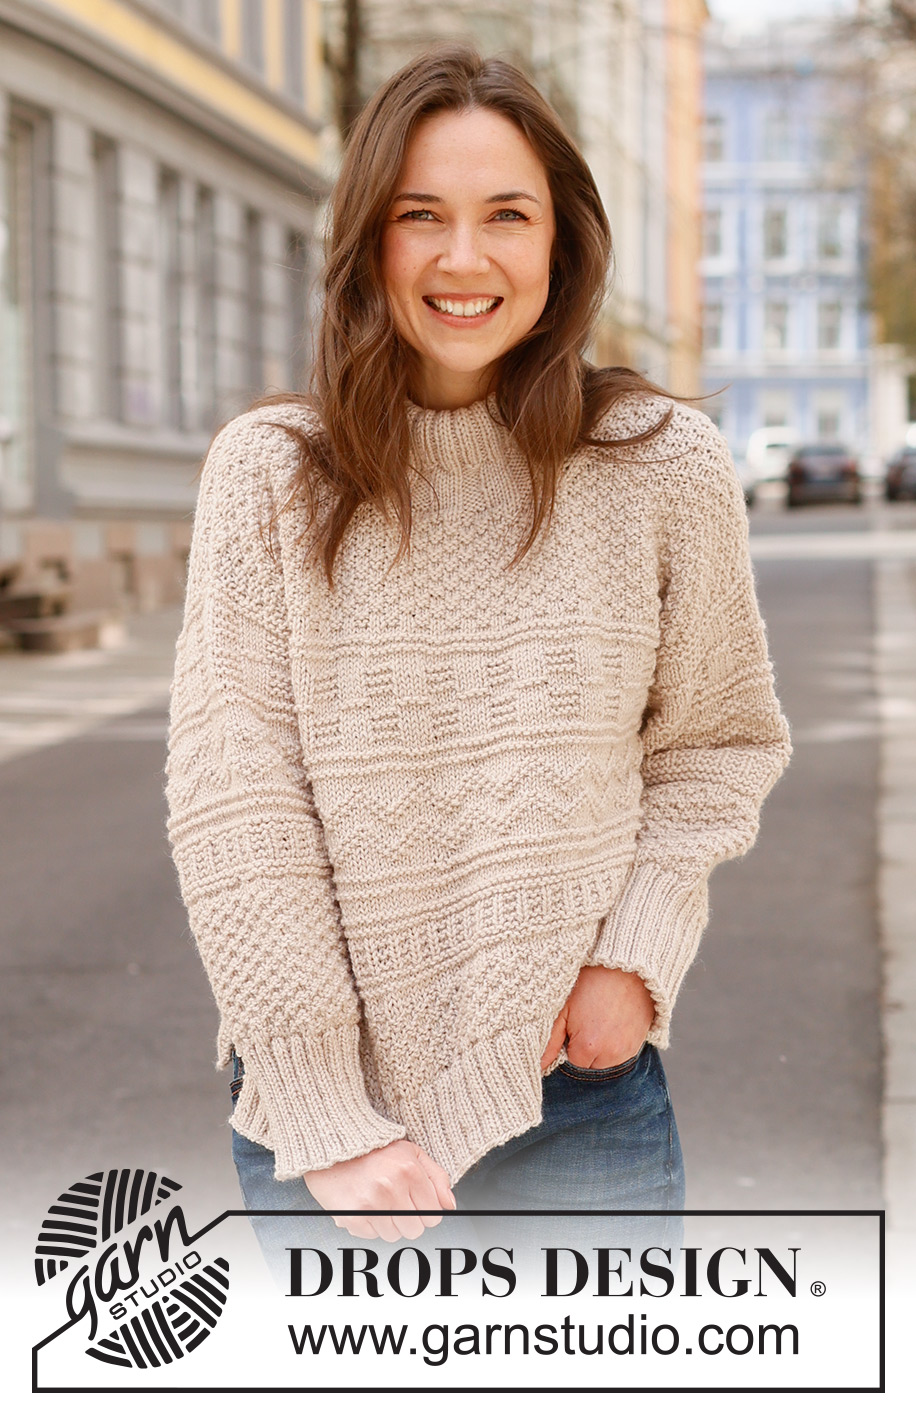
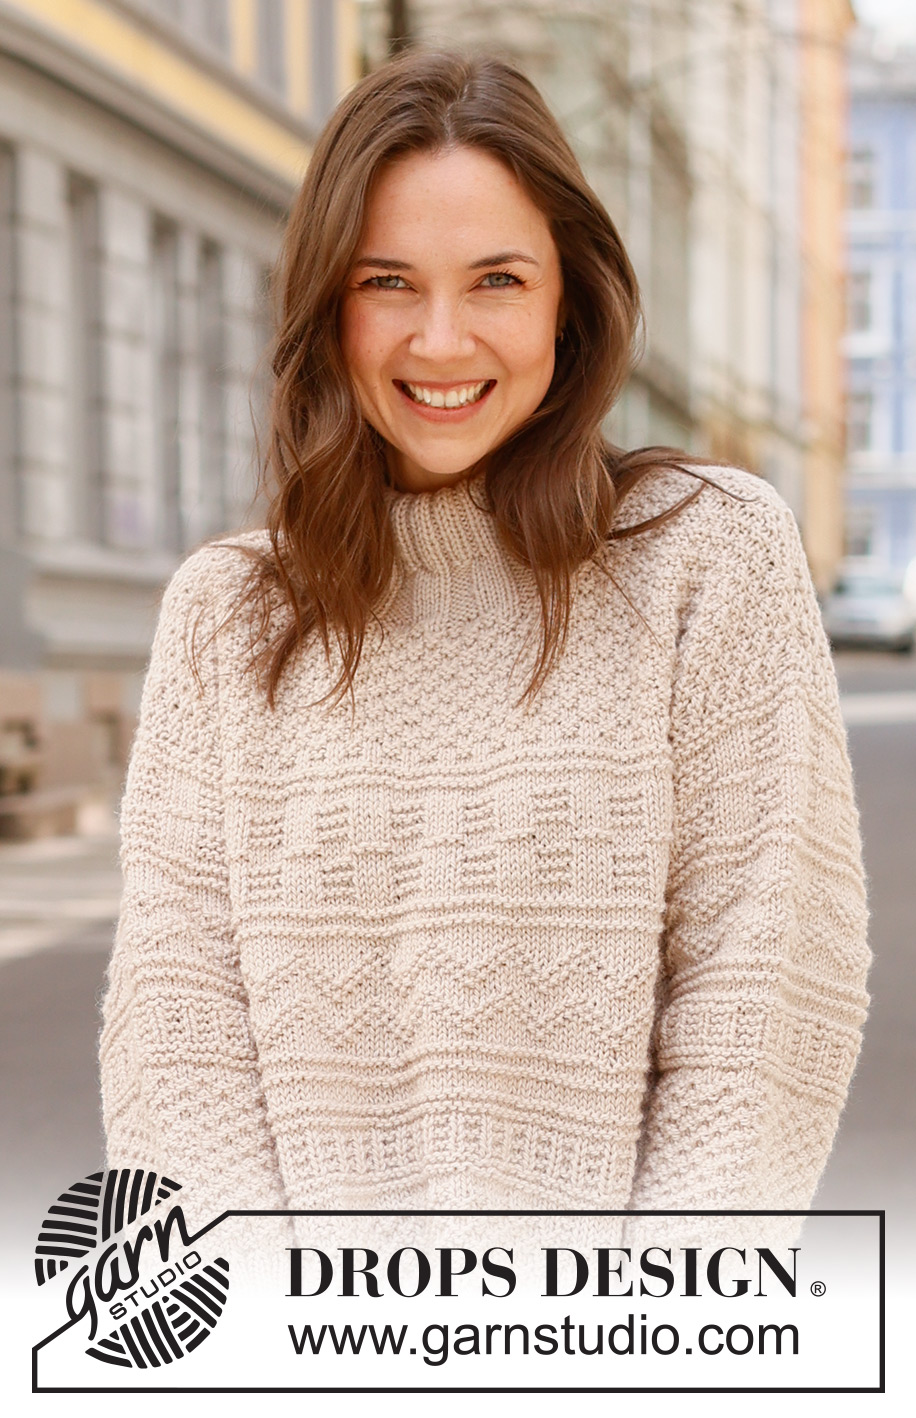
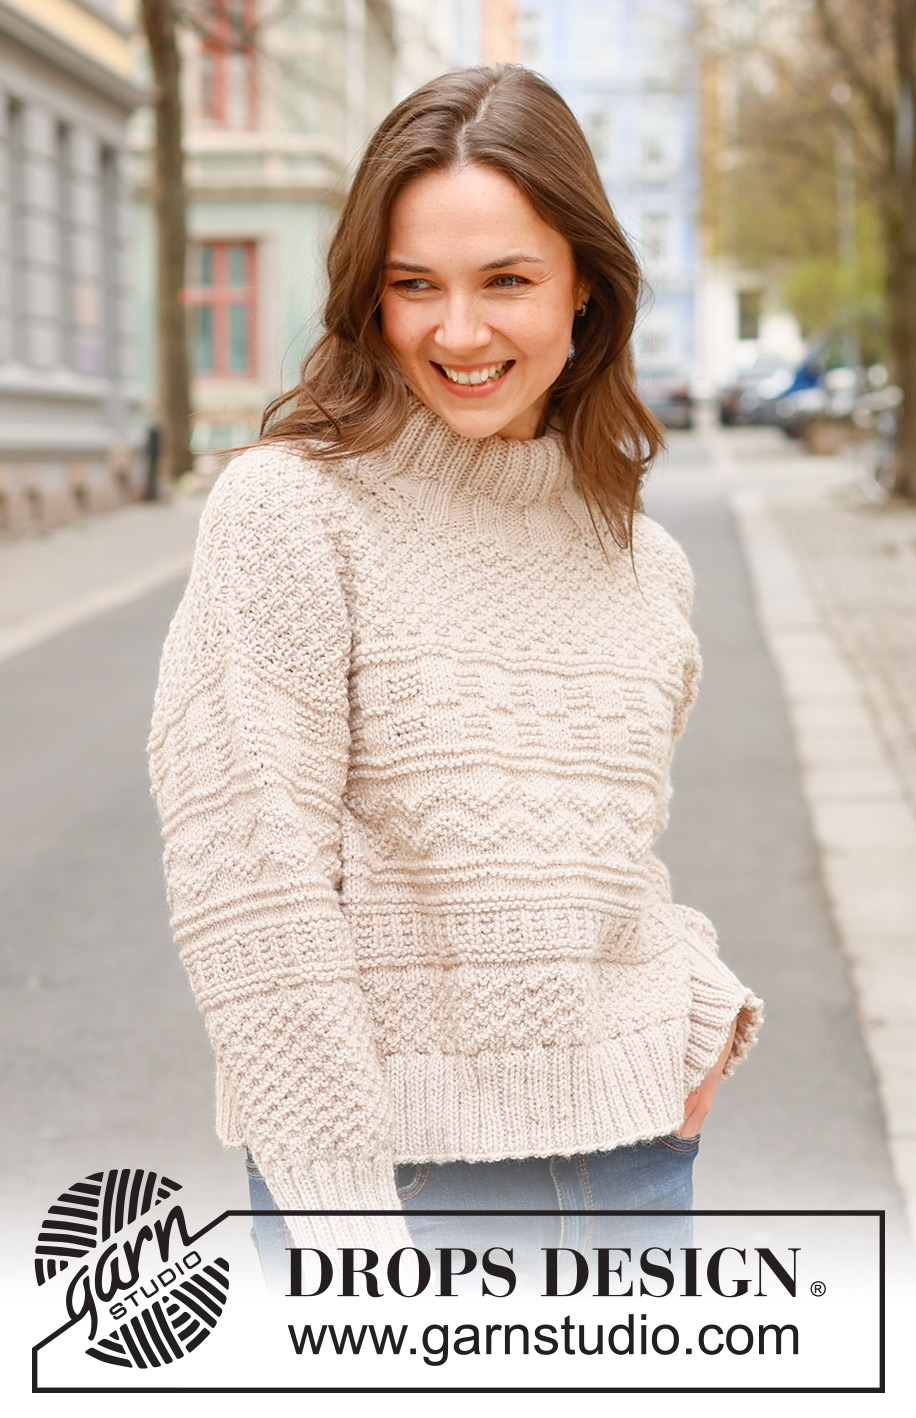
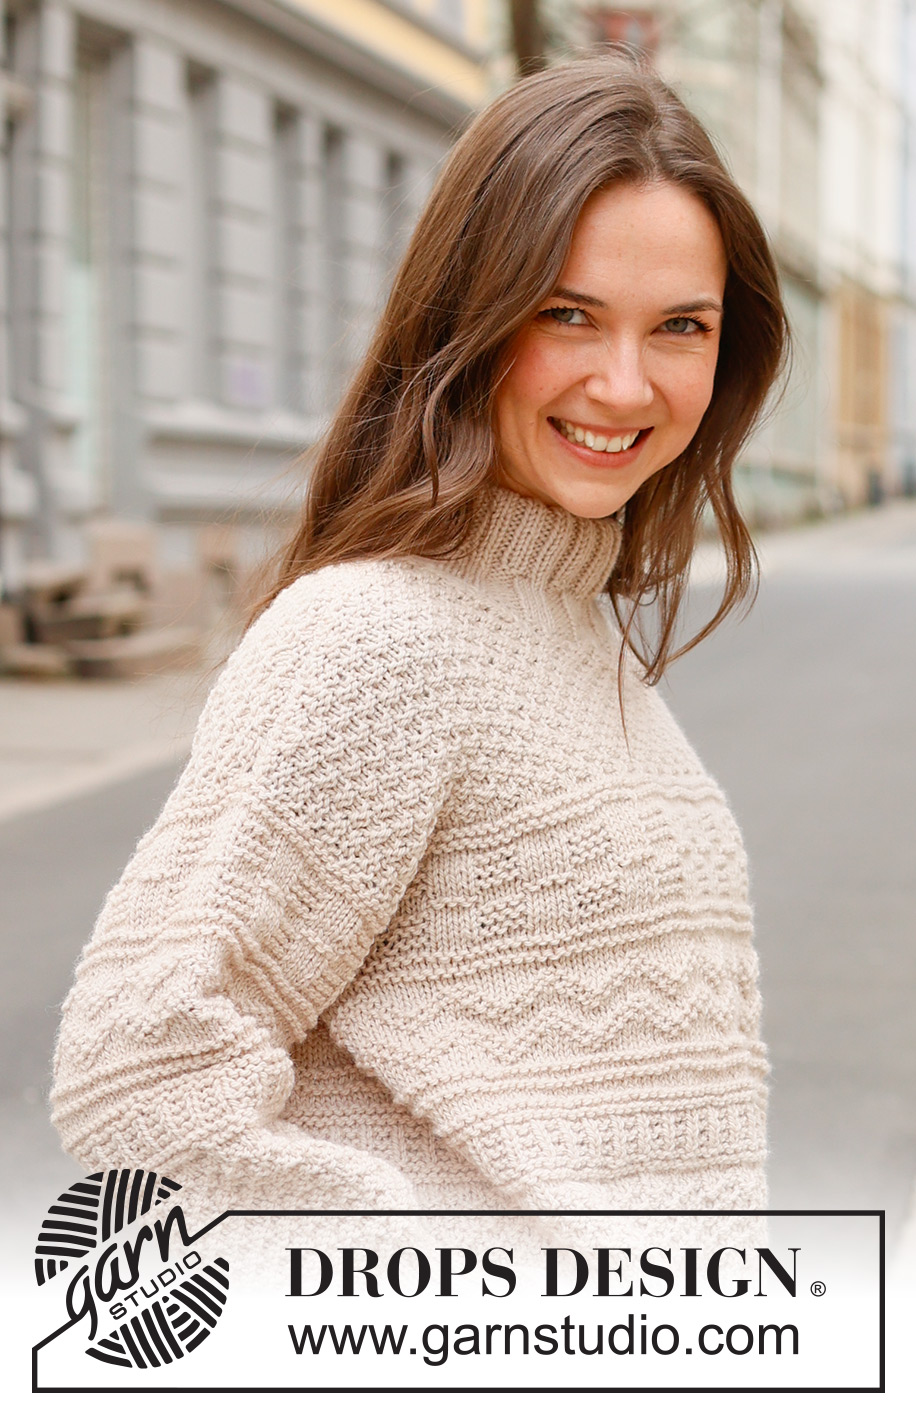
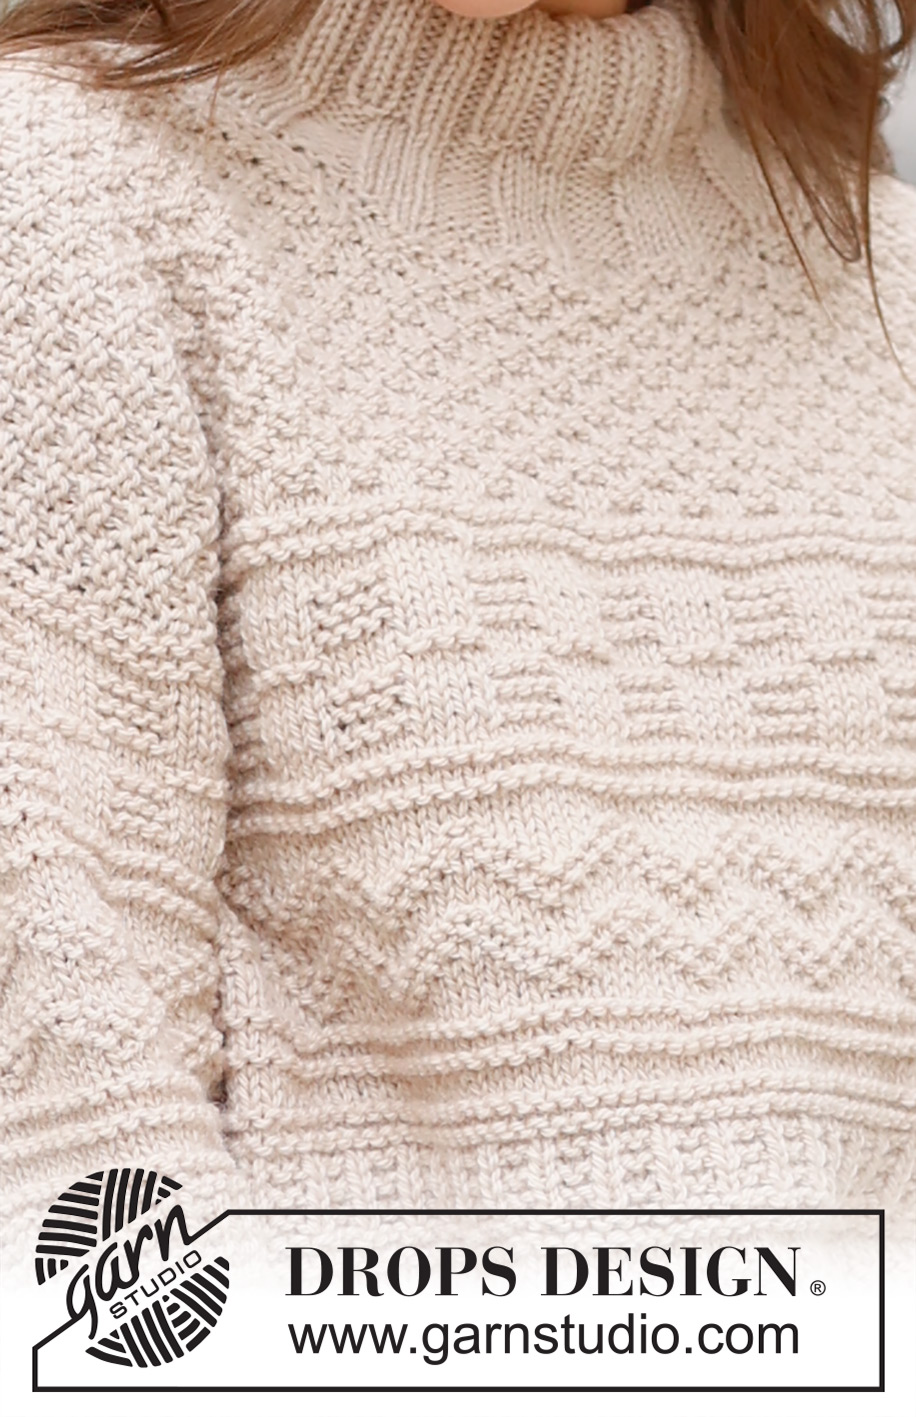
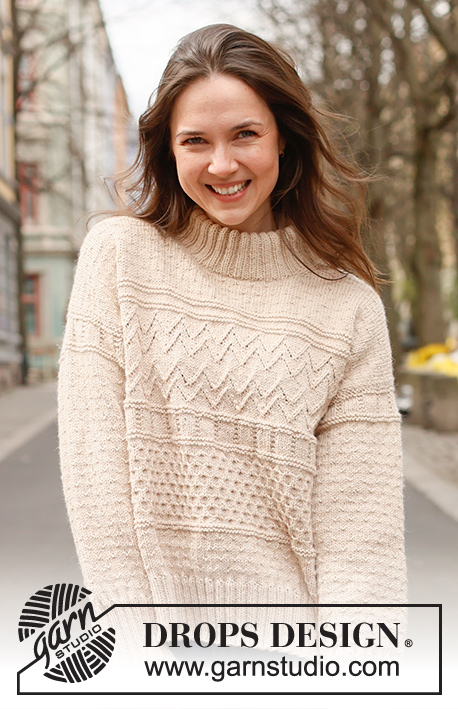
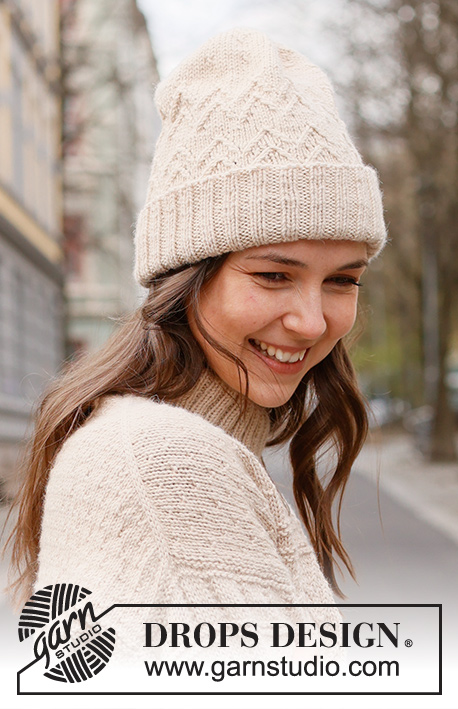
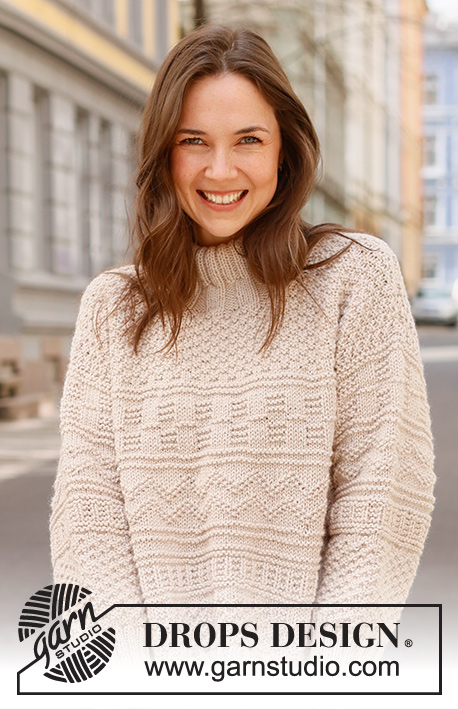
Knitted jumper in DROPS Alaska or DROPS Big Merino. Piece is knitted bottom up with relief pattern and double neck edge. Size XS – XXL.
DROPS 237-7 |
|||||||||||||
|
---------------------------------------------------------- EXPLANATION FOR THE PATTERN: ---------------------------------------------------------- GARTER STITCH (back and forth): Knit all rows. 1 ridge vertically = knit 2 rows. PATTERN: See diagrams A.1 to A.5. Choose diagram for your size (applies to A.2). Diagrams show all rows in pattern seen from the right side. DECREASE TIP-1 (applies to neck): All decreases are done from the right side! DECREASE AT BEGINNING OF ROW AS FOLLOWS FROM RIGHT SIDE: Work 2 stitches in stocking stitch, slip 1 stitch knitwise, knit 1, pass slipped stitch over stitch worked (1 stitch decreased). DECREASE AS FOLLOWS AT THE END OF ROW FROM RIGHT SIDE: Work until 4 stitches remain, knit 2 together and 2 stitches in stocking stitch (1 stitch decreased). DECREASE TIP-2 (applies to mid under sleeves): Decrease 1 stitch on each side of marker thread as follows: Work until 2 stitches remain before marker thread, knit/purl 2 together depending on pattern, marker thread, slip 1 stitch knitwise, knit 1, pass slipped stitch over stitch worked/purl 2 twisted together depending on pattern (2 stitches decreased). ---------------------------------------------------------- START THE PIECE HERE: ---------------------------------------------------------- JUMPER - SHORT OVERVIEW OF THE PIECE: Front and back piece back and forth on circular needle, bottom up until rib has been worked, then place piece together. Body is worked in the round on circular needle up to armholes. Then finish back piece and front piece back and forth on circular needle separately until finished measurements. Sew the shoulder seams. Pick up stitches along armholes and work the sleeves top down. Work sleeve cap back and forth on circular needle, work the rest of sleeve in the round on double pointed needles/a short circular needle, top down. Finish with a double neck edge. BACK PIECE: Cast on 110-118-126-138-150-162 stitches on circular needle size 3.5 mm with DROPS Alaska or DROPS Big Merino. Purl 1 row from wrong side. Work next row as follows from right side: 2 stitches in GARTER STITCH - read explanation above - * knit 2, purl 2 *, work from *-* until 4 stitches remain, knit 2 and finish with 2 stitches in garter stitch. Continue rib like this for 7 cm – adjust after a row from wrong side. Put piece aside and work the front piece. FRONT PIECE: Cast on the same number of stitches as on back piece and work piece the same way as back piece until piece measures 7 cm - finish after a row from wrong side. BODY: Put piece together as follows: Knit stitch from front piece and decrease at the same time 26-28-30-32-34-36 stitches evenly, knit over stitch from back piece and decrease at the same time 26-28-30-32-34-36 stitches evenly = 168-180-192-212-232-252 stitches on needle (84-90-96-106-116-126 stitches on front piece and 84-90-96-106-116-126 stitches on back piece). Switch to circular needle size 5 mm. Knit 1 round. Then work A.1 in the round on body. REMEMBER THE KNITTING TENSION! When piece measures 13-13-13-13-15-15 cm, work A.2 in the round - AT THE SAME TIME adjust number of stitches to 168-180-192-213-231-252 on the first round. On last round in A.2 increase 0-4-0-3-1-4 stitches evenly = 168-184-192-216-232-256 stitches. When A.2 has been worked, piece measures approx. 22-22-22-23-25-25 cm from cast-on edge on front/back piece. If the garment is shorter than this, continue in stocking stitch until correct measurements. Then work A.3 in the round on body. Repeat A.3 2-2-3-3-3-4 times in total vertically. When A.3 has been worked, piece measures approx. 27-27-30-31-33-35 cm from cast-on edge. If the garment is shorter than this, continue until correct measurements. Knit 1 round while decreasing 0-4-0-4-0-4 stitches evenly = 168-180-192-212-232-252 stitches. Insert 1 marker thread mid front and 1 marker thread mid back, insert in addition 1 marker in each side on body - this is done as follows: Insert 1 marker at beginning of round, count 42-45-48-53-58-63 stitches, insert 1 marker thread before next stitch (mid front), count 42-45-48-53-58-63 stitches, insert 1 marker before next stitch, count 42-45-48-53-58-63 stitches, insert 1 marker thread before next stitch (mid back). 42-45-48-53-58-63 stitches remain on round after last marker thread. Work A.4 as follows: Count out from symbol marked as the middle in diagram and marker thread mid from where pattern should start in the side, work A.4 as far as you can towards the marker in the side (marker thread mid front should fit symbol for the middle in A.4), then begin A.4 again the same way as on beginning of round, and work A.4 as far as you can until marker at the beginning of round (marker thread mid back should fit symbol for the middle in A.4). Continue pattern like this, and cast off for armholes as explained below. ARMHOLE: When piece measures 29-30-31-32-33-34 cm, cast off for armholes as follows: Begin 3-2-5-6-7-8 stitches remain before marker at the beginning of round, cast off 6-4-10-12-14-16 stitches for armhole, work as before until 3-2-5-6-7-8 stitches remain before marker in the other side, cast off 6-4-10-12-14-16 stitches for armhole, work as before the rest of round. Finish back piece and front piece separately. BACK PIECE: = 78-86-86-94-102-110 stitches. Begin from wrong side and continue A.4 with 1 stitch in garter stitch in each side. On last row from right side, increase 2 stitches evenly in all sizes = 80-88-88-96-104-112 stitches. When A.4 has been worked, A.1 with 1 stitch in garter stitch in each side. Repeat A.1 vertically until finished measurements. Then cast off for diagonal shoulder and neck as explained below. DIAGONAL SHOULDER: When piece measures 48-50-52-54-56-58 cm, slip stitches on a thread in each side for diagonal shoulder (to avoid cutting the yarn work stitches before slipping them on the thread): Slip stitches on a thread from the side as follows: 4-4-4-5-5-6 stitches 4 times and then the last the last 10-12-12-12-14-14 stitches towards the neck. When all stitches are on a thread, slip stitch back on needle size 5 mm. Purl 1 row from wrong side (to avoid a hole in the transitions where stitches where slipped on a thread, pick up the yarn between 2 stitches and purl them twisted together with first stitch on left needle). Cast off knitting from right side. NECK: At the same time when piece measures 49-51-53-55-57-59 cm, cast off the middle 24-28-28-28-32-32 stitches for neck and finish each shoulder separately. Continue A.1, continue to slip stitches on a thread for diagonal shoulder and work in addition the 3 stitches towards the neck in stocking stitch. AT THE SAME TIME on next row from right side, decrease 1 stitch for neck - read DECREASE TIP-1. Decrease like this on every row from right side 2 times in total. When all stitches have been cast off, piece measures approx. 52-54-56-58-60-62 cm from highest point on the shoulder and down. Repeat on the other shoulder. FRONT PIECE: = 78-86-86-94-102-110 stitches. Cast on and work pattern the same way as on back piece. In addition decrease for neck and diagonal shoulder as explained below. NECK: When piece measures 46-48-49-51-52-54 cm, slip the middle 20-24-24-24-26-26 stitches on a thread for neck, and finish each shoulder separately. Continue A.1 but work the outermost 3 stitches towards the neck in stocking stitch. AT THE SAME TIME on next row from right side, decrease 1 stitch for neck - read DECREASE TIP-1. Decrease like this on every row from right side 4-4-4-4-5-5 times in total. DIAGONAL SHOULDER: At the same time when piece measures 48-50-52-54-56-58 cm, slip stitches on a thread for diagonal shoulder the same way as on back piece, i.e. slip 4-4-4-5-5-6 stitches on a thread 4 times then slip the last 10-12-12-12-14-14 stitches towards the neck. When all stitches have been slipped on a thread, purl 1 row from wrong side as on back piece before casting off by knitting from right side. Repeat on the other shoulder. ASSEMBLY: Sew the shoulder seams. SLEEVES: Use circular needle size 5 mm and DROPS Alaska or DROPS Big Merino, pick up from right side 32-34-36-37-39-41 stitches from the bottom of armhole up to shoulder and 32-34-36-37-39-41 stitches from the shoulder and down to the bottom of armhole on the other side = 64-68-72-74-78-82 stitches along armhole. Insert 1 marker thread in the middle of the row - measure sleeve from this marker and use the marker thread when counting to where pattern should begin. Begin from wrong side and work A.5 as follows: Count out from the symbol marked as the middle in diagram and marker thread on sleeve where pattern should begin, and work A.5 back and forth with 1 stitch in garter stitch in each side. When sleeve measures 2-1-3-4-4-5 cm from where marker thread was inserted, put piece together on a short circular needle or double pointed needles size 5 mm – work the rest of sleeve in the round. Insert 1 marker thread at the beginning of round (mid under sleeve). Move marker thread upwards when working. Begin round mid under sleeve and continue pattern in the round (symbol for the middle in diagram should still fit marker thread mid on top of sleeve - pattern does not fit mid under sleeve). When piece measures 5-4-6-7-7-8 cm from where marker thread was inserted mid on top of sleeve, decrease 2 stitches mid under sleeve - read DECREASE TIP-2. Decrease like this every 4-4-3½-3-2½-2 cm 8-9-10-11-12-13 times in total = 48-50-52-52-54-56 stitches. When A.5 has been worked vertically, work A.1 in the round. Work until sleeve measures 39-38-39-38-36-35 cm from marker. 10 cm remain until finished measurements. Try the jumper and work to desired length before rib. Knit 1 round while increasing 12-14-12-16-18-16 stitches evenly = 60-64-64-68-72-72 stitches. Switch to double pointed needles size 3.5 mm. Work rib (knit 2/purl 2) for 10 cm. Loosely cast off. Sleeve measures approx. 49-48-49-48-46-45 cm from marker mid on top of sleeve. Work the other sleeve the same way. Sew bottom of armholes - see chart. DOUBLE NECK EDGE: Begin at one shoulder, use a short circular needle size 3.5 mm and pick up approx. 80-96-96-104-112-112 stitches around the neck inside 1 stitch (including stitches on thread). Work rib in the round (knit 4/purl 4 -adjust beginning of rib so that there are 4 purl stitches or 4 knit stitches on mid front). Insert 1 marker on row when rib measures 4 cm, use marker for measurements. Then work knit 2/purl 2 over all stitches. When rib measures 9-9-9-11-11-11 cm from marker, switch to a short circular needle size 5 mm. Cast off stitches with knit over knit and purl over purl. Fold the rib (knit 2/purl 2) down on the inside of garment. Fasten rib to get a double neck edge of approx. 4-4-4-5-5-5 cm. To avoid a tight neck edge that sticks out it is important to keep the seam elastic. |
|||||||||||||
Diagram explanations |
|||||||||||||
|
|||||||||||||
 |
|||||||||||||
 |
|||||||||||||
 |
|||||||||||||
Have you finished this pattern?Tag your pictures with #dropspattern #aroundtownsweater or submit them to the #dropsfan gallery. Do you need help with this pattern?You'll find 31 tutorial videos, a Comments/Questions area and more by visiting the pattern on garnstudio.com. © 1982-2025 DROPS Design A/S. We reserve all rights. This document, including all its sub-sections, has copyrights. Read more about what you can do with our patterns at the bottom of each pattern on our site. |
|||||||||||||


With over 40 years in knitting and crochet design, DROPS Design offers one of the most extensive collections of free patterns on the internet - translated to 17 languages. As of today we count 320 catalogues and 12091 patterns translated into English (UK/cm). 12091
We work hard to bring you the best knitting and crochet have to offer, inspiration and advice as well as great quality yarns at incredible prices! Would you like to use our patterns for other than personal use? You can read what you are allowed to do in the Copyright text at the bottom of all our patterns. Happy crafting!
Post a comment to pattern DROPS 237-7
We would love to hear what you have to say about this pattern!
If you want to leave a question, please make sure you select the correct category in the form below, to speed up the answering process. Required fields are marked *.