
Popular categories
Looking for a yarn?


Comments / Questions (51)
![]() Loredana wrote:
Loredana wrote:
Buongiorno, Le spiegazioni per il dietro sono: 2 m rasata, A2C × 8 volte (80 m), A2B x 1 volta (9 maglie), 2 m rasata (totale = 93 m). Quindi le ripetizioni sono 9...o sbaglio? Comunque, scalando di volta in volta un motivo da entrambi i lati, le ripetizioni totali in verticale sarebbero 5! Grazie Loredana
26.02.2016 - 07:55DROPS Design answered:
Buongiorno Loredana. Chiediamo scusa. E' corretto come dice lei. Le ripetizioni sul dietro sono 9 e le ripetizioni in verticale sono 5. Grazie e buon lavoro!
26.02.2016 - 09:28
![]() Loredana wrote:
Loredana wrote:
Buonasera. Sto realizzando la taglia M, ho sui ferri 201 maglie, quindi inizialmente 4 ripetizioni (orizzontali) del motivo ajour per il davanti e 9 per il dietro. Andandò a lavorare 1 motivo in meno ogni volta mi ritrovo con 4 ripetizioni (in totale) in verticale per il davanti e 5 per il dietro. Ovviamente il motivo è più alto nel dietro ....è giusto così il motivo deve avere lo stesso numero di ripetizioni? Grazie Loredana
25.02.2016 - 16:24DROPS Design answered:
Buongiorno Loredana. Per la taglia M, sul dietro, le ripetizioni del motivo dovrebbero essere 8. In questo modo, per questa taglia, l'altezza finale del motivo risulta uguale sul davanti e sul dietro. Buon lavoro!
26.02.2016 - 06:42
![]() Joanieke wrote:
Joanieke wrote:
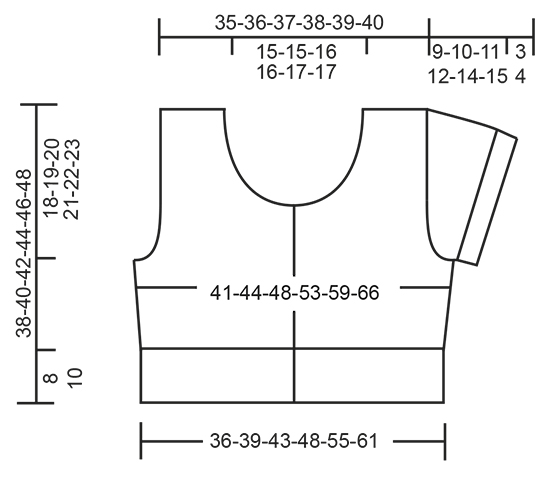
Hello, As I was reading the pattern, it said in the part about the body to continue the garter stitch for 2 cm: However if I look at the photo of the model wearing this vest it looks like the garter stitch is being continued more around 10 cm. And the drawing of the model below for the size guide, seems to say 8 or 10 centimeters as well. Can you please explain to me what the right lenght of the garter stitch should be?
03.02.2016 - 19:14DROPS Design answered:
Dear Joanieke, at the very beg of the body you start working in rib with 2 edge sts in garter st like this: 2 edge sts in garter st, K 1, P 1, K 1, P 2 (= 7 band sts), * K 2, P 2 * repeat from *-* until 9 sts remain on needle, finish with K 2 and 7 band sts as follows: P 2, K 1, P 1, K 1, 2 edge sts in garter st. Then work following diagrams A.1A and A.1B until piece measures 8-10 cm. Happy knitting!
03.02.2016 - 19:28
![]() Martha wrote:
Martha wrote:
Hab schon die passende Farbe ausgesucht, ich freue mich so darauf dieses Modell zu stricken :)
24.01.2016 - 15:18
![]() Sol Sandvik wrote:
Sol Sandvik wrote:
This is so beautiful! Retro, and such a lovely fit.
11.01.2016 - 20:43
![]() Roswitha wrote:
Roswitha wrote:
Zuckersüß! Als Alternative könnte man die Ärmel auch bis zu den Ellenbeugen verlängern.
18.12.2015 - 13:52
![]() Ille wrote:
Ille wrote:
So cute! Love the retro look!
17.12.2015 - 23:00
![]() Fabienne wrote:
Fabienne wrote:
Prachtig zomers truitje met oog voor details. Dit wil ik zeker breien!!
16.12.2015 - 17:17
![]() Lea Cadie wrote:
Lea Cadie wrote:
Le coup de coeur de la collection
11.12.2015 - 18:43
![]() Eva Hessmo wrote:
Eva Hessmo wrote:
Precis en sådan önskar sig min dotter!
10.12.2015 - 16:20
|
|||||||||||||||||||
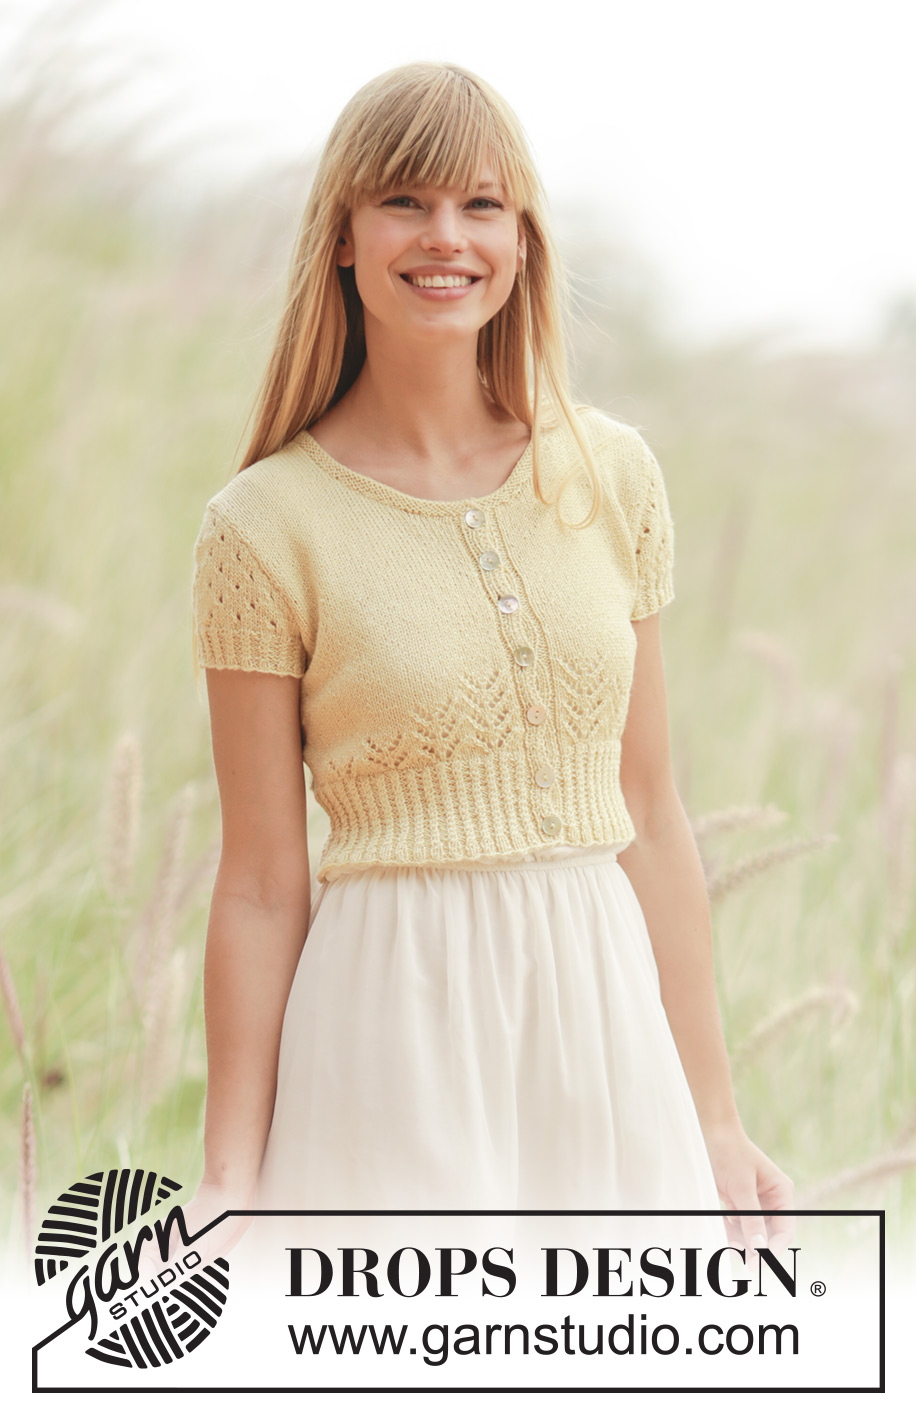
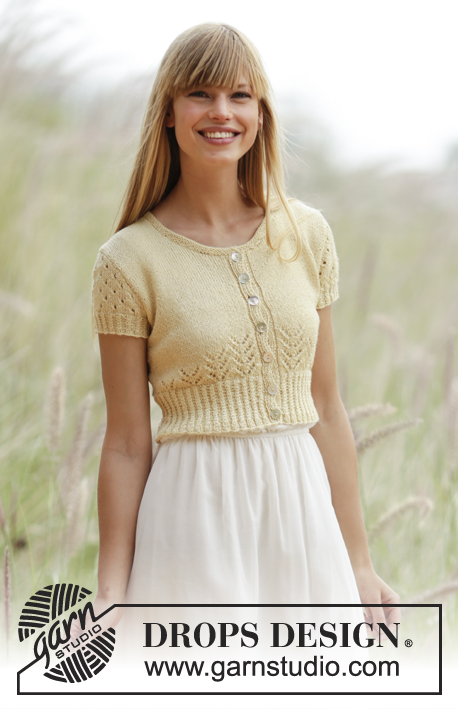
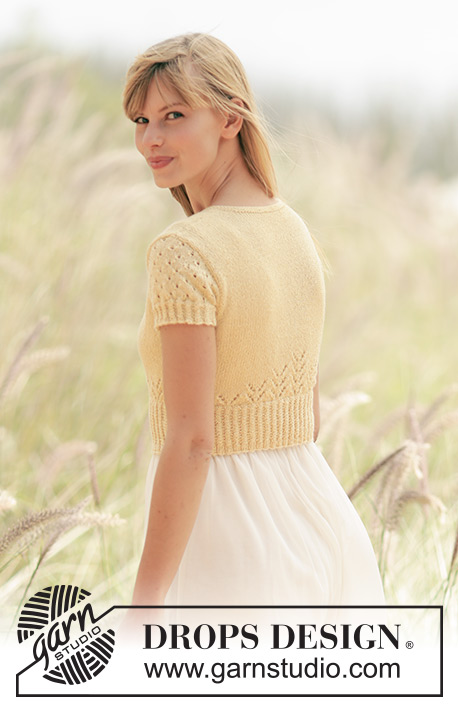
Spring Fling#springflingbolero |
|||||||||||||||||||
 |
 |
||||||||||||||||||
Knitted DROPS bolero with lace pattern and small cables in ”Alpaca”. Size: S - XXXL.
DROPS 169-11 |
|||||||||||||||||||
|
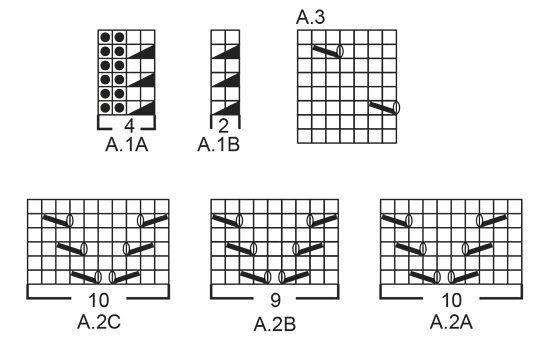
GARTER ST (back and forth): K all rows. 1 ridge = K2 rows. PATTERN: See diagrams A.1 to A.3. The diagrams show all rows in pattern seen from RS. INCREASE TIP: All inc are done from RS as follows: Work until 2 sts remain before marker, make 1 YO, K 4 (marker is in the middle of these 4 sts), make 1 YO. On next row (= WS) P YOs twisted to avoid holes. DECREASE TIP: To calculate how often dec should be done, use the total no of sts on row (e.g. 232 sts), minus bands (e.g. 14 sts) and divide the remaining sts by no of dec to be done (e.g. 47) = 4.6. I.e. in this example work alternately every third and fourth st and every fourth and fifth st tog (do not dec over bands). BUTTONHOLES: Dec for buttonholes on right band. 1 button hole = K third and fourth st from mid front twisted tog and make 1 YO, on next row work YO in rib. Dec for buttonholes when piece measures: SIZE S: 2, 7, 11, 15, 19, 23 and 27 cm SIZE M: 2, 7, 12, 17, 21, 25 and 29 cm SIZE L: 2, 7, 12, 17, 21, 25 and 29 cm SIZE XL: 2, 7, 12, 17, 22, 27 and 31 cm SIZE XXL: 2, 7, 12, 17, 22, 27 and 31 cm SIZE XXXL: 2, 8, 13, 18, 23, 28 and 33 cm ---------------------------------------------------------- BODY: Worked back and forth on circular needle from mid front. Cast on 232-256-280-312-356-392 sts (includes 7 band sts each side towards mid front) on circular needle size 2.5 mm / US 1.5 with Alpaca. P 1 row from WS. Work next row as follows from RS: 2 edge sts in garter st, K 1, P 1, K 1, P 2 (= 7 band sts), * K 2, P 2 * repeat from *-* until 9 sts remain on needle, finish with K 2 and 7 band sts as follows: P 2, K 1, P 1, K 1, 2 edge sts in garter st. Continue rib like this for 2 cm / ¾" – remember BUTTONHOLES on right band – see explanation above. Work next row as follows from RS: 7 band sts as before, work pattern according to diagram A.1A until 9 sts remain, work A.1B (= 2 sts) and finish with 7 band sts as before. Continue the pattern like this until piece measures 8-8-8-10-10-10 cm / 3"-3"-3"-4"-4"-4". Now K 1 row from RS while dec 47-55-59-67-79-83 sts evenly - READ DECREASE TIP = 185-201-221-245-277-309 sts. Switch to circular needle size 3 mm / US 2.5 and P 1 row (continue bands as before). Insert 1 marker 50-54-59-65-73-81 sts in from each side (= 85-93-103-115-131-147 sts between markers on back piece). Work next row as follows from RS: 7 band sts as before, work pattern according to diagram A.2A over the next 40-40-50-50-60-70 sts (= 4-4-5-5-6-7 repetitions of 10 sts), work 3-7-2-8-6-4 sts in stockinette st, marker, work 8-2-7-3-1-9 sts in stockinette st, work pattern according to diagram A.2C over the next 60-80-80-100-120-120 sts (= 6-8-8-10-12-12 repetitions of 10 sts), work A.2B 1 time (= 9 sts), 8-2-7-3-1-9 sts in stockinette st, marker, 3-7-2-8-6-4 sts in stockinette st, pattern according to diagram A.2C over the next 40-40-50-50-60-70 sts and finish with 7 band sts as before. READ ALL OF THE FOLLOWING SECTION BEFORE CONTINUING AND REMEMBER THE TENSION/GAUGE! PATTERN: Continue with pattern and in stockinette st until 1 repetition has been worked vertically. Now work pattern the same way but over 1 repetition less towards the markers in the side, i.e. work A.2A 3-3-4-4-5-6 times in total, work 13-17-12-18-16-14 sts in stockinette st, marker, 18-12-17-13-11-19 sts in stockinette st, A.2C 4-6-6-8-10-10 times in total, A.2B 1 time, 18-12-17-13-11-19 sts in stockinette st, marker, 13-17-12-18-16-14 sts in stockinette st, A.2C 3-3-4-4-5-6 times in total. Continue the pattern like this by working over 1 repetition les towards the markers in the sides until 1 repetition has been worked over last repetition mid front and mid back. Then work in stockinette st over all sts until finished measurements. SIDE INC: AT THE SAME TIME when piece measures 10-10-10-12-12-12 cm / 4"-4"-4"-4¾"-4¾"-4¾", inc 1 st on each side of markers in the sides (= 4 sts inc). Repeat inc every 1½-1½-2-2-2½-2½ cm / ½"-½"-¾"-¾"-⅞"-7/" 6-6-6-6-5-5 times in total = 209-225-245-269-297-329 sts. ARMHOLE: When piece measures 20-21-22-23-24-25 cm / 8"-8¼"-8¾"-9"-9½"-9¾", work next row as follows: Work 53-57-61-67-73-81 sts as before (= front piece), bind off 6-6-8-8-10-10 sts for armhole, work 91-99-107-119-131-147 sts as before (= back piece), bind off 6-6-8-8-10-10 sts for armhole, work the remaining 53-57-61-67-73-81 sts as before (= front piece). Finish fronts and back piece separately. BACK PIECE: = 91-99-107-119-131-147 sts. Continue with stockinette st back and forth and cast/bind off for armholes at beg of every row in each side as follows: bind off 3 sts 0-0-0-1-1-2 times, 2 sts 1-2-3-4-5-6 times and 1 st 1-2-3-3-6-7 times = 85-87-89-91-93-97 sts remain on needle. When piece measures 36-38-40-42-44-46 cm / 14¼"-15"-15¾"-16½"-17¼"-18", bind off the middle 33-33-35-35-37-37 sts for neck and finish each shoulder separately. Continue to cast/bind off 1 st at beg of the next 2 rows from neck = 24-25-25-26-26-28 sts remain on the shoulder. Continue to work until piece measures 38-40-42-44-46-48 cm / 15"-15¾"-16½"-17¼"-18"-19" and loosely bind off. RIGHT FRONT PIECE: = 53-57-61-67-73-81 sts. Continue in stockinette st back and forth on circular needle with 7 band sts towards mid front as before and cast/bind off for armhole at beg of every row from the side as on back piece. AT THE SAME TIME when piece measures 28-30-30-32-32-34 cm / 11"-11¾"-11¾"-12½"-12½"-13½", slip the first 12-12-13-13-14-14 sts at beg of row from mid front on 1 stitch holder for neck (work them before slipping them on stitch holder to avoid cutting the yarn). Continue to cast/bind off for neck at the beg of every row from mid front as follows: bind off 3 sts 1 time, 2 sts 4 times, and 1 st 3 times. After all bind offs for armhole and dec for neck, 24-25-25-26-26-28 sts remain on shoulder. Continue to work until piece measures 38-40-42-44-46-48 cm / 15"-15¾"-16½"-17¼"-18"-19" and loosely bind off. LEFT FRONT PIECE: Work as right front piece but reversed - NOTE: Do not dec for buttonholes on left front piece. SLEEVE: Worked in the round on double pointed needles, switch to circular needle when sleeve cap beg. Cast on 76-80-88-92-100-108 sts on double pointed needles size 2.5 mm / US 1.5 with Alpaca. K 1 round. Then work rib = K 2/P 2. When piece measures 1 cm / ⅜", work pattern in the round according to diagram A.1A. When piece measures 3-3-3-4-4-4 cm / 1⅛"-1⅛"-1⅛"-1½"-1½"-1½", work next round as follows: Bind off the first 3-3-4-4-5-5 sts, K 70-74-80-84-90-98 and bind off the last 3-3-4-4-5-5 sts. Switch to circular needle size 3 mm / US 2.5 and work pattern back and forth on circular needle according to diagram A.3. AT THE SAME TIME bind off for sleeve cap at beg of every row in each side as follows: bind off 2 sts 3-4-4-4-4-5 times and 1 st 6-7-9-9-12-12 times. Then cast/bind off 2 sts at beg of every row in each side until piece measures 11-12-13-15-17-18 cm / 6¾-7". Bind off 3 sts at beg of the next 2 rows before loosely binding off remaining sts, sleeve measures approx. 12-13-14-16-18-19 cm / 4¾"-5"-5½"-6¼"-7"-7½". Make another sleeve. ASSEMBLY: Sew the shoulder seams. Sew in sleeves. NECK EDGE: Pick up from RS on circular needle size 2.5 mm / US 1.5 approx. 118 to 138 sts around the neck (includes sts on stitch holders at the front). K 5 rows and then loosely bind off with K from RS. Sew the buttons on to left front piece. |
|||||||||||||||||||
Diagram explanations |
|||||||||||||||||||
|
|||||||||||||||||||
 |
|||||||||||||||||||
 |
|||||||||||||||||||
Have you finished this pattern?Tag your pictures with #dropspattern #springflingbolero or submit them to the #dropsfan gallery. Do you need help with this pattern?You'll find 26 tutorial videos, a Comments/Questions area and more by visiting the pattern on garnstudio.com. © 1982-2026 DROPS Design A/S. We reserve all rights. This document, including all its sub-sections, has copyrights. Read more about what you can do with our patterns at the bottom of each pattern on our site. |
|||||||||||||||||||


With over 40 years in knitting and crochet design, DROPS Design offers one of the most extensive collections of free patterns on the internet - translated to 17 languages. As of today we count 324 catalogs and 12290 patterns - 12280 of which are translated into English (US/in).
We work hard to bring you the best knitting and crochet have to offer, inspiration and advice as well as great quality yarns at incredible prices! Would you like to use our patterns for other than personal use? You can read what you are allowed to do in the Copyright text at the bottom of all our patterns. Happy crafting!
Post a comment to pattern DROPS 169-11
We would love to hear what you have to say about this pattern!
If you want to leave a question, please make sure you select the correct category in the form below, to speed up the answering process. Required fields are marked *.