Comments / Questions (75)
![]() Wenny wrote:
Wenny wrote:
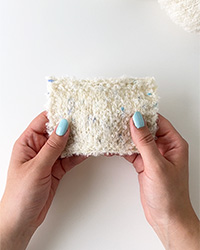
Vervolg op de eerste vraag , Net een proeflapje gemaakt met de verschuivingen in het A3 patroon, er komt dus iedere 4 pen een steek aan iedere kant bij, ik kan niet goed vinden wat ik hiermee ga doen, moeten die in a3 mee gebreid worden zodat de steken gaan verspringen of komen er steeds meer steken in A3 gebreid en steeds minder tricot steken in het middelste deel, Erg onduidelijk patroon, Hoop dat jullie mij snappen
14.02.2021 - 14:35DROPS Design answered:
Dag Wendy,
Aan het begin van de naald meerder je 1 steek voor A.3 en minder je 1 steek na A.3 en aan het eind van de naald minder je 1 steek voor A.3 en meerder je 1 steek na A.3. Het totaal aantal steken blijft dus hetzelfde, maar door het meerderen en minderen verplaatst het patroon zich richting midden voor. De gemeerderde steken brei je in tricotsteek. Lees ook de tips voor het meerderen en minderen bovenaan bij de instructies.
15.02.2021 - 10:07
![]() Wenny wrote:
Wenny wrote:
Ik ben begonnen met dit patroon,het einge waar ik even niet uit komis het volgende: Begin bij een hoogte van 26-24-24-23-23-23 cm met het verschuiven van A.3 middenachter. dat verspringen is niet het probleem maar ik begrijp het middenachter niet, misschien kunnen jullie helpen m.v.g Wenny
14.02.2021 - 13:04DROPS Design answered:
Dag Wendy,
Het 'midden achter' stond er een beetje ongelukkig; er wordt mee bedoeld dat je A.3 richting midden achter verschuift, dus door de meerderingen en minderingen aan beide kanten verschuift het patroon vanaf beide zijkanten richting midden achter. Ik heb de tekst nu aangepast.
15.02.2021 - 10:04
![]() Shirley Ray wrote:
Shirley Ray wrote:
I have been knitting for more than 70 years, and I have never seen a pattern as difficult to understand as this one. And with so many questions, none of which Americans can understand. Is there anyone on thisl ist who has completed this sweater without problems or confusion?
11.05.2020 - 19:31DROPS Design answered:
Dear Mrs Ray, The DROPS patterns are knitted and crocheted by thousands and thousands of people around the world. We understand however that in certain countries, with different knitting/crochet traditions than Scandinavia, our patterns might be written in a way that differs from what some are used to. But of course we want everyone to understand our patterns, so that’s why we have created an extensive library of tutorial videos as well as step by step lessons that explain how to follow the techniques we use and how to read the diagrams in our patterns. Give them a try!
12.05.2020 - 10:11
![]() Velia wrote:
Velia wrote:
Me quedo muy lindo el suéter las explicaciones son excelentes agradezco mucho la ayuda. Y aclaró que no es la primera vez que hago un trabajo bajo la dirección de ustedes gracias
07.07.2019 - 17:57
![]() Eva Gustavson wrote:
Eva Gustavson wrote:
Ska denna verkligen stickas i rätstickning alla varv : är det inte slätstickning ??? Instruktioner RÄTST (stickas fram och tillbaka): Maskorna stickas räta på alla varv.
06.07.2019 - 11:24DROPS Design answered:
Hej. Det är bara en förklaring på hur man stickar rätstickning som vi har längst upp på mönstret. Hela koftan stickas inte i rätstickning (bara t.ex kantm, som det står i mönstret). Lycka till!
08.07.2019 - 08:54
![]() Kitty Neijssel wrote:
Kitty Neijssel wrote:
Sorry, ik heb een paar keer een vergissing gemaakt met de wijdtematen van het vest. Bij XXXL staat onder de patroontekening 60 cm. De wijdte van het vest wordt dan 120 cm. En dat is voor XXXL toch echt te krap. Bovendien is op de foto duidelijk te zien dat het vest een behoorlijke overwijdte heeft. Ik zie daar geen vertekening in. Ik heb voor de boeken van Stella Ruhe over Nederlandse visserstruien 5 truien gebreid. Dus ik ben geen beginneling op "breigebied".
05.05.2019 - 22:20
![]() Kitty Neijssel wrote:
Kitty Neijssel wrote:
Aanvulling op mijn vraag. Ik brei voor de zekerheid maat XXXL, heb de rug bijna klaar maar het bevalt me echt niet. Ik heb precies de juiste stekenverhouding. Daar let ik altijd goed op. Het vest geeft op deze manier niet voldoende overwijdte, ondanks de lange splitten. Kunt u mij uitleggen hoe dit zit?
05.05.2019 - 12:44DROPS Design answered:
Dag Kitty,
Met de aangegeven stekenverhouding, zou je een vest moeten krijgen met de maten zoals die aangegeven zijn in de tekening onderaan het patroon. Het beeld op de foto kan altijd wat vertekend zijn, dus je moet kijken naar de maten in de schematekening.
05.05.2019 - 16:13
![]() Kitty Neijssel wrote:
Kitty Neijssel wrote:
Allereerst wil ik zeggen dat ik een enorme fan ben van Drops, zowel de garens als de patronen. Ik heb echter bij dit patroon een vraag. Ik heb maat 46/48. Meestal brei ik de XXL variant maar bij dit patroon heb ik mijn bedenkingen wat betreft de maten bij de patroontekening. Op de foto is te zien dat het vest een ruime overwijdte heeft. Bij de patroontekening staat bij XXL een wijdte van 58 cm, d.w.z. dat het vest 116 cm wijd wordt. Ik ben XXXL aan het breien maar dit wordt geen vest voor mij!
05.05.2019 - 12:08DROPS Design answered:
Dag Kitty,
Zie mijn antwoord hierboven op je andere vraag. Hopelijk kun je nu verder.
05.05.2019 - 16:14
![]() Vania wrote:
Vania wrote:
Hi jacket coming along nicely ☺️I was curious why for left front piece there is no decrease after you knit 8 3/4 length and there is a decrease evenly on right side?
26.07.2018 - 02:51DROPS Design answered:
Dear Vania, when piece measures 8 3/4" you cast on 2 new sts on each side on back piece and only on one side (towards back piece) on each front piece. I may misunderstand your meaning seing no decrease at 8 3/4". Happy knitting!
26.07.2018 - 10:12
![]() V Wengel wrote:
V Wengel wrote:
When it says bind off 3 st one time, 2 st one time and 1 stitch 1 time, do you bind off 3 at the beginning of the RS after I slipped the stitches on holder then at the beginning of the ws row bind off 2 one time then on RS row bind off 1 st 1 time and then repeat until there are 30stitcnes?
06.07.2018 - 03:24DROPS Design answered:
Deear Mrs Wengel, these sts are bound off for neck: work 1 row from RS (right front piece) slipping the first 14 sts on a st holder, then work row to the end, turn and work row from WS. At the beg of next row from RS bind off 3 sts, work row to the end, turn and work next row from WS. At the beg of next row from RS bind off 2 sts, and so on. i.e. you will bind off the sts for neck at the beg of each row from RS (towards neck) on right front piece (= at the beg of each row from WS for the left front piece). Happy knitting!
06.07.2018 - 08:27
Sigrid Jacket#sigridjacket |
|||||||
|
|
|||||||
Knitted DROPS jacket with false raglan, vent and textured pattern in ”Air”. Size: S - XXXL.
DROPS 166-11 |
|||||||
|
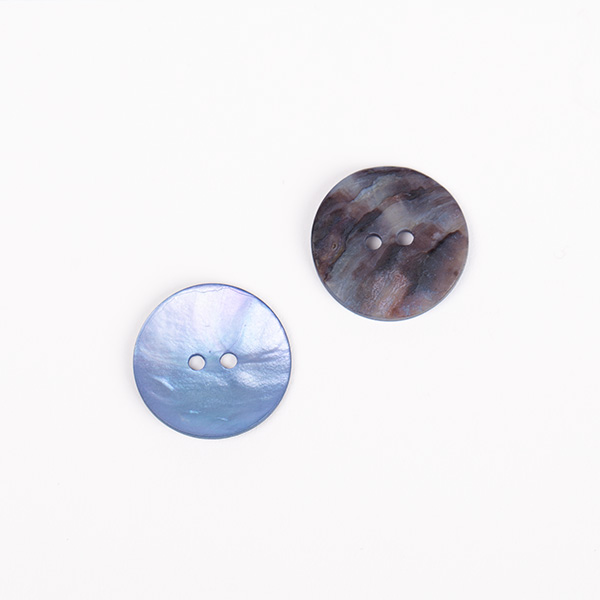
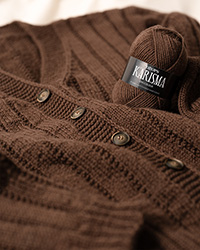
GARTER ST (back and forth): K all rows. 1 ridge = K2 rows. PATTERN: See diagrams A.1 to A.6. The diagrams show all rows in pattern seen from RS. INCREASE TIP: Inc 1 st by making 1 YO. On next row work YOs twisted, i.e. work in the back loop of st instead of front to avoid holes. NOTE: Work the inc sts gradually in diagram A.4. DECREASE TIP: Dec 1 sts as follows: All dec are done from RS! Dec as follows after A.3: K 2 tog. Dec as follows before A.3: Work until 2 sts before A.3, slip 1 st as if to K, K 1, psso. BUTTONHOLES: Dec for buttonholes on right band. 1 buttonhole = K tog third and fourth st from edge and make 1 YO. Dec for buttonholes when piece measures: SIZE S: 25, 33, 41, 49, 57 and 65 cm / 9¾",13",16",19¼",22½",25½". SIZE M: 25, 33, 42, 50, 59 and 67 cm / 9¾",13",16½",19¾",23¼",26½". SIZE L: 27, 35, 44, 52, 61 and 69 cm / 10½",13¾",17¼",20½",24",27". SIZE XL: 28, 37, 45, 54, 62 and 71 cm / 11",14½",17¾",21¼",24½",28". SIZE XXL: 28, 37, 46, 55, 64 and 73 cm / 11",14½",18",21½",25¼",28¾". SIZE XXXL: 30, 39, 48, 57, 66 and 75 cm / 11¾",15¼",19",22½",26",29½". ---------------------------------------------------------- JACKET: Worked back and forth on circular needle and sewn tog when finished. BACK PIECE: Cast on 95-98-101-107-113-116 sts on circular needle size 5 mm / US 8 with Air. Work rib as follows: A.1 (= 8 sts), K 1, * P 2, K 1 *, repeat from *-* until 8 sts remain on row, A.2 (= 8 sts). Continue like this back and forth until piece measures 4 cm / 1½". On next row from RS switch to circular needle size 5.5 mm / US 9 and work as follows: A.1, stockinette st over the next 79-82-85-91-97-100 sts, AT THE SAME TIME dec 15-14-15-17-21-20 sts evenly, A.2 = 80-84-86-90-92-96 sts on needle in total. Continue in stockinette st, work A.1 and A.2 in each side as before until piece measures 22 cm / 8¾". REMEMBER THE KNITTING TENSION/GAUGE At the end of the next 2 rows cast on 2 new sts (marks vent) = 84-88-90-94-96-100 sts. Now work as follows: 1 edge st in GARTER ST - see explanation above, A.3 (= 9 sts) stockinette st until A.2, work A.3 over A.2 and next to last st and finish with 1 edge st in garter st. When piece measures 26-24-24-23-23-23 cm / 10¼"-9½"-9½"-9"-9"-9", beg displacement of A.3 towards mid back. Work 1 edge st in garter st, inc 1 st - READ INCREASE TIP, A.3, dec 1 st - READ DECREASE TIP, stockinette st until 2 sts remain before A.3, dec 1 st, A.3, inc 1 st, 1 edge st in garter st. Repeat displacement of A.3 every 4th row 17-19-20-21-22-24 more times. NOTE: Inc is always inside 1 edge st in garter st in each side. AT THE SAME TIME when piece measures 60-61-62-63-64-65 cm / 23⅝"-24"-24⅜"-24¾"-25¼"-25½", cast on 1 new st at the end of the next 2 rows for armholes = 86-90-92-96-98-102 sts. Now continue pattern inside 1 edge st in garter st and 1 st in stockinette st in each side. Work the 82-86-88-92-94-98 middle sts in pattern as before. When piece measures 74-76-78-80-82-84 cm / 29⅛"-30"-30¾"-31½"-32¼"-33", cast/bind off the middle 24-24-24-26-26-26 sts for neck and finish each shoulder separately. On next row from the neck, cast/bind off 1 st = 30-32-33-34-35-37 sts remain on each shoulder. When piece measures 76-78-80-82-84-86 cm / 30"-30¾"-31½"-32¼"-33"-33⅞", work 1 ridge over all sts. Cast/bind off. Work the other shoulder the same way. RIGHT FRONT PIECE: Cast on 55-55-58-61-64-64 sts on circular needle size 5 mm / US 8 with Air. Work rib as follows: A.5 (= band), K 1, * P 2, K 1 *, repeat from *-* until 8 sts remain, A.2. Continue like this back and forth until piece measures 4 cm / 1½". On next row from RS switch to circular needle size 5.5 mm / US 9 and work as follows: A.5 (= 7 sts), stockinette st until 8 sts remain, AT THE SAME TIME dec 8-6-8-9-11-9 sts evenly over these sts, A.2 = 47-49-50-52-53-55 sts. Continue in stockinette st, work A.5 over band and A.2 in the side as before until piece measures 22 cm / 8¾". Now cast on 2 new sts in the side (= marks vent) = 49-51-52-54-55-57 sts. REMEMBER BUTTONHOLES! Now work A.3 over A.2 and next to last st on needle and work 1 edge st in garter st in the side. When piece measures 26-24-24-23-23-23 cm / 10¼"-9½"-9½"-9"-9"-9", beg displacement of A.3 towards mid front. Dec 1 st before A.3 and inc 1 st before last st on needle. Repeat displacement of A.3 every 4th row 17-19-20-21-22-24 more times. NOTE: Inc is always inside 1 edge st in garter st in the side. AT THE SAME TIME when piece measures 60-61-62-63-64-65 cm / 23⅝"-24"-24⅜"-24¾"-25¼"-25½", cast on 1 new st at the end of next row from RS for armhole = 50-52-53-55-56-58 sts. Continue pattern as before with 1 edge st in garter st and 1 st in stockinette st in the side. When piece measures 64-66-68-69-71-73 cm / 25¼"-26"-26¾"-27"-28"-28¾", slip the first 14-14-14-15-15-15 sts on a stitch holder for neck. Then cast/bind off sts on every row from neck as follows: 3 sts 1 time, 2 sts 1 time and 1 st 1 time = 30-32-33-34-35-37 sts remain for shoulder. Work edge st towards neck in garter st. When piece measures 76-78-80-82-84-86 cm / 30"-30¾"-31½"-32¼"-33"-33⅞", work 1 ridge over all sts. Cast/bind off. LEFT FRONT PIECE: Cast on and work as right front piece but reversed. I.e. work as follows on first row: A.1, K 1, * P 2, K 1 *, repeat from *-* until 7 sts remain, A.6 (= band). When piece measures 22 cm / 8¾", cast on 2 new sts in the side (marks vent). Now work A.3 over the 2nd st on row and A.1. When piece measures 26-24-24-23-23-23 cm / 10¼"-9½"-9½"-9"-9"-9", beg displacement of A.3 towards mid front. Inc 1 st after 1 edge st in garter st in the side and dec 1 st after A.3. Continue displacement the same way as on right front piece AT THE SAME TIME cast on 1 new st for armhole - adjust according to right front piece. When piece measures 64-66-68-69-74-73 cm / 25¼"-26"-26¾"-27"-28"-28¾", slip the first 14-14-14-15-15-15 sts seen from WS on a stitch holder for neck. Then cast/bind off sts on every row from neck as follows: 3 sts 1 time, 2 sts 1 time and 1 st 1 time = 30-32-33-34-35-37 sts. Work edge st towards neck in garter st. When piece measures 76-78-80-82-84-86 cm / 30"-30¾"-31½"-32¼"-33"-33⅞", work 1 ridge over all sts. Cast/bind off. SLEEVE: Work back and forth on circular needle. Cast on 39-41-43-43-43-45 sts on circular needle size 5 mm / US 8 with Air. Work rib as follows: 1 edge st in garter st, K 1, * P 1, K 1 *, repeat from *-* until 1 st remains, 1 edge st in garter st. When rib measures 4 cm / 1½", switch to circular needle size 5.5 mm / US 9 and continue pattern as follows: 1 edge st in garter st, work last st in A.4, repeat A.4 until 1 st remains, 1 edge st in garter st. When piece measures 10 cm / 4", inc 1 st inside 1 edge st in garter st in each side. Work the inc sts in pattern A.4: Repeat inc every approx. 5½-4½-4½-3½-3-3 cm / 2¼"-1¾"-1¾"-1¼"-1"-1" 6-7-7-9-11-11 more times = 53-57-59-63-67-69 sts. When sleeve measures 46 cm / 18" in all sizes, work a sleeve cap with short rows as follows from RS: Work until 8-9-9-10-11-12 sts remain, turn and work until 8-9-9-10-11-12 sts remain, turn and work until 17-19-19-21-22-23 sts remain, turn and work until 17-19-19-21-22-23 sts remain. Turn and work all sts on needle, turn and work over all sts. Cast/bind off with K from RS. Make another sleeve. ASSEMBLY: Sew the shoulder seams tog. Sew sleeves to body inside 1 edge st in garter st. Sew underarm seams and side seams in one inside 1 edge st in garter st but leave 22 cm / 8¾" for vent at the bottom of body. Sew the buttons on to left band. NECK EDGE: Beg from RS on right front piece and pick up approx. 120-130 sts (includes sts on stitch holders the front). K 1 round from WS while adjusting no of sts to 90-90-90-96-96-96 sts - but not over band sts, work these as before. Now work rib (K 1/P 2) inside band sts in each side, finish with K 1 before last band. When rib measures 3 cm / 1", cast/bind off with K over K and P over P. |
|||||||
Diagram explanations |
|||||||
|
|||||||
 |
|||||||
 |
|||||||
Have you finished this pattern?Tag your pictures with #dropspattern #sigridjacket or submit them to the #dropsfan gallery. Do you need help with this pattern?You'll find 24 tutorial videos, a Comments/Questions area and more by visiting the pattern on garnstudio.com. © 1982-2026 DROPS Design A/S. We reserve all rights. This document, including all its sub-sections, has copyrights. Read more about what you can do with our patterns at the bottom of each pattern on our site. |
|||||||






Post a comment to pattern DROPS 166-11
We would love to hear what you have to say about this pattern!
If you want to leave a question, please make sure you select the correct category in the form below, to speed up the answering process. Required fields are marked *.